


 0
0Black Ops 7 Season 2 Unlocking ARC M1 Assault Frame: Aggressive Launcher Tactics
- ELSA
- Share
- CoD: Black Ops 7
- 02/27/26
- 1165
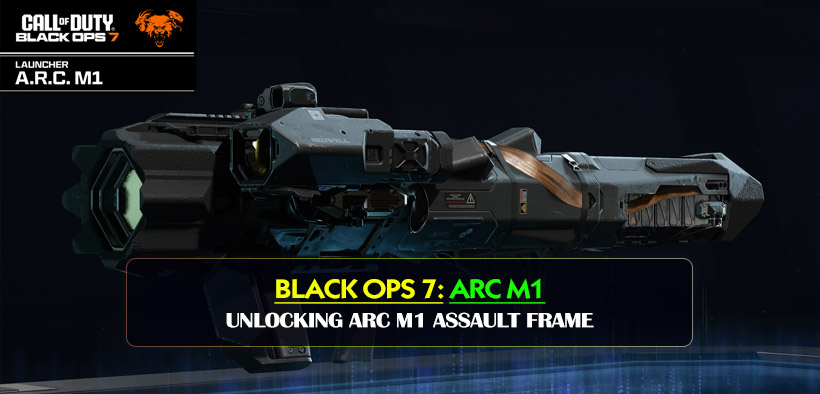
Let's breakdown the latest explosive meta shift in Call of Duty Black Ops 7 Multiplayer Season 2. We have an entirely new conversion kit for a weapon category that most players, in fast paced lobbies, would never consider using: the ARC M1 rocket launcher. Traditionally, launchers are a slow, and reactive weapon choice. With the addition of the ARC M1 Assault Frame, a major shift in playstyle is coming. No longer is the ARC M1 a heavy anti-air tool. Instead it is a lightweight, versatile crossbar weapon that is reminiscent of the best old school thundergun style gameplay. We will breakdown how to unlock the kit, the ways it will modify your weapon stats, and how to maximize its effectiveness in your next game.
- Context & Unlocking the Kit
- The Tactical Shift: Stats and Mechanics
- Field Testing & Practical Strategies
- Ammunition and Damage Output
- Camo Grinding and Scorestreaks
- Frequently Asked Questions
- Is the ARC M1 Assault Frame overpowered?
- Can you easily drop a Nuke with this setup?
- How does the crossbar aim feel compared to traditional ADS?
- Tactical Next Steps
↖ Context & Unlocking the Kit
Before starting to clear the objective points, we need to obtain the hardware first. The ARC M1 Assault Frame is directly linked with the Season 1/Season 2 weekly challenges, more specifically, it is located at the Week 4 challenges tab.
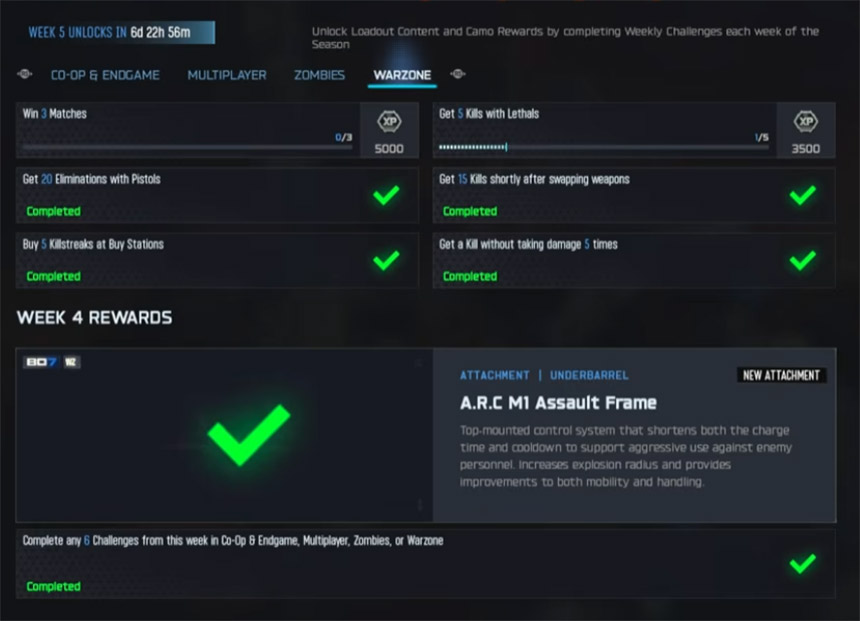
If you're mostly into Multiplayer, then the challenges, 10 kills with UAV or HARP active, and 25 kills with a pistol, will easily get you progression towards this unlock. If you happen to play Warzone, then completing 4 specific battle royale challenges will also grant you progress towards this unlock. Once unlocked, it is the only, transformative, attachment for the ARC M1 launcher.
↖ The Tactical Shift: Stats and Mechanics
Why does this specific conversion kit matter for your loadout? It is the top-mounted control system that completely transforms the weapon's identity. By shifting to a crossbar ADS (Aim Down Sights) style, the game allows you to maintain peripheral vision while charging your shots.
Below is a breakdown of how the Assault Frame alters the ARC M1's baseline performance.
| Stat Category | Base ARC M1 | With Assault Frame | Tactical Impact |
|---|---|---|---|
| Fire Rate | Standard | Doubled | Allows for rapid follow-up shots in chaotic gunfights. |
| Explosion Radius | Moderate | More than doubled | Highly forgiving splash damage; precision is less critical. |
| Mobility & Handling | Sluggish | Significantly increased | Faster sprint-to-fire and ADS speeds enable rushing. |
| Projectile Speed | Fast | Decreased (Slower velocity) | Requires leading your targets at longer distances. |
While the bullet velocity takes a noticeable hit, the expanded explosion radius ensures that near-misses still deal devastating damage. Not only does it double the fire rate, but it also drastically shortens both the charge time and the cooldown. What this means is that you can aggressively push enemy personnel rather than hiding in the back of the map waiting for scorestreaks to appear.
↖ Field Testing & Practical Strategies
We took this conversion kit into several high-action lobbies, including Raid, to test its true potential. Here is what we discovered from our hands-on experience.

↖ Ammunition and Damage Output
You spawn in with 12 rockets right off the rip. This is a massive advantage for sustained engagements. In terms of lethality, direct impacts are guaranteed one-shot kills. If you rely purely on the blast radius, it generally takes two shots to body a fully-healed opponent. We actually sniped a player across the map. It was insane. The forgiving splash damage means you can simply fire into high-traffic doorways or objective zones and consistently rack up hit markers and eliminations.
↖ Camo Grinding and Scorestreaks
If you find yourself struggling to get double kills for camo challenges, then equipping this frame is your best path forward. The increased fire rate makes chaining kills significantly easier, especially for the Singularity camo requirements. Furthermore, despite the slower projectile speed, this kit remains highly effective at clearing the skies. Taking down enemy UAVs and Counter UAVs is surprisingly effortless, allowing you to support your team while maintaining an aggressive boots-on-the-ground presence.
↖ Frequently Asked Questions
↖ Is the ARC M1 Assault Frame overpowered?
No, it is not game-breaking. While it is incredibly fun and undeniably the best way to run the ARC M1, it will not outgun a skilled player using a meta SMG in a pure one-on-one gunfight. It thrives on surprise and splash damage.
↖ Can you easily drop a Nuke with this setup?
Dropping a Nuke with a launcher is inherently difficult due to reload times and movement limitations. While technically possible if you play flawlessly and utilize streaks like the War Machine, it requires immense patience. We recommend using it for objective control and camo grinding rather than high-streak chasing.
↖ How does the crossbar aim feel compared to traditional ADS?
The crossbar stance keeps your weapon lowered but centered, similar to a chainsaw grip. This provides excellent peripheral vision and faster strafe speeds, making it ideal for close-to-medium range engagements where traditional launcher ADS would get you killed.
↖ Tactical Next Steps
The ARC M1 Assault Frame revitalizes a normally stagnant weapon class. It encourages aggressive play by trading projectile speed for fire rate, handling, and massive splash damage. Equip the frame, use your 12 starting rockets to control and flush out tight choke points, and clear out pesky defenders with the generous radius. Take unpredictable positions, target the ground for greater splash damage, and contribute to the havoc this set brings to the lobby.

Most Popular Posts
- Black Ops 7 Endgame Exotic Affinity Weapons Guide: Best Bonuses, Full Weapon List, and Farming Tips
- Black Ops 7 Zombies Totenreich Easter Egg Guide: Fast Solo & Co-Op Main Quest Walkthrough
- Black Ops 7 Cherry Fizz Guide: Fastest Illicit Cargo Event Route for Season 4
- Black Ops 7 Season 04 Endgame META: Best 5 Weapons After the XR3 Ion Nerf
- Black Ops 7 Season 4 Release Date, Maps, Weapons, Zombies, Warzone, and MW4 Reveal Prep
- Black Ops 7 Zombies Fast KOWAKUJO Easter Egg Guide: Cat Wonder Weapon, Evidence Puzzles
Popular Category Lists
- Grow a Garden / (286)
- ARC Raiders / (262)
- CoD: Black Ops 7 / (166)
- Monopoly Go / (146)
- MLB 26 / (145)
- Star Citizen / (112)
- Steal a Brainrot / (89)
- Sailor Piece / (68)
- ARK Survival Ascended / (67)
- Diablo IV / (61)
- Forza Horizon 6 / (60)
- Blox Fruits / (60)
- CoD: BLACK OPS 6 / (55)
- Adopt Me / (53)
- Path of Exile 2 / (48)
- Monster Hunter Wilds / (46)
- Windrose / (44)
- Path of Exile / (40)
- Grow a Garden 2 / (40)
- Bee Swarm Simulator / (36)


