


 0
0Fast Methods Hatch Grow A Garden Huge Pets: Tested Odds, and Pro Setups
- Cecila
- Share
- Grow a Garden
- 11/13/25
- 3346
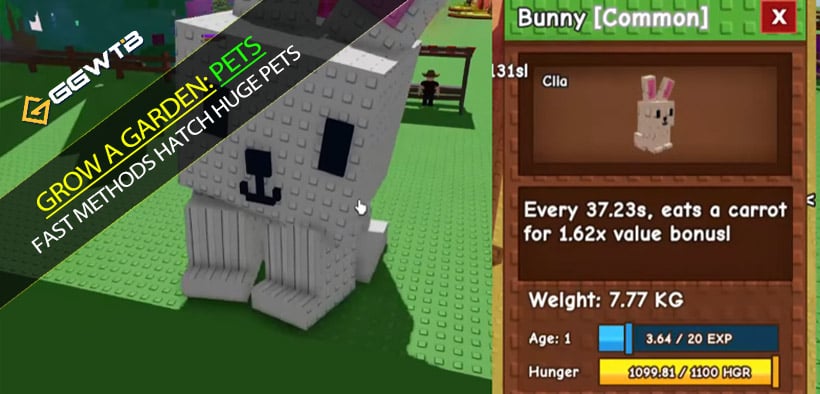
If you've been staring at those massive capybaras, peacocks, and mimic octopuses and wondering how players get them so fast, you're in the right place. Below is a practical, field-tested roadmap: how Huge odds actually work, which Grow a Garden pets to level first, and the exact combos that compress the grind without burning you out. Here's how it works—and how to stack the math in your favor.
- Core Mechanics You Must Know
- Huge Modifier Probability
- Method 1: Mixed-Egg Hatching (Fastest to 1,000 Attempts)
- Method 2: Elephant Boosting (Targeted Weight Pump)
- Method 3: Brontosaurus (Hatch Weight Multiplier up to 30%)
- Method 4: Koi + Seal Combo (Rehatch Engine + Inventory Economy)
- Method 5: Trading (Efficiency King, Risk Managed)
- Pro Loadouts and Step-by-Step
- FAQ
- Wrap-Up
↖ Core Mechanics You Must Know
Before sprinting, let's align on the rules that drive everything that follows.
↖ Huge Modifier Probability
- Every pet you obtain (egg/shop/chest) has a 0.1% chance to roll a 4× Huge modifier.
- Base hatch weight range (eggs): 0.88–2.22 kg; shop/chest: 0.88–1.32 kg.
- Huge = base × 4, so a 1.10 kg becomes 4.40 kg.
- Practical meaning: expected ~1 Huge per 1,000 pets, but variance matters—900 or 1,200 is normal.
Global Counting, Not Per-Egg
- The 0.1% applies across all eggs combined. Your pity isn't per egg type.
- This unlocks a key time-saving approach: mix egg types to reach attempts faster.
Hard Caps and Sanity Checks
- With Brontosaurus (max 30% hatch weight boost), hatch range rises to 1.14–2.86 kg; Huge: 4.56–11.44 kg.
- Current legit ceiling ≈ 11.44 kg per Huge hatch (effective max). Anything far above in-session is likely modded/scripted and resets on relog.
What this means: your plan should focus on (1) increasing attempts cheaply, (2) pushing base weight upward before Huge rolls, and (3) chaining systems that multiply each other.
Here's a compact snapshot of key thresholds and what they unlock.
| System | Key Threshold | Effect |
|---|---|---|
| Huge chance | 0.1% per pet obtained | ~1 per 1,000 on average; global across eggs |
| Egg base weight | 0.88–2.22 kg | Shop/chest: 0.88–1.32 kg |
| Bronto cap | +30% hatch weight | Huge band: 4.56–11.44 kg |
| Elephant (reg) | Up to ~3.9 kg boost | 0.1 kg per Lv.50 cycle; 1 Elephant only |
| Elephant (rainbow) | Up to ~6.1 kg boost | Premium Safari Egg; high variance cost |
| Koi rehatch | 50% cap | 8 Kois ≥1.18 kg + Nightmare; or 7 Kois >1.6 kg with boosting |
| Seals | 8 Seals ≥1.7 kg | Max sell efficiency loop |
Takeaway: combine Bronto (weight) + Koi (attempts) + Seals (economy) + Elephant (targeted boosts), then checkpoint at 800 attempts to pivot egg quality.
↖ Method 1: Mixed-Egg Hatching (Fastest to 1,000 Attempts)
This is the speedrun for the 0.1% lottery.
Why it works
- Since Huge odds pool globally, you don't need 1,000 of the same egg—just 1,000 total.
- Common eggs hatch in ~10 minutes, letting you rack attempts quickly.
How to run it
- Hatch common eggs to ~800–900 total attempts.
- Switch to higher-tier eggs for the final ~100–200 to increase base weight for any potential Huge.
- Track attempts; probability isn't a guarantee at exactly 1,000.
Field note
- In bulk hatching across tens of thousands of eggs, the switch window around 800 attempts consistently felt like the sweet spot between speed and outcome quality.
If you're time-poor, front-load commons, then pivot to premium eggs in the last stretch.
↖ Method 2: Elephant Boosting (Targeted Weight Pump)
Elephants increase another pet's base weight in 0.1 kg steps.
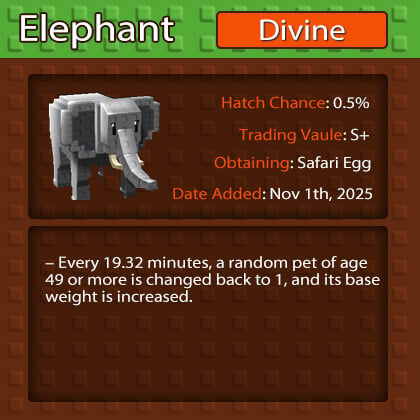
Real numbers from testing
- Regular Elephant: boosts up to ~3.9 kg (despite 3.5 kg in-game text).
- Rainbow Elephant: up to ~6.1 kg.
- Only one Elephant applies: they don't stack with each other.
Constraints that matter
- You must level the boosted pet to Lv.50 before each additional 0.1 kg increase. Without fast-level methods, this is the bottleneck.
- Rainbow Elephant comes from Premium Safari Egg (Robux). Worst-case cost can hit ~$600 if unlucky.
Fast leveling combos
- Seven French Fry Ferrets or seven Capybaras accelerate leveling.
- A Rainbow Dilophosaurus is even faster if you have it.
Thresholds to hit max boost
- For regular Elephant max: base pet > 2.12 kg + Nightmare mutation (no tools), or with Medium Toy + Grand Sprinkler, only > 1.0 kg base needed.
Elephant is the cleanest path to a Huge-sized unit without relying solely on RNG, but your throughput is gated by Lv.50 cycles—optimize XP or you'll crawl.
↖ Method 3: Brontosaurus (Hatch Weight Multiplier up to 30%)
The Bronto from a past event increases hatch weight, which scales Huge results.
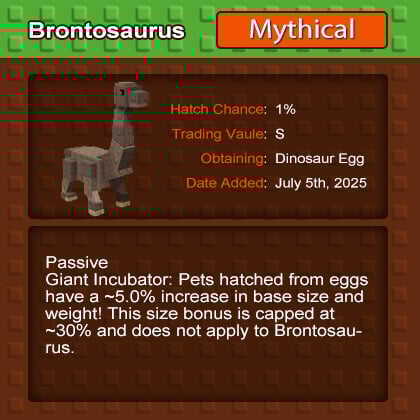
Caps and compositions
- Cap: +30% hatch weight.
- Paths to cap:
- 6× regular 1.0 kg Brontos at max level (or 5× if all are fully leveled).
- 4× Brontos at 1.1 kg + Nightmare mutation.
- 3× Brontos at 3.6 kg + Nightmare mutation.
- 2× Brontos at 8.66 kg + Nightmare mutation.
Why it synergizes
- Higher pre-Huge base weight raises the entire Huge outcome band to 4.56–11.44 kg.
- It also sets up better starting points for Elephant boosting later.
Field note
- We use Bronto stacks to push the baseline while pursuing the 0.1% via mixed-egg strategy; it's the best math-first force multiplier.
If you can field even a partial Bronto stack, your average Huge will weigh meaningfully more, compounding Elephant gains.
↖ Method 4: Koi + Seal Combo (Rehatch Engine + Inventory Economy)
Rehatching increases your effective attempts per egg; Seals keep the loop funded.
Koi mechanics
- Each Koi adds up to 8% chance to rehatch, capping at 50%.
- Baseline to hit 50%: 8 Kois at ≥1.18 kg each + Nightmare mutation at max level.
- With Elephant help:
- If Koi base > 1.6 kg, you only need 7 Kois for 50%.
- At 1.98 kg + Nightmare, an individual Koi hits its 8% cap; without mutation, you need 2.28 kg.
Recommended setups
- 7 Kois + 1 Bronto (heavier is better) for 50% rehatch and higher weights.
- If your Kois are maxed: 6 Kois + 2 Brontos ≈ 48% rehatch but stronger overall boosts.
Seal mechanics
- Once your backpack fills, switch to Seals to sell non-rares, recycle currency, and buy more eggs.
- Aim for 8 Seals each ≥1.7 kg (no mutation needed) to hit max sell efficiency.
Real outcomes
- Using this loop, we hatched a Huge Peacock and two Huge Ostriches. Time-intensive, yes—pair with Bald Eagle/Rhino/Hydra to reduce hatch time.
Resource pivot
- Short on eggs? Trade regular pets (Capybara, Ostrich, Peacock, Scarlet Macaw) for Paradise Eggs. These can roll Huge Capybara or Huge Mimic Octopus.
Koi raises attempts per egg, Bronto lifts weight, Seals bankroll the loop—together, they turn a trickle into a steady pipeline.
↖ Method 5: Trading (Efficiency King, Risk Managed)
If your goal is own a Huge now, trading is the most time-efficient.
Where and how
- Use reputable communities or in-game trading hubs.
- Trade up with surplus pets, aim for cheaper Huge models (Huge Dog, Golden Lab) if you're collecting, not optimizing power.
Anti-scam guardrails
- If anyone asks you to click a link, subscribe, or leave the platform to confirm a Huge (e.g., Rainbow Elephant) for your normal pet—walk away.
- Use escrow or platform-native trades only; verify pet IDs and recent login history when possible.
Treat trading like flipping—small, safe increments beat one “too good to be true” leap.
↖ Pro Loadouts and Step-by-Step
- Early Game (low budget/time)
1) Stack common egg hatches to 800 attempts.
2) Slot 2–3 Brontos if available; any weight helps.
3) Swap to higher-tier eggs for the final 200 attempts.
4) Use Seals to fund repeats; keep a hard sell/disenchant routine.
- Mid Game (some assets)
1) Build 7 Kois + 1 Bronto to hit 50% rehatch.
2) Maintain 8 Seals ≥1.7 kg.
3) Ride the mixed-egg curve; track attempts and pivot at 800–900.
4) Start one Elephant lane on your best base-weight pet; plan Lv.50 cycles.
- Late Game (whales/collectors)
1) Full Bronto cap (+30%).
2) 6–7 high-weight Kois, remaining slots to Brontos.
3) Rainbow Elephant lanes to 6.1 kg cap on priority pets.
4) Targeted trading for specific Huge skins; avoid overpaying for appearance-only variants.
↖ FAQ
- Q: Does hatching 1,000 of the same egg increase Huge odds?
- A: No. The 0.1% rolls aggregate across all eggs. Mixed-egg counts are equally valid.
- Q: I saw a 114.44 kg pet—legit?
- A: The math points to ~11.44 kg as the current legit Huge cap from hatching. Anything drastically higher is likely modded/scripted and reverts after logout.
- Q: Can I stack multiple Elephants?
- A: No. Only one Elephant applies to a pet at a time.
- Q: What's the cheapest Huge to target in trades?
- A: Typically Huge Dog or Golden Lab—good entry points for collection without overpaying.
- Q: When should I switch from common to higher-tier eggs?
- A: Around 800–900 total attempts, then finish the last 100–200 with higher tiers to capitalize on weight.
- Q: I don't have Nightmare mutations—am I doomed?
- A: No. You'll need slightly higher base weights to hit certain caps (e.g., Koi 2.28 kg without Nightmare), but the core strategies still work.
↖ Wrap-Up
You're playing two games at once: the probability game (more attempts, smarter timing) and the weight game (heavier bases, better modifiers). If you focus on mixed-egg throughput, stack Brontos for +30%, run a Koi + Seal engine for rehatches and funding, and use an Elephant lane for targeted power-ups, you'll convert the 0.1% grind into a controlled progression path. Stay disciplined at the 800-attempt pivot, use trading to bridge gaps, and keep your account safe from link-bait “deals.” Happy hatching and may your next roll be the Huge you've been chasing.

Most Popular Posts
- Grow a Garden 2 Release Date Guide: Why Saturday Is the Likely Launch Window
- Grow a Garden Bizzy Bee Event: Honey Coins, Bee Eggs, Seeds, Upgrades, and Rewards
- Grow a Garden Bee Dungeon Guide: Best Wave 100 Strategy, Bee Shards, and Team Setup
- Grow A Garden Best Pet Mutations 2026: Ranked Guide for Power, Trading, and AFK Farming
- Grow a Garden Bee Stats Guide: Best Bees Ranked by Damage, HP, and DPS
- Grow a Garden Busy Bee Part 2 Guide: Royal Jelly, Best Pets, New Seeds, and Prep Strategy
Popular Category Lists
- ARC Raiders / (304)
- Grow a Garden / (286)
- CoD: Black Ops 7 / (166)
- MLB 26 / (151)
- Monopoly Go / (148)
- Star Citizen / (131)
- ARK Survival Ascended / (93)
- Steal a Brainrot / (92)
- Sailor Piece / (68)
- Forza Horizon 6 / (68)
- Diablo IV / (62)
- Blox Fruits / (62)
- Grow a Garden 2 / (58)
- Adopt Me / (58)
- CoD: BLACK OPS 6 / (55)
- Path of Exile 2 / (48)
- Monster Hunter Wilds / (46)
- Windrose / (44)
- Path of Exile / (40)
- Donut SMP / (37)


