


 0
0Grow a Garden Bonanza Bloom Seed Fast Growing Guides: Restock Odds, Egg Timer Ability and Mutation Profit Route
- Jordan
- Share
- Grow a Garden
- 01/05/26
- 1835
Grow a Garden Bonanza Bloom is one of those blink and you miss it transcendent seeds: hard to restock, expensive when it shows up, and deceptively powerful once you build around mutations and its egg-hatch reduction ability. I'm going to walk you through how I approach planting, scaling, and cashing it out—with clear checkpoints so you know whether you're on pace or wasting time.
- 1) What Bonanza Bloom Is (and Why Players Care)
- Visual identity (quick recognition)
- Ability: the hidden utility that changes your garden rhythm
- 2) How to Get Bonanza Bloom (and What to Expect)
- Reality check on the odds
- Obtainment
- 3) Grow Plan (from Seed → Big Cashout)
- Phase A — Planting: maximize not getting scammed by placement
- Phase B — Scaling: stack value multipliers instead of randomly hoping
- 4) Mutation Strategy That Actually Moves the Needle
- The big jump moment: Rainbow
- A clean priority ladder (how I decide what to wait for)
- Benchmark numbers (for expectation management)
- 5) Solo vs Friend-Assisted (Faster)
- Route 1 — Solo, reliable, slower
- Route 2 — Friend-assisted pigeon transfer style (fastest)
- 6) Using Bonanza Bloom's Egg Ability
- Practical setup
- Why Carnival clutter suddenly becomes valuable
- FAQ
- 1) Is Bonanza Bloom worth buying if it's expensive?
- 2) What's the best time to harvest?
- 3) I'm not getting big value jumps—what am I doing wrong?
- 4) How rare is it in the shop again?
- 5) How do I make the egg-hatch reduction actually trigger?
- Conclusion
↖ 1) What Bonanza Bloom Is (and Why Players Care)
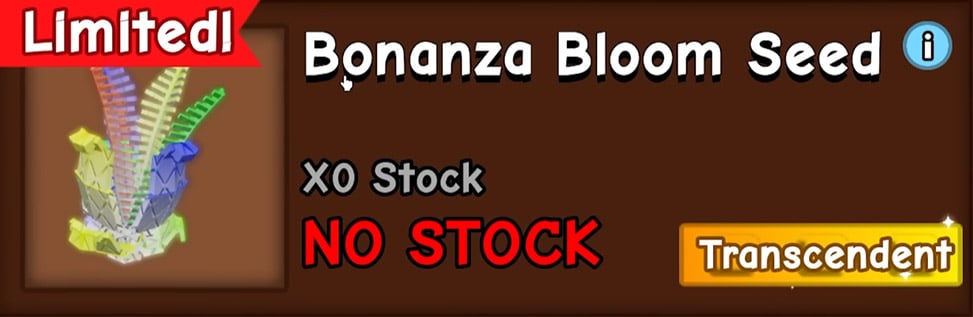
Bonanza Bloom is a limited transcendent crop that appeared during the Garden Games event in the Seed Shop rotation.
↖ Visual identity (quick recognition)
- The seed resembles a Sakura Bush seed shape, but blue, and has flags on the sides.
- The produce looks like a tulip-like bouquet with extra leaf-like elements in the center.
That easy to spot part matters because when the shop restocks, you don't want to second-guess what you're buying.
↖ Ability: the hidden utility that changes your garden rhythm
Every 5 minutes, Bonanza Bloom reduces the hatch time of a nearby egg by 30 seconds for every Carnival Cosmetic you have placed in your garden.
Why this matters:
if you're a player sitting on stacks of Carnival items, Bonanza Bloom isn't just a money plant—it becomes a time economy tool. Egg timers are a bottleneck, and this crop is basically a lever that converts decor clutter into faster hatch cycles.
↖ 2) How to Get Bonanza Bloom (and What to Expect)
You can obtain Bonanza Bloom from:
- Seed Shop restock: 0.14% chance (1/700) to appear
- It can also be restocked by Dragon's Firework (event interaction)
↖ Reality check on the odds
A 1/700 restock chance is low enough that you should treat it like a rare roll, not a routine purchase.
Here's the way I think about it:
- If you see it and you're actively playing the event, buying it is usually correct if you already have a mutation plan.
- If you're broke on supporting tools/pets, buying it just to own it often leads to an underwhelming harvest.
↖ Obtainment
| Source | Chance / Mechanic | What I do in practice |
|---|---|---|
| Seed Shop | 0.14% (1/700) restock | Check frequently during active sessions; buy instantly when it appears |
| Dragon's Firework | Forces/affects restock | Use when you're prepared to commit to a full mutation cycle |
↖ 3) Grow Plan (from Seed → Big Cashout)
I use two phases: plant correctly, then stack mutations intelligently. The second phase is where most people either print money or stall out.
↖ Phase A — Planting: maximize not getting scammed by placement
Bonanza Bloom often behaves like a single main produce plant. That's good: fewer fruits can mean less chaos and more focus for mutation stacking.
If you notice the plant is clipping into the ground or visually bugging, then re-plant it.
If it stays cleanly above ground, then keep it—stable positioning reduces weird interaction failures with pets/effects.
What I saw in my runs: a normal-looking early harvest can be around 6 kg with a baseline sale value around 260K (numbers vary by your modifiers and current economy tuning).
↖ Phase B — Scaling: stack value multipliers instead of randomly hoping
This is the core loop:
1. Start with a healthy base fruit
2. Apply frequent mutations (your own pets/effects)
3. Add transfer or steal style effects if available
4. Time your Rainbow conversion to lock in a massive multiplier
If you're one mutation away from Rainbow, then slow down and time your conversion tool/pet—getting Rainbow too early can waste potential combos; getting it too late can waste cycles.
↖ 4) Mutation Strategy That Actually Moves the Needle
Here's how I prioritize mutations: I aim for high-multiplier transformations first, then fill in with secondary boosts.
↖ The big jump moment: Rainbow
Rainbow is the turning point because it can massively multiply the fruit's base value.
What this means in practice: if your mutated fruit is sitting at tens of millions, Rainbow can push it into billions territory quickly—especially when it's combined with other strong mutations.
↖ A clean priority ladder (how I decide what to wait for)
| Priority | Goal | Why it's worth it | Common mistake |
|---|---|---|---|
| 1 | Secure a strong base fruit | Everything multiplies off the base | Harvesting too early out of impatience |
| 2 | Stack consistent mutations | Builds momentum before the big conversion | Using long-cooldown pets too late |
| 3 | Trigger Rainbow at the right time | Locks in huge value jump | Converting before enough mutations are present |
| 4 | Chase premium/rare mutations | Finishes the trillion push | Chasing rare hits while the base is still weak |
↖ Benchmark numbers (for expectation management)
I've taken a Bonanza Bloom fruit from normal to absurd by combining multiple mutation sources in a short window—enough to break into trillion-scale value with the right sequence and timing.
And weight scaling can spike too. I've seen jumps like:
~6 kg baseline → ~150 kg in a high-roll, well-mutated harvest
If your weight barely increases after multiple mutation cycles, then your setup is likely missing either (a) a key conversion step like Rainbow, or (b) a reliable mutation refresh cadence.
↖ 5) Solo vs Friend-Assisted (Faster)
Not everyone has the same access to Grow a Garden pets or coordinated setups, so I use two routes.
↖ Route 1 — Solo, reliable, slower
Use your best mutation pets/tools with the shortest, most consistent cooldowns first.
Solo principles:
- Prefer consistent procs over flashy long timers
- Boost pets that are not at 100% proc chance (when boosting exists in your kit)
- Don't reshuffle constantly—give the cycle time to pay off
↖ Route 2 — Friend-assisted pigeon transfer style (fastest)
If you have a friend who can run mutation-transfer pets/items, you can effectively import extra mutation rolls into your garden.
If you have a trusted friend, then this method is often the fastest way to hit trillion values because it stacks mutation opportunities from two gardens into one payoff fruit.
Here's a simple coordination table:
| Role | What they do | Why it helps |
|---|---|---|
| You (host garden) | Grow Bonanza Bloom + keep fruit unharvested during stacking | You control the final harvest timing |
| Friend | Runs mutation transfer/steal carriers and keeps cycles active | You gain extra mutation attempts without extra waiting |
↖ 6) Using Bonanza Bloom's Egg Ability
The crop's ability checks for nearby eggs every 5 minutes and reduces hatch time based on how many Carnival Cosmetics you have placed.
↖ Practical setup
- Place eggs near where Bonanza Bloom is planted/active.
- Place your Carnival Cosmetics intentionally (not randomly across the plot).
If you see the ability message saying it didn't find eggs, then your eggs are probably too far away (or not placed in a way the ability can detect). Move eggs closer and test again on the next 5-minute tick.
↖ Why Carnival clutter suddenly becomes valuable
Many players hoard Carnival crates/eggs/cosmetics and never convert that stockpile into progress. This ability is exactly that conversion:
cosmetics placed → egg timers shrink → hatch cycles accelerate → pet pipeline improves
That's not cosmetic value. That's production value.
↖ FAQ
↖ 1) Is Bonanza Bloom worth buying if it's expensive?
If you already have a mutation plan (pets, timers, and a harvest window), yes—because the crop scales extremely well. If you don't have any mutation support, it can feel underwhelming relative to the cost.
↖ 2) What's the best time to harvest?
If you're going for profit, harvest after you hit a major conversion mutation (especially Rainbow) and at least a few strong supporting mutations.
If you're going for ability utility (egg timers), you can keep it planted and treat harvesting as secondary.
↖ 3) I'm not getting big value jumps—what am I doing wrong?
Most often it's one of these:
- You're harvesting too early
- Your mutation cadence is too slow (long cooldowns, low proc rates)
- You're missing a capstone conversion like Rainbow
- Your friend-transfer loop isn't actually delivering mutations consistently
↖ 4) How rare is it in the shop again?
Bonanza Bloom's restock chance is 0.14% (1/700), so it's normal to go a long time without seeing it.
↖ 5) How do I make the egg-hatch reduction actually trigger?
Put eggs near the Bonanza Bloom, and place Carnival Cosmetics in your garden.
If the game reports no eggs found, treat it like a positioning/range issue and re-place eggs closer.
↖ Conclusion
Bonanza Bloom is special for two reasons: it can scale to absurd harvest values with the right mutation sequencing, and it has an egg-timer reduction ability that turns Carnival Cosmetics into real progression speed. My best results come from keeping the fruit unharvested during the mutation window, timing Rainbow intelligently, and—when possible—running a friend-assisted mutation transfer loop to multiply attempts.

Most Popular Posts
- Grow a Garden 2 Release Date Guide: Why Saturday Is the Likely Launch Window
- Grow a Garden Bizzy Bee Event: Honey Coins, Bee Eggs, Seeds, Upgrades, and Rewards
- Grow a Garden Bee Dungeon Guide: Best Wave 100 Strategy, Bee Shards, and Team Setup
- Grow A Garden Best Pet Mutations 2026: Ranked Guide for Power, Trading, and AFK Farming
- Grow a Garden Bee Stats Guide: Best Bees Ranked by Damage, HP, and DPS
- Grow a Garden Busy Bee Part 2 Guide: Royal Jelly, Best Pets, New Seeds, and Prep Strategy
Popular Category Lists
- Grow a Garden / (286)
- ARC Raiders / (266)
- CoD: Black Ops 7 / (166)
- Monopoly Go / (146)
- MLB 26 / (145)
- Star Citizen / (116)
- Steal a Brainrot / (89)
- ARK Survival Ascended / (74)
- Sailor Piece / (68)
- Forza Horizon 6 / (63)
- Diablo IV / (61)
- Blox Fruits / (60)
- CoD: BLACK OPS 6 / (55)
- Adopt Me / (53)
- Path of Exile 2 / (48)
- Monster Hunter Wilds / (46)
- Windrose / (44)
- Grow a Garden 2 / (42)
- Path of Exile / (40)
- Bee Swarm Simulator / (36)


