


 0
0Grow a Garden Break Pets: Exact Weights, Ages, and Setups to Hit 50–100% Caps
- Jordan
- Share
- Grow a Garden
- 10/12/25
- 4571
You've probably heard the whispers: Which pets actually break Grow a Garden? Good news—you're about to get the hard numbers and the why behind them. I've tested these setups in real runs (yes, including a garden with 800+ mythical plants waiting for reclaim), tracked caps before and after nerfs, and distilled the Grow a Garden pets that can push your account into a different league. You'll see the exact age-1 weights, when you need rainbow, what conflicts with what, and which routes are realistic if you don't have unlimited shekels or premium eggs. most caps live at 50% or 100%, and your path is to hit either 8 × single-pet threshold or compress that with heavier/rainbow individuals. If you can't reach it now, I'll show you the backup plans.
- Seal — Perma-Egg Engine (post-nerf sweet spot)
- Koi — Half the Eggs Stay (shop-pet ceiling pain)
- Squirrel — Infinite Reclaimers (the practical hero)
- Barn Owl — Heavier Shop Pets (quiet power, cheap to max)
- Brontosaurus — Heavier Egg Hatches (but conflicts with Koi)
- Pachycephalosaurus — 2x Crafts (situational, but crazy for high-value recipes)
- Chipmunk — Infinite Harvest Tools (niche, high bar)
- Putting It All Together — Recommended Loadouts
- FAQ
↖ Seal — Perma-Egg Engine (post-nerf sweet spot)
Converts any pet into an egg, permanently inflating the egg economy. With enough seals, this scales into a shekel-to-egg refinery.
- Cap: 50% (previously 64% before the nerf).
- Single-pet target: 6.25% each × 8 = 50%.
- Exact requirement:
- Age-1 weight: 1.71 kg.
- Age-100: Reaches 6.25% per seal at or above that starting weight.
- Difficulty: Low. 1.71 kg at age 1 is very attainable; heavier seals reduce count/age needed.
- Why it breaks the game: A stable stream of eggs means repeat chances at top-tier hatch pulls; with enough shekels, you're converting currency into more rolls—indefinitely.
- Quick win:
- Get 8 seals ≥1.71 kg at age 1.
- Level to age 100, or use fewer ages if you have >2.0 kg seals.
- If you lack 8: Mix in a few 2.0–2.1 kg seals; you may cap with 6–7 at age 100.
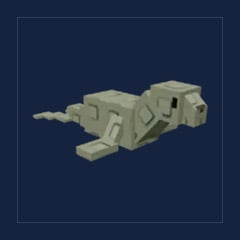
↖ Koi — Half the Eggs Stay (shop-pet ceiling pain)
Each koi increases the chance you hatch an egg and another free egg appears. It's capped at 50%.
- Cap: 50%.
- Single-pet target: 6.25% each × 8 koi.
- Exact requirement:
- Must be rainbow.
- Age-1 weight: ≥1.21 kg (with max around 1.31–1.32 kg from shop).
- Difficulty: High. You're fishing in the top percentile of koi weights and also need rainbow.
- Why it matters: At 50%, half your hatches clone an extra egg. If you're egg-looping, this compounds fast.
- Strategy:
- Prioritize weight first, then rainbow; trade aggressively for 1.25+ kg starts.
- If you can't field 8 rainbows ≥1.21 kg, run a partial set and complement with Brontosaurus (below).
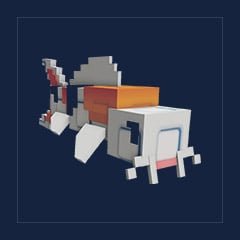
↖ Squirrel — Infinite Reclaimers (the practical hero)
Grants free reclaimers; with enough squirrels you hit 100% and reclaim without consumable costs.
- Cap: 100%.
- Single-pet target: 12.5% each × 8.
- Exact requirement:
- Age-1 weight: ≥0.84 kg to hit 12.5% at age 100.
- Difficulty: Very low. Random squirrels often exceed 1.4–2.1 kg at birth; you'll hit 12.5% around age ~50 in many cases.
- Why it matters: If you ever flood your garden (think 800+ plants) and want to keep everything, reclaimers become your bottleneck unless you automate them.
- Quick win:
- Collect any 8 squirrels; age them until their averages cross 12.5% each.
- Don't obsess over marginal weight; time-to-cap is short with average rolls.
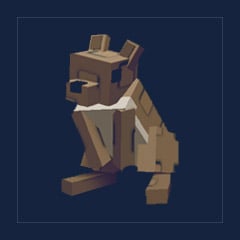
↖ Barn Owl — Heavier Shop Pets (quiet power, cheap to max)
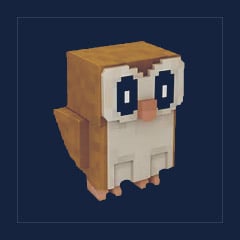
Increases the weight of pets purchased from the shop.
- Cap: +3.0 kg combined (0.4 kg per owl × up to 8).
- Single-pet target: +0.4 kg at age 100.
- Exact requirement:
- Age-1 weight: ≥1.08 kg.
- Difficulty: Low. Barn Owls hatch at ~2.0 kg baseline as an egg pet, so 1.08 kg is trivial.
- Why it matters: +3 kg turns a 1 kg shop pet into a ~4 kg pull, which cascades into hitting other pets' thresholds faster (especially for shop-limited species).
- Pro tips:
- Standard owls suffice; Giant premium variants are optional and overpriced unless you're min-maxing a trade economy.
- Park 8 owls; age to ~100 for reliable +0.4 kg per owl.
↖ Brontosaurus — Heavier Egg Hatches (but conflicts with Koi)
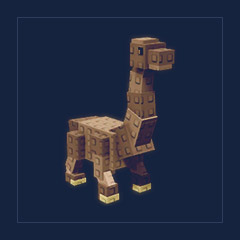
Increases weight of pets from eggs.
- Cap: +30% combined.
- Conflict: Shares field slots with Koi. You must trade off between more eggs (Koi) and heavier eggs (Bronto).
- Target planning (choose one):
- Plan A — 4 Brontos, 4 Koi:
- Requirement: 4 Brontos ≥1.73 kg at age 1 → reaches +30% at age 100.
- Why: Realistic for non-premium players; strong middle ground.
- Plan B — 3 Brontos, 5 Koi:
- Requirement: 3 Brontos ≥4.3 kg at age 1 (Huge rarity).
- Why: Keeps 5 Koi for egg chaining; needs Huge Brontos from premium sources/trades.
- Plan C — 2 Brontos, 6 Koi:
- Requirement: 2 Brontos, rainbow, ≥8.2 kg at age 1 (Titanic tier).
- Why: Maximizes Koi fielding while still capping +30%. Extremely rare and expensive.
- Decision rule:
- If you're early/mid game: Go Plan A.
- If you own Huge stock: Consider Plan B.
- If you're endgame with deep trades: Plan C is the ceiling.
↖ Pachycephalosaurus — 2x Crafts (situational, but crazy for high-value recipes)
Grants double craft results up to 100%.
- Cap: 100% chance for double craft.
- Two paths:
- Non-rainbow route:
- 8 Pachys ≥2.17 kg at age 1 → cap at age 100.
- Achievable but tight without Bronto support.
- Rainbow route:
- 8 rainbow Pachys ≥1.77 kg at age 1 → cap at age 100.
- Easier weights, but requires rainbow acquisition.
- Why it matters: On recipes like Anti-B Egg (Bee Egg + Honey), that's 2 per craft. For any scarce-input, high-output recipe, your throughput straight-up doubles.
- My field note: With Brontos boosting egg weights, I've hatched 2.8 kg age-1 Pachys; that makes the non-rainbow route much less painful.
- If you're short on rainbow: Pair Bronto Plan A with standard Pachys to hit 2.17 kg consistently.
↖ Chipmunk — Infinite Harvest Tools (niche, high bar)

Lets you use harvest tools infinitely when capped.
- Cap: 100% free tools.
- Exact requirement:
- Must be rainbow.
- Age-1 weight: ≥2.12 kg.
- Difficulty: Very high. Chipmunk is a shop pet with natural ceilings ~1.3 kg; you'll need Barn Owls to push purchases over the 2.12 kg threshold, then rainbow on top.
- Why you might skip it: You can harvest a whole garden for 9 Robux. Unless you're allergic to micro-spend or want true zero-cost cycles, the ROI can be questionable.
- If you insist:
- Run 8 Barn Owls at +3.0 kg total shop boost first.
- Time your shop buys during high-weight windows; aim for ≥2.2 kg starts, then rainbow.
↖ Putting It All Together — Recommended Loadouts
- Economy First (eggs + reclaim):
- 8 Seals (≥1.71 kg), 8 Squirrels (any ≥0.84 kg) — rotate as needed; you don't need all 16 active simultaneously. Use Seals when buying pets; swap to Squirrels when cleaning massive gardens.
- Egg Chaining vs Weight:
- Mid-game: Plan A (4 Brontos ≥1.73 kg, 4 Koi rainbow ≥1.21 kg).
- Late-game: Plan B/C if you've secured Huge/Titanic Brontos and rainbow Koi.
- Craft Power:
- If you craft high-value recipes in bulk, dedicate a session with 8 Pachys (pick your route). Craft in batches to amortize setup time.
- Shop Scaling:
- Keep 8 Barn Owls leveled in a bench slot; activate when shopping for limited pets (especially store-only species).
↖ FAQ
Q: Do I always need rainbow to hit caps?
A: Not always. Seals, Squirrels, Barn Owls can cap without rainbow. Koi and Chipmunk explicitly require rainbow to hit their single-pet thresholds; Pachy has a non-rainbow path but needs heavier starts.
Q: How strict are those age-1 weights?
A: They're practical thresholds tested at age 100. Heavier than listed reduces the number of pets or age required; lighter often means you'll miss the per-pet percent at cap.
Q: Can Brontos help me hatch heavier Brontos?
A: No. Brontosaurus explicitly does not increase Bronto hatch weights (self-exclusion). You'll need Huge/Titanic Brontos from premium eggs, trades, or events.
Q: I don't have 8 koi at ≥1.21 kg rainbow. Worth running partial?
A: Yes. Even 3–5 well-rolled koi meaningfully boost free eggs. Pair with Plan A Brontos to keep your average hatch weights healthy.
Q: Is infinite harvest via Chipmunk worth the grind?
A: For most players, no—the 9 Robux harvest option is cheaper in time and stress. It's a prestige project; do it if you enjoy the chase or operate at no-spend constraints.
Q: How many Reclaimers do I actually need without Squirrels?
A: Modern events flood you with reclaimers (I've stockpiled 127 at times), but large cleanups (hundreds of plants) still burn through them fast. Eight squirrels remove that ceiling entirely.
If you focus on only two cores, make it Seals for permanent egg economy and Squirrels for zero-cost reclaiming—they're easy to cap and immediately useful. When you're ready to push deeper, decide your identity: egg multiplication (Koi) or egg quality (Bronto), then lock a plan (A/B/C) that matches your inventory. Use Barn Owls as your always-on shop multiplier, and schedule Pachy sessions when you have big-ticket crafts queued.

Most Popular Posts
- Grow a Garden 2 Release Date Guide: Why Saturday Is the Likely Launch Window
- Grow a Garden Bizzy Bee Event: Honey Coins, Bee Eggs, Seeds, Upgrades, and Rewards
- Grow a Garden Bee Dungeon Guide: Best Wave 100 Strategy, Bee Shards, and Team Setup
- Grow A Garden Best Pet Mutations 2026: Ranked Guide for Power, Trading, and AFK Farming
- Grow a Garden Bee Stats Guide: Best Bees Ranked by Damage, HP, and DPS
- Grow a Garden Busy Bee Part 2 Guide: Royal Jelly, Best Pets, New Seeds, and Prep Strategy
Popular Category Lists
- Grow a Garden / (286)
- ARC Raiders / (283)
- CoD: Black Ops 7 / (166)
- MLB 26 / (149)
- Monopoly Go / (148)
- Star Citizen / (128)
- Steal a Brainrot / (90)
- ARK Survival Ascended / (85)
- Sailor Piece / (68)
- Forza Horizon 6 / (66)
- Diablo IV / (62)
- Blox Fruits / (62)
- Adopt Me / (57)
- CoD: BLACK OPS 6 / (55)
- Grow a Garden 2 / (54)
- Path of Exile 2 / (48)
- Monster Hunter Wilds / (46)
- Windrose / (44)
- Path of Exile / (40)
- Bee Swarm Simulator / (37)


