


 0
0Grow a Garden Most Useful Pets to Turbocharge Farming, Eggs, Mutations and Huge
- Jordan
- Share
- Grow a Garden
- 08/26/25
- 2949
Do you keep ripping up whole fields because an event wants a different plant, or staring at that 1,750 eggs achievement thinking this will take a year? If you've ever wasted reclaimers, missed mutation spreads, or sold away eggs too slowly, you're leaking time. This guide is not about flex value or prettiest Grow a Garden pets. It's about raw utility: the 10 pets that shrink grind hours, stabilize resource loops, and raise your expected value per minute.
- Core Mechanics Primer
- Pet 1: Squirrel (Tag: Reclaimer Loop Engine)
- Pet 2: Butterfly (Tag: Mutation Multiplier Keystone)
- Pet 3: Koi (Tag: Egg Refund Backbone)
- Pet 4: Seal (Tag: Sale Yield Booster / Monetization Link)
- Pet 5: Triceratops (Tag: Growth Time Compressor)
- Pet 6: T-Rex (Tag: Mutation Diffuser)
- Pet 7: Spinosaurus (Tag: Mutation Funnel / Single-Core Amplifier)
- Pet 8: Bald Eagle (Tag: Hatch Speed Accelerator)
- Pet 9: Brontosaurus (Tag: Size Amplifier—Huge → Toward Titanic)
- Pet 10: Mimic Octopus (Tag: Universal Cooldown Clone / Slot Efficiency)
- Chain Synergies (Turning Individual Effects into Loops)
- Progression Roadmap
- Trade Value Notes (Optional Insight)
- FAQ

↖ Core Mechanics Primer
Three end metrics govern efficiency:
- 1. Time saved (cycle compression: growth, hatch, mutation spread).
- 2. Resource recovery (seeds, eggs, pet slot tempo).
- 3. Value amplification (multipliers: Rainbow, size upgrades, concentrated mutations).
Every pet below meaningfully lifts at least one metric; the strongest lift two or three simultaneously.
↖ Pet 1: Squirrel (Tag: Reclaimer Loop Engine)

- Mechanic: Each Squirrel shows ~14% chance to refund your Reclaimer when you uproot. With 8 average-aged squirrels: 8 × 14% ≈ 112% expected return rate (practically near-infinite reclaimers over long samples). This means you swap entire fields (Sugar Apples ↔ Beanstalks ↔ Achievement plants) with negligible Reclaimer cost.
- Recommended: Aim for 6–8; age ≥50 for reliability; size less critical than consistency. Rainbowing is optional (no multiplicative mechanic here).
- Synergies: Triceratops (accelerated cycles produce more reasons to replant), mutation catch grids (fast layout churn).
- Use Cases: Event rotations, achievement plant sprints, clearing accidental huge growth attempts.
- Common Mistake: Underestimating aging—low-age squirrels feel RNG cold streak and players falsely conclude the mechanic was nerfed.
↖ Pet 2: Butterfly (Tag: Mutation Multiplier Keystone)

Mechanic: Rainbow acts after additive stacking of all other mutation bonuses.
Simplified formula:
- Let BaseYield = base plant output.
- Let Σ(Mutations) = sum of all additive mutation modifiers (Gold, Silver, special effects, etc. excluding Rainbow).
- FinalYield = (BaseYield + Σ(Mutations)) × Rainbow Multiplier.
- RainbowMultiplier ≈ ×50 (current version). Losing five minor mutations to secure Rainbow still usually yields vastly higher final output because additive block is multiplied.
Why Only One Needed Early: Cooldown is long (25 min), so extra copies have diminishing uptime returns unless you're sequencing multi-field multi-session mutation pushes.
Recommended: 1 early, 2–3 late if you run parallel mutation farms. Rainbow > Gold > Silver > everything else.
Synergies: T-Rex (spreads diversity to maximize additive block before multipliying), Spinosaurus (if you decide to funnel onto a single flagship plant after staging Rainbow).
Use Cases: High-value harvest windows, pre-sell buff stacking.
Mistake: Hoarding lesser mutations and delaying Rainbow adoption—this delays a multiplicative step and harms compounding.
↖ Pet 3: Koi (Tag: Egg Refund Backbone)

- Mechanic: Chance (≈3–4.5% per Koi depending on age/quality) to refund an egg upon hatching. With 8 modest Koi, binomial expectation gives roughly 0.3–0.36 eggs per hatch cycle—over hundreds, that is a meaningful reduction in total egg acquisition time.
- Test: 8 Primal Dino Eggs hatched → 2 refunded (sample small but consistent with expectation variance).
- Recommended: 6–8 during your 1,750 egg grind stage.
- Synergy: Bald Eagle (eggs hatch faster → more Koi refund opportunities), Seal (monetize the overflow quickly).
- Use Cases: Bulk event eggs, achievement quotas, chasing a Huge/Titanic roll.
- Mistake: Replacing Koi too early with pure value pets and dragging out the egg milestone.
↖ Pet 4: Seal (Tag: Sale Yield Booster / Monetization Link)

- Mechanic: Boosts returns when selling pets/eggs—improves resource → currency exchange velocity. Every sale is leverage for next hatch wave.
- Recommended: 2–4; focus on higher weight improvements if scaling market flips. Rainbowing yields compounding but is optional early.
- Synergies: Koi (refund), Bald Eagle (speed), Brontosaurus (larger wins become more profitable when sold).
- Use Cases: Clearing mass hatch dumps, stabilizing cash for seed shop bursts.
- Mistake: Ignoring sale optimization and feeling cash starved despite high hatch volume.
↖ Pet 5: Triceratops (Tag: Growth Time Compressor)

Mechanic: Charges every 20 seconds (short CD) to advance growth (e.g., +30 min equivalent) letting you chain growth/harvest loops or reroll for huge outcomes (Bone Blossoms, Burning Buds).
Rotation Method (8-Slot Cycle):
- 1. Place Triceratops A, let it charge target (e.g., Burning Bud).
- 2. 20s later place B, continue until H.
- 3. By the time you drop H, A's cooldown nearly returns—maintains pseudo-continuous acceleration.
Example Timeline (Seconds): 0 A, 20 B, 40 C, 60 D, 80 E, 100 F, 120 G, 140 H, ~160 A again.
Recommended: Fill all slots when chasing time-sensitive huge attempts or fruit achievements.
Synergies: Squirrel (quickly reclaim non-huge fails), Spinosaurus (if focusing mutations on single accelerated plant).
Use Cases: Huge hunting, achievement X fruit sells, event-limited growth windows.
Mistake: Deploying all 8 simultaneously → idle downtime instead of staggered cadence.
↖ Pet 6: T-Rex (Tag: Mutation Diffuser)
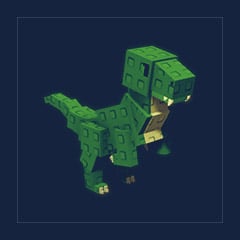
- Mechanic: Spreads existing mutations across garden, turning isolated mutation nodes into networked coverage—supports broad-based Rainbow multiplier value.
- Recommended: 1 sufficient for most players; 2 if running very large multi-biome grids.
- Synergies: Butterfly (amplifies diversified additive layer), Squirrel (rebuild strategic mutation catcher rows rapidly).
- Use Cases: Preparing a uniform field before Rainbow harvest cycle.
- Mistake: Over-investing in multiple T-Rex early—slot opportunity cost becomes high.
↖ Pet 7: Spinosaurus (Tag: Mutation Funnel / Single-Core Amplifier)

- Mechanic: Absorbs distributed mutations and funnels onto a favored plant, creating a hyper-stacked flagship target. Perfect when you decide one monster fruit > field average.
- Recommended: 1 (occasional swap with T-Rex depending on stage objective).
- Synergies: Butterfly (multiply the concentrated stack), Triceratops (rush growth of the flagship), Brontosaurus (if flagship relates to egg size yield pathways indirectly).
- Use Cases: Late-game high-value plant customization, showpiece garden builds.
- Mistake: Using Spinosaurus too early before you have enough mutation density to make concentration matter.
↖ Pet 8: Bald Eagle (Tag: Hatch Speed Accelerator)

- Mechanic: Reduces hatch cycle time; 8 Bald Eagles ≈ almost double effective hatch throughput compared to 8 Blood Kiwis (even counting Kiwi passive + active). More cycles = more Koi refunds + more chances at Huge rolls + quicker Seal monetization.
- Recommended: Stack as many as feasible during egg grind phase; mute game audio if fireworks spam.
- Synergies: Koi (refund per hatch), Seal (fast liquidation), Brontosaurus (more shots at upgrading a base Huge).
- Use Cases: 1,750 egg achievement, event-limited hatch frenzies, testing new egg pools.
- Mistake: Mixing half Eagles half filler—dilutes the time compression curve.
↖ Pet 9: Brontosaurus (Tag: Size Amplifier—Huge → Toward Titanic)

- Mechanic: Does NOT create a Huge from a normal pet. It enhances the size of what would already roll Huge, pushing borderline scaling into Titanic territory. Example: Base Huge 7 kg → +30% = 9.1 kg (clears Titanic threshold if threshold ≈ 9 kg). A 6 kg → 7.8 kg might still fall short, so variance matters.
- Expected Value Logic: If Huge chance ~1/1,000, over 1,750 eggs your probability of ≥1 Huge ≈ 1 - (999/1000)^{1750} ≈ 82% (approx). Brontosaurus raises payoff of success event (payout magnitude) rather than probability of occurrence → a variance amplifier.
- Recommended: Adopt once your egg throughput (Eagles + Koi loop) is stable; low priority for brand-new players.
- Synergies: Bald Eagle (more trials), Koi (cost reduction per trial), Seal (higher sale delta if market values Titanic premium).
- Use Cases: Targeting trade leverage, prestige scaling.
- Mistake: Expecting it to force a Huge outcome or equating it with raw hatch rate improvement.
↖ Pet 10: Mimic Octopus (Tag: Universal Cooldown Clone / Slot Efficiency)

Mechanic: Copies the effect of another pet you have deployed, best when the mimicked effect has a long cooldown or high marginal value (e.g., Butterfly Rainbow cycle) or when you lack full sets (e.g., only 3 Bald Eagles → fill remaining with Mimics).
Priority Targets to Mimic: Butterfly > Bald Eagle > Koi (if refund phase) > Seal (during sell bursts) > Triceratops (if doing stagger but short CDs reduce mimic ROI).
Recommended: 2–4 flexible fillers until you acquire specialized duplicates.
Synergies: Everything—it is an adaptive elasticity slot.
Use Cases: Transitional rosters, events requiring sudden shift (mutation cycle → hatch sprint).
Mistake: Mimicking low-impact, short-CD pets where inherent return per minute is already saturated.
↖ Chain Synergies (Turning Individual Effects into Loops)
- Replant Loop: Squirrel → Fast layout pivot → T-Rex spread mutations → Butterfly multiplies → Harvest → Seal monetize → Reinvest seeds.
- Hatch Economy Loop: Bald Eagle accelerates hatches → Koi refunds eggs lowering effective cost → Brontosaurus amplifies rare Huge payoff → Seal monetizes overflow → Funds buy more premium eggs → Loop repeats.
- Huge Fruit / Flagship Loop: Triceratops accelerates growth cycles → Squirrel reclaims failures → Spinosaurus funnels mutations onto target → Butterfly multiplies final yield snapshot.
↖ Progression Roadmap
New Player (0–50 hrs)
Priority Order: Squirrel (field flexibility) > Butterfly (mutation multiplier) > Koi (cost control) > Bald Eagle (if egg milestone unlocked).
Objective: Establish reclaim + mutation multiplicative baseline.
Mid Game (50–150 hrs; chasing 1,750 eggs)
Slots Focus: 4–5 Bald Eagles, 4–6 Koi, 1 Butterfly, 1 Squirrel, 1 Seal (rotate via Mimics to cover missing duplicates).
Insert Triceratops when doing large fruit or achievement pushes.
Late Game (150 hrs+; chasing Huge/Titanic, prestige plants)
Core: Bald Eagle set + Koi set + Brontosaurus + targeted T-Rex/Spinosaurus swap + Butterfly + 1–2 Mimic Octopus + situational Triceratops.
Philosophy: Specialize loops around highest marginal bottleneck (rare size rolls or flagship mutation peak).
Quick Reference Memory Hooks
- Squirrel: Infinite field edits = strategic agility.
- Butterfly: Additive block × Rainbow = exponential-looking growth.
- Koi + Bald Eagle: Rate × Refund = sustained hatch velocity.
- Seal: Converts velocity into capital.
- Triceratops: Time slicing = compressed growth timeline.
- T-Rex vs Spinosaurus: Spread for breadth, funnel for depth.
- Brontosaurus: Payoff amplifier, not ticket increaser.
- Mimic Octopus: Adaptive patch for missing set pieces.
↖ Trade Value Notes (Optional Insight)
Functional longevity keeps Butterfly, Bald Eagle, Mimic Octopus, and mutation dinosaurs (T-Rex/Spino) from collapsing in value even when supply increases. Pets whose effects scale multiplicatively or accelerate time (rather than flat boosts) usually resist devaluation. Brontosaurus value is tied to meta interest in Titanic thresholds; if dev adjusts size scaling, re-evaluate.
↖ FAQ
Q1: I don't have Rainbow Butterfly—use Gold or Silver now or wait?
A: Use the best available immediately. Delaying a multiplier entirely is worse than running a lower tier. Upgrading later simply re-bases your FinalYield formula with a higher multiplier.
Q2: Are 8 Squirrels overkill?
A: If you're still rotating full fields multiple times per session—no. Once rotation frequency drops, you can trim to 4–6 and free slots for hatch or mutation tools.
Q3: My Triceratops rotation feels messy—any workaround?
A: Use a timer (phone or on-screen clock) and deploy every 20 seconds; or group in pairs (A/B together, then C/D) sacrificing some efficiency for cognitive ease. Mimic Octopus can clone one to smooth gaps.
Q4: Is Brontosaurus worth it before I average >200 hatches/week?
A: Usually no. Without steady hatch volume you dilute its expected value uplift window. Focus on Bald Eagle + Koi first to raise trial count, then slot Brontosaurus.
Q5: Can Spinosaurus and T-Rex run simultaneously?
A: You can, but it's often conflicting goals: diffuser wants broad distribution, funnel wants concentration. Stage them: spread first (T-Rex) until additive set stable, then funnel (Spino).
Q6: Should Mimic Octopus copy Koi or Bald Eagle during egg grind?
A: If hatch time is your bottleneck (long waits), mimic Bald Eagle; if egg acquisition cost is your limiter (scarce eggs), mimic Koi. Diagnose by asking: Am I waiting idle (time bottleneck) or running out of eggs (resource bottleneck)?
Q7: Does higher pet size always beat age for utility?
A: Not universally. Squirrel reclaimer reliability ties more to maturity milestones than size. For refund or chance-based pets, stable probability via age often outweighs marginal size bragging rights.
Q8: How do I know if Rainbow multiplier math is still current after an update?
A: Track patch notes or run a controlled test: baseline yield on a mutation-neutral plant vs mutated + Rainbow plant; if ratio shifts from ~×50, recalc FinalYield formula before reallocating slots.

Most Popular Posts
- Grow a Garden 2 Release Date Guide: Why Saturday Is the Likely Launch Window
- Grow a Garden Bizzy Bee Event: Honey Coins, Bee Eggs, Seeds, Upgrades, and Rewards
- Grow a Garden Bee Dungeon Guide: Best Wave 100 Strategy, Bee Shards, and Team Setup
- Grow A Garden Best Pet Mutations 2026: Ranked Guide for Power, Trading, and AFK Farming
- Grow a Garden Bee Stats Guide: Best Bees Ranked by Damage, HP, and DPS
- Grow a Garden Busy Bee Part 2 Guide: Royal Jelly, Best Pets, New Seeds, and Prep Strategy
Popular Category Lists
- Grow a Garden / (286)
- ARC Raiders / (262)
- CoD: Black Ops 7 / (166)
- Monopoly Go / (146)
- MLB 26 / (145)
- Star Citizen / (112)
- Steal a Brainrot / (89)
- Sailor Piece / (68)
- ARK Survival Ascended / (67)
- Diablo IV / (61)
- Forza Horizon 6 / (60)
- Blox Fruits / (60)
- CoD: BLACK OPS 6 / (55)
- Adopt Me / (53)
- Path of Exile 2 / (48)
- Monster Hunter Wilds / (46)
- Windrose / (44)
- Path of Exile / (40)
- Grow a Garden 2 / (40)
- Bee Swarm Simulator / (36)


