0
Created: Nov 18,2026 | COD: Modern Warfare 4
MW4 DMZ Loot Guide: Best Breach Rooms & Solo Container Route

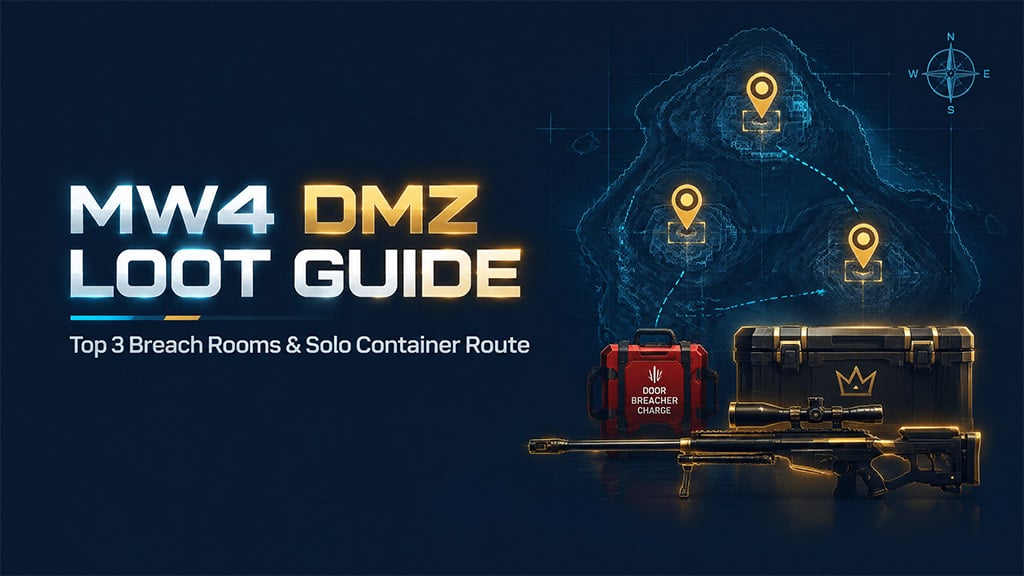
Target Rosie's Armory, Chemist's Room, and Iskra's Room with your Door Breacher Charges for top-tier Legendary weapons, then run our cross-map container sweep to stack crafting mats and DRC keys without forcing PvP.
- Top 3 Door Breacher Charge Rooms
- Rosie's Armory (Netshing Tech Complex)
- Chemist's Room (Nuclear Reactor)
- Iskra's Room (Array)
- Solo Loot Route: High-Container Sweep
- Phase 1: Early Safe Blitz
- Phase 2: Peak & Escra Control
- Phase 3: Cross-Water Material Sweep
- Route Decisions & Inventory Rules
- FAQ (Frequently Asked Questions)
- Where do you get Door Breacher Charges in MW4 DMZ?
- Can a full squad run this solo container route?
- Are battery-operated safes worth the detour?
- Where is the best place to farm DRC keys?
- Should I keep duplicate recipes or paper stacks?
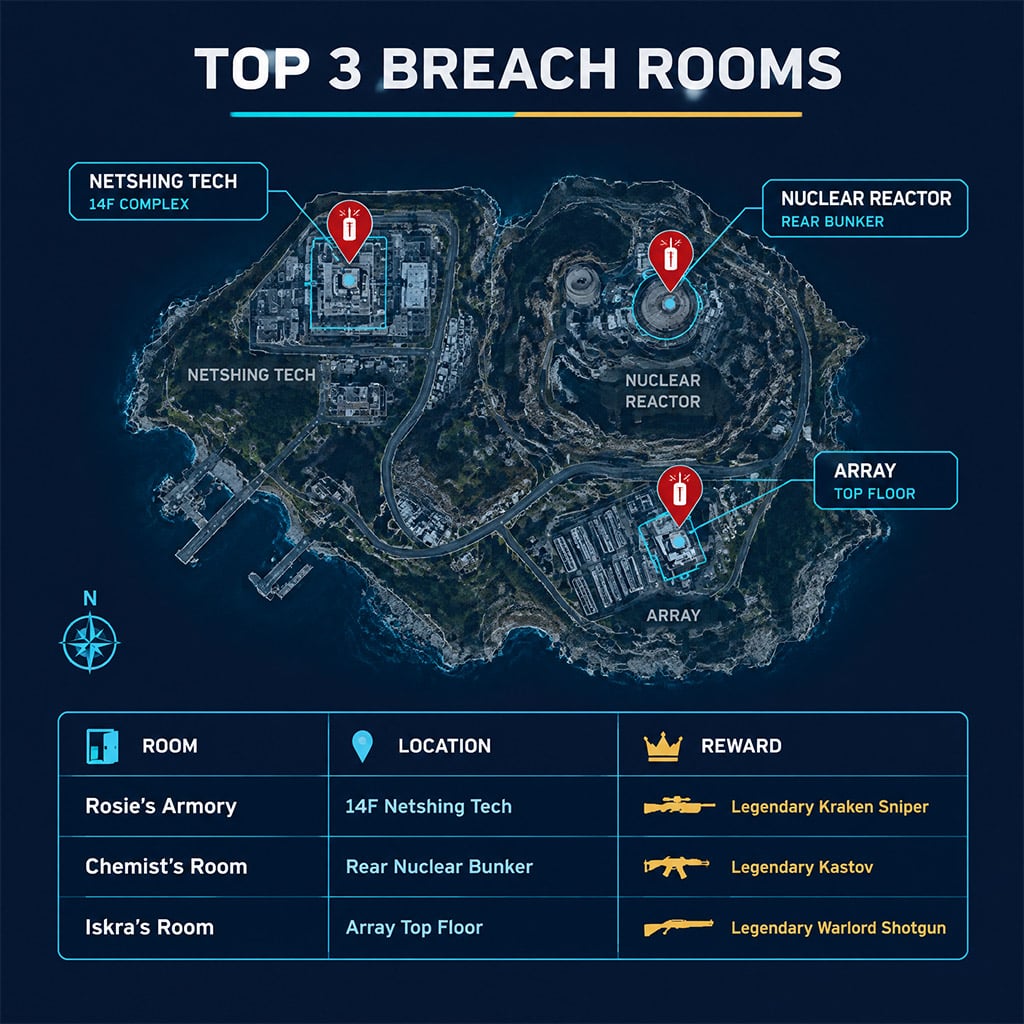
Top 3 Door Breacher Charge Rooms
We tested every major locked room in MW4 DMZ to isolate the three Lieutenant Crates worth burning a single-use Door Breacher Charge.
| Room | Exact Location | Target Weapon | Tactical Trade-Off |
|---|---|---|---|
| Rosie's Armory | 14th floor, Netshing Tech complex (Grid) | Legendary Kraken Sniper | High vertical exposure; dominates long sightlines |
| Chemist's Room | Rear bunker, Nuclear Reactor | Legendary Kastov | Requires Hazmat Suit; best all-range primary |
| Iskra's Room | Upper level, Array main building | Legendary Warlord Shotgun | Shreds close quarters; crippled by slow reload |
Skip Iskra's Room unless you already own the Kraken and Kastov, because a slow-reloading shotgun loses open-ground rotations.
Rosie's Armory (Netshing Tech Complex)
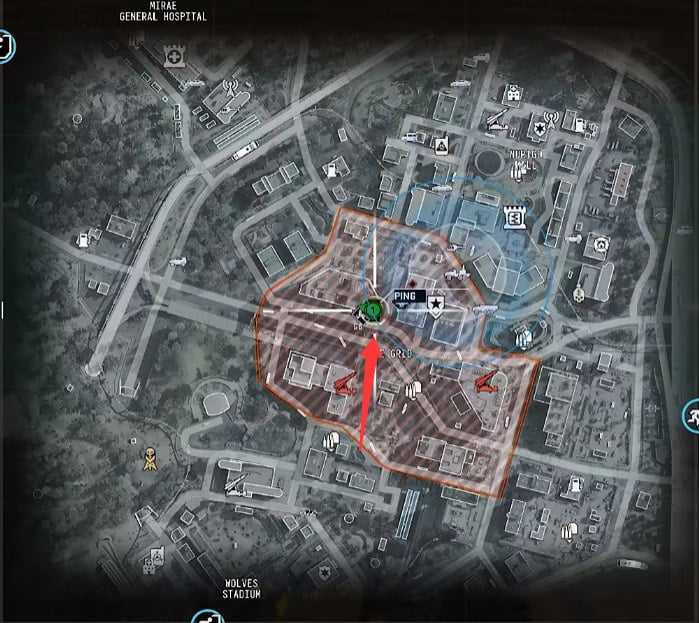
Breach Trigger: Push the 14th floor of the Netshing Tech complex in the Grid, skipping the sniper tower where Rose camps.
Key Alternative: Complete the main Grid mission to earn Rosie's High-Rise Armory Key and save your breacher charge.
Chemist's Room (Nuclear Reactor)
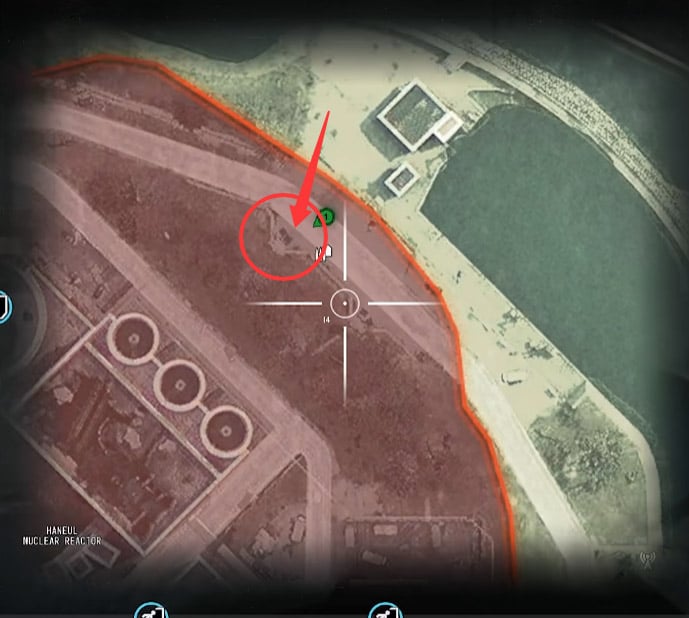
Breach Trigger: Grab the Hazmat Suit from the reactor control room, then breach the rear Nuclear Reactor bunker for the Legendary Kastov.
Build Upgrade: Add a scope, suppressor, and the Apex attachment to turn this rifle into a reliable Deathstalker killer.
Iskra's Room (Array)
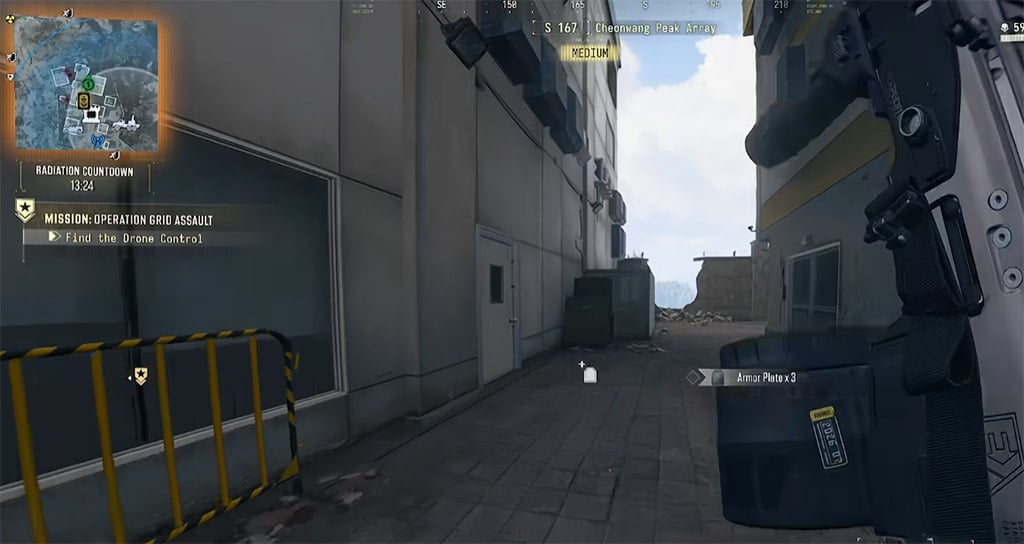
Breach Trigger: Clear the top of Array's main building and breach Iskra's room for the Legendary Warlord Shotgun.
Pro Tip: Always stash your Door Breacher Charge inside a Secure Slot before deploying so an early PvP wipe never deletes your crafting investment.
Solo Loot Route: High-Container Sweep
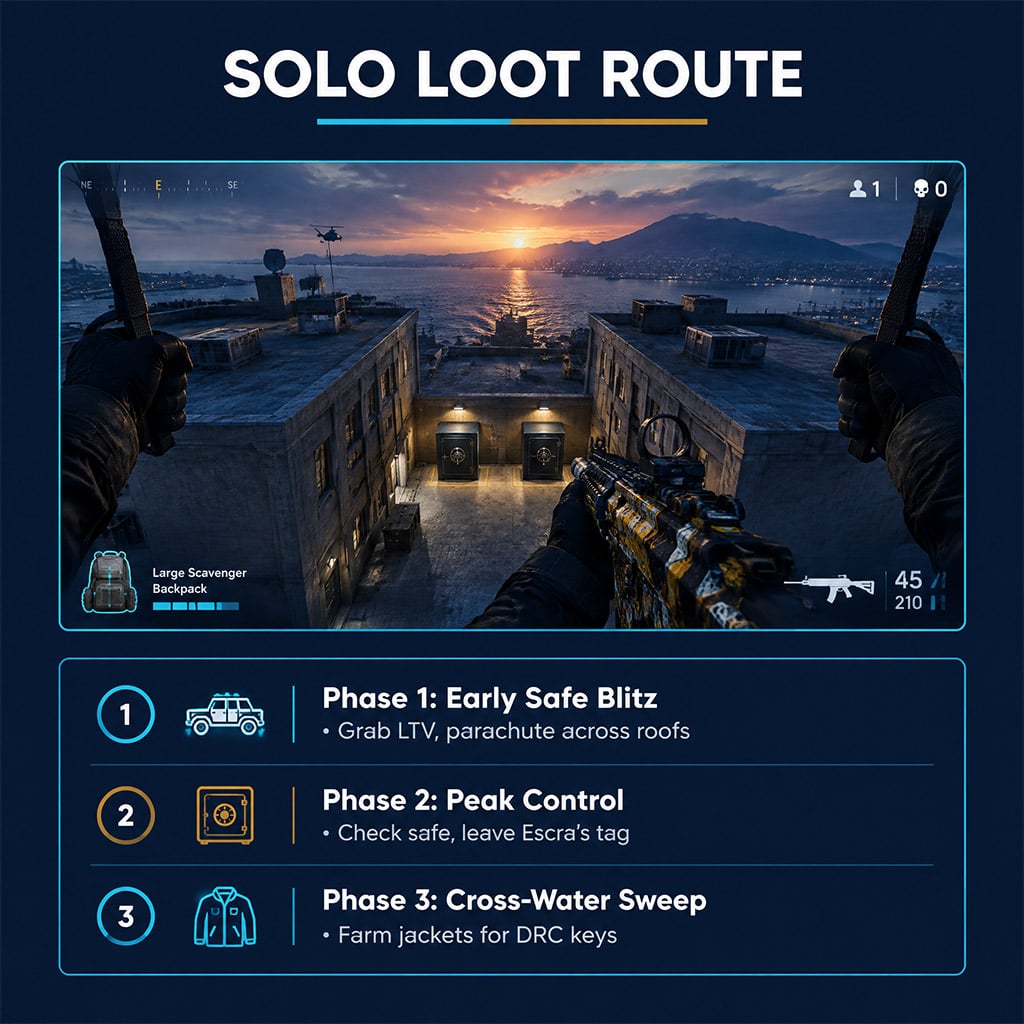
Pure safe-hunting leaves you rich in cash but starved for crafting materials. Deploy with a Large Scavenger Backpack and a Parachute to sweep high-density containers across three phases.
Phase 1: Early Safe Blitz
Clear Spawn Fast: Grab an LTV immediately, as Hospital spawns can push your starting position within 35 seconds.
Skip Pipe Climbs: Parachute directly from adjacent roofs to reach double safes faster and preserve your barrel rolls for escapes.
Bypass Opened Safes: Never detour to a safe that is already cracked; rotate straight to the next cluster.
Phase 2: Peak & Escra Control
Check Peak First: Inspect the main safe at Peak and bail immediately if it is already looted.
Leave Escra's Tag: If you kill Escra, loot her Large Secure Backpack and leave her dog tag on the ground so you do not broadcast your live location.
Phase 3: Cross-Water Material Sweep
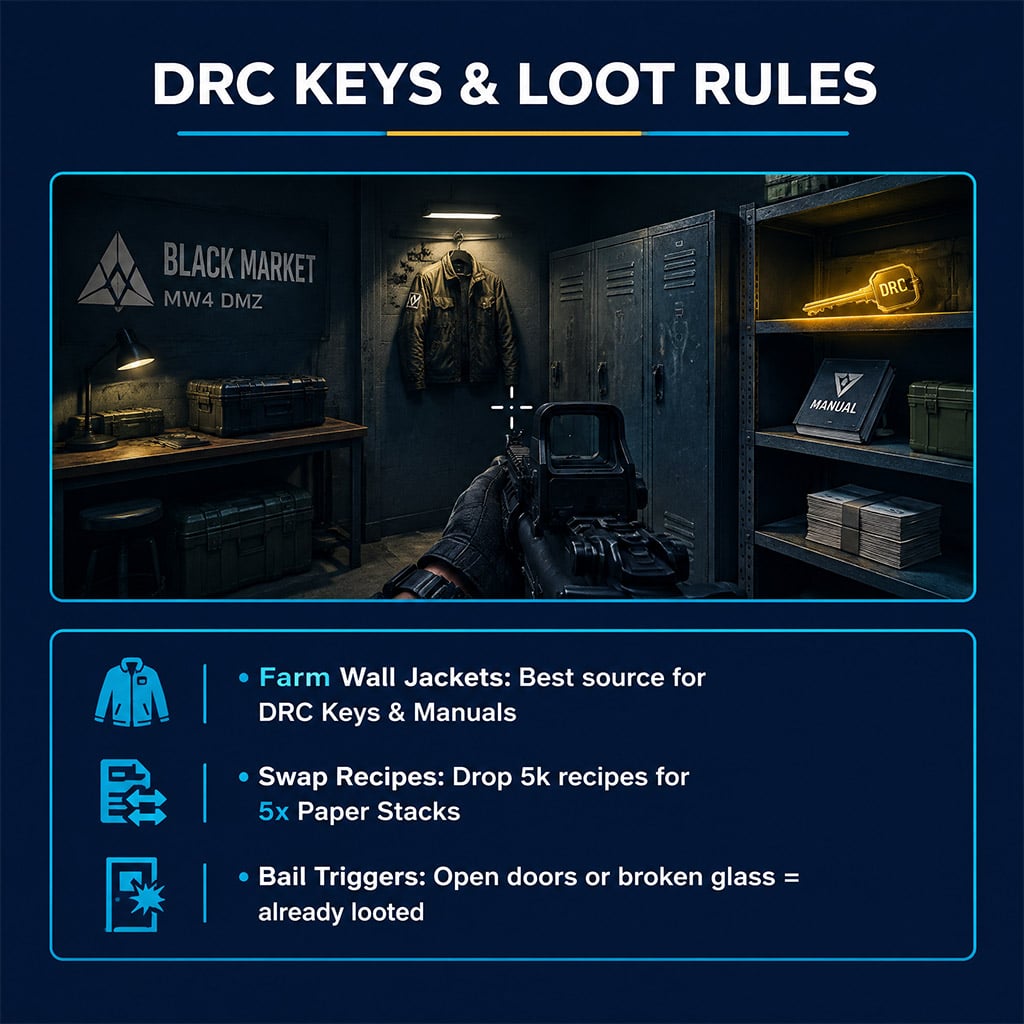
Hit Jackets & Lockers: Sweep the Black Market, Underground Bunkers, Hospitals, and clustered houses on foot to farm mats, Weapon Manuals, and DRC keys.
Trigger Exfil Early: Stop adding buildings once your backpack is full or extraction pressure spikes near the top-left exfil.
Pro Tip: In our testing, an open door or broken glass is an immediate bail trigger—never waste time clearing a POI that another squad already touched.
Route Decisions & Inventory Rules
Small inventory mistakes cost solo players 200,000+ cash per death. Apply these four rules during every extraction:
Swap Recipes for Paper: Once you own all crafting recipes, drop duplicate 5k recipes to stack 5x Papers for higher sell value per slot.
Pair Casino Keys: Hold any Mechanic Shack Key until you also have the Counting Room and Vault Key, then run all three together with a Weapons Backpack.
Skip Battery Safes: Ignore battery-operated safes unless you already hold a battery and the safe sits directly on your path.
Audit Squad Splits: Run this route solo; a three-man squad splits too few mats and jackets to justify the slower rotation.
Pro Tip: Do not rely on a yellow minimap alert as proof a building is unlooted, because passing players often leave AI alive behind them.
FAQ (Frequently Asked Questions)
Where do you get Door Breacher Charges in MW4 DMZ?
Buy them from your daily vendor or craft them using 1 Experimental Compound, 5 Stock Rods, and 3 Volatile Explosives after extracting the recipe from red key rooms.
Can a full squad run this solo container route?
No. A three-man squad starves for mats, jackets, and paper stacks on this path, forcing unnecessary PvP detours.
Are battery-operated safes worth the detour?
Skip them unless you already carry a battery and the safe sits on your route. The opening animation exposes you to nearby Iron Citadel spawns.
Where is the best place to farm DRC keys?
Loot every jacket inside the Black Market, Peak, and cross-water houses. Wall jackets consistently roll DRC keys far more often than safes.
Should I keep duplicate recipes or paper stacks?
Drop duplicate 5k recipes for 5x Paper Stacks. Paper stacks generate higher total cash per occupied backpack slot once your crafting progression is complete.

I’m Hiroshi Tanaka, a Japanese Technical Content Writer at GGWTB covering action RPGs, loot farming, and gear builds. My guides connect character progression with stat priorities, gear synergies, and targeted farming routes. A build needs to work before the perfect drop arrives—not just after every slot is filled.
Most Popular Posts
- MW4 Beta Meta Weapons Class Setups: Attachments, Perks, and Tuning included
- MW4 Beta Easter Eggs: All 15 Secrets, Locked Doors, Hidden Routes & Unlocks Tested
- Modern Warfare 4 Settings: Best Controller, Graphics & PC Config for Max FPS
- Modern Warfare 4 Beta Best Weapons, Loadouts, Perks & Killstreaks
- MW4 Beta Guide: Maps, Weapons, Perks, and the Fastest Way to Level 20
- Modern Warfare 4 Beta Rewards: Full Unlock List, Level Requirements & Fastest Grind Guide
Popular Category Lists
- ARC Raiders / (375)
- Grow a Garden / (301)
- Star Citizen / (172)
- CoD: Black Ops 7 / (168)
- MLB 26 / (159)
- Monopoly Go / (153)
- ARK Survival Ascended / (132)
- Steal a Brainrot / (101)
- Adopt Me / (79)
- Blox Fruits / (74)
- Forza Horizon 6 / (72)
- Sailor Piece / (68)
- Grow a Garden 2 / (68)
- Aion 2 / (66)
- Diablo IV / (62)
- COD: Modern Warfare 4 / (61)
- CoD: BLACK OPS 6 / (55)
- Maplestory Classic / (50)
- Path of Exile 2 / (48)
- Monster Hunter Wilds / (46)