0
Created: Nov 19,2026 | COD: Modern Warfare 4
MW4 DMZ Mirae General Hospital Loot Route: Room 705 Key & Lab Lockers

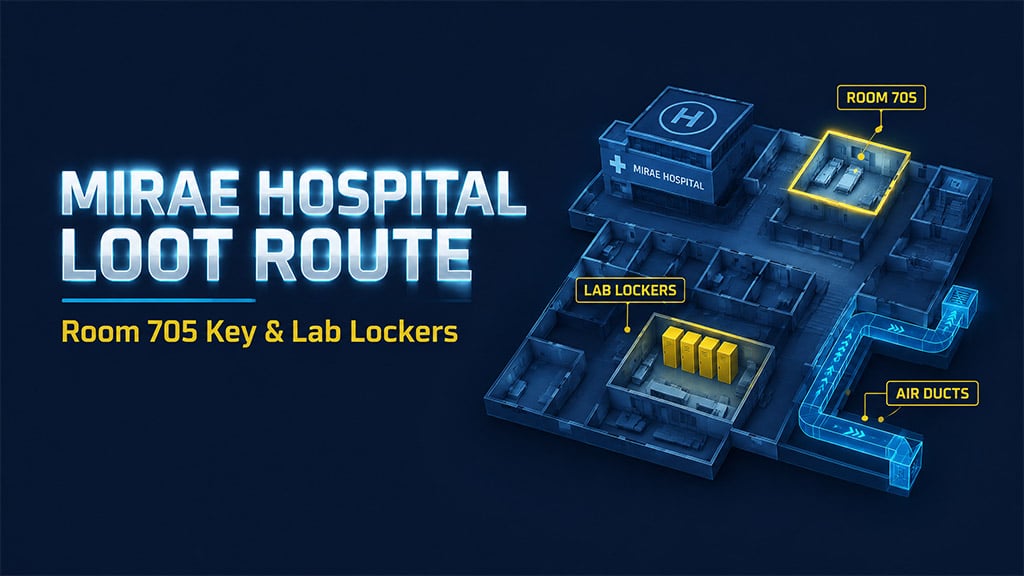
Enter Mirae General Hospital via the parking lot, ride the elevator to the top floor, and loot Room 705 for the Science Laboratory Key. Drop back to the first floor, push toward the morgue, and clear the four yellow lockers inside the lab.
- Step 1: Secure the Room 705 Key
- Step 2: Raid the First-Floor Science Laboratory
- Step 3: Breach the Secret Duct Room
- FAQ (Frequently Asked Questions)
- Is the Room 705 Science Laboratory Key guaranteed to spawn?
- Do all four yellow lockers in the Science Laboratory require a key?
- What loot drops inside the Mirae General Hospital laboratory?
- How do you get into the locked room near the laboratory?
- Can enemies call a search party inside Mirae General Hospital?
Follow this exact floor-by-floor sequence to clear the hospital's high-tier storage in under three minutes.
| Step | Location | Key Action | Target Loot |
|---|---|---|---|
| Step 1 | Top Floor (Room 705) | Sweep room for key | Science Laboratory Key |
| Step 2 | First Floor (Morgue / Lab) | Unlock lab & check lockers | 4 Yellow Lockers & 3 Keys |
| Step 3 | First Floor (Adjacent Room) | Crawl through air duct | Locked room supplies |
Skip the top-floor detour if you only want fast, unkeyed ground-floor supplies.
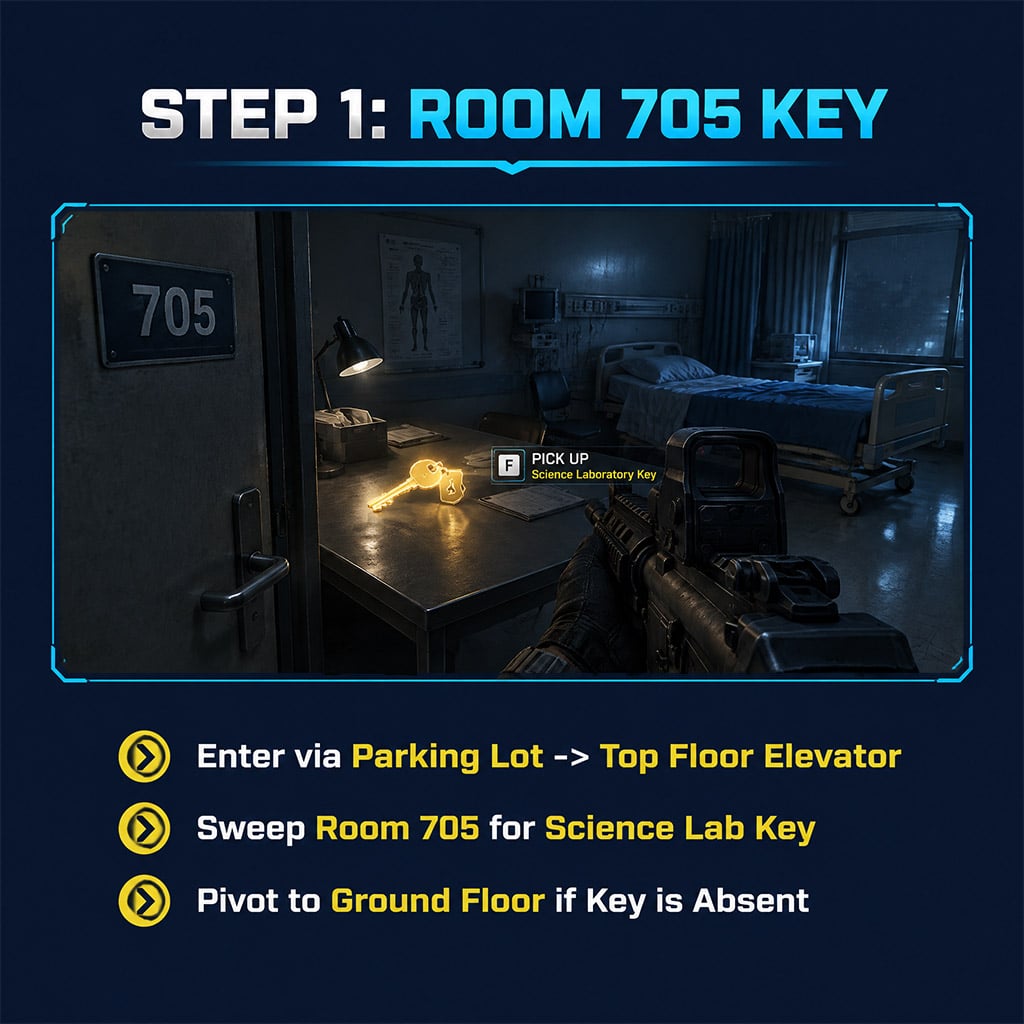
Step 1: Secure the Room 705 Key
Breach through the parking-lot entrance and take the elevator straight to the top floor. Sweep Room 705 thoroughly for the Science Laboratory Key; in our testing, the key spawn is not guaranteed every match.
Backup Trigger: If Room 705 is empty, pivot immediately to the non-keyed ground-floor lockers or extract rather than wasting time.
Pro Tip: Clear the top-floor hallway before looting Room 705 so enemy patrols do not trap you inside the doorway.
Step 2: Raid the First-Floor Science Laboratory
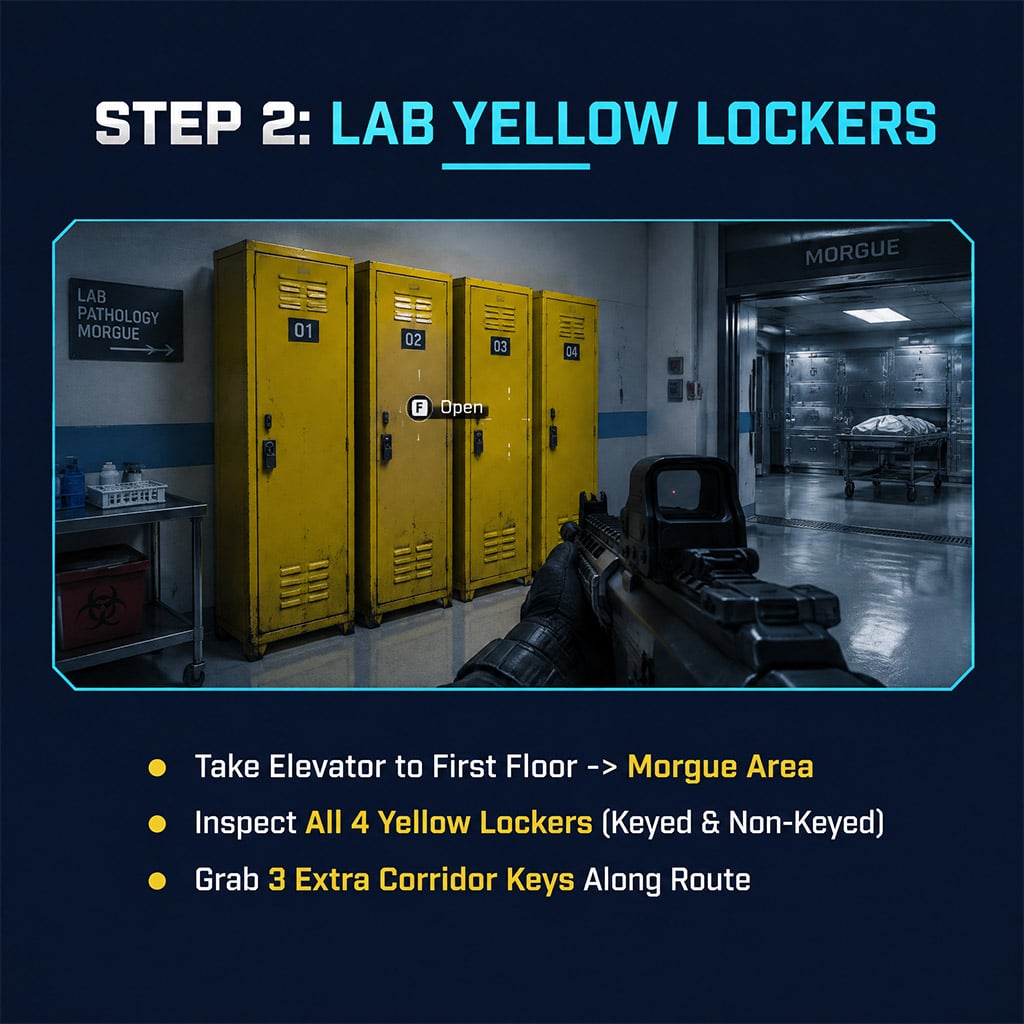
Take the elevator back to the first floor and push toward the morgue area to locate the Science Laboratory. Use your key to open the lab and inspect all four yellow lockers; we verified that this room holds a mix of keyed and non-keyed lockers.
- Loot All Four: Check every yellow locker regardless of key status, as non-keyed units still drop valuable supplies.
- Grab Extra Keys: Watch for three additional keys along this corridor, though you should not rely on them for guaranteed doors.
Pro Tip: Always check the non-keyed lockers first if you are under fire, saving your key animation for when the room is clear.
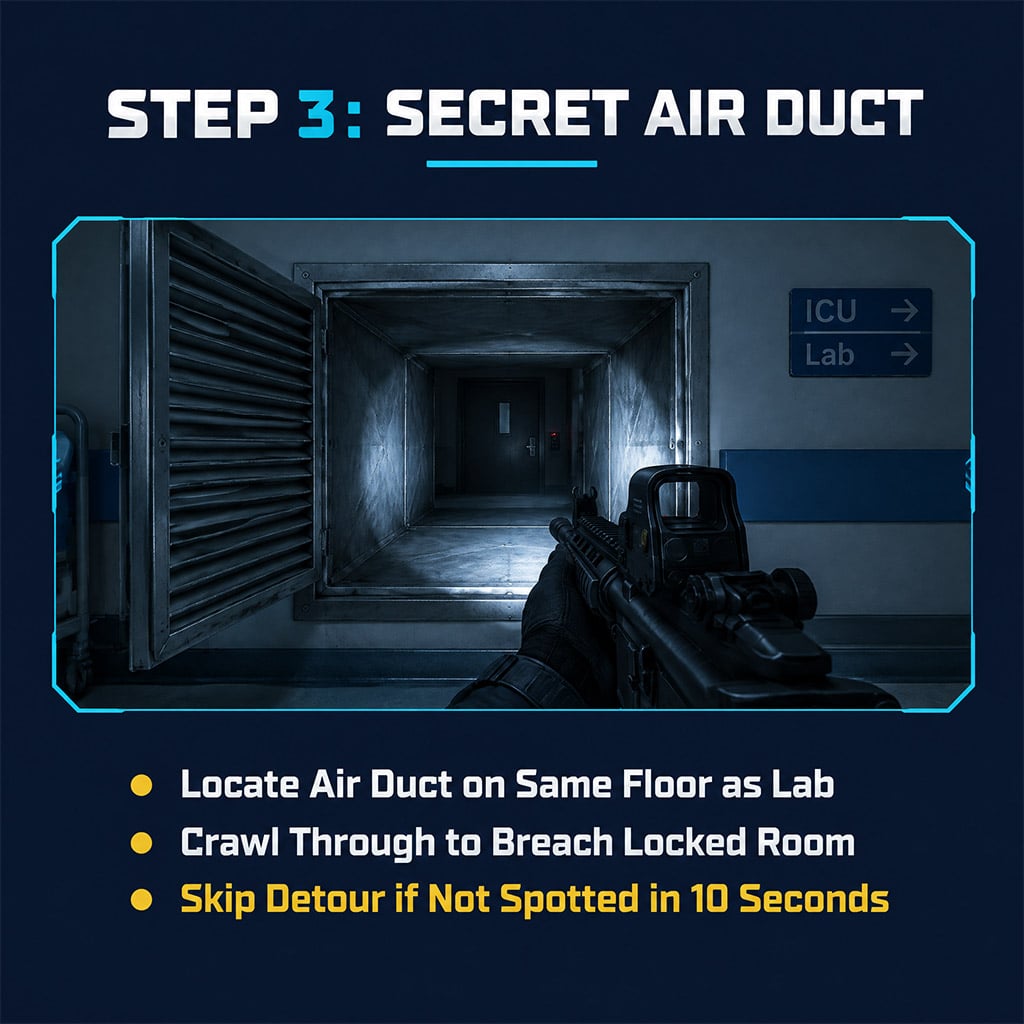
Step 3: Breach the Secret Duct Room
Locate the air duct on the same floor as the Science Laboratory to bypass a nearby room locked from the inside. In our endgame runs, the duct entrance blends into the wall; if you cannot spot it within 10 seconds, skip this detour and move on.
Pro Tip: Keep fights short inside the hospital, as enemy AI will investigate bodies and call in a search party.
FAQ (Frequently Asked Questions)
Is the Room 705 Science Laboratory Key guaranteed to spawn?
No. Room 705 is the primary spawn location, but the key is not guaranteed every match.
Do all four yellow lockers in the Science Laboratory require a key?
No. The laboratory contains a mix of keyed and non-keyed yellow lockers, so check all four.
What loot drops inside the Mirae General Hospital laboratory?
The four yellow lockers drop general high-tier supplies. Do not run this route expecting a single guaranteed item.
How do you get into the locked room near the laboratory?
Crawl through the air duct on the same floor. Skip it if you cannot spot the entrance quickly.
Can enemies call a search party inside Mirae General Hospital?
Yes. An in-game warning triggers when enemies investigate bodies, so eliminate patrols quickly and stay mobile.

I’m Sofia Bergström, a Swedish Managing Editor covering FPS, competitive shooters, and extraction shooters for GGWTB. My guides focus on loadout trade-offs, positioning, and when to commit—or cut your losses. A weapon’s stats tell only part of the story; I focus on how it fits your role and the fight ahead.

Most Popular Posts
- MW4 Beta Meta Weapons Class Setups: Attachments, Perks, and Tuning included
- MW4 Beta Easter Eggs: All 15 Secrets, Locked Doors, Hidden Routes & Unlocks Tested
- Modern Warfare 4 Settings: Best Controller, Graphics & PC Config for Max FPS
- Modern Warfare 4 Beta Best Weapons, Loadouts, Perks & Killstreaks
- MW4 Beta Guide: Maps, Weapons, Perks, and the Fastest Way to Level 20
- MW4 DMZ Hajin Map: Confirmed Features, Release Date and What's Still Unknown
Popular Category Lists
- ARC Raiders / (375)
- Grow a Garden / (301)
- Star Citizen / (172)
- CoD: Black Ops 7 / (168)
- MLB 26 / (159)
- Monopoly Go / (153)
- ARK Survival Ascended / (132)
- Steal a Brainrot / (101)
- Adopt Me / (79)
- Blox Fruits / (74)
- Forza Horizon 6 / (72)
- Sailor Piece / (68)
- Grow a Garden 2 / (68)
- Aion 2 / (67)
- Diablo IV / (62)
- COD: Modern Warfare 4 / (62)
- CoD: BLACK OPS 6 / (55)
- Maplestory Classic / (50)
- Path of Exile 2 / (48)
- Monster Hunter Wilds / (46)