0
Created: Dec 7,2025 | ARC Raiders
New BEST Safe PvE ARC Raiders Blueprint Route: 13 Blueprints in 10 Runs

Blueprints are the most sought-after rarity in ARC Raiders, but after the recent update, spawn locations have completely shifted. If you are tired of running home empty-handed, you need to change your strategy.
I have logged over 141 hours topside and currently hold 53 of the 74 rare blueprints existing in the game. I didn't get there by luck; I got there by optimizing my pathing. To prove this route works, I recorded 10 consecutive raids (3 day, 3 night, and a mix of others).

This includes game-changers like the Defib and the VA Spray. Whether you are a solo looter or running a squad, here is the exact path you need to take on the Buried City map to replicate my success.
The Route: From Plaza Rosa to Space Travel
We are focusing on density. We want to hit the buildings with the highest container counts in the shortest amount of time.
Route Overview
First, here's an overview of the route, followed by a detailed breakdown of each point.
- Starting Point: Plaza Rosa Pharmacy
- Next Stop: Red Tower
- Middle Section: Piazza Arbus Pharmacy
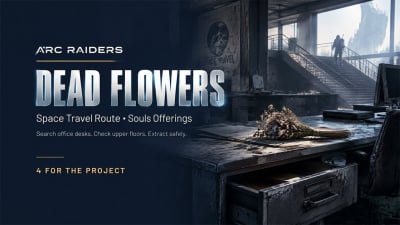
- Core Destination: Space Travel Building + Adjacent Research Building
1. The Start: Plaza Rosa Pharmacy
This is arguably the best building on the map. Make this your priority spawn or first rotation.

Entry Strategy:
Do not go through the bottom door unless necessary. Head to the rooftop. It is much safer and gives you a tactical advantage if someone else is already inside.
Why Here?
This building is packed with drawers and containers. During my test runs, this location consistently dropped high-tier attachments like the Angled Grip and Muzzle Brake 3.
The "Friendly" Meta:
You will likely run into people here. Don't shoot on sight. I've had great success just calling out, "Hello, I'm friendly." Most people are just here to loot, same as you.
2. The Bridge: Red Tower
From the pharmacy, cut through the Red Tower.

Speed is Key:
Don't spend too much time here. Check the ammo spawns and the main containers.
The Breachable Room:
If you have a breach tool, check the locked door. While I didn't find a blueprint here during the test runs, it's a known spawn point for good loot. If it's already looted, just keep moving. We want to get to the Space Travel building ASAP.
3. The Sleeper Pick: Piaza Arbusto Pharmacy
Do not skip the second pharmacy. Many players loot the first one and extract, leaving this one untouched.

The Proof:
This is exactly where I found the Extended Shorty Mag 2 blueprint.
Looting Tactic:
It has a similar layout to Plaza Rosa. Check every drawer behind the counter. It only takes a minute, and the payoff can be massive.
4. The Holy Grail: Space Travel Building
This is where the magic happens. If your run has been dry so far, this building will likely save it.

Top-Down Strategy:
Head immediately to the 6th Floor. Work your way down to the bottom.
Key Locations:
- 6th & 5th Floors: These offices are dense with desks. I found the Flanking Blueprint here.
- Breach Doors (3rd Floor): This is critical. Behind the breachable doors on the lower floors is where I secured the Defib Blueprint and the Wolfpack Blueprint.
- The "Secret" Spot: On the 2nd floor, check the lockers and the side rooms. I found the VA Spray Blueprint here after thinking the run was over.
Danger Level:
This is a high-traffic area. Listen for footsteps. If you hear a "Rattler" or "Stitcher" firing, you know you have company.
Pro Tip: The "Container Slot" Theory
Here is a detail that will save you hours of looting time. Not all containers are created equal.
Pay attention to the grid size of the container you are looting.
3 Slots:
If you open a drawer and see only 3 slots, it's usually low-tier loot (bandages, basic ammo).
4 or 5 Slots:
This is what you are looking for. Blueprints and Epic (Pink) attachments almost exclusively spawn in these larger-capacity containers.
What does this mean for you?
If you are in a rush or hearing enemy footsteps, you can instantly stop looting a container if you see it only has 3 slots. Focus your time on the 4 and 5-slot containers to maximize your blueprint chances.
FAQ
Q: Do I need to run this at night to get the best blueprints?
A: No. There is a rumor that items like the Tempest only spawn at night, but my data says otherwise. I found the Defib, Wolfpack, and VA Spray during daytime raids. Don't wait for the night cycle; just get in there.
Q: What if I run into other players?
A: Trust the "Friendly" shout. In my 10 runs, I encountered multiple players. By simply announcing I was friendly, I avoided combat almost every time. However, always keep a Stitcher or Deadline ready in your hands just in case they decide to be aggressive.
Q: I keep finding "Complex Gun Parts," are they worth keeping?
A: Honestly? No. Unless you are specifically crafting the Jupiter, Aphilion, or Equalizer, they are the "least satisfying Pink item" you can find. They take up space and aren't used for much else. Prioritize Blueprints and Keycards over these.
Summary
If you want to fill your crafting bench, stop wandering aimlessly. Here is the recap of the golden loop:
1. Start: Plaza Rosa Pharmacy (Loot everything).
2. Rotate: Through Red Tower (Check quickly).
3. Stop: Piaza Arbus Pharmacy (Don't skip it).
4. Finish: Space Travel Building (Clear from 6th floor down).
I went from 50 to 53 blueprints in a single session using this exact method. The results speak for themselves. Good luck, Raider—get those blueprints into your safe pocket immediately
Most Popular Posts
- ARC Raiders Update 1.42: Phantom Targets Farming Guide (Glitched Wasps, Rewards, Regional Conditions)
- ARC Raiders Best Pop Trigger Strategy: Fast Phantom Targets Damage Guide
- ARC Raiders Subway Skin Guide: Unlock the Subterranean Outfit
- ARC Raiders Medium & Heavy Gun Parts Blueprint Guide: Best Farm Route, Locations, and Refiner Crafting
- ARC Raiders Frozen Trail Update Guide: Pendola Pass, Frigate & Meta Loadouts
- ARC Raiders Ascending the Mountain: Fast Loot Routes and Item Guide
Popular Category Lists
- ARC Raiders / (360)
- Grow a Garden / (295)
- CoD: Black Ops 7 / (167)
- Star Citizen / (164)
- MLB 26 / (159)
- Monopoly Go / (153)
- ARK Survival Ascended / (128)
- Steal a Brainrot / (99)
- Blox Fruits / (74)
- Adopt Me / (74)
- Forza Horizon 6 / (72)
- Sailor Piece / (68)
- Grow a Garden 2 / (68)
- Diablo IV / (62)
- Aion 2 / (57)
- CoD: BLACK OPS 6 / (55)
- Path of Exile 2 / (48)
- Monster Hunter Wilds / (46)
- COD: Modern Warfare 4 / (45)
- Windrose / (44)