0
Created: Nov 16,2026 | Planet Zoo 2
Planet Zoo 2 Mixed-Species Savannah Guide: Layout, Budget & Escapes

Lock in your perimeter barriers and guest sightlines first, balance shared terrain and shelter stats, then buy your 18-animal starter herd for roughly 1,000 Conservation Credits (CC). Reserve perimeter footprints for future giraffe and rhino houses before placing rocks.

- Optimal 18-Animal Starter Roster & CC Budget
- Sightlines & Perimeter Layout
- Escape-Proofing Barriers & River Edges
- Shared Terrain, Shelter & Enrichment Setup
- Multi-Species Terrain Tuning
- Staged Shelters & Enrichment
- Functional Backstage & Keeper Access
- FAQ (Frequently Asked Questions)
- How do I stop animals from walking over low savannah walls?
- How many Conservation Credits do I need for a mixed savannah?
- Does one animal's 100% terrain score mean the whole mixed herd is happy?
- How do I edit terrain directly underneath an existing habitat barrier?
- Can Lions live inside the mixed-species savannah habitat?
Optimal 18-Animal Starter Roster & CC Budget
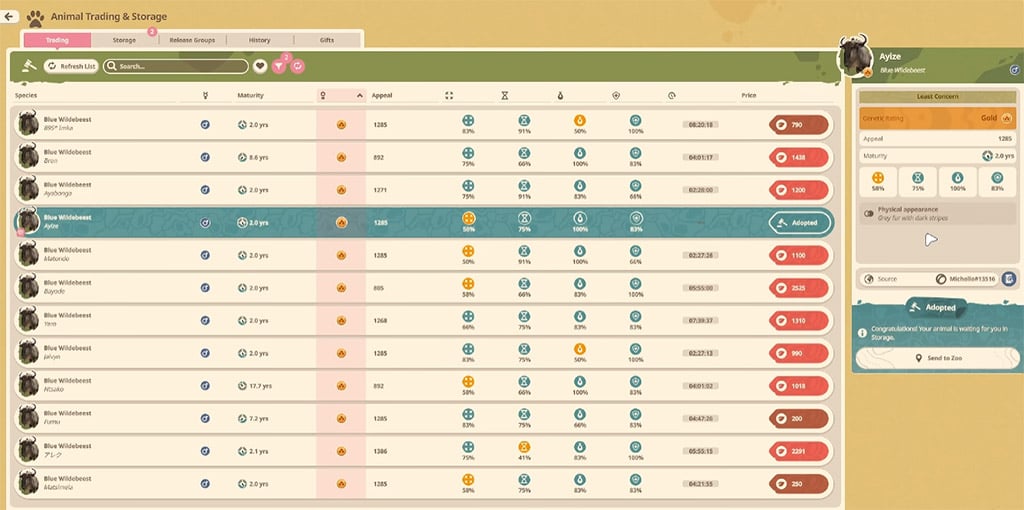
Prioritize Gold-rated breeding males or pairs while filling the remaining herd slots with cheaper Silver or unrated animals.
| Species | Count | Priority Rating |
|---|---|---|
| Blue Wildebeest | 5 | Gold-rated breeding pair |
| Common Ostrich | 2 | Gold-rated breeding pair |
| Plains Zebra | 5 | Gold-rated male + budget females |
| Thomson's Gazelle | 6 | Gold-rated male + budget females |
| Total Herd | 18 | ~1,000 CC total market cost |
Skip all-Gold herds early on to avoid draining your Franchise CC reserves before unlocking vet research.
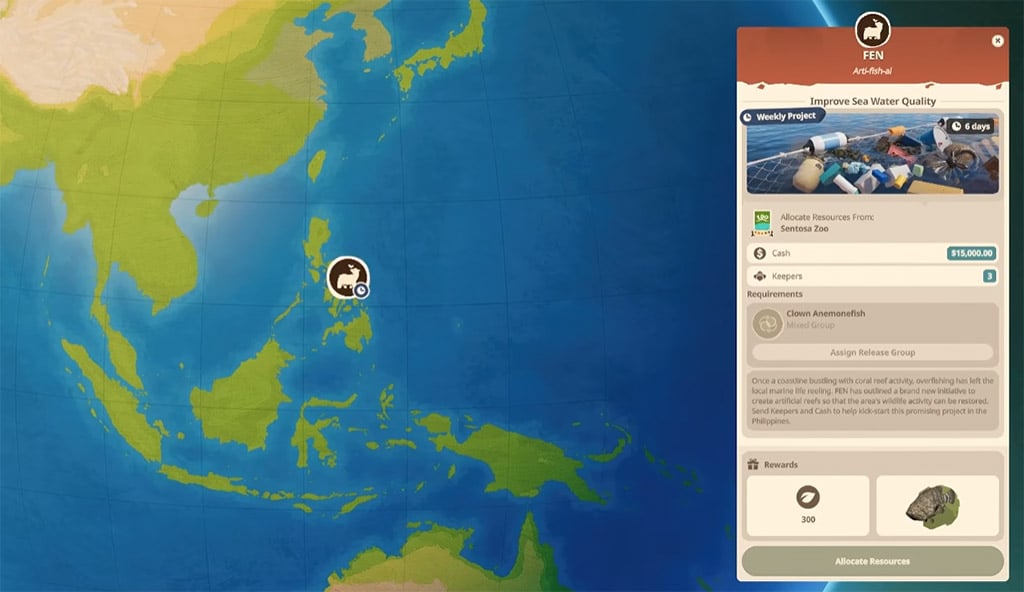
- Farm Fast CC: Complete active Conservation Projects for quick 300 CC payouts and release surplus bred Warthogs to fund this roster.
- Check Group Ratios: Verify each species' minimum social group size on the Animal Market before purchasing to prevent instant welfare drops.
Sightlines & Perimeter Layout
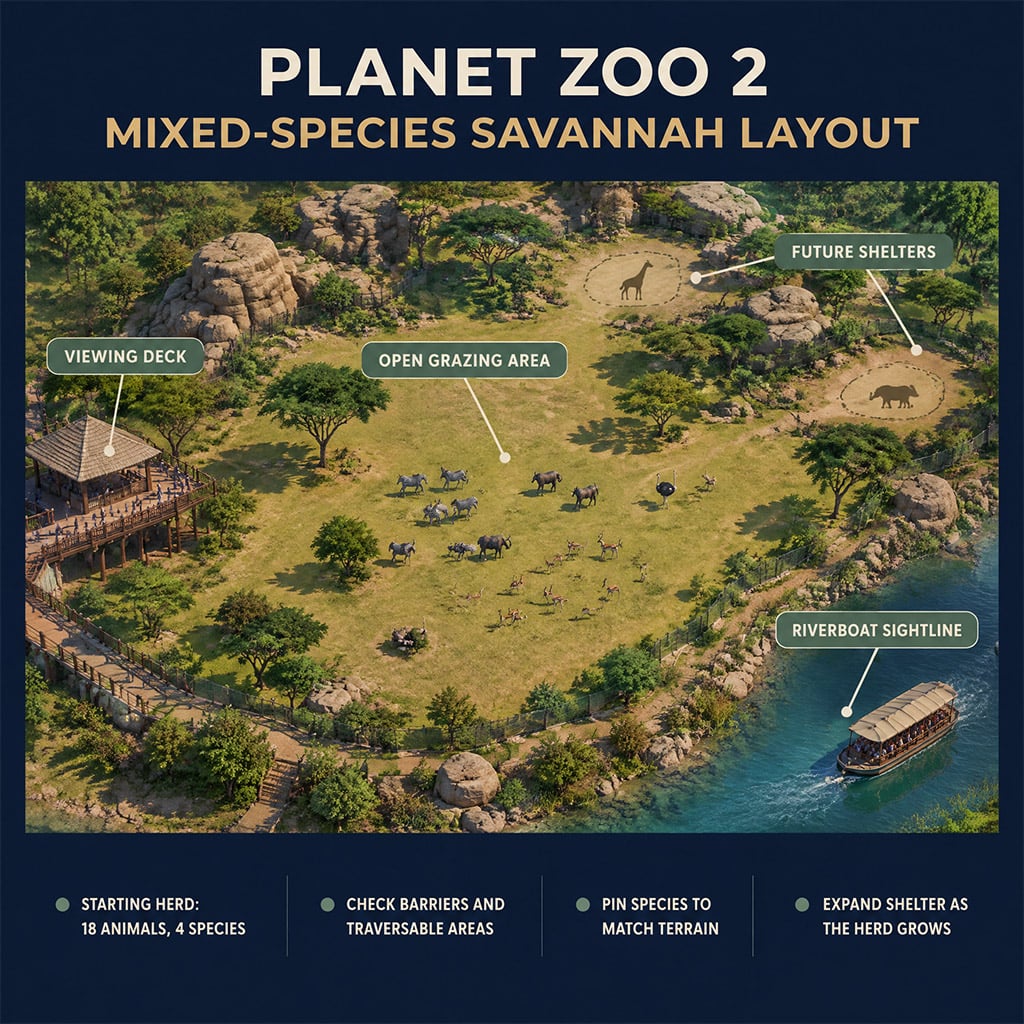
Map all guest viewing zones and expansion plots before sculpting terrain or placing hardscape.
- Primary Viewing Deck: Anchor your main guest plaza along one broad border overlooking the open central plains.
- Secondary Shelter View: Place an opposing viewing gallery aimed directly at your main hard shelter so resting animals stay visible.
- Riverboat & Lion Sightlines: Flatten banks along riverboat tracks for unobstructed passenger views and keep an open sightline across any neighboring Lion enclosure.
- Marginal Hardscaping: Push kopje rock formations and dense foliage to the outer edges to preserve central herd pathing.
Mark future Giraffe and Black Rhino indoor shelter footprints with terrain paint immediately so decorative rockwork never blocks expansion.
Escape-Proofing Barriers & River Edges
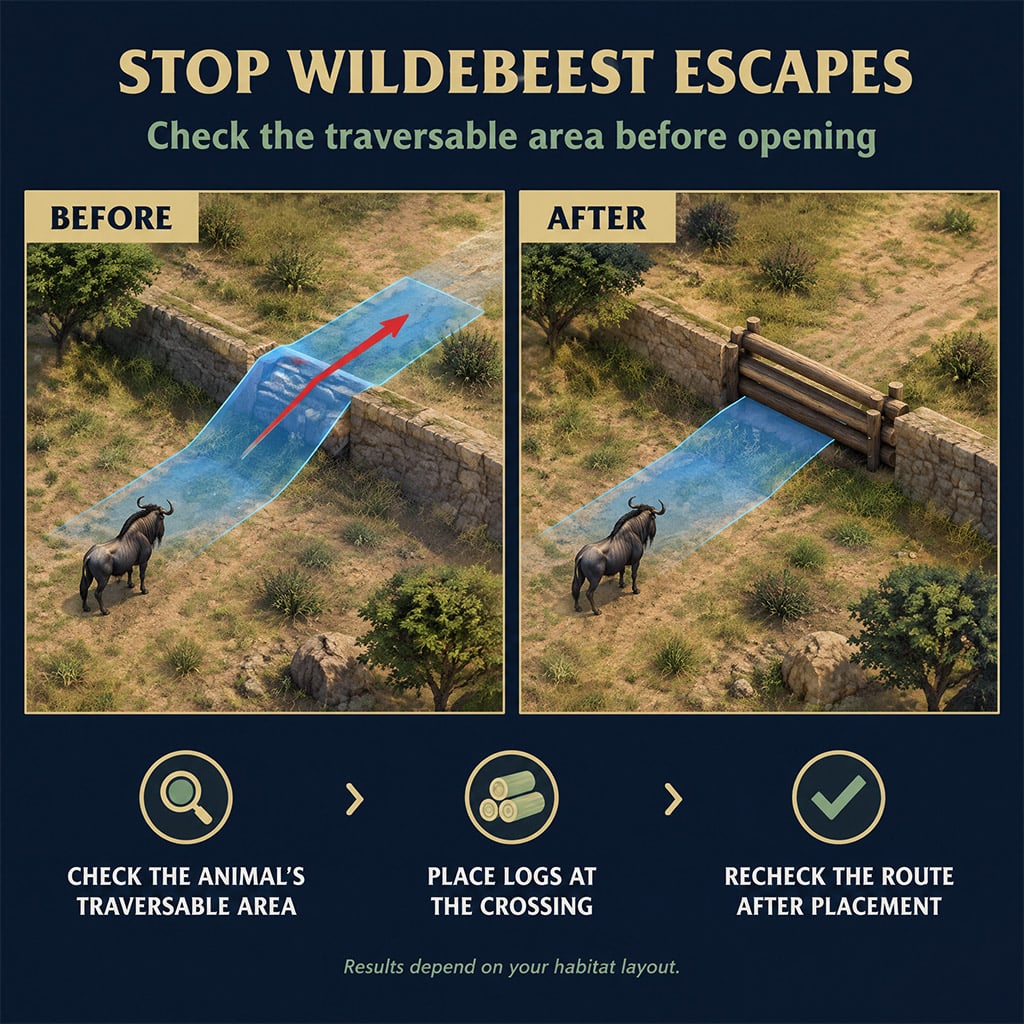
Custom scenery fences fail if underlying geometry creates climbable slopes. In our Franchise testing, Blue Wildebeest walked straight over low path-side walls until we placed horizontal logs at the base to sever their traversable hitbox.
- Run Traversability Heatmaps: Select an animal inside the sealed habitat and open the Traversable Area overlay to spot red escape nodes near rocks and raised paths.
- Block False Walls: Lay heavy logs inside decorative walls and back un-walled path edges with hidden chain-link barriers.
- Secure Boat Views: Sink a concrete moat wall topped with scaled-down wire mesh along riverbanks to stop swimmers without ruining boat sightlines.
- Edit Locked Barrier Terrain: Swap problematic fence segments to a Null Barrier, flatten or trench the ground, then restore the real barrier.
Never swap an occupied perimeter to a Null Barrier without boxing or relocating your animals first, or you will trigger immediate escape penalties.
Shared Terrain, Shelter & Enrichment Setup
Visual savannah realism conflicts with in-game welfare math; our testing confirmed mixed hoofstock demand far more hard shelter and Long Grass than bare dirt plains provide.
Multi-Species Terrain Tuning
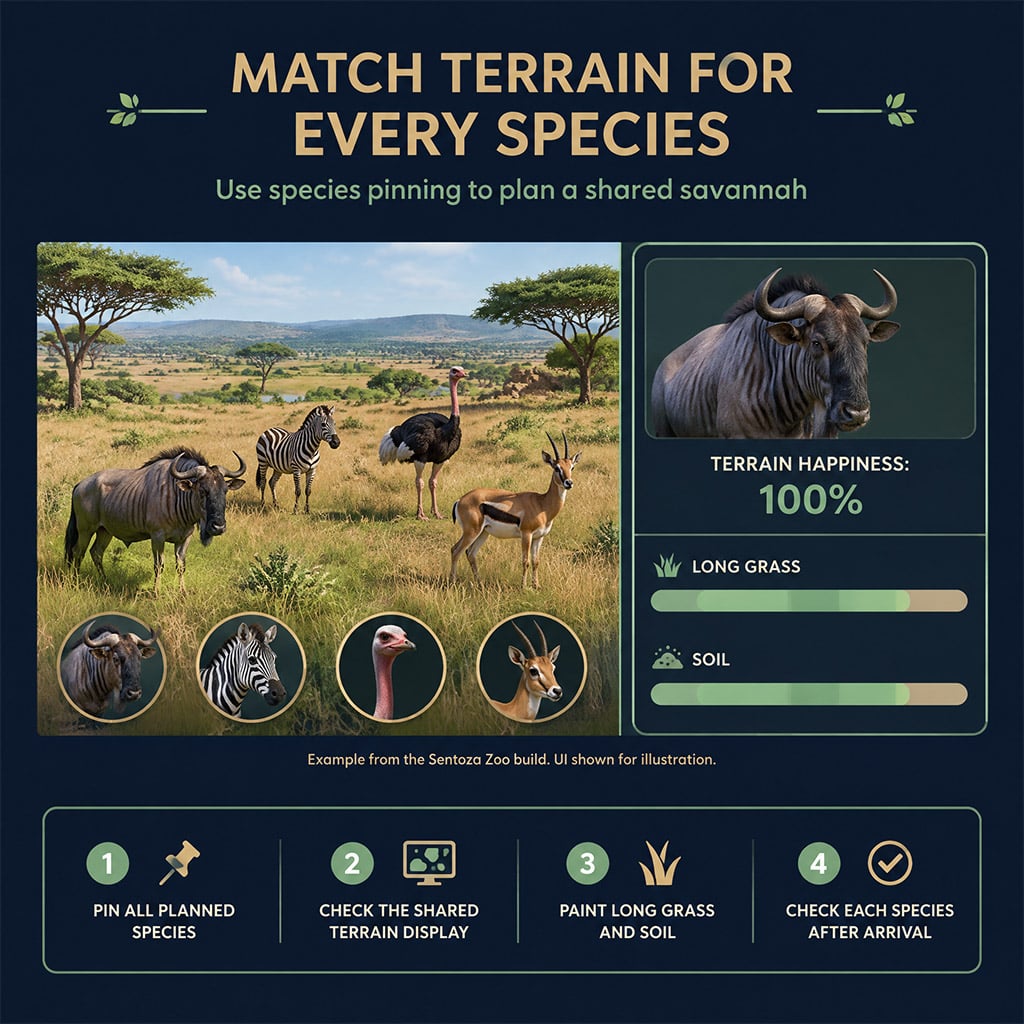
Use the Species Pinning UI to align overlapping biome tolerances before unpausing the simulation.
- Paint Long Grass: Coat outer boundaries with Long Grass and stipple smaller patches across the center until the pinned tracker turns green; we hit 100% terrain welfare on Blue Wildebeest using this exact brush pattern.
- Clean Shelter Floors: Paint Soil directly beneath roofs and scrub default barrier dirt tracks to keep grass ratios stable.
- Audit Per Species: Inspect one adult from all four species upon delivery rather than trusting a single animal's green welfare bar.
Staged Shelters & Enrichment
Build modular cover so you can scale square footage fast when herd populations boom.
- Distribute Shelter Pods: Scatter compact roofed pods along the perimeter and tuck one oversized barn behind the kopje rocks facing your secondary viewing deck.
- Cluster Feed Stations: Drop water troughs and feeders right outside shelter entrances to minimize keeper walking time, then check traversability to ensure zero blocked items.
- Verify Toy Hitboxes: Test custom-height items like tree-mounted hanging ball toys on Thomson's Gazelles via the item's usage tab instead of eyeballing chain length.
- Isolate Ostrich Nests: Place the Ostrich nest in a quiet corner away from heavy feeder traffic so chicks hatch clear of herd bottlenecks.
Recheck hard shelter capacity immediately after every birth wave, as juvenile hoofstock silently push shared square footage into the red.
Functional Backstage & Keeper Access
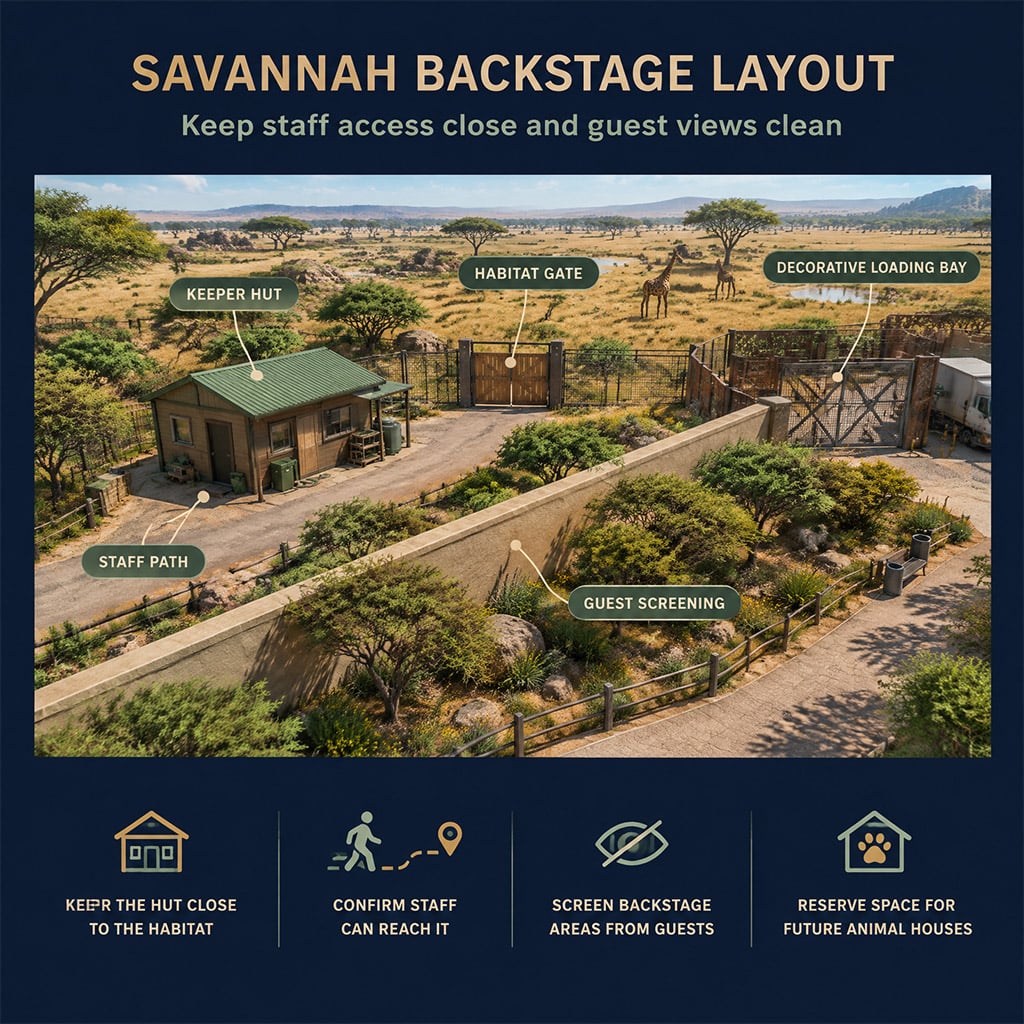
Prioritize Keeper Hut pathing distance over cosmetic loading bays so daily feeding cycles never stall.
- Anchor Keeper Huts: Snap a Keeper Hut and staff room directly beside the Habitat Gate to cut staff travel delay to seconds.
- Screen Staff Zones: Block guest sightlines using solid plaster walls and dense perimeter bushes to prevent negative Staff Facility aura penalties.
- Stage Realistic Transfers: Frame a decorative mesh loading bay with a truck-sized gate and large barn doors solely after 100% containment and welfare checks pass.
Skip interior backstage lighting tricks—like embedding reversed glowing panels behind fake exterior windows—until your Franchise zoo turns a steady profit.
FAQ (Frequently Asked Questions)
How do I stop animals from walking over low savannah walls?
Open the Traversable Area heatmap for the escaping species and place horizontal logs or rocks directly inside the wall base. Recheck the blue pathing mesh to confirm the crossing breaks.
How many Conservation Credits do I need for a mixed savannah?
Budget roughly 1,000 Conservation Credits for an 18-animal starter herd. Buy Gold-rated males or pairs for breeding genetics and fill remaining slots with cheap unrated females.
Does one animal's 100% terrain score mean the whole mixed herd is happy?
No, shared Species Pinning previews overlap tolerances, not individual satisfaction. Click at least one animal per species after unpausing to verify green terrain welfare across the board.
How do I edit terrain directly underneath an existing habitat barrier?
Secure or box your animals first, swap the locked fence piece to a Null Barrier, sculpt the terrain, and immediately restore the physical barrier. Run a traversability check right after.
Can Lions live inside the mixed-species savannah habitat?
No, Lions will hunt your hoofstock and must go in a separate neighboring habitat. Use sunken moats or hidden barriers between enclosures to create a safe predator-prey sightline.

I’m Priya Raman, an Indian Content Strategist at GGWTB covering fantasy MMORPGs, classic online games, and guild-focused play. I plan coverage around class roles, group coordination, and long-term character growth. A strong solo build is only part of the picture—I focus on what you bring to a party and which investments stay useful as your guild takes on tougher content.

Most Popular Posts
- Planet Zoo 2 Cash & Conservation Credits Guide: Smarter Franchise Mode Starts
- Planet Zoo 2 Franchise Build Guide: Entrance, Meerkat Habitat & Budget Checks
- Planet Zoo 2 Franchise Maps: Rolling Hills, Blueprint Codes & Highlands Saves
- Planet Zoo 2 Conservation Credits: Fast Breeding and Trade Guide
- Planet Zoo 2 Beginner Guide: Everything Need To Know
- Planet Zoo 2 Aquarium Guide: Fix Keeper Gates, Shallow Ponds & Rays
Popular Category Lists
- ARC Raiders / (374)
- Grow a Garden / (300)
- Star Citizen / (172)
- CoD: Black Ops 7 / (168)
- MLB 26 / (159)
- Monopoly Go / (153)
- ARK Survival Ascended / (132)
- Steal a Brainrot / (101)
- Adopt Me / (78)
- Blox Fruits / (74)
- Forza Horizon 6 / (72)
- Sailor Piece / (68)
- Grow a Garden 2 / (68)
- Aion 2 / (65)
- Diablo IV / (62)
- COD: Modern Warfare 4 / (59)
- CoD: BLACK OPS 6 / (55)
- Maplestory Classic / (50)
- Path of Exile 2 / (48)
- Monster Hunter Wilds / (46)