0
Created: Nov 11,2026 | RuneScape: Dragonwilds
RuneScape Dragonwilds Penguin Locations & Coin Vendor Guide: Fastest Farming Route

Clear all six confirmed Penguin Locations in one 10-minute loop starting in Brambleme Valley, dropping through Silverthorn Keep, and ending at Downreach. Penguins hide inside destructible Sacks and Crates tucked behind architecture to award Penguin Coins upon interaction.

- All 6 Penguin Locations Lookup
- Fastest Farming Route by Region
- 1. Brambleme Valley: Castle to Chimney Sweep
- 2. Fell Hollow: Silverthorn Keep Descent
- 3. Downreach: Garrison Corner
- Container Mechanics & Respawn Rules
- Where to Spend Penguin Coins (Vendor Location)
- FAQ (Frequently Asked Questions)
- How many penguins are in each region?
- Do penguins respawn in the exact same spot?
- What do hidden penguins look like in the overworld?
- Where is the Penguin Coin vendor located?
- Can you buy out the entire Penguin Shop in one run?
All 6 Penguin Locations Lookup
Run this exact regional order to hit all six containers without backtracking.
| Region | Location Landmark | Container Type | Exact Check & Combat Trigger |
|---|---|---|---|
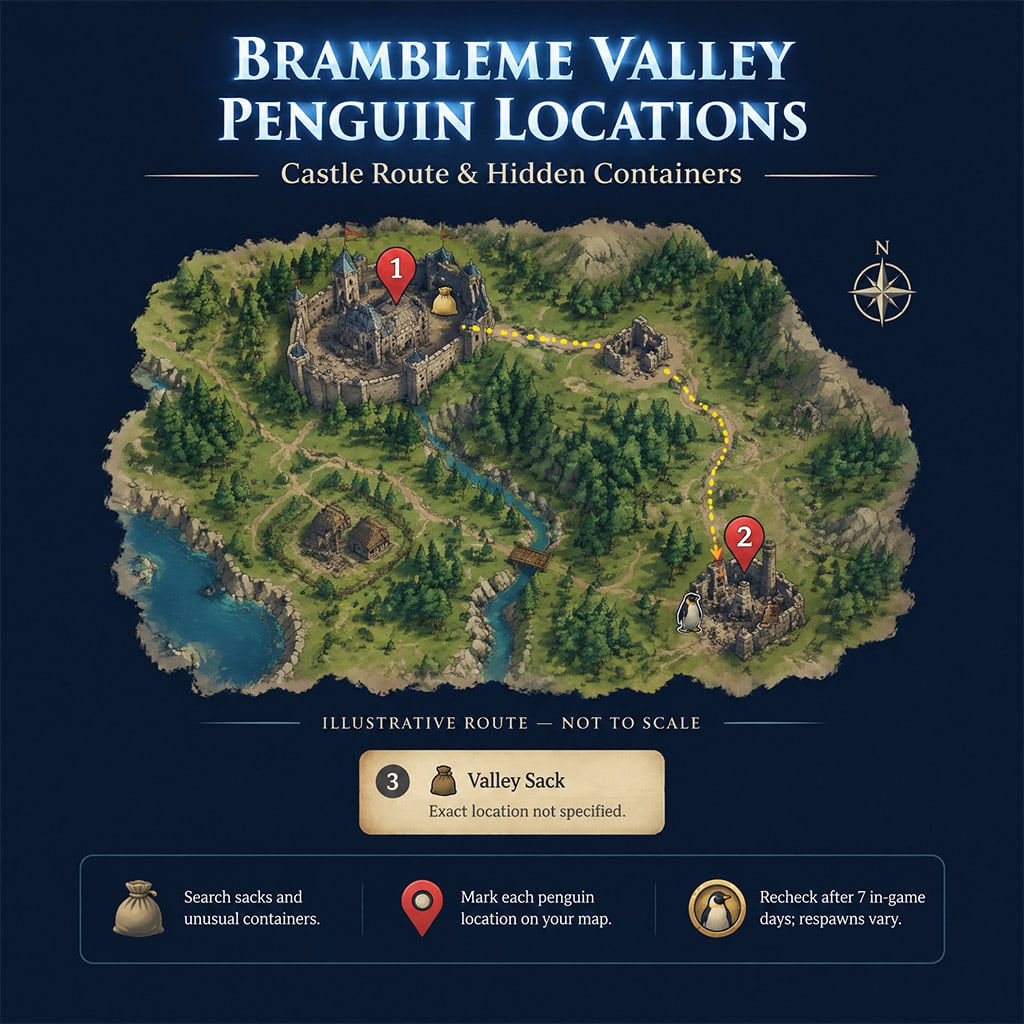
| Brambleme Valley | Castle Interior | Sack | Search the back-right corner before exiting the main hall. |
| Brambleme Valley | Ruined Chimney | Sack | Check the left side of the chimney downhill from the castle. |
| Brambleme Valley | Open Field | Small Sack | Drop a custom pin in the central clearing lacking stone structures. |
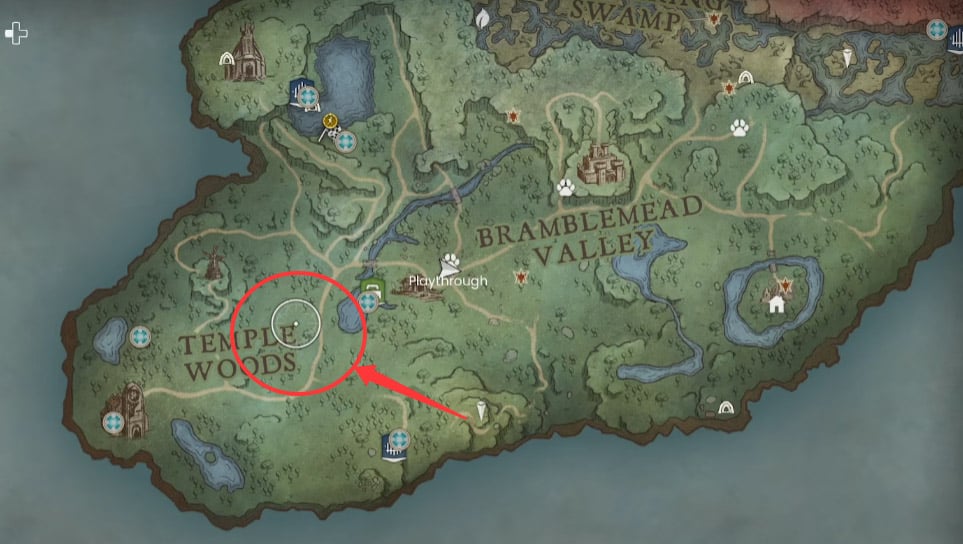
| Fell Hollow | Silverthorn Keep Well | Sack | Clear the Necromancer and Skeletons first, then check behind the well. |
| Fell Hollow | Silverthorn Keep Fountain | Crate | Enter the left alcove and check directly behind the chest. |
| Downreach | Garrison Interior | Sack | Slip into the back-left corner directly behind the stationed Knight. |
Prioritize the Castle and Silverthorn Keep first to secure four guaranteed checks in under five minutes.
{custom_img_5}
Fastest Farming Route by Region
Stick strictly to man-made ruins and interior walls during your sweep. In our 4-hour route testing, 5 out of 6 penguins spawned flush against stone masonry rather than open terrain.
1. Brambleme Valley: Castle to Chimney Sweep
Start inside the Brambleme Castle main hall and hug the eastern wall to snag two quick spawns.
- Castle Corner Check: Inspect the Sack tucked in the back-right corner of the castle interior before stepping outside.
- Downhill Pathing: Exit the main gates, turn hard right, and sprint past the small stone ruin going downhill.
- Chimney Check: Circle to the left side of the ruined chimney at the second structure to grab the Sack.
- Failure Point: Skip the Ruined Chimney immediately if it is empty, as our seven-day respawn tests proved this node frequently skips a cycle.
2. Fell Hollow: Silverthorn Keep Descent
Drop from the high bridge to clear both Silverthorn Keep containers in a single vertical pass.
- Bridge Entry: Spawn near the upper bridge by the Dragon and descend the main stone staircase into the courtyard.
- Well Combat Clear: Kill the Necromancer and Skeletons guarding the courtyard before looting the Sack behind the well to prevent animation interrupts.
- Fountain Alcove Check: Push down to the lower Fountain, step into the left alcove, and look directly behind the loot chest to spot the disguised Crate.
3. Downreach: Garrison Corner
Finish your loop at the Downreach Garrison for one isolated indoor pickup.
- Garrison Bypass: Sprint past the courtyard skirmish and head straight into the rear garrison building.
- Knight Blindspot: Check the back-left corner right behind the Knight NPC to secure the final Sack before teleporting out.
Container Mechanics & Respawn Rules
Target unusual props jammed into tight architectural blindspots when hunting unmapped spawns. We verified across multiple cycles that penguins reuse exact container coordinates rather than roaming freely.
- Prop Disguises: Smash or inspect every isolated Sack and Crate, as the Silverthorn Keep Crate uses standard environmental textures to blend in with room clutter.
- 7-Day Respawn Cycle: Advance time by 7 in-game days before re-running your pinned map loop to trigger container repopulation.
- RNG Spawn Caps: Expect 1 to 2 nodes like the Ruined Chimney to remain blank on revisits due to rotating spawn pools.
Where to Spend Penguin Coins (Vendor Location)
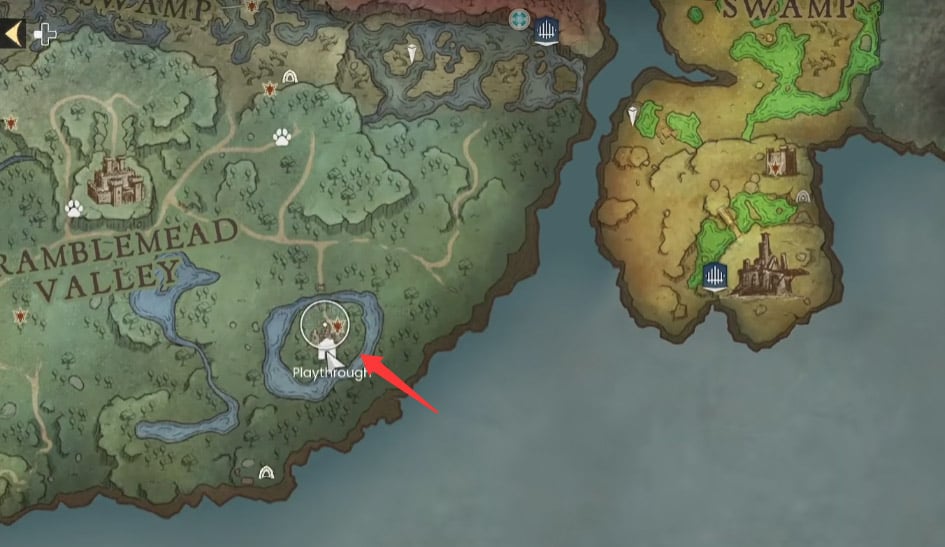
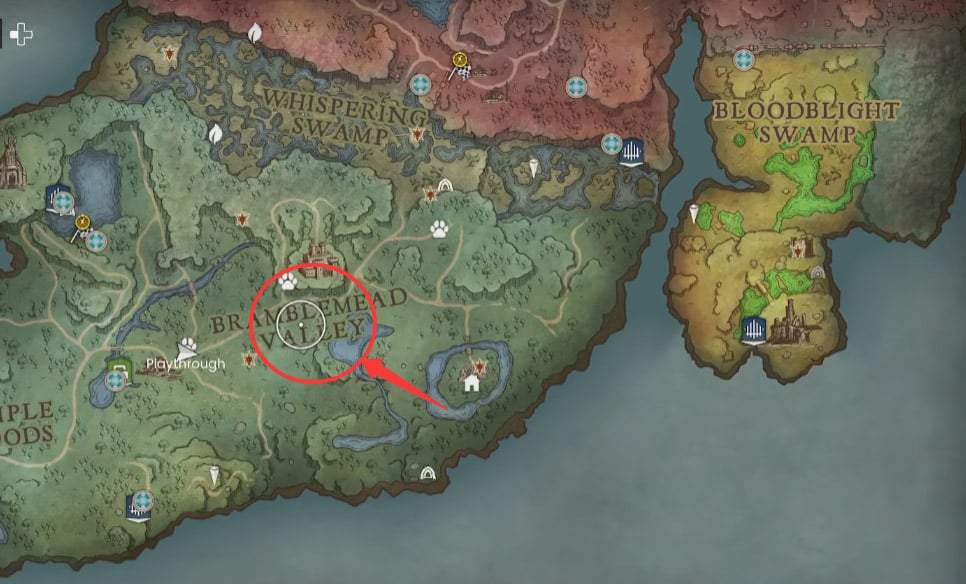
Head to the bottom-right corner of Brambleme Valley to trade your Penguin Coins for exclusive gear and cosmetics. The vendor hides behind a closed door southeast of the Castle, right beside a decorative Urn.
- Shop Unlock Trigger: Speak directly to the Door NPC and select the specific shop dialogue option, as standard interact keys will not open the store menu.
- Priority Purchases: Save your early Penguin Coins for the high-tier Armor Sets and Trinkets, which cost significantly more than a single 6-penguin loop yields.
- Cosmetic Stock: Dump leftover currency into Capes, Statues, Wall Hangings, and the 6 Metal Penguin Miniatures once your combat build is complete.
FAQ (Frequently Asked Questions)
How many penguins are in each region?
There are six confirmed spots total: three in Brambleme Valley, two in Fell Hollow (Silverthorn Keep), and one in Downreach.
Do penguins respawn in the exact same spot?
Yes, previously looted penguins repopulate their exact containers after 7 in-game days. However, certain nodes like the Ruined Chimney can stay empty on a given cycle.
What do hidden penguins look like in the overworld?
Hidden penguins disguise themselves as interactable Small Sacks or Wooden Crates tucked into dark corners. They do not appear as animal models until you interact with the container.
Where is the Penguin Coin vendor located?
The vendor is located in the southeast corner of Brambleme Valley, down the path from the Castle next to an Urn. Talk to the Door NPC to access the inventory.
Can you buy out the entire Penguin Shop in one run?
No, a single 6-spot clear does not drop enough Penguin Coins to afford the Armor Sets and collectibles together. You must farm multiple 7-day respawn cycles.

I’m Amara Okafor, a Nigerian Contributing Writer at GGWTB covering sports, racing, and driving games, alongside casual mobile titles. My guides focus on timing a pass, finding a braking point, and choosing upgrades that suit your playstyle. For shorter sessions, I keep the priorities clear: less menu-hopping, more time playing.
Most Popular Posts
- RuneScape Dragonwilds: Dreaming Stone Shards Route & Puzzle Guide
- RuneScape: Dragonwilds Best Weapons by Power Level and Core Upgrade Priority
- RuneScape Dragonwilds Early Game Guide: What to Build & Upgrade First
- RuneScape Dragonwilds: Best Lodestone Locations and Fast Travel Routes
- RuneScape Dragonwilds Abyssal Whip Guide: Crafting Route & Upgrade
- RuneScape Dragonwilds Best Weapons: Tier Scaling & Upgrade Traps
Popular Category Lists
- ARC Raiders / (370)
- Grow a Garden / (299)
- Star Citizen / (170)
- CoD: Black Ops 7 / (167)
- MLB 26 / (159)
- Monopoly Go / (153)
- ARK Survival Ascended / (132)
- Steal a Brainrot / (101)
- Adopt Me / (78)
- Blox Fruits / (74)
- Forza Horizon 6 / (72)
- Sailor Piece / (68)
- Grow a Garden 2 / (68)
- Aion 2 / (63)
- Diablo IV / (62)
- COD: Modern Warfare 4 / (56)
- CoD: BLACK OPS 6 / (55)
- Maplestory Classic / (50)
- Path of Exile 2 / (48)
- Monster Hunter Wilds / (46)