0
0Steal a Brainrot Dragon Gingerini Fusion Guides: Real Odds, Best Inputs
- Lambe
- Share
- Steal a Brainrot
- 12/24/25
- 1353
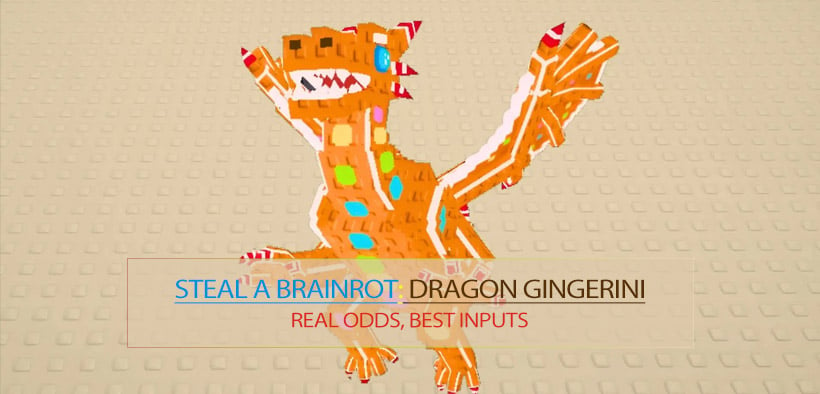
Getting Dragon Gingerini isn't hard in the usual grindy way—it's hard in the probability way. You can do everything right, hit a 5–8% screen, and still walk away with candy-tier results. The good news is you can still play this smart: control your inputs, only gamble when the math says it's worth it, and avoid the classic I just deleted my best roster for nothing moment.
- Core Mechanics: What Fusion Really Rewards
- Why that matters
- The Odds: What 6% (or 8%) Actually Feels Like
- Practical probability math (the part that saves your inventory)
- Best Inputs: What to Feed the Machine (and What Not To)
- Input priority table (what tends to work)
- The classic trap (comparison that matters)
- My No-Regret Fusion Rules (Inventory Risk Control)
- Rule 1: Don't pay trophy units to buy single-digit percentages
- Rule 2: If Dragon isn't listed, stop and rebuild the input set
- Rule 3: Budget by attempts, not by vibes
- Step-by-Step Execution (What I'd Do on a Fresh Run)
- Step 1: Build a Dragon-eligible core
- Step 2: Use Fuse Luck only when the pool is correct
- Step 3: Track outcomes like a tester, not a gambler
- Recommended Strategies by Player Type
- FAQ
- 1) Is 6% good enough, or should I wait for 8%?
- 2) Why do some lower DPS combos unlock better results?
- 3) Should I fuse Headless-tier/OG bases to chase Dragon?
- 4) What's the best path if I keep missing Dragon?
- 5) If I got Dragon from a gift/trade, did I cheat the system?
- Summary
↖ Core Mechanics: What Fusion Really Rewards
Fusion looks like it should reward raw $/sec power, but in practice it often behaves like it rewards specific item families/tiers (and sometimes traits/mutations) more than pure numbers.
↖ Why that matters
Because if the machine values category/tier, then a weaker-looking rare combo can unlock higher-tier outputs while a stronger-looking common toilet/standard unit doesn't even appear in the result pool.
This means you should stop asking What's my highest DPS? and start asking:
- Does this input unlock the Dragon Gingerini pool at all?
- Does stacking four of the same eligible tier raise my displayed Dragon %?
- Is Fuse Luck better spent raising a good pool from 6% to 8%, or forcing a bad pool into 2%?
↖ The Odds: What 6% (or 8%) Actually Feels Like
A displayed chance like 6% is emotionally persuasive and mathematically rude.
↖ Practical probability math (the part that saves your inventory)
Let p = 0.06.
- Expected attempts to hit once: E = 1/p ≈ 16.7 fusions
- Chance you miss after N tries: (1 - p)^N
- Chance you hit at least once after N tries: 1 - (1 - p)^N
Here's what that looks like for 6%:
| Attempts (N) | Chance to get Dragon ≥1 time |
|---|---|
| 5 | 1 - 0.94^5 ≈ 26.6% |
| 10 | 1 - 0.94^10 ≈ 46.1% |
| 15 | 1 - 0.94^15 ≈ 60.7% |
| 20 | 1 - 0.94^20 ≈ 70.9% |
Direct takeaway: a 6% screen is still a coin-flip even after ~10 tries.
I've personally had streaks where good odds produced nothing but filler—because that's how variance works when your sample size is small.
↖ Best Inputs: What to Feed the Machine (and What Not To)
Below is the cleanest way I've found to think about inputs: eligibility first, percentage second, traits last.
↖ Input priority table (what tends to work)
This table is a decision tool, not a promise.
| Input Type | Why It's Valuable | Typical Role | Risk Level |
|---|---|---|---|
| Secret/Legacy combinations (older fuse-machine exclusives) | Often unlock higher-tier output pools | Core ingredients for 5–8% Dragon attempts | Medium (rare, but replaceable via trading) |
| Mid-to-high seasonal rares (ginger/holiday tier items) | Synergize with Dragon Gingerini pool | % booster without sacrificing your crown jewels | Medium |
| Ultra-rare trophy units (Headless-tier, OG base units) | Only worth it if it pushes you into a materially better chance | Emergency leverage to reach top pool | Very High |
| Strong but common high DPS units | Can be misleading if they don't unlock the pool | Filler only if they still keep Dragon in results | Low-to-Medium |
↖ The classic trap (comparison that matters)
A 60M/s common unit can be worse than a 15M/s legacy combo if the legacy combo belongs to a rarer fusion category.
It feels backwards, but it's consistent with a tiered loot-pool system.
↖ My No-Regret Fusion Rules (Inventory Risk Control)
I use these rules to keep one more try from turning into I deleted my account.
↖ Rule 1: Don't pay trophy units to buy single-digit percentages
If you're sacrificing a top collectible just to move from, say, 5% to 6%, that's usually not a good trade.
- Why: the marginal gain is small.
- This means: you should demand a big jump (example: from Dragon not in pool → Dragon in pool, or from 2% → 6–8%).
- Action: only add trophy-tier units if they unlock Dragon or push you into the best pool breakpoint.
↖ Rule 2: If Dragon isn't listed, stop and rebuild the input set
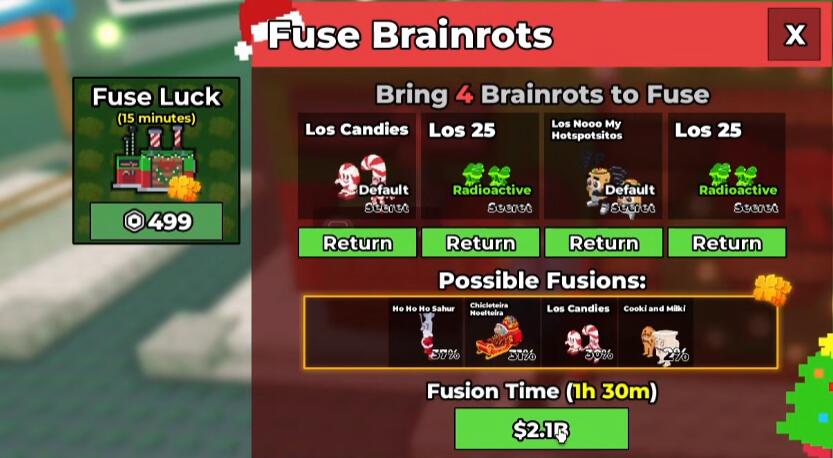
If you notice the result preview doesn't show Dragon Gingerini, then don't fuse just to see.
If you see Cookie & Milky but not Dragon, then your set may be in the wrong pool—great for farming Cookie, bad for Dragon.
↖ Rule 3: Budget by attempts, not by vibes
Pick your attempt count first.
- If you can only afford 5 tries at 6%, accept you're only at ~26.6% success.
- If you want ~70%, you're looking at roughly 20 tries at 6%.
↖ Step-by-Step Execution (What I'd Do on a Fresh Run)
↖ Step 1: Build a Dragon-eligible core
Aim for 4 items that keep Dragon Gingerini visible in the preview.
If you can reach 6–8% without trophy units, that's the sweet spot.
↖ Step 2: Use Fuse Luck only when the pool is correct
Fuse Luck is wasted on the wrong pool.
- If Dragon isn't listed: don't buy luck yet.
- If Dragon is listed at 5–8%: then buy luck and commit to your planned number of attempts.
↖ Step 3: Track outcomes like a tester, not a gambler
I keep a tiny log:
- Attempt #
- Displayed Dragon %
- Inputs used (category, not full names)
- Output tier
Why: it stops me from repeating the same losing configuration for 12 tries just because it felt close.
↖ Recommended Strategies by Player Type
Here's a practical menu—pick the lane that matches your inventory.
| Player Type | Goal | What You Fuse | What You Never Fuse | Target Dragon % |
|---|---|---|---|---|
| Conservative trader | Get Dragon eventually via trade leverage | Eligible combos + seasonal rares | Trophy collectibles | 5–6% |
| Efficient grinder | Farm Cookie & Milky first, then Dragon | Builds Cookie pipeline, upgrades inputs | Anything irreplaceable | 6–8% later |
| High-roller | Force attempts quickly | Best eligible set + luck | Only one trophy max | 6–8% |
| Collector | Preserve museum pieces | Anything except trophies | Headless-tier / first-edition bases | Whatever you can reach safely |
↖ FAQ
↖ 1) Is 6% good enough, or should I wait for 8%?
6% is playable, but 8% changes the feel.
At 8%, expected attempts drop to 12.5 (from 16.7), and your hit at least once curve improves faster. If reaching 8% requires sacrificing a trophy unit, I usually stay at 6% and increase attempts instead.
↖ 2) Why do some lower DPS combos unlock better results?
Because the fusion system likely uses tier/category gates rather than raw DPS. That's why a legacy/secret combo can show Cookie/Dragon pools while a higher DPS common unit doesn't.
↖ 3) Should I fuse Headless-tier/OG bases to chase Dragon?
Only if it flips a real switch—like Dragon appears when it didn't before, or your percent jumps dramatically. If it's just a +1% nudge, you're paying premium inventory for a small math improvement.
↖ 4) What's the best path if I keep missing Dragon?
Farm a stable mid-tier outcome (often Cookie & Milky) to rebuild value, then re-enter Dragon attempts with better eligible ingredients. Missing streaks happen; the fix is better inputs and a planned attempt count, not panic-fusing rarities.
↖ 5) If I got Dragon from a gift/trade, did I cheat the system?
No—trading and community deals are part of the economy loop. For ultra-rare chase units, trading is often the most time-efficient route, especially when variance is punishing.
↖ Summary
Dragon Gingerini is a probability boss fight, not a skill check. The winning approach is: (1) make sure Dragon is in the preview pool, (2) push to a stable 6–8% without burning trophies, (3) commit to an attempt budget that matches the real math, and (4) rebuild via mid-tier fusions when variance smacks you. I've lost great units by treating 6% like a promise; playing it like a long-run system is how you keep progress—and your sanity—intact.
Most Popular Posts
- Steal A Brainrot Cyber Update Guide: Best Craft Recipes, Rainbow Chances, Traits, and Profit Tips
- How to Get Every Steal a Brainrot Cyber Craft Brainrots?
- How to Unlock DUGGY BROS in Steal a Brainrot: Best Red Carpet and Crafting Strategy
- Steal a Brainrot John Pork Guide: How to Get Him, Stats, Trait, and Best Trading Tips
- Steal A Brainrot ARCADRAGON Trait Farming Guide: Best Traits, Rituals, Admin Abuse Strategy
- Steal a Brainrot Summer Update 2 Base Unlock, Phantom Mutation, Octo Lucky Blocks, and Best Brainrots
Popular Category Lists
- Grow a Garden / (286)
- ARC Raiders / (262)
- CoD: Black Ops 7 / (166)
- Monopoly Go / (146)
- MLB 26 / (144)
- Star Citizen / (112)
- Steal a Brainrot / (89)
- Sailor Piece / (68)
- ARK Survival Ascended / (67)
- Diablo IV / (61)
- Forza Horizon 6 / (60)
- Blox Fruits / (60)
- CoD: BLACK OPS 6 / (55)
- Adopt Me / (53)
- Path of Exile 2 / (48)
- Monster Hunter Wilds / (46)
- Windrose / (44)
- Path of Exile / (40)
- Grow a Garden 2 / (40)
- Bee Swarm Simulator / (36)