



 0
0 Created: Jul 30,2026 | ARC Raiders
ARC Raiders Battle-tested Hidden Mechanics: Zipline tricks, Trap exploits, Barricade resets

ARC Raiders doesn't explain half its systems. You find them by dying, rage-quitting, then figuring out why that barricade launched a Deadline into your face. Here are 20 mechanics that actually matter in real raids — no fluff, just what to do and why it works.
- Trap & Utility Mechanics
- 1. Hide a Zipline With a Crash Mat
- 2. Blaze Grenades Trigger Mines Through Walls
- 3. Noisemaker Blocks Deadline Damage
- 4. Cover the ARC's Blue Sensor Light
- 5. Pulse Mine Cancels Fall Damage
- Door Control & Ambush Setups
- 6. Launch a Deadline Off a Barricade
- 7. Angle Blaze Traps Into Door Geometry
- 8. Smoke + Gas Reveals Silhouettes
- 9. Lock a Door From One Side With a Barricade
- 10. Reset Barricade Health by Picking It Up
- Movement & Fall Damage Tech
- 11. Battlegrounds Control Tower: Skip the Second Floor
- 12. Test NX Extraction Hiding Spot
- 13. Reach Control Tower A6 Without a Key
- 14. Catch Ziplines Mid-Fall From Any Height
- 15. Roll Before Landing to Cut Fall Damage
- 16. Ziplines Cancel Hurricane Wind Slowdown
- 17. Power Descender + Crash Mat = Safe Drop From Any Height
- 18. Snap Hook Boosts Zipline Speed
- Combat & Damage Blocking
- 19. Radar Flare Blocks Surge Coil Damage
- 20. Combat Mk II Flanking + Two Anvils = Fire-Rate Pressure
- Quick Reference Table
- Loadout by Playstyle
- FAQ
- What's the single most useful hidden mechanic?
- Can blaze grenades really trigger mines through walls?
- Does the pulse mine fall-damage cancel work from any height?
- How do you block ARC attacks with items?
- Why pick up a damaged barricade instead of just fighting behind it?
- Bottom Line
Trap & Utility Mechanics
1. Hide a Zipline With a Crash Mat
Place the crash mat first. Deploy the zipline on it. The zipline visually disappears after placement.
| Step | Action |
|---|---|
| 1 | Drop crash mat |
| 2 | Deploy zipline on/near it |
| 3 | Route becomes untraceable |
Warning: it's one-way concealment. Keep a backup escape.
2. Blaze Grenades Trigger Mines Through Walls
Suspect a mine behind a door? Throw a blaze grenade at the wall. It sets off gas mines, jolt mines, and most placed traps without you stepping in.
| Trap | Triggers Through Wall? |
|---|---|
| Gas Mine | Yes |
| Jolt Mine | Yes |
| Other traps | Usually |
3. Noisemaker Blocks Deadline Damage
Drop a noisemaker as close as possible between you and the Deadline, then crouch behind it. Proximity is everything — off to the side, and you still eat the damage.
4. Cover the ARC's Blue Sensor Light
Every ARC unit has a blue sensor point. Cover it, and it can't lock onto you.
| Item | Effectiveness |
|---|---|
| Fireworks Box | High — best size/shape |
| Explosive Mine | Medium |
| Gas Mine | Medium |
| Pulse Mine | Situational |
Best against turrets and shredders. Miss the placement and it still punishes you — be fast.
5. Pulse Mine Cancels Fall Damage
Place a pulse mine near your landing spot, trigger it, and drop as it activates. The hit animation interrupts your fall.
Limit: only works on medium drops. Full free-fall animation = full damage, no exceptions.
Door Control & Ambush Setups
6. Launch a Deadline Off a Barricade
Damage a barricade until it's one hit from breaking. Place a Deadline near it. Break the barricade with a Volcano, Il Toro, or Anvil (Anvil Splitter) — the Deadline launches forward.
Enemies respect the Deadline's normal radius. They don't expect it flying at them.
7. Angle Blaze Traps Into Door Geometry
A wire across a doorway gets dodged. Clip the trap into the door's swing path instead — opening the door triggers it automatically, no footsteps required.
| Setup | Reliability |
|---|---|
| Open wire trap | Low |
| Angled into door path | High |
8. Smoke + Gas Reveals Silhouettes
Smoke conceals. Gas adds a layer that outlines shapes moving inside it. Layer them together to spot enemies hiding in cover or pushing through smoke.
9. Lock a Door From One Side With a Barricade
Angle a barricade at the doorway edge so it closes from your side but blocks opening from theirs. Enemies have to destroy it to get in — giving away timing and position instantly.
10. Reset Barricade Health by Picking It Up
Dismantle a damaged barricade and re-place it — full health, no cooldown penalty. Great for draining enemy ammo over a long hold.
Don't try this mid-push. Only reset when the angle is clear.
Movement & Fall Damage Tech
11. Battlegrounds Control Tower: Skip the Second Floor
Jump from the correct outer edge and aim your fall to clear the second-floor landing entirely. Faster than the standard zipline, but riskier to land clean.
12. Test NX Extraction Hiding Spot
There's a tuck-in spot near the lower extraction that breaks camper sightlines. Push your character fully in — half-exposed gets you spotted.
13. Reach Control Tower A6 Without a Key
Snap hook onto the lower external section, ride a zipline up, then drop and snap hook onto the top ledge near the peak. Free access, plus a surprise angle on anyone using the normal entrance.
14. Catch Ziplines Mid-Fall From Any Height
Jump from a tower, align your camera with the zipline, and interact at the right moment — you can grab it even from extreme heights. Miss the alignment and you're dead. The timing window is forgiving; the angle isn't.
15. Roll Before Landing to Cut Fall Damage
Roll near the ground on a drop, or roll straight off the ledge for slightly higher falls. Don't gamble max-height rolls with low HP — practice the timing first.
16. Ziplines Cancel Hurricane Wind Slowdown
Wind wrecks your movement speed on foot. Ziplines ignore most of the penalty. In a hurricane raid, zip — don't sprint.
17. Power Descender + Crash Mat = Safe Drop From Any Height
Descender controls your fall speed, crash mat softens the landing. This combo makes any rooftop or cliff a viable escape route.
18. Snap Hook Boosts Zipline Speed
Engage the snap hook while riding a zipline for extra travel speed. Less time exposed on open crossings — make this a habit, every time.
Combat & Damage Blocking
19. Radar Flare Blocks Surge Coil Damage
Place a radar flare between yourself and an active surge coil. It interrupts or negates the damage. Niche, but it lets you hold space that would otherwise be a death zone.
20. Combat Mk II Flanking + Two Anvils = Fire-Rate Pressure
Pair Combat Mk II Flanking with dual Anvils for close-to-mid range tempo pressure. Don't announce yourself early — close the gap, then commit hard.
Quick Reference Table
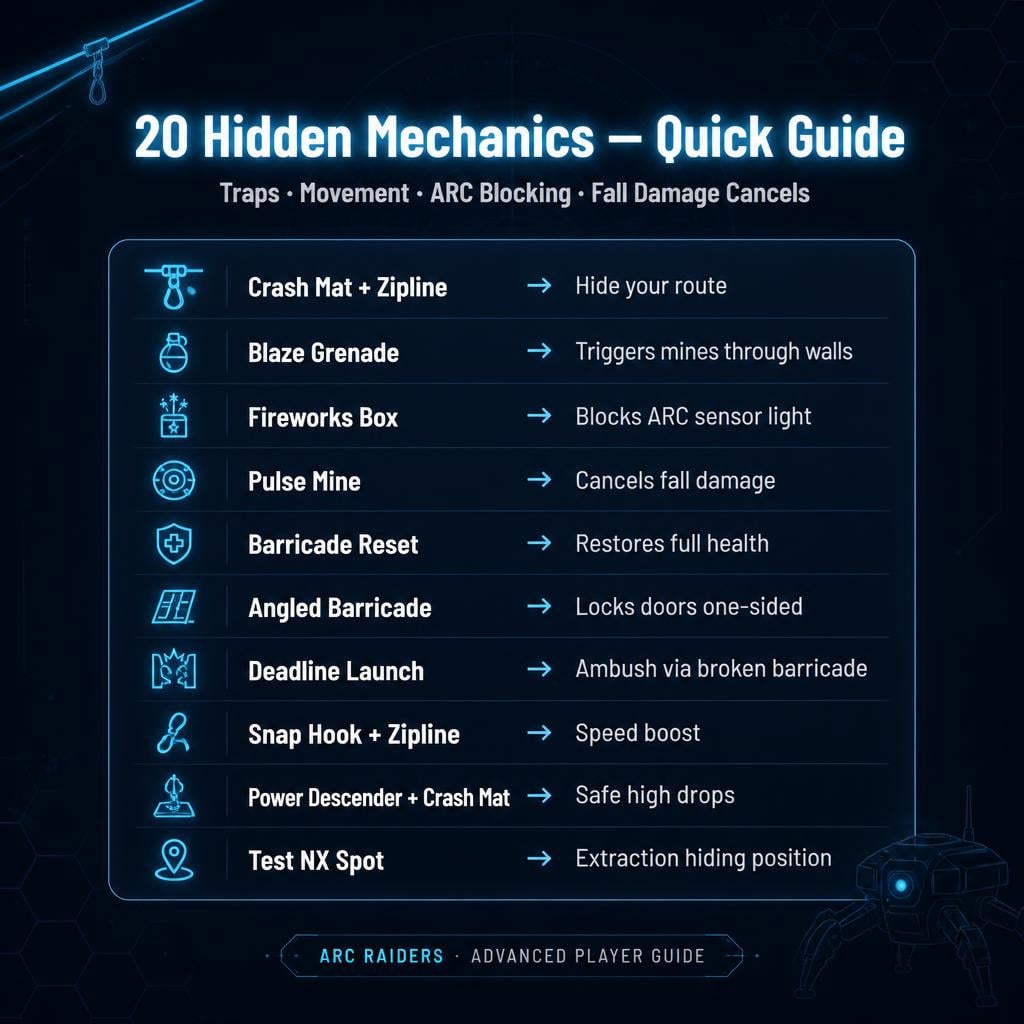
| Situation | Mechanic | Why |
|---|---|---|
| Hide your route | Crash mat + zipline | Erases visible zipline |
| Suspect a trap | Blaze grenade | Triggers through walls |
| Hold a key room | Angled barricade lock | Forces enemy to breach |
| Escape a tower | Zipline catch / roll cancel | Converts height into speed |
| Fighting ARC turrets | Cover blue sensor | Blocks detection |
| Extraction campers | Test NX hide spot | Breaks sightlines |
| Hurricane raid | Zipline travel | Ignores wind penalty |
| Reuse defenses | Pick up barricade | Restores full HP |
| Surprise trap | Launched Deadline | Extends threat range |
| Cross open zipline | Snap hook boost | Cuts exposure time |
Loadout by Playstyle
| Playstyle | Core Items | Unlocks |
|---|---|---|
| Stealth Looter | Crash mat, zipline, smoke | Hidden routes, clean extracts |
| Trap Defender | Barricade kit, blaze trap, Deadline | Door locks, launched traps |
| ARC Hunter | Fireworks box, mines, radar flare | Sensor blocking, surge control |
| Movement Specialist | Snap hook, zipline, power descender | Fast rotations, safe drops |
| Extraction Survivor | Smoke, gas, crash mat | Vision control, escape options |
Solo? Prioritize mobility. Squad? Split roles — one on utility, one on movement, one on area denial.
FAQ
What's the single most useful hidden mechanic?
Snap hook + zipline speed boost. It applies in nearly every raid and cuts your exposure time on every crossing.
Can blaze grenades really trigger mines through walls?
Yes. Gas mines and jolt mines both go off. Throw one at a suspicious wall instead of walking in blind.
Does the pulse mine fall-damage cancel work from any height?
No. Medium drops only. Full free-fall animation overrides it completely.
How do you block ARC attacks with items?
Find the blue sensor light and cover it directly. Fireworks boxes work best due to size.
Why pick up a damaged barricade instead of just fighting behind it?
Because re-placing it resets it to full health. Free durability recycling during long holds.
Bottom Line
ARC Raiders isn't won by better aim alone — it's won by knowing what items actually do. A crash mat hides your zipline. A blaze grenade clears rooms through walls. A barricade locks doors, launches Deadlines, and resets itself. Small stuff — noisemakers, radar flares — blocks real damage when placed right.
Start stacking one or two of these per raid. Snap hook every zipline. Carry a barricade kit into contested rooms. Layer gas over smoke. Once these become muscle memory, raids stop feeling random — they start feeling controlled.

Most Popular Posts
- ARC Raiders Update 1.42: Phantom Targets Farming Guide (Glitched Wasps, Rewards, Regional Conditions)
- ARC Raiders Hullcracker Blueprints: Fastest Way to Complete The Major's Footlocker
- ARC Raiders Best Pop Trigger Strategy: Fast Phantom Targets Damage Guide
- ARC Raiders Subway Skin Guide: Unlock the Subterranean Outfit
- ARC Raiders Looting Mk. 3 Survivor Blueprint Guide: Best Blue Gate Route and Drop Locations
- ARC Raiders Medium & Heavy Gun Parts Blueprint Guide: Best Farm Route, Locations, and Refiner Crafting
Popular Category Lists
- ARC Raiders / (354)
- Grow a Garden / (294)
- CoD: Black Ops 7 / (167)
- Star Citizen / (163)
- MLB 26 / (159)
- Monopoly Go / (153)
- ARK Survival Ascended / (128)
- Steal a Brainrot / (99)
- Blox Fruits / (74)
- Adopt Me / (74)
- Forza Horizon 6 / (72)
- Sailor Piece / (68)
- Grow a Garden 2 / (68)
- Diablo IV / (62)
- CoD: BLACK OPS 6 / (55)
- Aion 2 / (52)
- Path of Exile 2 / (48)
- Monster Hunter Wilds / (46)
- Windrose / (44)
- Maplestory Classic / (42)






