0
0 Created: Mar 4,2026 | ARC Raiders
Arc Raiders Farm Blueprints via Hurricane Caches & Pool Targeting Guides after Patch 1.18

After Arc Raiders wipe, blueprints feel like they evaporate overnight—so the only sane response is a repeatable farm plan. Patch 1.18 made this simple: Hurricane first-wave caches are the best density for top-end weapon blueprints, and pool targeting is still the fastest way to force everything else.
- 1) Patch 1.18 Changes That Actually Affect Your Farm
- 2) The Rule: Don't Farm the Item—Farm the Pool
- 3) The Two Best Lanes
- 3.1 Lane A: Hurricane First-Wave Cache Route (Ultra-rare weapons)
- 3.2 Lane B: Pool Targeting (Everything else, faster + steadier)
- 4) A Short, Repeatable Run Template
- FAQ
- Q1) What's the fastest way to get an ultra-rare weapon blueprint?
- Q2) Are hurricane caches still worth it after the nerf?
- Q3) I'm looting a lot but not getting what I want—why?
- Q4) Where do augments drop most consistently?
- Closing Takeaways
1) Patch 1.18 Changes That Actually Affect Your Farm
Two shifts matter in practice:
- Hurricane first-wave caches became the key loot source. Because they can roll ultra-rare weapon blueprints, we spend more time routing caches than general looting.
- Nerf + rebalance: rare blueprint drop rate down, high-tier materials up. This means fewer jackpot hits per run, but the route is still efficient because value stays high.
If you keep waiting for specific events to show up, then you're choosing downtime over progress.
2) The Rule: Don't Farm the Item—Farm the Pool
Blueprints are effectively split by location tag + container type + loot value.
- Because pools exist, opening 50 wrong containers isn't bad luck—it's wrong math.
- If you stack a loot-value condition (night/cold snap/hurricane) on a high-value tagged zone, then each container roll improves.
Field expectation (when we stick to routes): 1–3 blueprint sightings per targeted run is common; hurricane cache runs can spike higher, though Patch 1.18 reduced rare hits.
3) The Two Best Lanes
3.1 Lane A: Hurricane First-Wave Cache Route (Ultra-rare weapons)
- Goal: ultra-rare weapon blueprints and rule-breaking rare drops.
- How we run it: route cache spawn clusters using the hurricane-cache map filter.
- Common failure: relying on sound cues (wind masks it).
- If you're searching by ear, then switch to spawn-point routing.
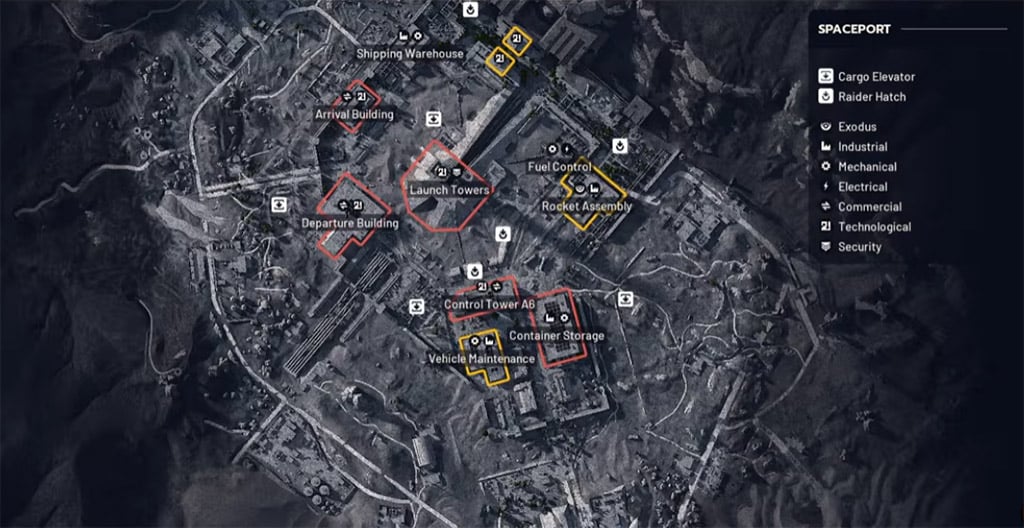
3.2 Lane B: Pool Targeting (Everything else, faster + steadier)
Pick one category and only loot its containers.
| Target | Best Pool/Tag | Best Containers | Where We Focus |
|---|---|---|---|
| Medical blueprints | Medical | med crates/cabinets | hospitals, pharmacies, medical research |
| Industrial blueprints | Industrial | tool cabinets, metal crates | high-value industrial sites |
| Augments | Medical + Security | med containers + black lockers/crates | security/armory wings, dense locker rooms |
| Raider weapons/parts | Raider | raider ammo/weapon cases | raider-heavy zones with many raider containers |
| Attachments | Residential/Commercial | lockers, apartment/commercial storage | apartments, long locker lines, departure buildings |
| Utilities (electrical) | Electrical | server racks, generators, control panels | electronics/robotics-heavy rooms |
If you mix pools in one run, then you dilute your correct rolls per minute.
4) A Short, Repeatable Run Template
We keep it boring on purpose—boring farms faster.
1. Commit: choose one lane (Hurricane caches or one pool).
2. Route: hit the highest-density cluster first; don't loot on the way unless it matches your target.
3. Extract discipline: if you hit your blueprint or your bag value spikes, then leave.
FAQ
Q1) What's the fastest way to get an ultra-rare weapon blueprint?
Hurricane first-wave caches. Route spawn clusters; don't rely on audio.
Q2) Are hurricane caches still worth it after the nerf?
Yes—rare blueprints are less frequent, but the best odds are still concentrated there, and materials gained keep runs profitable.
Q3) I'm looting a lot but not getting what I want—why?
If your containers don't match the blueprint pool, then your rolls don't count for that target in any meaningful way. Pick one pool per run and increase containers opened per minute.
Q4) Where do augments drop most consistently?
Medical containers + security armory storage (black lockers/crates). If you find a dense locker room, then clear it fast and rotate.
Closing Takeaways
Patch 1.18 pushed the meta toward hurricane cache routing for top-tier weapons, while pool targeting remains the cleanest way to force specific blueprint categories. One run, one purpose, high-density route, fast extract—that's how we rebuild blueprint libraries on schedule.

Most Popular Posts
- ARC Raiders Update 1.42: Phantom Targets Farming Guide (Glitched Wasps, Rewards, Regional Conditions)
- ARC Raiders Hullcracker Blueprints: Fastest Way to Complete The Major's Footlocker
- ARC Raiders Best Pop Trigger Strategy: Fast Phantom Targets Damage Guide
- ARC Raiders Subway Skin Guide: Unlock the Subterranean Outfit
- ARC Raiders Looting Mk. 3 Survivor Blueprint Guide: Best Blue Gate Route and Drop Locations
- ARC Raiders Medium & Heavy Gun Parts Blueprint Guide: Best Farm Route, Locations, and Refiner Crafting
Popular Category Lists
- ARC Raiders / (350)
- Grow a Garden / (294)
- CoD: Black Ops 7 / (167)
- Star Citizen / (162)
- MLB 26 / (159)
- Monopoly Go / (152)
- ARK Survival Ascended / (127)
- Steal a Brainrot / (99)
- Blox Fruits / (74)
- Adopt Me / (74)
- Forza Horizon 6 / (72)
- Sailor Piece / (68)
- Grow a Garden 2 / (68)
- Diablo IV / (62)
- CoD: BLACK OPS 6 / (55)
- Aion 2 / (50)
- Path of Exile 2 / (48)
- Monster Hunter Wilds / (46)
- Windrose / (44)
- Donut SMP / (41)