0
0 Created: Sep 19,2026 | ARC Raiders
ARC Raiders High Altitude Project Guide: Spawn Routes & Fast Extraction

Losing a rare project item to an extraction ambush wastes hours of targeted farming. Completing the High Altitude Project demands breaking away from multi-objective scavenging and running strict, single-item extraction loops.

Here is how to locate every required component, manage your secure inventory under pressure, and extract cleanly.
- High Altitude Project Requirements & Loot Matrix
- Rocket Thruster Location & Assembly Line Strategy
- The Direct-Line Assembly Sprint
- High-Speed Headphones Farming Circuit
- The Three-Pass Scavenge System
- Hard Reset Rule
- Broken Guidance Systems & Technical Scrap
- Sentinel Firing Core Combat Protocol
- Engagement & Extraction Rules
- Vaporizer Regulator Tactics
- Tactical Decision Matrix: Profit vs. Project Deployments
- The High Altitude Whiteboard: Roadmap Context
- Optimized 5-Stage Project Completion Order
- FAQ (Frequently Asked Questions)
- Where is the most reliable spawn for Rocket Thrusters in ARC Raiders?
- What is the most efficient way to farm Headphones?
- Should I prioritize project items over high-value trading salvage in my Safe Pocket?
- How do you get a Sentinel Firing Core safely as a solo player?
- Does completing the High Altitude whiteboard unlock a new vehicle?
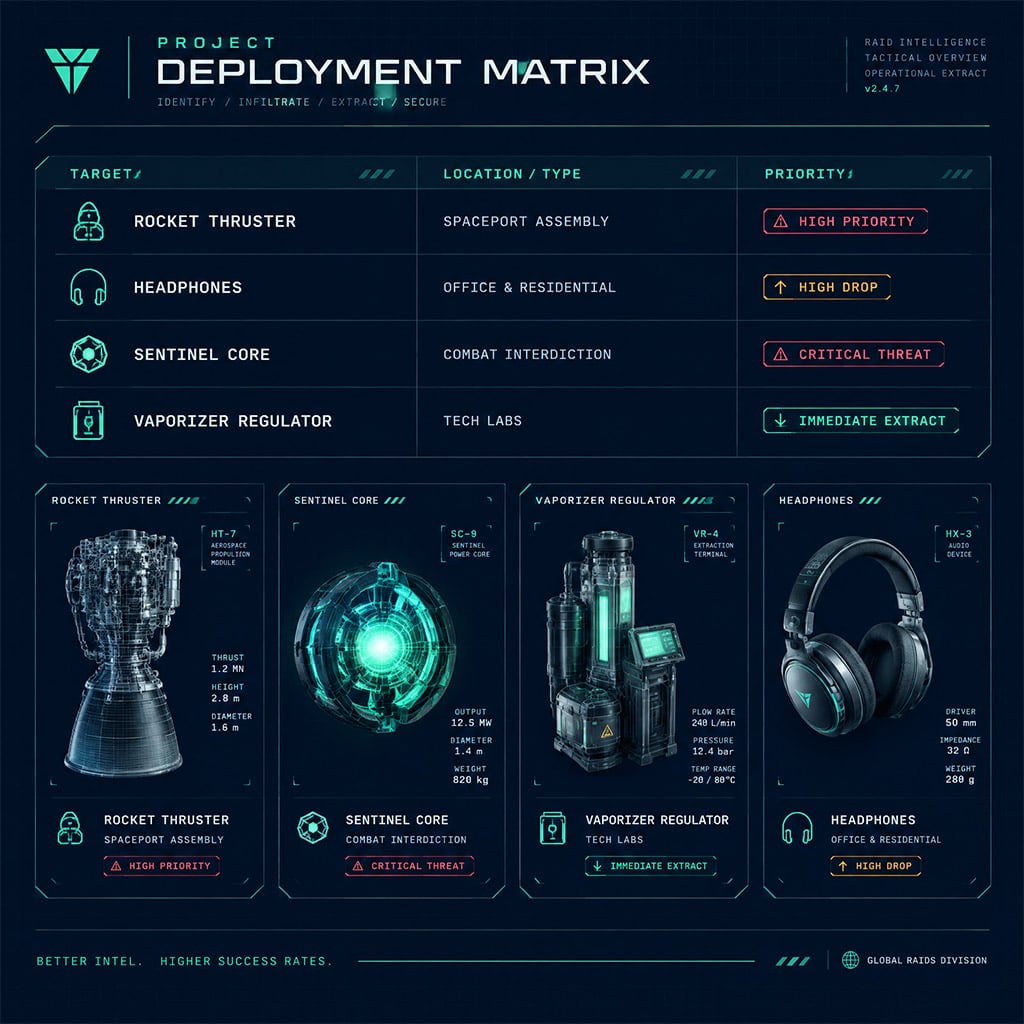
High Altitude Project Requirements & Loot Matrix
Treating project items as general loot destroys extraction efficiency. Each item family demands a tailored deployment profile, distinct threat awareness, and an uncompromising extraction trigger.
| Required Item | Target Container / Entity | Primary Map Zone | Threat Level | Extraction Protocol |
|---|---|---|---|---|
| Rocket Thruster | Industrial shelves, heavy assembly bins | Spaceport (Rocket Assembly) | Medium–High | Secure in Safe Pocket; extract immediately |
| Headphones | Desks, lockers, residential drawers | Urban commercial / Office clusters | Low–Medium | Pocket priority over market valuables |
| Broken Guidance System | Avionics racks, navigation consoles | Technical maintenance hubs | Medium | Abort route once acquired |
| Sentinel Firing Core | Destroyed Sentinel chassis wrecks | Open combat sectors / Patrol routes | Critical | Requires dedicated heavy-firepower kit |
| Vaporizer Regulator | Specialized clean-room & tech storage | High-tier industrial sectors | High | Evacuate via low-traffic perimeter exits |
| Breathtaking Snow Globe | Display shelves, residential lockers | Commercial living quarters | Low | Passive collection during office sweeps |
| Mechanical Components | Toolboxes, maintenance crates | Universal industrial zones | Minimal | Bank passively in standard backpack slots |
| Pop Trigger | Munitions boxes, demolition lockers | Industrial workshops & depots | Medium | Pair with explosive material runs |
| Explosive Compound | Hazardous storage, chem lockers | Ammunition depots & labs | Medium | Farm alongside industrial components |
Rocket Thruster Location & Assembly Line Strategy
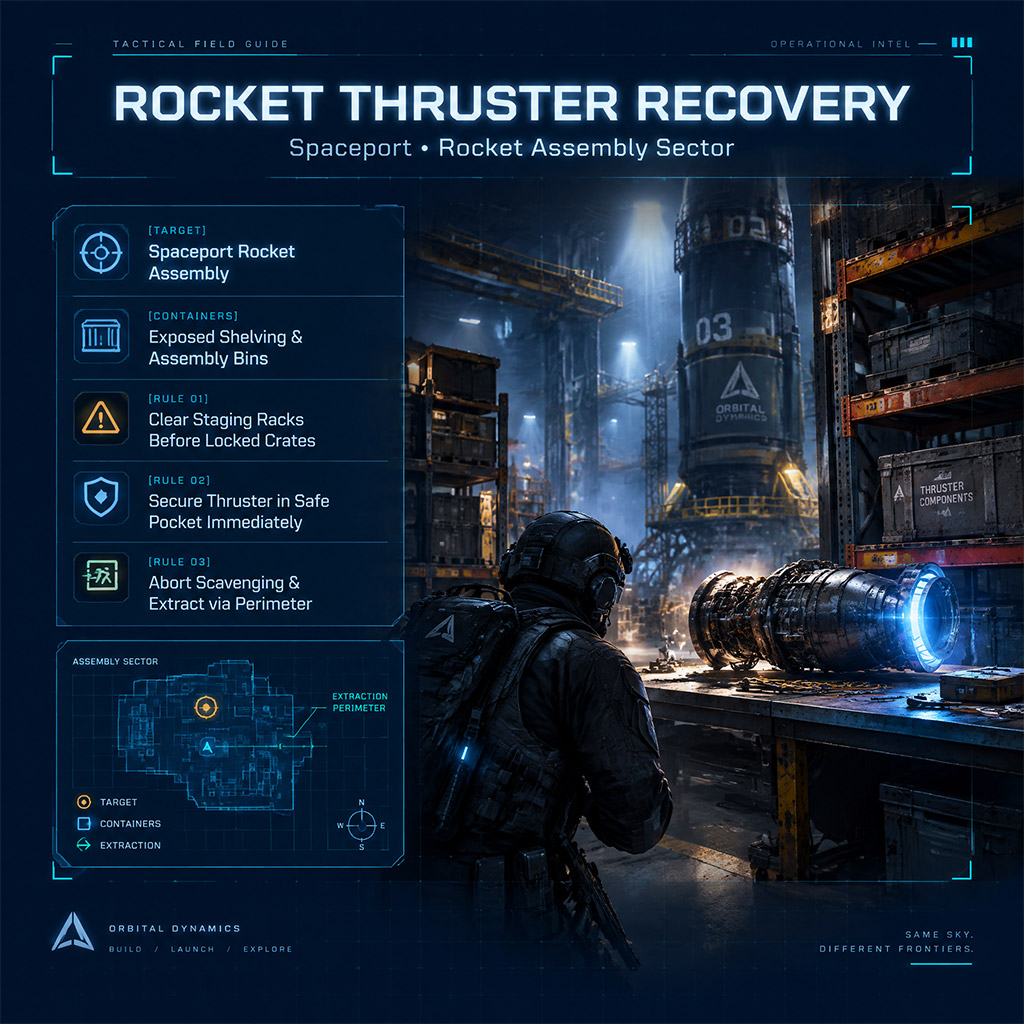
Rocket Assembly inside the Spaceport is the premier spawn location for Rocket Thrusters. You are searching exposed industrial racking, steel staging shelves, and assembly bins surrounding the primary fuselage jigs.
The Direct-Line Assembly Sprint
Arriving late at Rocket Assembly turns an item run into a contested meat grinder. Execute this sequence off spawn:
1. Assess Spawn Radius: If your drop point sits more than 400 meters from Rocket Assembly, do not sprint through contested chokepoints. Treat the raid as a secondary tech run instead.
2. Surface Clearance First: Check exposed workbenches and lower staging shelves before opening closed bins. Thrusters frequently spawn as visible world loot.
3. Listen for Perimeter Breaches: The high metal roofs amplify acoustic signatures. If ARC units aggro outside or footsteps hit metal decking, hold the high gantry or drop into an exit pipe immediately.
4. Immediate Safe-Pocket Transfer: The Rocket Thruster must go into your secure pocket the second you pick it up. Do not leave it in standard backpack inventory while sorting supplies.
High-Speed Headphones Farming Circuit
Headphones have no fixed landmark spawn; they pull from a massive civilian and commercial item pool. Success depends on container check velocity, not map coverage.

The Three-Pass Scavenge System
Clear multi-story office blocks and civilian outposts using this structured sequence:
- Pass 1 (Surface Scan): Sweep reception counters, breakroom tables, and executive desks.
- Pass 2 (Small Enclosures): Open filing cabinets, personal lockers, and bedside drawers. Skip heavy industrial crates.
- Pass 3 (Looted Container Inspection): Check containers already opened by other players.
Field Tip (The Second-Looter Advantage): Rushing players routinely leave salvage behind when searching for weapons or raw currency. In our field testing, searching previously looted office desks repeatedly recovered discarded quest items and high-tier personal electronics left behind by tunnel-visioned squads.
Hard Reset Rule
Limit your civilian search to one designated cluster per raid. If four contiguous buildings yield zero Headphones, rotate directly to the nearest extraction terminal. Do not wander across open territory into another contested POI with depleted utility items.
Broken Guidance Systems & Technical Scrap
Target dense clusters of technical utility rooms rather than massive, empty aerospace landmarks.
A compact maintenance building featuring six accessible avionics consoles delivers three times the roll velocity of an echoing aerospace terminal where containers sit hundreds of meters apart.
Check High-Density Nodes: Prioritize relay switchboards, avionic diagnostic racks, and server banks.
Skip Isolated Singles: Avoid detouring 150 meters for a solitary technical wall-box.
Preserve Extraction Mobility: Once a Guidance System drops, avoid dynamic world events. Move along map perimeters to extract.
Sentinel Firing Core Combat Protocol
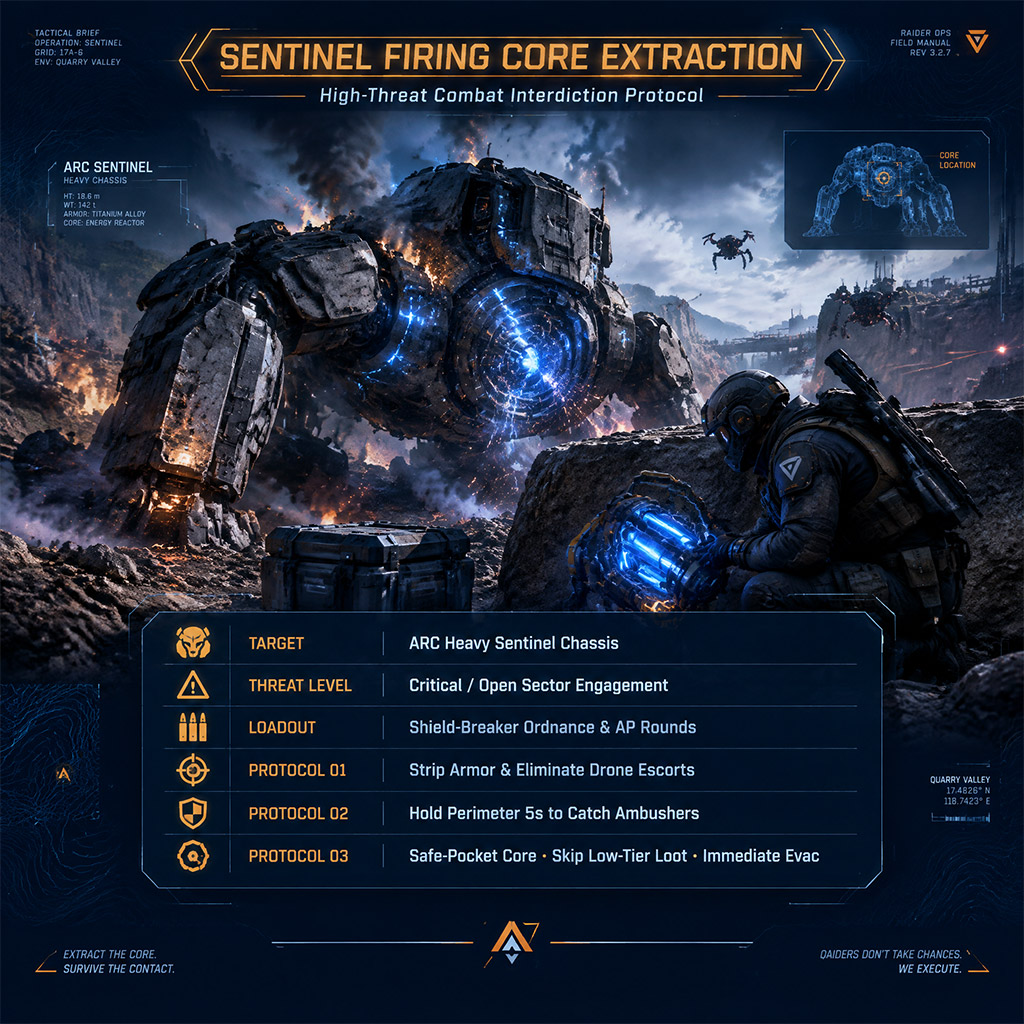
The Sentinel Firing Core is an active combat milestone. Treating it as standard scavenging guarantees a trip back to the lobby.
Engagement & Extraction Rules
1. Bring Shield-Stripping Ordnance: Never engage a Sentinel with base kinetic sidearms alone. Pack heavy ordnance or high-penetration munitions to finish the encounter before third parties converge.
2. Lock Down the Chassis: When the Sentinel falls, suppress the immediate perimeter. Do not rush the smoking chassis immediately—wait five seconds to catch opportunistic ambushers drawn by the acoustic signature.
3. Bag and Break: Secure the Firing Core, replenish depleted shields behind hard cover, and disengage. Disregard secondary loot containers dropped by escort units. Every second spent looting common scrap increases the risk of being ambushed.
Vaporizer Regulator Tactics
Vaporizer Regulators spawn in high-tier technical infrastructure and research labs.
The primary failure point during Regulator runs is loot inertia—continuing to search cabinets after acquiring the key objective.
Secure Pocket Over Currency: The moment a Vaporizer Regulator drops, it takes precedence in your safe container over raw coin stacks, high-value barter trinkets, or spare medical gear.
Perimeter Extraction: High-tier tech zones typically sit adjacent to heavily monitored extract points. Circle out to an exterior, low-activity terminal rather than triggering the primary facility elevator.
Tactical Decision Matrix: Profit vs. Project Deployments
Mixing profit goals with project milestones leads to disastrous decision-making. Use this procedural checklist to determine your actions in raid:
[Required Item Secured?]
│
├─► YES: Lock in Safe Pocket ──► Abort Secondary Scavenging ──► Route to Low-Risk Extract
│
└─► NO:
│
├─► Target POI Contested? ──► Relocate to Alternate Secondary Node or Reset
│
└─► Search Node Exhausted? ──► Rotate to Extract (Do not wander open terrain)
| In-Raid Situation | Tactical Move | Dead Trait to Avoid |
|---|---|---|
| Project item drops in first 2 minutes | Route directly to an exterior extract point | Searching one more floor for trading salvage |
| Safe pocket holds raw coin; project piece found | Move coin to normal pack; pocket the project piece | Prioritizing instant cash over progress items |
| Extract terminal is hot with automatic fire | Disengage; rotate to secondary distant extraction | Challenging fortified campers while carrying quest loot |
| Squadmate demands detouring to an armory | Hold extraction protocol; refuse offensive detours | Compromising mission objectives for team greed |
The High Altitude Whiteboard: Roadmap Context
The in-game High Altitude Project whiteboard tracks ongoing operations and narrative teasers. While community speculation connects its schematics to long-range cameras, specialized drones, or high-altitude transport mechanics, no gameplay function is officially confirmed beyond existing roadmap documentation.
Official updates confirm major expansions:
The Frozen Trail Map: The largest play space introduced to date, featuring distinct mountain terrain and cold-weather survival hazards.
Expanded Progression: Structural reworks to player skill trees, new tactical weapons, specialized tools, and hostile ARC units.
Narrative Arc: The High Altitude equipment cluster (thrusters, regulators, avionics, guidance systems) clearly points toward atmospheric or high-altitude operations, but the board itself serves as narrative scene-setting, not technical patch notes.
Plan your inventory around immediate progression rewards, not speculative future crafting recipes.
Optimized 5-Stage Project Completion Order
Follow this route sequence to clear the project stages without bottlenecking your stash:
1. Stage 1 (Passive Crafting Bulk): Gather Mechanical Components, Pop Triggers, and Explosive Compounds during standard budget runs. Do not waste safe pockets on these.
2. Stage 2 (Spaceport Thruster Sprints): Equip lightweight, high-mobility gear. Sprint the Rocket Assembly line off spawn, pocket the Rocket Thruster, and exit.
3. Stage 3 (Civilian Office Clearouts): Run mid-tier urban circuits focusing exclusively on filing cabinets and desks for Headphones.
4. Stage 4 (Heavy Sentinel Interdiction): Deploy with dedicated high-tier squads, anti-armor ordnance, and heavy medical supplies to take down Sentinels for the Firing Core.
5. Stage 5 (High-Tier Tech Extraction): Sweep high-density tech labs for the Vaporizer Regulator and Broken Guidance System, extracting immediately upon discovery.
FAQ (Frequently Asked Questions)
Where is the most reliable spawn for Rocket Thrusters in ARC Raiders?
The most consistent spawn area is Rocket Assembly on Spaceport. Focus on the exposed steel staging shelves, tool benches, and assembly parts bins located directly beneath the central construction scaffolding.
What is the most efficient way to farm Headphones?
Run short, disciplined circuits through commercial office complexes and residential blocks. Search desks, lockers, and filing cabinets, and make sure to inspect containers already opened by other players who passed over quest items.
Should I prioritize project items over high-value trading salvage in my Safe Pocket?
Yes. Project items like Headphones, Vaporizer Regulators, and Sentinel Cores represent hard bottlenecks to game progression. Always sacrifice high-value trade items or raw cash to secure rare project requirements in your safe pocket.
How do you get a Sentinel Firing Core safely as a solo player?
Engage isolated Sentinels from hard structural cover using heavy armor-piercing ordnance, and immediately disengage if third-party gunfire breaks out. Once the unit drops, secure the core into your safe pocket immediately and extract via perimeter routes.
Does completing the High Altitude whiteboard unlock a new vehicle?
No official source confirms vehicles tied to the whiteboard. While the lore and diagrams point toward high-altitude aerospace tech, the whiteboard functions as world-building and milestone tracking alongside major game updates.

I’m Sofia Bergström, a Swedish Managing Editor covering FPS, competitive shooters, and extraction shooters for GGWTB. My guides focus on loadout trade-offs, positioning, and when to commit—or cut your losses. A weapon’s stats tell only part of the story; I focus on how it fits your role and the fight ahead.

Most Popular Posts
- ARC Raiders Update 1.42: Phantom Targets Farming Guide (Glitched Wasps, Rewards, Regional Conditions)
- ARC Raiders Hullcracker Blueprints: Fastest Way to Complete The Major's Footlocker
- ARC Raiders Best Pop Trigger Strategy: Fast Phantom Targets Damage Guide
- ARC Raiders Subway Skin Guide: Unlock the Subterranean Outfit
- ARC Raiders Looting Mk. 3 Survivor Blueprint Guide: Best Blue Gate Route and Drop Locations
- ARC Raiders Medium & Heavy Gun Parts Blueprint Guide: Best Farm Route, Locations, and Refiner Crafting
Popular Category Lists
- ARC Raiders / (345)
- Grow a Garden / (292)
- CoD: Black Ops 7 / (167)
- Star Citizen / (161)
- MLB 26 / (159)
- Monopoly Go / (152)
- ARK Survival Ascended / (126)
- Steal a Brainrot / (98)
- Blox Fruits / (74)
- Adopt Me / (73)
- Forza Horizon 6 / (72)
- Sailor Piece / (68)
- Grow a Garden 2 / (68)
- Diablo IV / (62)
- CoD: BLACK OPS 6 / (55)
- Path of Exile 2 / (48)
- Monster Hunter Wilds / (46)
- Aion 2 / (46)
- Windrose / (44)
- Donut SMP / (41)