0
0 Created: Aug 15,2026 | ARC Raiders
ARC Raiders Solo Matriarch Guides: Farming Core in trios lobbie

Most squads botch the Matriarch. They poke her, panic, eat a Leaper combo, and bail. That's the gap you exploit.

Hook onto her back, damage her from a safe interior position, loot fast, extract before the lobby wakes up. No duel. No hero plays. Just timing.
- The Loadout
- Step 1: Approach Without Triggering Chaos
- Step 2: Hook From the Rear — Nowhere Else
- Step 3: Damage Her Safely
- Step 4: Don't Forget the Real Threat Is Players
- Step 5: Loot With Discipline
- Step 6: Extract Before Someone Ambushes You
- Common Failures and Fixes
- FAQ
- Can you actually solo the Matriarch in trios lobbies?
- What's the best weapon for this?
- How much ammo do I need?
- Where exactly do I hook from?
- How many cores can one run realistically produce?
- Summary
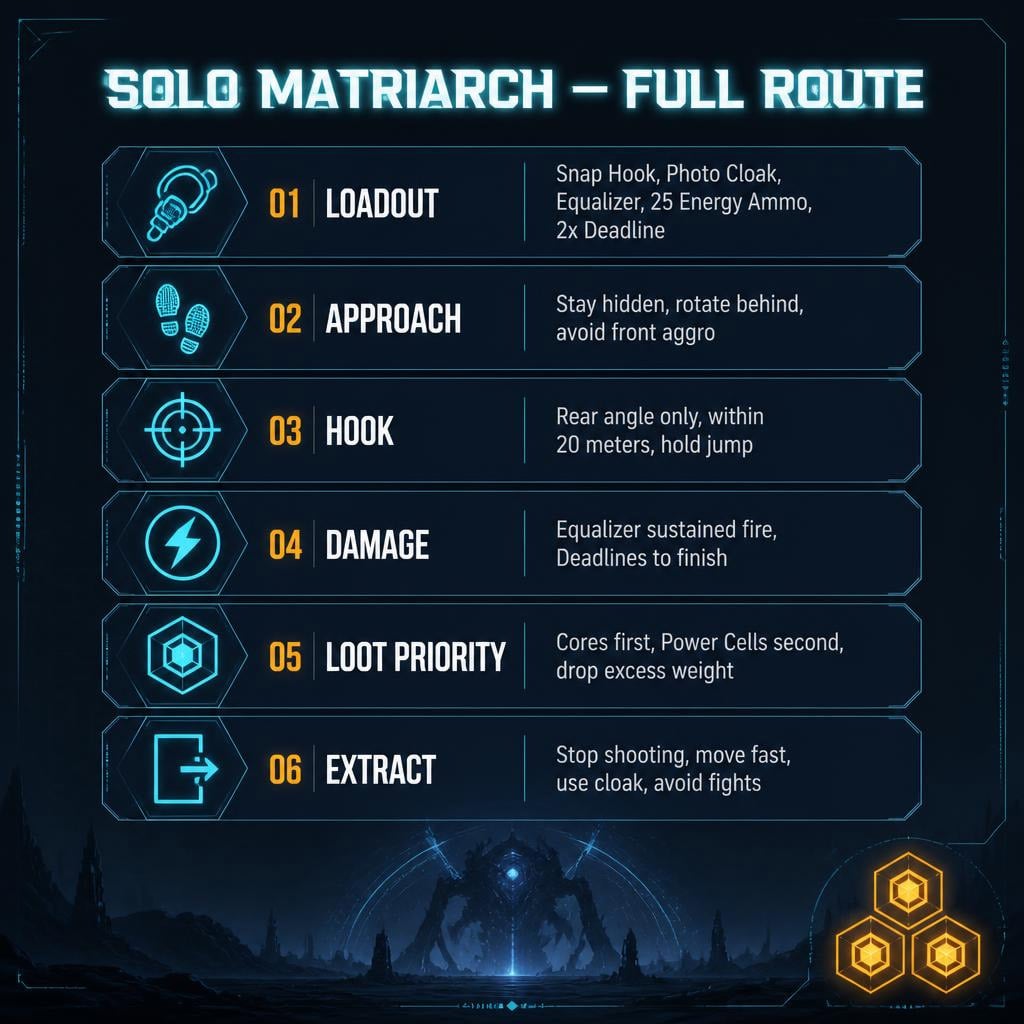
The Loadout
Skip the flashy gear. Consistency wins this fight.
| Slot | Pick | Why |
|---|---|---|
| Mobility | Snap Hook | Non-negotiable — this is the entire strategy |
| Tactical | Photo Cloak | Breaks sightlines on approach and extract |
| Weapon | Equalizer | Cleanest, most consistent damage |
| Ammo | ~25 energy clips | Full kill with margin for error |
| Finisher | 1–2 Deadlines | Optional, but speeds up the last stretch |
| Backpack | Max capacity | Cores are heavy — make room now |
Weapon comparison: the Equalizer beats the Jupiter here because its damage lands more predictably. The Dabra works, but projectile inconsistency isn't worth the risk on a first run.
Step 1: Approach Without Triggering Chaos
Positioning matters more than damage. Rushing in is how people die.
If she's not aggroed yet:
1. Approach from behind, stay quiet
2. Ping her back, close to under 20 meters
3. No wasted shots
4. Hook from the rear
If another squad already popped her:
That's not bad news — it's cover. ARC waves chase whoever triggered them, not you.
| Signal | Move |
|---|---|
| Leaper chasing another player | Rotate behind her now |
| Hornets drifting off | Air threat is down — prep the hook |
| ARC returning to patrol | Abort, reposition |
If the first wave drifts away from the Matriarch, that's your window. Move.
Step 2: Hook From the Rear — Nowhere Else
This is the mechanic the whole run hinges on. Get it wrong and you're on the ground with an angry Matriarch and zero cover.
Do not hook from the front. The angle won't land you right.
Do not hook from the side. You'll bounce off or miss entirely.
Stay inside 20 meters. Beyond that, the hook simply won't connect.
Execution:
1. Rotate to her back
2. Live-ping until range reads ≤20m
3. Fire the hook at the rear/top section
4. Hold jump through the travel arc
5. If she wobbles on landing, spam jump and nudge forward
Panic is the enemy here. Wobble happens — keep moving, don't freeze.
Step 3: Damage Her Safely
Once you're in, this stops being a raid fight and starts being maintenance.
Rough budget:
- Equalizer: primary damage, ~25 clips as buffer
- 2x Deadline: ~7,000 damage combined for the finish
Field rule: if you're not sure she's low enough, keep shooting. Under-damaging and whiffing your Deadlines leaves you exposed with no follow-up plan. Overkill costs ammo. Under-kill costs the run.
Don't tunnel vision, though — the longer this drags, the more attention you're pulling from the lobby.
Step 4: Don't Forget the Real Threat Is Players
Most trios ignore the Matriarch entirely. That's your edge. But don't get comfortable.
| Sound/Signal | Meaning |
|---|---|
| Looting SFX nearby | Someone's close enough to steal or ambush |
| Sudden silence after chaos | A team may be watching, not gone |
| Gunfire at extract | Route is likely camped |
Use Photo Cloak crossing open ground, near Sentinel/Rocketeer sightlines, and any time you're heavy with loot. It's not invincibility — it's breaking the one glance that ends your run.
Step 5: Loot With Discipline
This is where good runs turn into deaths. Greed is the killer, not the Matriarch.
Priority order:
1. Cores — the entire point of this run
2. Advanced Power Cells — high value, take them
3. Rare components — only if space allows
4. Everything else — drop it
Real result from a clean run: 13 cores, 300,000+ total value. That single kill outperforms multiple standard loot raids.
Overweight? Cut fast: drop unused ammo → drop heavy low-value gear → drop duplicate utility → never chase the last minor item.
Step 6: Extract Before Someone Ambushes You
Killing her is the easy part. Someone in that lobby heard it.
| Step | Action |
|---|---|
| 1 | Stop shooting immediately |
| 2 | Loot by priority, no lingering |
| 3 | Drop dead weight |
| 4 | Rotate to extract right away |
| 5 | Cloak through open terrain |
| 6 | Skip optional fights |
If you hear activity near extract: don't sprint blind. Pause, listen, and consider rotating wider. Overweight + fair fight is a losing combo. A patrol chasing you doesn't mean panic-fire — shooting draws players faster than it draws ARC.
Common Failures and Fixes
| Problem | Cause | Fix |
|---|---|---|
| Hook fails | Wrong angle or too far | Reposition rear, confirm ≤20m |
| Leaper kills you pre-hook | Rushed after aggro | Wait for wave to chase someone else |
| Fall off after hooking | Wobble mishandled | Spam jump, nudge position |
| Ran out of ammo | Missed damage / no Deadlines | Bring 25 clips, add Deadlines |
| Cores stolen | Slow looting | Prioritize, leave fast |
| Died overweight | Poor inventory calls | Drop ammo/gear early, not late |
FAQ
Can you actually solo the Matriarch in trios lobbies?
Yes. The rear hook removes you from the ground fight entirely. Your real risk is other players, not the Matriarch's kit.
What's the best weapon for this?
Equalizer. Most consistent damage delivery. Jupiter is a viable backup; Dabra works but feels less reliable.
How much ammo do I need?
~25 energy clips, plus 1–2 Deadlines if you want a faster, safer finish.
Where exactly do I hook from?
Behind her, within 20 meters. Front and side angles fail or bounce — don't waste the attempt on either.
How many cores can one run realistically produce?
12+ cores on a clean kill, with strong rolls pushing past 13 cores and 300k+ value.
Summary
| Requirement | Pick |
|---|---|
| Mobility | Snap Hook |
| Stealth | Photo Cloak |
| Damage | Equalizer |
| Ammo | ~25 energy clips |
| Finisher | 2x Deadline (optional) |
| Loot priority | Cores → Power Cells |
| Golden rule | Extract before greed kills you |
This isn't luck. It's a repeatable route: rear hook, controlled damage, disciplined loot, clean exit. Run it right and 12+ cores per Matriarch stops being a highlight reel — it becomes routine.

Most Popular Posts
- ARC Raiders Update 1.42: Phantom Targets Farming Guide (Glitched Wasps, Rewards, Regional Conditions)
- ARC Raiders Hullcracker Blueprints: Fastest Way to Complete The Major's Footlocker
- ARC Raiders Best Pop Trigger Strategy: Fast Phantom Targets Damage Guide
- ARC Raiders Subway Skin Guide: Unlock the Subterranean Outfit
- ARC Raiders Looting Mk. 3 Survivor Blueprint Guide: Best Blue Gate Route and Drop Locations
- ARC Raiders Medium & Heavy Gun Parts Blueprint Guide: Best Farm Route, Locations, and Refiner Crafting
Popular Category Lists
- ARC Raiders / (350)
- Grow a Garden / (294)
- CoD: Black Ops 7 / (167)
- Star Citizen / (162)
- MLB 26 / (159)
- Monopoly Go / (152)
- ARK Survival Ascended / (127)
- Steal a Brainrot / (99)
- Blox Fruits / (74)
- Adopt Me / (74)
- Forza Horizon 6 / (72)
- Sailor Piece / (68)
- Grow a Garden 2 / (68)
- Diablo IV / (62)
- CoD: BLACK OPS 6 / (55)
- Aion 2 / (49)
- Path of Exile 2 / (48)
- Monster Hunter Wilds / (46)
- Windrose / (44)
- Donut SMP / (41)