


 0
0Bee Swarm Simulator Blue Hive Guide (2026): From Early Meta to Trillions Honey AFK
- NELSO
- Share
- Bee Swarm Simulator
- 01/12/26
- 28918
Welcome to the most comprehensive Blue Hive guide for 2026. Whether you are just transitioning from a mixed hive or you are an end-game player looking to optimize your hourly rates, we have combined all our testing data into one definitive resource.
We have spent countless hours analyzing the Blue Hive Meter, testing macro patterns, and destroying alt account hives to find the mathematical best setups. This guide will take you through the journey of building an efficient early-game hive, setting up the perfect AFK macro, and finally, tuning your end-game composition for massive daily gains.
Here is how we turn your hive into a honey-making machine.
- The New Early Game Meta (Diamond & Ninja)
- Why We Ditch the Frosty Bee
- The Optimal Early Composition
- The AFK Strategy (Making Trillions)
- Field Selection: Stump vs. Pine Tree
- Macro Configuration
- The Barrier: Diamond Mask
- End-Game Optimization (Buoyant & Tadpole)
- The Golden Ratio
- The Mutation Meta: Convert Amount is King
- Essential Beequips
- Consumables, Nectars & Teamwork
- Nectar Management
- The Power of Teammates
- FAQ: Troubleshooting Your Hive
- Final Words
↖ The New Early Game Meta (Diamond & Ninja)
If you are just starting your blue journey, forget what you know about Frosty Bee spam. A new meta has emerged that outperforms the old strategy by a significant margin.
↖ Why We Ditch the Frosty Bee
For years, Frosty Bees were the standard. However, our recent tests on alt accounts showed that replacing them with Diamond Bees and Ninja Bees yields about 10% more honey—even with suboptimal nectars.
The Logic:
1. Diamond Bee (The Converter): The Shimmering Honey passive grants +25% honey when converting at the hive (+2.5% per level). Since early blue hives have small bags, you spend a lot of time converting. This passive turns that downtime into profit.
2. Ninja Bee (The Speedster): With +50% Move, Gather, and Convert speed, Ninja Bees solve the mobility issue. The faster you move, the sooner you return to the field.
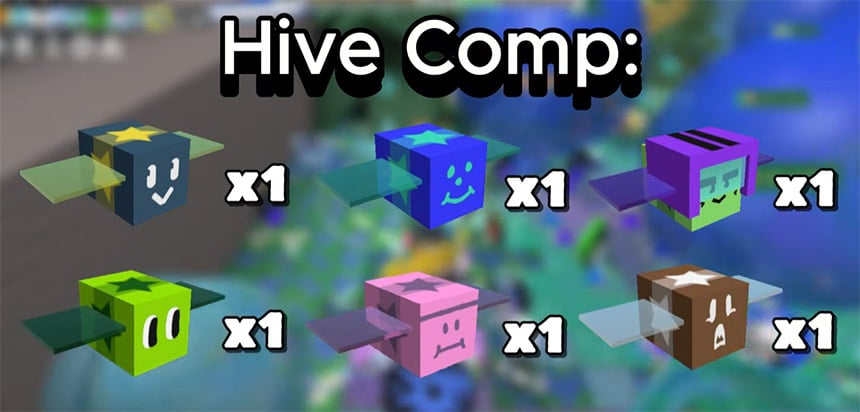
↖ The Optimal Early Composition
Here is the blueprint we used to beat the Frosty hive records:
| Bee Type | Quantity | Role / Requirement |
|---|---|---|
| Gifted Basic Bee | 1 | x1.2 Pollen (Mandatory) |
| Gifted Event Bees | 1 each | Tabby, Photon, Gummy, Festive, Bear, Puppy (for speed) |
| Gifted Support | 1 each | Looker, Bumble, Stubborn, Commander, Shocked, Bucko |
| Music Bee | 4 | Melody & Focus tokens |
| Baby Bee | 4 | Baby Love (Loot Luck) |
| Ninja Bee | 6 | Speed & Blue Bomb+ |
| Diamond Bee | Rest | Primary Conversion Engine |
Pro Tip: This setup requires the Bubble Mask. Unlike the Frosty hive, you do not need the Supreme Saturator because you aren't destroying flowers as aggressively.
↖ The AFK Strategy (Making Trillions)
Once you have established your hive, the goal shifts to automation. Making trillions shouldn't require you to be glued to the screen.
↖ Field Selection: Stump vs. Pine Tree
Where you macro matters just as much as your hive composition. We alternate between two fields based on specific conditions.
Stump Field: This is our preferred field only if the Stump Snail is defeated. The enclosed area keeps tokens and balloons close, allowing for high efficiency.
Pine Tree Forest: If the Snail is alive, move here immediately. It offers consistent blue pollen and high capacity caps, though drift can be an issue.
↖ Macro Configuration
Through extensive testing, we have found that the Square Pattern is superior for AFK grinding.
Pattern: Square (Medium/Large).
Why: It covers corners efficiently, ensuring you don't miss Wealth Clock or Balloon tokens.
Drift Control: If you find your character drifting, ensure your sprinkler placement is set to Center to anchor your loop.
↖ The Barrier: Diamond Mask
You should try to get the Diamond Mask as soon as possible. We cannot stress this enough. The Diamond Drain passive is the engine that allows you to stay in the field longer. Do not attempt to macro for trillions with a Bubble or Honey Mask; the capacity simply isn't there.
↖ End-Game Optimization (Buoyant & Tadpole)
When you acquire the Supreme Star Amulet (Pop Star), the strategy shifts. Now, your honey production relies entirely on the synergy between bubbles (Tadpoles) and balloons (Buoyants).
↖ The Golden Ratio
The balance between filling balloons and popping bubbles is delicate. Too many Tadpoles, and you lack filling power; too many Buoyants, and you lose your Pop Star aura.
Current Recommended Setup:
Buoyant Bees: 18 - 20 (Prioritize +Capacity gifted bonus).
Tadpole Bees: 8 - 10 (Prioritize +Baby Love).
Music Bees: 3 - 4 (Ensure 100% Melody uptime).
Support: 1 Commander, 1 Looker, 1 Tabby, 1 Bear.
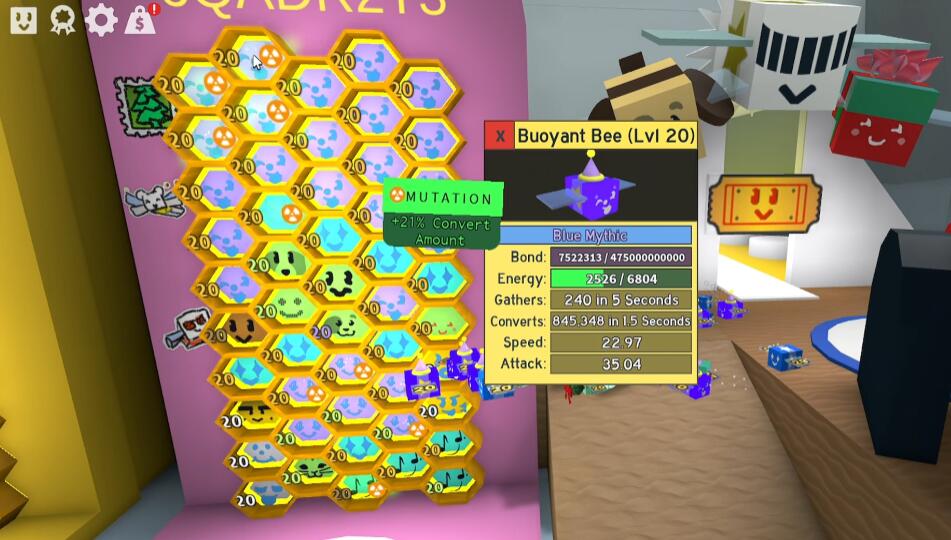
↖ The Mutation Meta: Convert Amount is King
This is where average hives get separated from the best.
For Buoyant Bees: We prioritize Convert Amount.
Why? Your limiting factor is how fast you can empty your massive balloons at the hive. Higher convert amounts mean you return to the field faster.
For Tadpole Bees: We prioritize Blue Ability Rate (BAR).
Why? More bubbles equal higher Pop Star aura uptime.
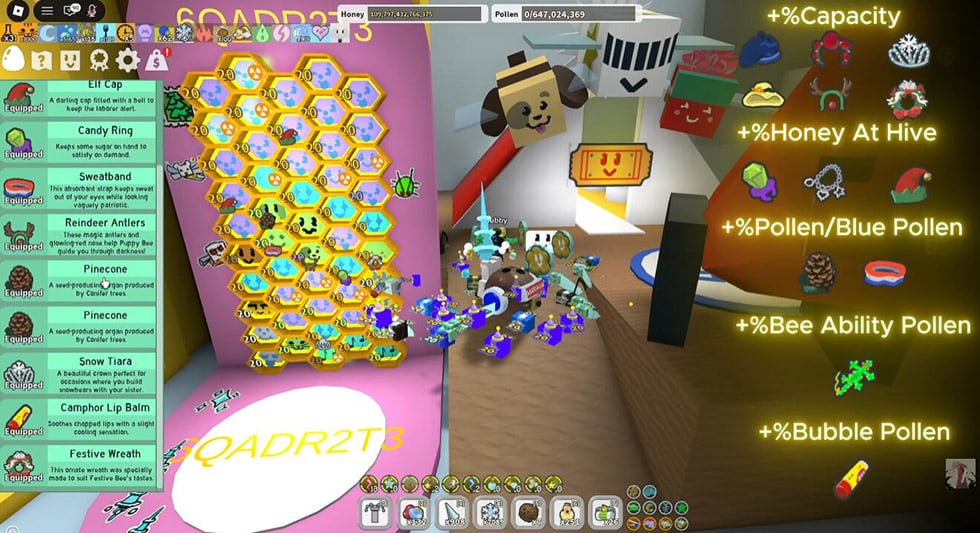
↖ Essential Beequips
Pinecones: Best for general capacity in Pine Tree Forest.
Toy Drums/Whistles: Essential on Music Bees.
Elf Caps: If you have them, these are best-in-slot for capacity.
↖ Consumables, Nectars & Teamwork
You can't drive a race car without high-octane fuel. To maximize your hourly rates, you need to manage your external buffs.
↖ Nectar Management
You cannot rely on random pots. We recommend a strict rotation using Hydroponic and Petal Planters to maintain the Holy Trinity of blue nectars:
1. Comforting: +Honey Per Pollen.
2. Motivating: +Ability Rate (Crucial for bubbles).
3. Refreshing: +Blue Pollen.
Implementation: If you notice a nectar dropping below 12 hours, rotate your planters immediately. Do not wait for them to expire.
↖ The Power of Teammates
Ideally, a server should have six Blue Hive players working together.
This means: Shared jelly beans, massive balloon float, and synchronized bubble popping.
The Result: When six players trigger Pop Star simultaneously, the multiplier creates a honey spike that a solo player simply cannot achieve.
↖ FAQ: Troubleshooting Your Hive
Q: My balloon fills up instantly, and I waste honey. What's wrong?
A: You likely lack Capacity mutations or your Convert Rate at the hive is too slow. Try adding a gifted Photon Bee (for instant conversion) or swapping a beequip for capacity stats.
Q: Can I run the end-game setup without the Tide Popper?
A: You can, but expect about 30-40% less honey. The Tide Popper's passive wave ability is integral to popping bubbles efficiently during macro sessions.
Q: Is it worth switching to Blue if I don't have the Diamond Mask yet?
A: We strongly advise against it. Stick to a mixed hive until you craft the Diamond Mask. The capacity buff is non-negotiable for the numbers we are aiming for.
Q: Why do you use Ninja Bees in the early game but not late game?
A: In the early game, speed is your main bottleneck due to small bag space. In the late game, Buoyant Bees provide balloons that essentially act as a second backpack, reducing the need for constant travel, so we replace Ninjas with Buoyants for raw capacity.
↖ Final Words
Optimizing a Blue Hive in 2026 is a journey of precision. It starts with the smart use of Diamond and Ninja bees, evolves into a disciplined macro strategy with the Diamond Mask, and culminates in a perfectly tuned Buoyant/Tadpole composition.
We have laid out the data, the compositions, and the strategies. Now, it is up to you to implement them. Whether you are manually grinding or setting up for an overnight macro session, remember that Convert Amount and Consistency are your best friends.

Most Popular Posts
- Bee Swarm Simulator Progression Guide: Best Gear Order from Early Game to Endgame
- Bee Swarm Simulator Bee Bear Quest Guide: Best Fields, Blooms, Stickers & Petal Cub Tips
- Bee Swarm Simulator Planters Guide: Best Fields, Nectar, Growth Times, and Buying Order
- How to Make 20B+ Pollen in Hive Hub as a Blue Hive in Bee Swarm Simulator
- Bee Swarm Simulator Best Mythic Bee: Ranked for Every Hive
- BSS Beesmas Update This Week: BBM Quest, Honeyday, Timer Extension, and Best Prep Guide
Popular Category Lists
- Grow a Garden / (286)
- ARC Raiders / (266)
- CoD: Black Ops 7 / (166)
- Monopoly Go / (146)
- MLB 26 / (145)
- Star Citizen / (116)
- Steal a Brainrot / (89)
- ARK Survival Ascended / (74)
- Sailor Piece / (68)
- Forza Horizon 6 / (63)
- Diablo IV / (61)
- Blox Fruits / (60)
- CoD: BLACK OPS 6 / (55)
- Adopt Me / (53)
- Path of Exile 2 / (48)
- Monster Hunter Wilds / (46)
- Windrose / (44)
- Grow a Garden 2 / (42)
- Path of Exile / (40)
- Bee Swarm Simulator / (36)


