


 0
0Bee Swarm Simulator Blue Hive Guide (Early & Mid Game): Best Setup, Bees, Macro, Amulets
- WYNN
- Share
- Bee Swarm Simulator
- 03/28/26
- 2458
If you are choosing your first color hive in Bee Swarm Simulator, Blue is usually the safest and smartest option. It is easier to build, easier to maintain, and far less punishing than Red or White when your account is still developing.
From experience, most players who struggle with Blue are not failing because the color is weak. They are usually switching too early, running the wrong bee ratios, or losing honey through bad balloon conversion timing. That is why this guide stays focused on the parts that actually move your honey count: when to switch, what to run, and what to fix first.
- Why Blue Hive Is So Good Early On
- How Blue makes honey
- When You Should Switch to Blue
- Recommended switch checklist
- One mistake that matters a lot
- Best Bees for Early and Mid Game Blue Hive
- Core blue bees
- Simple hive rule
- Best Amulets for Blue Hive
- Key amulet stats
- Best Beequips for Blue Hive
- Best value beequips
- Macro Settings That Actually Matter
- Simple macro priorities
- Balloon Deflation: The Hidden Honey Loss
- Practical rule
- When Diamond Bee Becomes Worth It
- Common Blue Hive Mistakes
- FAQ
- Is Blue Hive the best first color?
- How many Buoyant and Tadpole Bees should I use?
- What is the best SSA for Blue?
- When should I use Diamond Bees?
- What field is best for Blue Hive?
- Summary
↖ Why Blue Hive Is So Good Early On
Blue works because its honey is built around balloons, not just raw field collection.
That changes everything. Instead of forcing a complex active playstyle, Blue gives you:
- strong macro value
- easier scaling
- simpler mechanics
- safer progression for first color swap
In practice, that is why Blue is widely considered the best first color for early and mid game players.
↖ How Blue makes honey
The short version is simple:
| Color | Main Honey Source | Difficulty |
|---|---|---|
| Blue | Balloons + conversion | Low |
| Red | Direct pollen collection | Medium/High |
| White | Goo and layered mechanics | High |
For Blue, the core loop is:
1. Buoyant Bees make balloons
2. Tadpole Bees help fill with bubbles and blue tokens
3. You convert balloons efficiently at hive
That is the whole engine.
↖ When You Should Switch to Blue
This is the part players rush, and it is usually where progress gets derailed.
You should not switch just because you feel ready. You should switch when your account can support it.
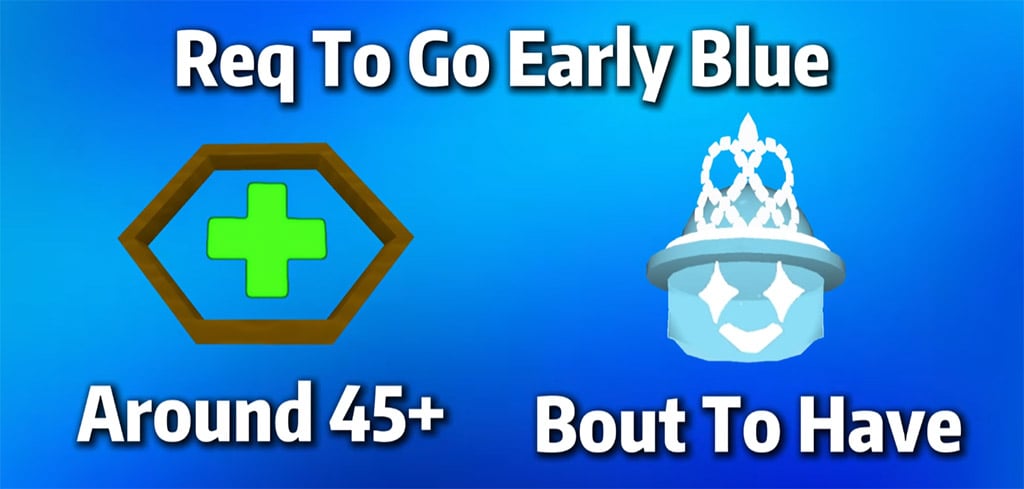
↖ Recommended switch checklist
| Requirement | Recommended |
|---|---|
| Bee Count | Around 45 bees |
| Mask | Diamond Mask or close |
| Science Bear | Finished |
| Onett Quests | Finished, or only final pollen parts left |
| Spirit Bear | 10 quests minimum, 20 is better |
| Grandmaster Badges | 10 completed |
| Saved Honey | 10B–20B |
If you are missing multiple items here, Blue often feels underwhelming. Not because Blue is bad, but because the account foundation is not there yet.
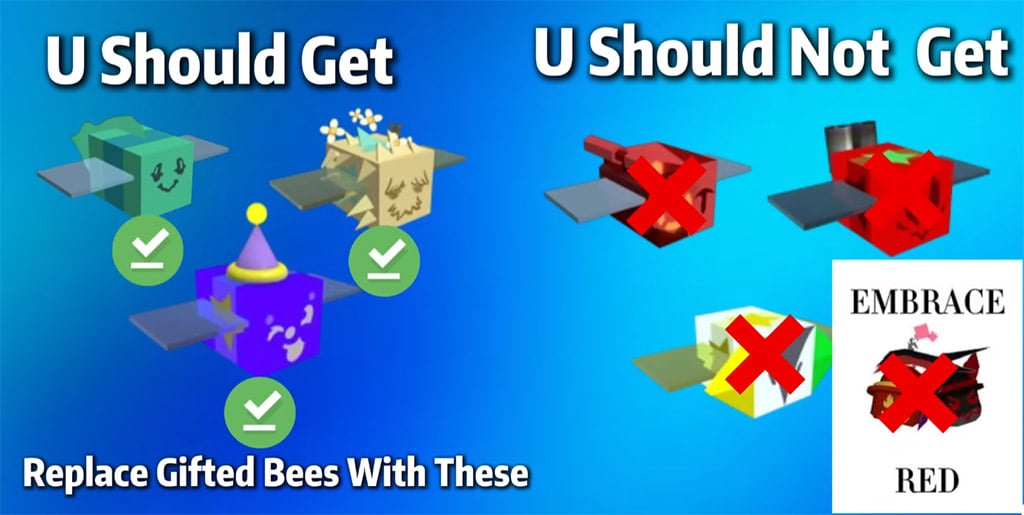
↖ One mistake that matters a lot
Before switching, use your Star Eggs carefully.
A strong approach is:
- first get all possible gifted non-mythic, non-event bees
- then use Star Eggs for a better shot at gifted mythics
That single decision can save a lot of pain later.
↖ Best Bees for Early and Mid Game Blue Hive
For most players, Blue is not complicated. The hive mostly revolves around a few core bees.
↖ Core blue bees
| Bee | Why it matters |
|---|---|
| Buoyant Bee | Spawns balloons, main income source |
| Tadpole Bee | Makes bubbles, helps fill and build Pop Star |
| Diamond Bee | Strong later for honey-at-hive scaling |
↖ Simple hive rule
- Early to mid game: focus on Buoyant + Tadpole
- Later on: add more Diamond Bees once your hive is high enough level
A common early-mid game target is:
- 15–16 Buoyant
- 8–11 Tadpole
If you find that your hive is underfilling, add more Tadpoles.
If your balloon value feels weak, look at capacity and Buoyant count first.
↖ Best Amulets for Blue Hive
You do not need to overcomplicate amulets early on. Just focus on stats that consistently help Blue perform.
↖ Key amulet stats
| Amulet | Priority Stats |
|---|---|
| SSA | Pop Star, Blue Pollen, Red Pollen |
| Shell Amulet | Blue Pollen, Red Pollen |
| Other amulets | Useful pollen and conversion stats |
A practical tip from real gameplay: a strong Solo Pop Star is usually better than forcing a weak double passive. A clean Pop Star setup is easier to use and more consistent for early and mid game Blue.
↖ Best Beequips for Blue Hive
Beequips can make a huge difference, but only a few really matter early.
↖ Best value beequips
| Beequip | Why it's good |
|---|---|
| Pine Cone | Excellent for Pine Tree capacity and pollen |
| Elf Cap | Strong if it has Honey at Hive |
| Camphor Lip Balm | Great bubble pollen support |
| Candy Ring | Strong Honey at Hive value |
| Snow Tiara | Useful blue field capacity |
If you are keeping things simple, start with Pine Cone and Honey at Hive-focused pieces. Those give some of the most noticeable returns.
↖ Macro Settings That Actually Matter
For Blue, macro is not optional. It is part of the build.
What matters most is not having fancy settings. It is having consistent settings that protect balloon value.
↖ Simple macro priorities
| Setting | Recommendation |
|---|---|
| Field | Pine Tree is usually best |
| Pattern | Use a good custom pattern |
| Field Boost | Maintain 4x when possible |
| Balloon Convert Timing | Around every 10 minutes |
| Consumables | Blue Extract + Oil are strong choices |
From testing and general player results, a good custom pattern often improves honey more than people expect. A bad pattern can make an otherwise decent hive look weak.
↖ Balloon Deflation: The Hidden Honey Loss
This is one of the most important Blue mechanics to understand.
When your balloon reaches hive, it starts losing value over time. If you hold it too long, the loss becomes painful very quickly.
↖ Practical rule
- Convert around every 10 minutes
- Do not let balloons sit too long at hive
- More capacity helps your overall balloon performance
This is one of the biggest reasons some Blue players make far less honey than they should. The hive is fine, but the conversion timing is bad.
↖ When Diamond Bee Becomes Worth It
Diamond Bee is strong, but mostly once your hive is more developed.
| Stage | Recommendation |
|---|---|
| Level 18 and below | Standard Blue comp |
| Level 19+ | Diamond Blue becomes much better |
That means most early and mid game players should not rush Diamond Hive too soon. Standard Blue is usually more stable and makes better practical honey until your levels catch up.
↖ Common Blue Hive Mistakes
These are the issues I see most often:
- switching too early
- keeping the wrong mythics
- forcing Diamond Bees too soon
- ignoring token link and haste
- using weak macro patterns
- converting balloons too late
If you fix those six things, your Blue Hive usually improves fast.
↖ FAQ
↖ Is Blue Hive the best first color?
For most players, yes. It is easier to build and more forgiving than Red or White.
↖ How many Buoyant and Tadpole Bees should I use?
A common target is 15–16 Buoyant and 8–11 Tadpole, then adjust based on filling.
↖ What is the best SSA for Blue?
A strong Solo Pop Star is usually the most reliable choice for early and mid game.
↖ When should I use Diamond Bees?
Usually once your hive reaches around level 19 or higher.
↖ What field is best for Blue Hive?
Pine Tree Forest is one of the best and most consistent fields for Blue.
↖ Summary
Blue Hive is strong because it is efficient, stable, and realistic for growing accounts. If you switch at the right time, build around Buoyant + Tadpole, use a solid Pop Star, and convert balloons on time, Blue will usually outperform more complicated color choices in early and mid game.
The most important takeaway is simple: do not chase an advanced Blue setup too early. Build the basics first, and the honey follows.

Most Popular Posts
- Bee Swarm Simulator Progression Guide: Best Gear Order from Early Game to Endgame
- Bee Swarm Simulator Bee Bear Quest Guide: Best Fields, Blooms, Stickers & Petal Cub Tips
- Bee Swarm Simulator Planters Guide: Best Fields, Nectar, Growth Times, and Buying Order
- How to Make 20B+ Pollen in Hive Hub as a Blue Hive in Bee Swarm Simulator
- Bee Swarm Simulator Best Mythic Bee: Ranked for Every Hive
- BSS Beesmas Update This Week: BBM Quest, Honeyday, Timer Extension, and Best Prep Guide
Popular Category Lists
- Grow a Garden / (286)
- ARC Raiders / (266)
- CoD: Black Ops 7 / (166)
- Monopoly Go / (146)
- MLB 26 / (145)
- Star Citizen / (116)
- Steal a Brainrot / (89)
- ARK Survival Ascended / (74)
- Sailor Piece / (68)
- Forza Horizon 6 / (63)
- Diablo IV / (61)
- Blox Fruits / (60)
- CoD: BLACK OPS 6 / (55)
- Adopt Me / (53)
- Path of Exile 2 / (48)
- Monster Hunter Wilds / (46)
- Windrose / (44)
- Grow a Garden 2 / (42)
- Path of Exile / (40)
- Bee Swarm Simulator / (36)


