0
Created: Nov 2,2026 | Bee Swarm Simulator
Bee Swarm Simulator Progression Guide: Optimal Gear & Hive Route

To progress fast in Bee Swarm Simulator, maintain a mixed hive until you obtain the Supreme Star Amulet (SSA), and always upgrade the specific gear piece fixing your immediate farming bottleneck. If your backpack fills in under two minutes, buy capacity gear; if bosses dodge your attacks, invest in bee levels before buying another hive slot.
- Progression Route at a Glance
- Early Game: Reaching 35 Bees Without Stalling
- Balancing Hive Slots vs. Mountain Top Gear
- Securing Tabby Bee and Protecting Diamond Eggs
- Midgame: Solving the Material Bottleneck
- Choosing Your Midgame Mask
- First Spirit Petal: Petal Belt vs. Petal Wand
- Beating Coconut Crab and Crafting Coconut Gear
- SSA Transition and Endgame Scaling
- The Star Egg Rule and Unlocking SSA
- Executing the Blue Hive Pivot
- Macro Efficiency and Digital Bee Preparation
- FAQ (Frequently Asked Questions)
- What should I buy first in Bee Swarm Simulator?
- Should I get Petal Belt or Petal Wand first?
- When should I switch to a blue hive?
- How do I guarantee a Gifted Mythic from a Star Egg?
- Should I buy Coconut Canister or Coconut Clogs first?
Progression Route at a Glance
Use your current bee count to identify your immediate equipment priority and prevent resource starvation.
| Stage | Primary Purchase Target | Pivot Trigger (When to Change Course) |
|---|---|---|
| Under 25 Bees | Hive Slots and Mountain Top Shop Starter Gear | Your bag fills in under 90 seconds, making extra bee slots useless. |
| 25 to 35 Bees | Mondo Belt Bag, Beekeeper's Mask, and Porcelain Dipper | Buying your next hive slot delays the 150M Honey Porcelain Dipper. |
| 35+ Bees (Early Midgame) | Porcelain Port-O-Hive, Honey Mask, and Spirit Bear Quests | Shifting to a single-color hive stalls multi-field Spirit Bear requirements. |
| Midgame | First Spirit Petal Item, Coconut Canister, and Level 12 Bees | Crafting a secondary item drains Tropical Drinks or Glitter needed for your main goal. |
| SSA Transition | 40 Gifted Bee Types, Pop Star SSA, and Mythic Hive Core | Rolling for a double passive leaves you with zero honey to actually buy Mythic bees. |
| Endgame | Tide Popper / Dark Scythe / Gummyballer and Endgame Planters | Chasing prestige collector tools before your hive reaches Level 17+. |
Always fix your tightest bottleneck first: constant conversion trips demand capacity upgrades, while slow Spirit Bear quests require balanced field multipliers.
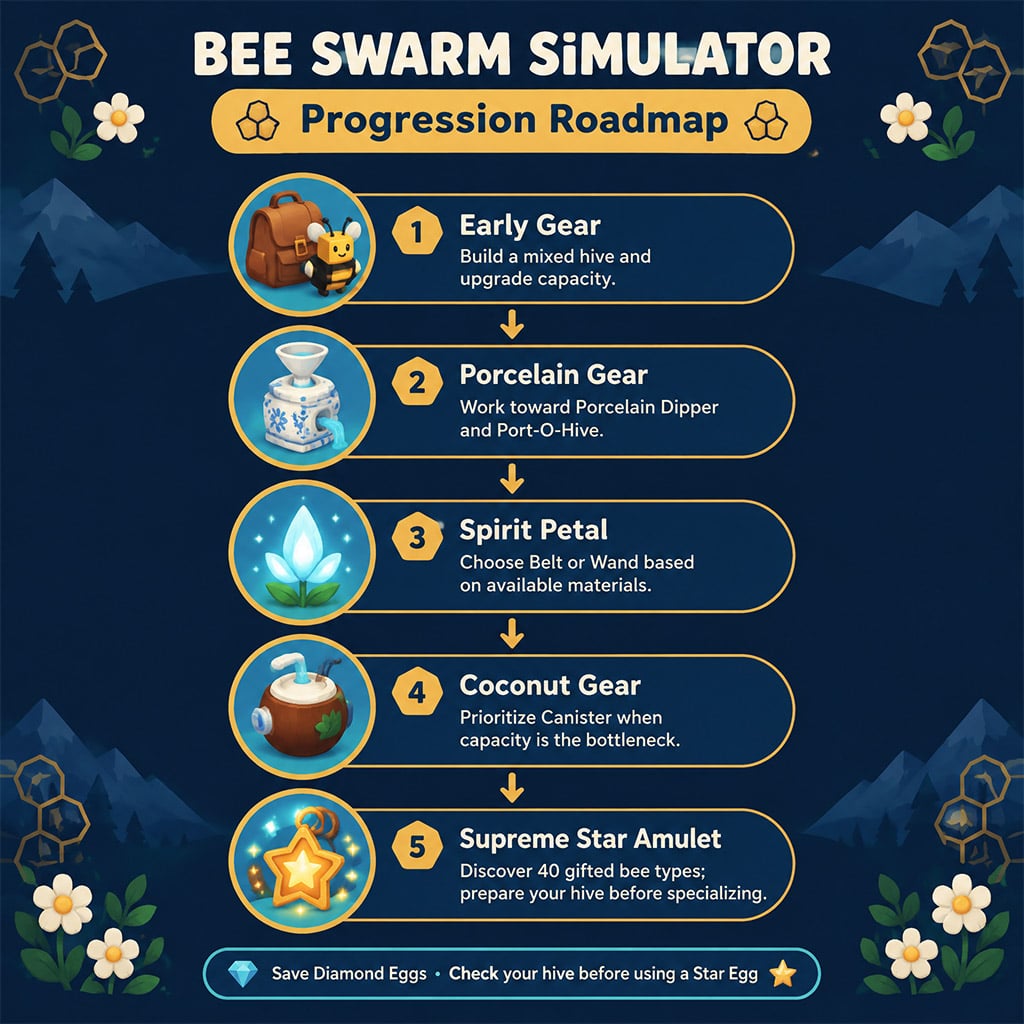
Early Game: Reaching 35 Bees Without Stalling
Balancing Hive Slots vs. Mountain Top Gear
New players often rush 35 Hive Slots to enter the Wind Shrine area, only to hit a massive honey wall because their backpack holds nothing. You must alternate between buying slots and clearing out the Mountain Top Shop.
If your next hive slot costs more than the Porcelain Dipper (150M Honey), stop buying slots immediately and grind for the collector.
Ignore the popular community myth about stopping strictly at a 33-bee checkpoint. In our fresh-account speedruns to the 35-bee gate, pausing at 31 or 32 bees to secure the Porcelain Dipper and Beekeeper's Boots shaved four hours off our total grind time compared to forcing 33 slots on a Golden Rake.
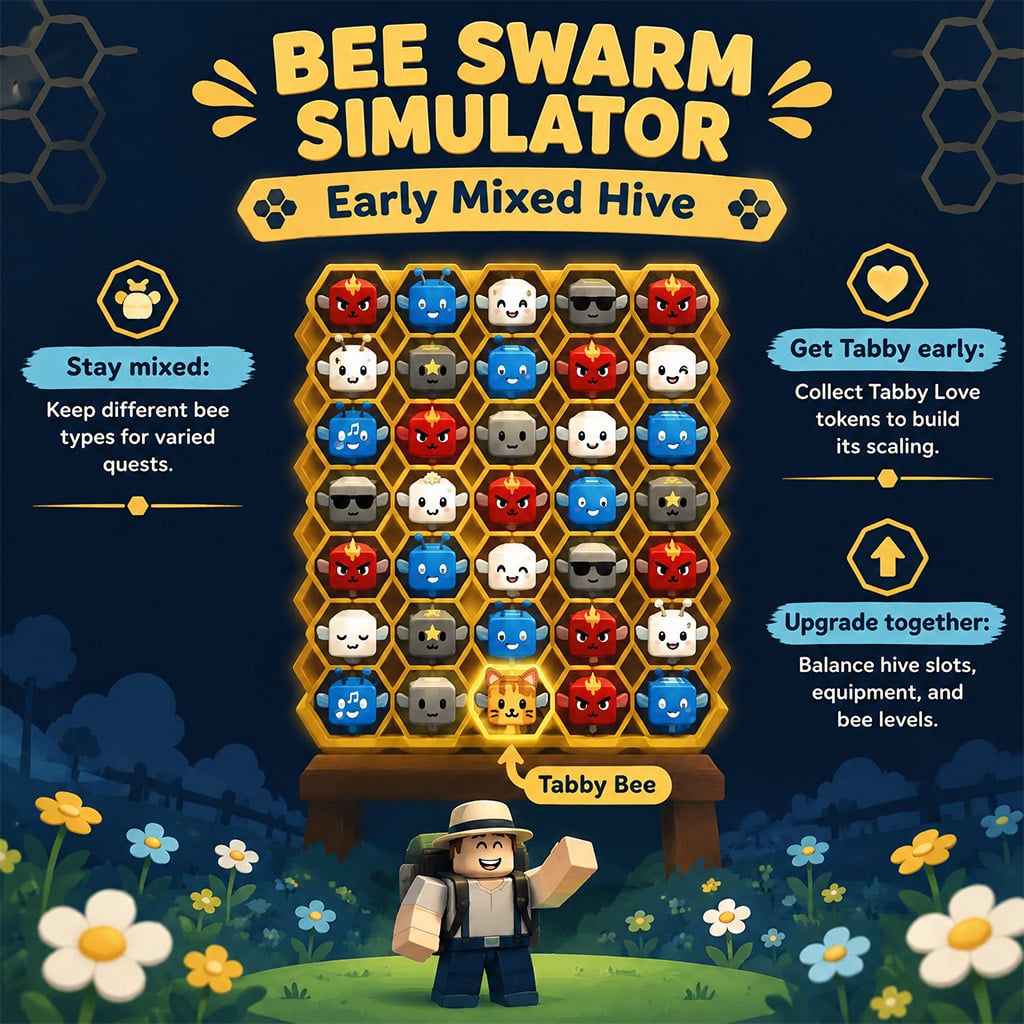
Securing Tabby Bee and Protecting Diamond Eggs
Wasting Tickets on Gold Eggs or hatching Diamond Eggs early will cripple your midgame crafting. Buy Tabby Bee first from the Ticket Tent for 500 Tickets and place it in the bottom-center hive slot for faster conversion speed.
Why does early placement matter? Tabby Love stacks up to 1,000 times, granting a permanent +1,000% Gather Amount and Conversion Link boost, and it only builds when you physically collect its ability tokens.
Lock every Diamond Egg in your inventory. You need 5 Diamond Eggs to craft the Diamond Mask, and burning them in the early game forces you to spend 2,000 Tickets or rely on rare boss drops later.
Midgame: Solving the Material Bottleneck
Choosing Your Midgame Mask
Committing to a single-color hive before finishing Spirit Bear's 30th quest makes pollen collection in opposing fields agonizingly slow. Instead, use your mask to boost your primary farming style while keeping your actual bee roster mixed.
Compare the three midgame masks below based on whether you play actively at the keyboard or macro overnight.
| Mask | Optimal Use Case | Material Trap to Avoid |
|---|---|---|
| Honey Mask | Active play across mixed fields using Coin Scatter for instant conversion. | Spending 5 Gold Eggs here is mandatory, so never waste Tickets on Gold Eggs earlier unless needed for this craft. |
| Bubble Mask | Unattended blue-field grinding or early macroing before owning 5 Diamond Eggs. | Do not buy this first if you play actively; it tanks your red and white quest speed. |
| Diamond Mask | Direct skipping from Honey Mask once you hold 5 Diamond Eggs and 250 Blue Extracts. | Crafting Bubble Mask right before this drains the Blue Extracts and Glitter you need. |
Buy the Honey Mask first if you actively play the game, and skip the Bubble Mask entirely until you transition toward a blue build.
First Spirit Petal: Petal Belt vs. Petal Wand
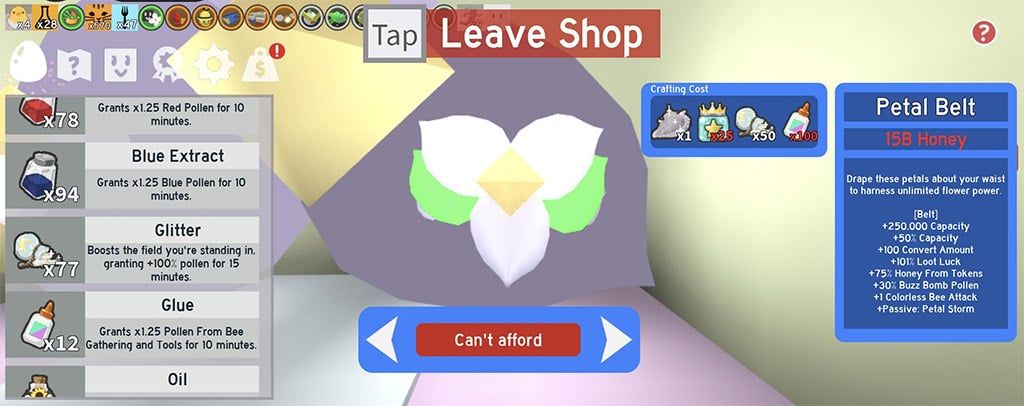
Deciding how to spend your first Spirit Petal at Spirit Bear's 10th quest causes massive progression delays if you misread your inventory. While the Petal Belt provides superior +25% Capacity and bomb conversion, it costs 15 Billion Honey, 50 Star Jellies, 25 Glitter, and 100 Glue.
What this actually means is you must audit your blender materials before turning in the 10th quest. If you are within 20% of the Belt's material requirements, save for the Petal Belt first.
Here is the catch. If you lack Star Jellies and Glue, hoarding for the Belt leaves you farming with a weak Porcelain Dipper for weeks. Craft the Petal Wand (1.5 Billion Honey, 10 Star Jellies, 25 Glitter, 75 Enzymes) first if your materials are low, and never donate your first or second petal to the Wind Shrine—donating a petal only unlocks the chance to roll Windy Bee with Cloud Vials, offering zero immediate stat gains.
Beating Coconut Crab and Crafting Coconut Gear
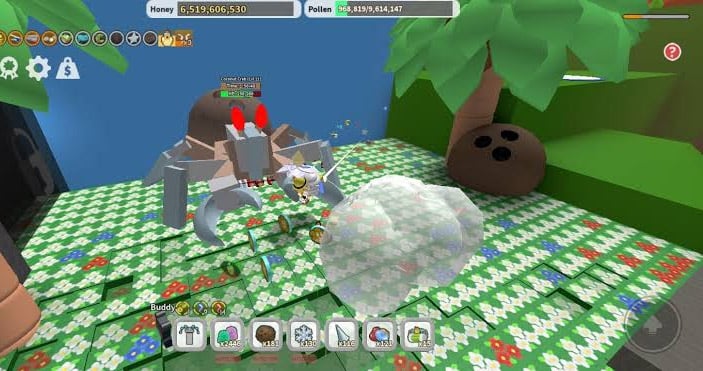
Players routinely dump billions of honey into a 40th hive slot hoping to beat the Coconut Crab, only to watch their bees miss 80% of their attacks. The Crab is a Level 12 boss, meaning level mechanics dictate your damage output far more than raw bee count.
In our testing with a 40-bee hive against Coconut Crab, upgrading Vicious Bee to Level 12 while keeping the rest of the hive at Level 10 cut our clear time from 18 minutes down to under 7 minutes. Focus all your treats on Vicious Bee first.
Once you start farming Coconut Crab consistently, prioritize the Coconut Canister over the Coconut Clogs:
Coconut Canister (25B Honey, 150 Tropical Drinks, 150 Coconuts): Buy this first. Its Inspire Coconuts and massive capacity multiply your honey per hour across all fields.
Coconut Clogs (10B Honey, 100 Coconuts, 50 Tropical Drinks, 50 Glue): Only craft these first if you already have 100+ Glue sitting idle and are still weeks away from the Canister's 25B Honey price tag. Otherwise, spending 50 Tropical Drinks here will stall your Canister by days.
SSA Transition and Endgame Scaling
The Star Egg Rule and Unlocking SSA
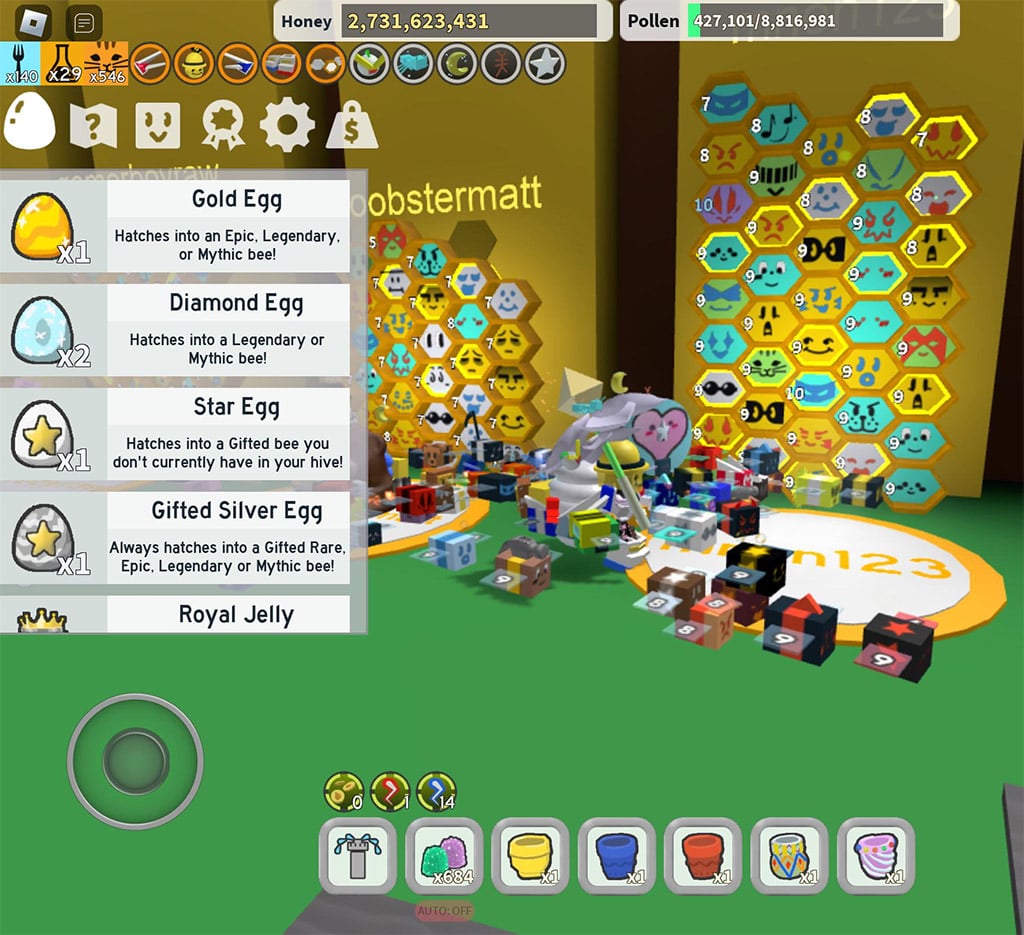
Wasting a Star Egg before setting up your hive properly costs you thousands of Tickets in lost value. The Supreme Star Amulet (SSA) requires you to discover 40 unique Gifted Bee types across your account's history, but the Star Egg checks only what is actively sitting in your hive at the exact moment of hatching.
Follow this exact checklist before touching a Star Egg or the SSA generator:
| Milestone | Exact Game Mechanic to Verify | Fatal Mistake to Avoid |
|---|---|---|
| Hatching a Star Egg | Guaranteed to hatch a Gifted bee type not currently in your hive. | Relying on your discovery log; you must hold every Gifted Basic, Rare, Epic, and Legendary bee in your active slots to force a Gifted Mythic. |
| Selecting Target Slot | Placing the Star Egg onto an existing hive slot replaces that bee first. | Dropping the Star Egg on your only copy of a Gifted Legendary removes it from the pool, causing you to re-roll that Legendary instead of a Mythic. |
| Rolling First SSA | Costs 10 Billion Honey per roll after discovering 40 Gifted types. | Spending all your honey chasing a 5/5 double passive before funding your actual hive transition. |
Never hatch a Star Egg until every single non-Mythic, non-Event Gifted bee is physically present in your hive, and always hatch it onto an ungifted duplicate slot.
Executing the Blue Hive Pivot
Switching to a Red or White hive immediately after unlocking SSA will bankrupt your account because both colors require Scorching/Star Saw or Gummy/Star Saw double passives and full Gifted Mythic rosters to function. Pivot to a Blue Hive first.
After testing post-SSA transitions across three separate accounts, we confirmed that a budget solo-Pop Star Blue Hive using Bubble Bees and Frosty Bees out-farms a poorly funded Red Hive by over 300% Honey per hour.
Once you roll any SSA with the Pop Star passive, keep at least 100 Billion to 500 Billion Honey in reserve to roll Buoyant Bees and Tadpole Bees. Do not waste honey rerolling the amulet until your hive has at least 15+ Buoyant Bees and 10+ Tadpole Bees.
Macro Efficiency and Digital Bee Preparation
Running an uncalibrated macro overnight often yields less honey than a 30-minute active boost if your character constantly drifts out of the field. Before leaving a session unattended, run a 60-minute supervised trial.
Track your hourly honey gain, drift rate, and backpack fill timer. If your character walks off the Pine Tree Forest ledge, adjust your walkspeed drift compensation or switch to corner-align patterns immediately.
Keep your Robo Bear Challenge and Digital Bee grind completely separate from your early SSA pivot. Transitioning to a Blue Hive temporarily drops your attack power in early Robo Bear rounds; secure your base honey income first, then craft Drives and build attack mutations once you can afford level 16+ bees.
FAQ (Frequently Asked Questions)
What should I buy first in Bee Swarm Simulator?
Prioritize alternating between Hive Slots and capacity gear until you unlock the 25-bee Mountain Top area. If your backpack fills up in under two minutes of farming, upgrade your bag before buying another bee slot.
Should I get Petal Belt or Petal Wand first?
Craft the Petal Belt first if you already have most of the 50 Star Jellies, 100 Glue, and 15 Billion Honey required, as its capacity boost scales much harder. If you are severely short on crafting materials, buy the Petal Wand first so you do not stall your farming speed for weeks.
When should I switch to a blue hive?
Switch to a blue hive only after you finish Spirit Bear's questline, unlock the Supreme Star Amulet (SSA), and roll a Pop Star passive. Switching before you have SSA and at least 100 Billion Honey saved for Buoyant and Tadpole bees will destroy your quest completion speed.
How do I guarantee a Gifted Mythic from a Star Egg?
You must have one copy of every Gifted Basic, Rare, Epic, and Legendary bee physically sitting in your active hive at the exact moment you use the Star Egg. Merely having them recorded in your discovered bee log will not prevent duplicate rolls.
Should I buy Coconut Canister or Coconut Clogs first?
Always buy the Coconut Canister first unless you are sitting on a massive surplus of Glue and Tropical Drinks while lacking honey. Buying Coconut Clogs early consumes 50 Tropical Drinks and 100 Coconuts, which severely delays the far stronger Canister upgrade.

I’m Chloe Whitaker, a British Fact Checker at GGWTB focused on Currency farming, pet collecting, and management games, alongside Minecraft sandbox content. I check the details that shape your next move: growth timers, unlock requirements, and whether a reward is still obtainable. An old event tip shouldn’t cost you an evening chasing a pet you can no longer get.
Most Popular Posts
- Bee Swarm Simulator Blue Hive Guide (2026): From Early Meta to Trillions Honey AFK
- Bee Swarm Simulator Most OP Beesmas Items Offline Voucher Guides
- Bee Swarm Simulator Beesmas 2026: How to Complete the Questline Fast?
- Bee Swarm Simulator (2026) Full Progression Guide: From Zero To Supreme Star Amulet
- Bee Swarm Simulator Blue Hive Guide: Best For All Levels, Amulets Stats, Mutations, More
- Bee Swarm Simulator Best Amulet Stats: All 7 Amulets + Best SSA by Color
Popular Category Lists
- ARC Raiders / (363)
- Grow a Garden / (297)
- CoD: Black Ops 7 / (167)
- Star Citizen / (165)
- MLB 26 / (159)
- Monopoly Go / (153)
- ARK Survival Ascended / (130)
- Steal a Brainrot / (99)
- Blox Fruits / (74)
- Adopt Me / (74)
- Forza Horizon 6 / (72)
- Sailor Piece / (68)
- Grow a Garden 2 / (68)
- Diablo IV / (62)
- Aion 2 / (59)
- CoD: BLACK OPS 6 / (55)
- COD: Modern Warfare 4 / (50)
- Path of Exile 2 / (48)
- Maplestory Classic / (47)
- Monster Hunter Wilds / (46)