


 0
0Bee Swarm Simulator Best Amulet Stats: All 7 Amulets + Best SSA by Color
- WYNN
- Share
- Bee Swarm Simulator
- 01/04/26
- 9411
Amulets in Bee Swarm Simulator look like small bonuses, but they're really your hidden engine. When my honey/hour felt stuck, it wasn't because I needed one more bee Stickers, it was because I kept rolling the wrong stats for the wrong stage. Once I treated each amulet like a tool that solves a specific bottleneck, progress got a lot more predictable.
the best stats for all 7 amulets across early, mid, and endgame, plus the best SSA lines for Blue/Red/White, and the rolling rules that prevent you from donating your honey to the reroll button.
- 1) Amulets solve bottlenecks (not vanity stats)
- The 3 bottlenecks that decide almost every roll
- 2) The 7 Amulets and what each one is supposed to do
- 3) Stage rules: what to roll (and when to stop)
- 3.1 Early game: get upgrades, not perfection
- 3.2 Midgame: roll to fix your bottleneck
- 3.3 Endgame: color optimization + SSA passives
- 4) Best stats for every amulet (all stages)
- 4.1 Star Amulet (Bronze → Diamond): early & midgame priorities
- 4.2 Supreme Star Amulet (SSA): best stats for every color + midgame rule
- 4.3 Moon Amulet: the early-game capacity hack and late-game efficiency
- 4.4 Ant Amulet / Supreme Ant Amulet: crit is king (and queen)
- 4.5 King Beetle Amulet: conversion + attack + the fields you actually farm
- 4.6 Diamond Stick Bug Amulet: burst scaling and cleanup power
- 4.7 Cog Amulet (Robo Challenge): endgame specialization, not early obsession
- 4.8 Shell Amulet / Supreme Shell: banking value you already earned
- 5) Rolling order + stop-loss rules (how I keep rerolls under control)
- The rolling order I use
- Stop-loss rule (simple and effective)
- FAQ
- 1) Should early-game players reroll Star Amulets for perfect stats?
- 2) Why roll Moon Amulet exactly 10 times?
- 3) Is 6% Crit Chance really that important (especially on SSA)?
- 4) Blue hive: Bee Ability Rate or Instant Conversion on SSA—what do I pick?
- 5) When should I start chasing perfect SSA passives?
- 6) What's the most common amulet mistake you see?
- Summary
↖ 1) Amulets solve bottlenecks (not vanity stats)
Most bad amulet rolls share one problem: the stats don't match what's limiting you.
↖ The 3 bottlenecks that decide almost every roll
1. Fill speed (bag fills too fast): Pollen + Color Pollen
2. Uptime (boosts feel inconsistent): Bee Ability Rate (BAR) + token-friendly lines
3. Empty speed (you can't bank what you farm): Convert Rate + Instant Conversion + Convert Amount
Why this matters:
If you're overflowing during boosts, adding more pollen can make your run worse. If your buffs feel dead, raw pollen won't fix the token engine—BAR often will. This is the logic that keeps your rolls efficient.
↖ 2) The 7 Amulets and what each one is supposed to do
I judge every amulet by one question: what job does this amulet do for my loop?
| Amulet | Main Role | What good feels like | Common Mistake |
|---|---|---|---|
| Star (Bronze→Diamond) / SSA | Your biggest multiplier package + passives (SSA) | Your whole farming loop improves | Rolling early like it's endgame |
| Moon | Capacity + farming efficiency | Less overflow, smoother sessions | Skipping the 10-roll capacity ramp |
| Ant / Supreme Ant | Crit consistency + pollen support | Faster clears, steadier farming | Keeping low-impact filler stats |
| King Beetle | Convert + attack + key field pollen | Better cashout and tempo | Treating it as pollen only |
| Stick Bug (Diamond) | Attack + bomb/token synergy | Stronger burst and cleanup | Chasing one niche line forever |
| Cog (Robo) | High-end specialized lines | Big color-based efficiency | Over-focusing before you can farm it |
| Shell / Supreme Shell | Conversion/amount + niche value | Better end-of-session banking | Rolling too early at low tiers |
↖ 3) Stage rules: what to roll (and when to stop)
↖ 3.1 Early game: get upgrades, not perfection
Early game ROI is brutal if you chase perfect stats. I did it anyway once—spent honey rerolling, then realized a single gear/bee progression step would've outscaled those tiny percentage bumps.
Early game rules I follow
Star Amulet (Bronze/Silver/Gold/Diamond): roll once per tier, then move on.
If you just unlocked a new tier, buy it and accept good enough.
This means: you keep honey for progression that multiplies everything.

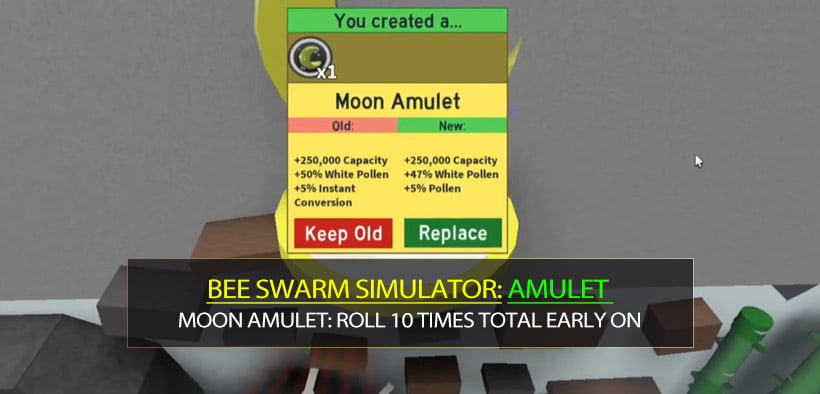
Moon Amulet: roll 10 times total early on.
Each purchase increases capacity by 25,000, capping at 250,000 after 10 rolls.
Why this is huge: less overflow = more of your farming actually becomes honey.
Ant + King Beetle: aim for 2–3 strong lines, then stop.
Crit/convert/attack are the high-impact early winners.
↖ 3.2 Midgame: roll to fix your bottleneck
If you notice one of these, here's what it usually means:
- If your bag keeps exploding, then prioritize Capacity / Convert Rate / Instant Conversion
- If boosts feel spiky, then prioritize BAR and token-support lines
- If damage is lagging, then prioritize Crit Chance / Crit Power / Attack
↖ 3.3 Endgame: color optimization + SSA passives
Endgame is when chasing best-in-slot makes sense because:
- you can afford rerolls without stalling progression
- you're committed to Blue/Red/White
- small improvements compound over long boosts
↖ 4) Best stats for every amulet (all stages)
I'll list targets as Best and Good Alternatives so you have a clear stopping point.
↖ 4.1 Star Amulet (Bronze → Diamond): early & midgame priorities
In these tiers, don't overthink it:
- Prefer broadly useful lines like Pollen, Convert Rate, and Crit Chance when they appear.
- If you discover you're rerolling more than a couple times, then you're probably paying endgame prices for midgame gains.
↖ 4.2 Supreme Star Amulet (SSA): best stats for every color + midgame rule
SSA is where stats stop being nice and start being your build.
Midgame SSA (not color-locked yet)
My practical keep rule:
- Keep if you have Crit Chance + Pollen + (BAR or Convert Rate)
- Reroll if it's missing Crit Chance and doesn't fix your bottleneck
| Midgame SSA | Must-Have | Great Add-ons | Usually Skip | Why |
|---|---|---|---|---|
| Mixed hive | Crit Chance, Pollen | BAR, Convert Rate | Hard color commitment lines | You want universal consistency first |
| Color-leaning | Crit Chance, Pollen, your Color Pollen | BAR or Convert Rate | Lines that don't address your bottleneck | Specialization only pays when supported |
Endgame SSA targets by color
| Hive Color | Best SSA Lines | Passives (common best) | What to change based on symptoms |
|---|---|---|---|
| Blue | Blue Pollen, Convert Rate, BAR, Crit Chance, Pollen | Solo Pop Star (transition) → add Star Shower if staying Blue | If overflow is constant, value Convert/IC more; if runs feel inconsistent, value BAR more |
| Red | Red Pollen, Crit Chance, Pollen, Instant Conversion, BAR (or Bee Gather Pollen with strong Digital Bee drives) | Scorching Star + Star Saw | If spike windows feel short, BAR helps; if bag explodes mid-boost, IC helps |
| White | White Pollen, Pollen, Crit Chance, BAR, Bee Gather Pollen | Gummy Star + Star Saw | If your white loop feels weak, prioritize white lines over generic ones |
Experience note: Across dozens of rolls, the line I feel most consistently is 6% Crit Chance. If two SSAs are close, I take the one with crit chance unless the other clearly fixes my main bottleneck (usually conversion/overflow).
↖ 4.3 Moon Amulet: the early-game capacity hack and late-game efficiency
| Stage | Best Goal | Best Stats to Keep | Good Alternatives |
|---|---|---|---|
| Early | Roll 10× to cap capacity (+250,000) | Honey Per Pollen, White Pollen | After cap: any lines supporting your main farm route |
| Mid/End | Optimize for your current project | Honey Per Pollen + White Pollen | Bond from Treats (if leveling bees hard) |
If you discover you're feeding treats constantly, then Bond from Treats can outperform small pollen lines because leveling scales your entire hive, not just one field.
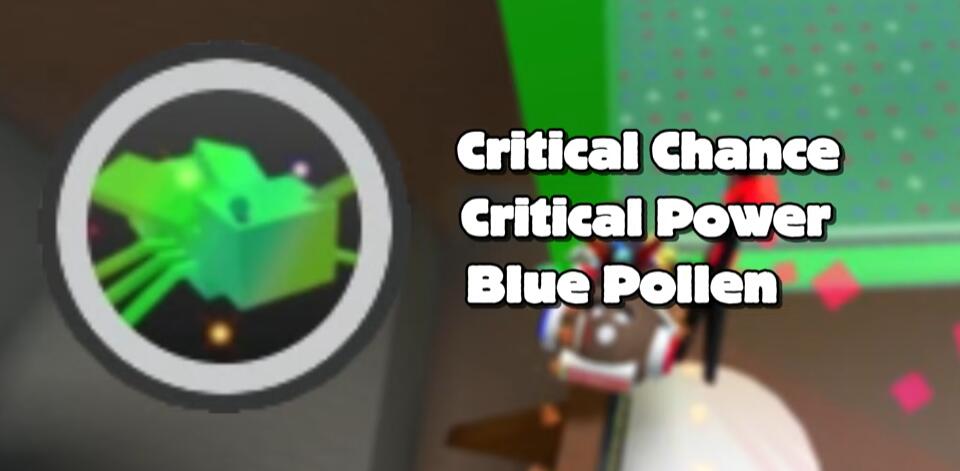
↖ 4.4 Ant Amulet / Supreme Ant Amulet: crit is king (and queen)
| Build | Best Stats | Why it works |
|---|---|---|
| Early (any) | Crit Chance, Crit Power, Blue Pollen | Early tempo: faster kills + strong general pollen value |
| Blue | Crit Chance, Crit Power, Blue Pollen, Pollen, White Pollen | Supports blue farming while keeping damage consistent |
| Red | Crit Chance, Crit Power, Red Pollen, Pollen, White Pollen | Red spikes scale better when crit is reliable |
| White | Crit Chance, Crit Power, White Pollen, Pollen, Red Pollen | White benefits from steady baseline scaling + useful secondary |
If you're forced to choose between cute filler stats and Crit Chance/Crit Power, take the crit—your whole session becomes more stable.
↖ 4.5 King Beetle Amulet: conversion + attack + the fields you actually farm
| Stage / Color | Best Stats | Field Pollen Targets | This means |
|---|---|---|---|
| Early (any) | Convert Rate, +1 Bee Attack | Any fields you use often | Better cashout + faster clearing |
| Blue | Convert Rate, Bee Attack, Bamboo Field Pollen, Blue Flower Field Pollen | Bamboo, Blue Flower | Smooth daily farming routes in common blue progression |
| Red | Bee Attack, Convert Rate, Strawberry Field Pollen, Mushroom Field Pollen | Strawberry, Mushroom | Better red route tempo and fight speed |
| White | +1 Bee Attack | Optional Spider Field Pollen | Don't overspend here; white gets more from other amulets |
↖ 4.6 Diamond Stick Bug Amulet: burst scaling and cleanup power
| Hive Color | Best Stats | Good Alternatives | Why |
|---|---|---|---|
| Blue | Blue Pollen (or Pollen), +2 Blue Bee Attack, +1 Bee Attack, Blue Bomb Pollen (or Bomb Pollen) | Swap Blue Pollen ↔ Pollen depending on roll | Bomb synergy supports blue collection loops |
| Red | Red Pollen (or Pollen), +2 Red Bee Attack, +1 Bee Attack, Bee Attack % | — | Red scales extremely well with stacked attack |
| White | White Pollen (or Pollen), Honey From Tokens, +2 Red Bee Attack, +1 Bee Attack | — | Token honey is a real income driver in white setups |
If you discover tokens are carrying your income during boosts, then Honey From Tokens becomes a priority line, not a luxury.
↖ 4.7 Cog Amulet (Robo Challenge): endgame specialization, not early obsession
Blue targets
| Tier Aim | Best Stats | Good Alternatives |
|---|---|---|
| Diamond (common) → Supreme (later) | Blue Pollen, Bubble Pollen, Ability Token Lifespan, Instant Blue Conversion, Blue Bee Attack (or Attack) | If incomplete, prioritize Blue Pollen + Lifespan + Instant conversion |
Red targets
| Tier Aim | Best Stats | Why |
|---|---|---|
| Supreme (endgame) | Super Crit Power, Red Pollen, Event Bee Pollen, Bee Attack, Instant Red Conversion | Crit/attack density + IC protect red's spike boosts |
White targets
| Tier Aim | Best Stats | Good Alternatives |
|---|---|---|
| Supreme (endgame) | Honey From Tokens, Markability Pollen, White Pollen, Instant White Conversion, Bee Attack | If attack lines vary, Red/Colorless attack can still be fine |
If you discover you can't clear Robo consistently, then Cog perfection is a trap—treat it as upgrade later.
↖ 4.8 Shell Amulet / Supreme Shell: banking value you already earned
| Hive Color | Best Stats | Good Alternatives | Why |
|---|---|---|---|
| Blue | Convert Amount, Pollen | — | Better cashout per cycle; steadier long sessions |
| Red | Goo Conversion, Convert Amount | — | Helps pace and conversion during aggressive play |
| White | Goo Conversion, Honey From Tokens (or White Pollen), Spider Field Pollen | — | White often benefits from goo + token value loops |
↖ 5) Rolling order + stop-loss rules (how I keep rerolls under control)
Here's the exact order I recommend because it matches real power spikes.
↖ The rolling order I use
1. Moon Amulet to 10 rolls (early)
You immediately feel the +250,000 capacity cap.
2. Star Amulet once per tier
Progress tiers; don't chase perfection.
3. Ant + King Beetle until you get 2–3 strong lines
Crit/convert/attack give the biggest felt improvements.
4. Only then chase color-optimized endgame rolls
SSA passives, Cog optimization, Stick Bug perfection, Shell fine-tuning.
↖ Stop-loss rule (simple and effective)
- If an amulet has 3+ lines that match my current bottleneck, I keep it.
- I only chase perfect 5-line rolls when I'm endgame and fully color-locked.
This rule alone stopped me from burning weeks of honey for improvements I couldn't even feel.
↖ FAQ
↖ 1) Should early-game players reroll Star Amulets for perfect stats?
No. Roll once per tier and move on. If you discover your honey is disappearing into rerolls, then you're paying for endgame min-max before you have endgame income.
↖ 2) Why roll Moon Amulet exactly 10 times?
Because it ramps capacity by 25,000 per purchase up to 250,000 total. That's one of the most efficient early-game investments because it reduces overflow and increases usable farming time.
↖ 3) Is 6% Crit Chance really that important (especially on SSA)?
In practice, yes. It's one of the most universally felt lines across farming and combat. If two SSAs are close, crit chance often wins unless the other roll fixes a clear bottleneck like overflow.
↖ 4) Blue hive: Bee Ability Rate or Instant Conversion on SSA—what do I pick?
If you discover your runs feel inconsistent and your token engine stalls, then pick BAR.
If you discover you overflow constantly during boosts, then pick Instant Conversion (and also value Convert Rate more).
↖ 5) When should I start chasing perfect SSA passives?
When you're endgame and committed to a color. If you still might swap colors, then transition-friendly choices usually save honey and frustration.
↖ 6) What's the most common amulet mistake you see?
Chasing pollen on everything. If conversion is the real bottleneck, more pollen just makes your bag explode faster—your session looks busy, but your honey doesn't scale.
↖ Summary
I treat amulets like a toolkit: each one fixes a specific weakness in your farming loop. Early game is about smart milestones (Moon 10-roll capacity cap, Star once per tier), midgame is about fixing the bottleneck you can actually feel (overflow, uptime, or damage), and endgame is where you commit to Blue/Red/White and chase optimized SSA lines and passives.
If you use the rolling order and stop-loss rules here, you'll spend less honey rerolling and more honey actually getting stronger—your boosts become predictable, and your honey/hour climbs for reasons you can explain.

Most Popular Posts
- Bee Swarm Simulator Progression Guide: Best Gear Order from Early Game to Endgame
- Bee Swarm Simulator Bee Bear Quest Guide: Best Fields, Blooms, Stickers & Petal Cub Tips
- Bee Swarm Simulator Planters Guide: Best Fields, Nectar, Growth Times, and Buying Order
- How to Make 20B+ Pollen in Hive Hub as a Blue Hive in Bee Swarm Simulator
- Bee Swarm Simulator Best Mythic Bee: Ranked for Every Hive
- BSS Beesmas Update This Week: BBM Quest, Honeyday, Timer Extension, and Best Prep Guide
Popular Category Lists
- Grow a Garden / (286)
- ARC Raiders / (266)
- CoD: Black Ops 7 / (166)
- Monopoly Go / (146)
- MLB 26 / (145)
- Star Citizen / (116)
- Steal a Brainrot / (89)
- ARK Survival Ascended / (74)
- Sailor Piece / (68)
- Forza Horizon 6 / (63)
- Diablo IV / (61)
- Blox Fruits / (60)
- CoD: BLACK OPS 6 / (55)
- Adopt Me / (53)
- Path of Exile 2 / (48)
- Monster Hunter Wilds / (46)
- Windrose / (44)
- Grow a Garden 2 / (42)
- Path of Exile / (40)
- Bee Swarm Simulator / (36)


