


 0
0Bee Swarm Simulator Progression Guides: From Fresh Account to Endgame Meta
- WYNN
- Share
- Bee Swarm Simulator
- 01/10/26
- 6179
Bee Swarm Simulator is deceptively punishing. You join the game, see cute bees, and assume it's a casual clicker. But if you don't have a mathematical plan, you will hit a wall where upgrades seem impossible to afford. The hardest part isn't the endgame; it's the beginning, where resources are scarce and every decision counts.
We have combined the best strategies from fresh account playthroughs and endgame optimization to bring you this definitive guide. Whether you are a manual clicker or a macro user, here is how to progress efficiently without wasting your time.
- The Foundation (0 - 25 Bees)
- The Early Shopping List
- Critical Tip: The King Beetle Glitch
- The Mountain Top & The 152 Million Rule
- Gear Priority Order
- The 152 Million Cutoff
- The Midgame Split (Ace Shop & Macro)
- The Mask Dilemma: Honey vs. Bubble
- Essential Accessories
- Pro Tip: Sprinkler Stacking
- Hive Composition & Event Bees
- The Optimal Event Bee Order
- The Golden Rule of Star Treats
- The Spirit Petals & Endgame Transition
- The Modern Petal Order
- The Coconut Grind
- Choosing a Hive Color (SSA)
- Which Color is Best?
- Frequently Asked Questions
- Final Thoughts
↖ The Foundation (0 - 25 Bees)
Your first major goal is simple: unlock the Mountain Top Shop. To do this, you need 25 bees.
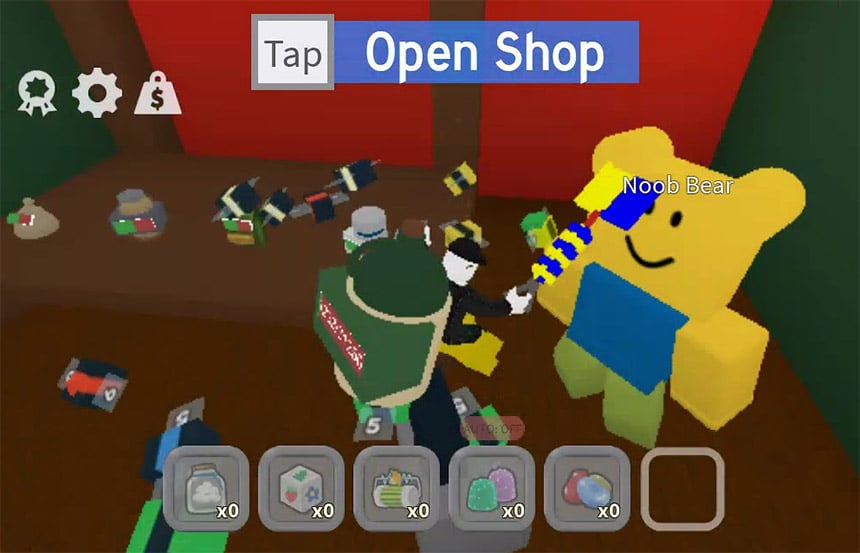
↖ The Early Shopping List
Don't overthink the Noob Shop. You can skip several of the cheapest tools because honey generation ramps up quickly. Buy tools in the order they appear, but your focus should be on hive slots and basic eggs.
↖ Critical Tip: The King Beetle Glitch
There is a secret to getting massive amounts of honey early on: The King Beetle. Normally, you need high-level bees to defeat him, but you can cheese this fight immediately.
1. Enter the King Beetle's lair (behind the clover field).
2. Run immediately to the corner of the room.
3. Stand still.
4. Due to a pathfinding blind spot, the Beetle cannot damage you here. You can kill him safely, earning rewards that would normally take hours to grind.
↖ The Mountain Top & The 152 Million Rule
Once you hit 25 bees, stop buying hive slots. You are now in the Mountain Top zone, and your spending strategy needs to change immediately.
↖ Gear Priority Order
You need to acquire the full Mondo gear set. While the order is flexible, I recommend this path for maximum efficiency:
| Item | Why You Need It |
|---|---|
| 1. Beekeeper Boots | Movement speed is king. Faster walking means faster farming. |
| 2. Mondo Belt Bag | Capacity is the bottleneck for early game quests. |
| 3. Beekeeper Mask | Decent stats, but less impactful than the boots. |
↖ The 152 Million Cutoff
After you have the gear above, go back to buying hive slots. Keep clicking that button until you have roughly 33 bees.
Here is the specific rule: When the cost of your next hive slot reaches 152 Million Honey, stop.
At this exact price point, it becomes mathematically better to buy the Porcelain Dipper than another bee. Buy the Dipper, then push to 35 bees.
Don't Forget the Glider: Somewhere in this phase, spend the 5 million honey for the Glider. It is not just a toy; the mobility increase drastically improves your honey per hour.
↖ The Midgame Split (Ace Shop & Macro)
You now have 35 bees and the Porcelain Port-O-Hive (which you should buy for 250M). You are entering the Ace Shop territory. This is where your playstyle dictates your gear.
↖ The Mask Dilemma: Honey vs. Bubble
Old guides will tell you to buy the Honey Mask. However, the modern meta has shifted.
If you Macro (AFK Farm): Buy the Bubble Mask. It regenerates bubbles that collect pollen while you sleep. Skip the Honeycomb Belt for now to save materials.
If you Play Manually: You can still buy the Honey Mask for its Coin Scatter ability, which is great for active boosting. However, the Bubble Mask is cheaper and arguably better for transitioning to endgame.
Verdict: If you are unsure, go with the Bubble Mask. It is cheaper and future-proofs you for the Blue Hive meta.
↖ Essential Accessories
Regardless of your mask choice, you must buy:
1. Cobalt & Crimson Guards: These are non-negotiable. Even endgame players wear these.
2. Honeycomb Belt: If you are playing manually, buy this immediately. If you macro, you can delay it, but you will need it eventually.
↖ Pro Tip: Sprinkler Stacking
You don't need the Supreme Saturator to be efficient. When placing sprinklers, jump in place. This allows you to stack multiple sprinklers on the exact same spot. This creates a zone of instant flower regeneration, allowing you to farm endlessly without moving.
↖ Hive Composition & Event Bees
At this stage, you should be running a Mixed Hive. Do not try to specialize in a color yet. Your power comes from Event Bees.
↖ The Optimal Event Bee Order
Most Event Bees are bought with Tickets. Do not waste tickets on Royal Jelly; save them for these bees in this specific order:
| Order | Bee | Reason |
|---|---|---|
| 1 | Tabby Bee | Needs to stack Tabby Love permanently. Get it ASAP. |
| 2 | Photon Bee | Infinite energy and massive instant conversion. |
| 3 | Cobalt & Crimson | Essential for mixed hive synergy. |
| 4 | Festive Bee | Good passive gifts. |
| 5 | Puppy Bee | Only useful later for leveling bees (bond saving). |
Obtainable via Gameplay:
Vicious Bee: Costs 250 Stingers. Essential for mob killing.
Gummy Bee: Costs 2500 Gumdrops.
Bear Bee: (Robux) If you spend money, get this. It's second only to Tabby Bee.
↖ The Golden Rule of Star Treats
Never use a Star Treat on a non-Event bee. Mythics can be gifted with blueberries; Event bees cannot.
Gifting Priority: Bear (if owned) -> Gummy/Vicious -> Tabby -> Photon.
↖ The Spirit Petals & Endgame Transition
You are now grinding Spirit Bear quests. You will receive three Spirit Petals total. How you use the first one is the subject of much debate, but the math is clear.
↖ The Modern Petal Order
1. Petal 1 → Petal Belt: Yes, the Belt. It gives Amp and capacity that scales your entire hive.
2. Petal 2 → Windy Bee: Donate to the Wind Shrine.
3. Petal 3 → Petal Wand: By the time you get this, it is just a nice accessory. The Belt is the real powerhouse.
Exception: If you have 5 Diamond Eggs, craft the Diamond Mask immediately. If not, stick to the Bubble Mask and keep grinding.
↖ The Coconut Grind
While working on petals, you need to kill the Coconut Crab on cooldown.
Goal: Reach 45 Hive Slots.
Gear: Buy the Coconut Canister first, then the Coconut Clogs.
Warning: Save your Tropical Drinks! You need 1,500 for the Coconut Belt later. Do not waste them.
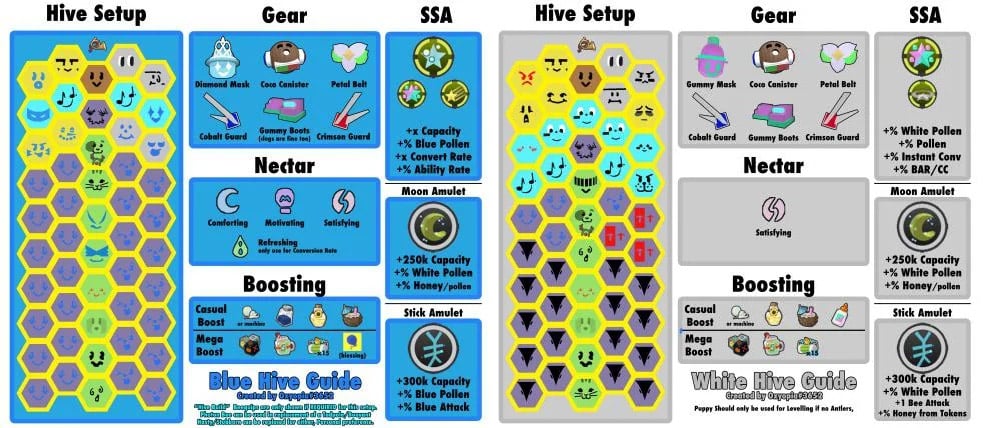
↖ Choosing a Hive Color (SSA)
You have reached the endgame door. You have your Coconut gear and you have discovered 40 Gifted Bee Types. This unlocks the Supreme Star Amulet (SSA).
Do not switch hive colors until you have the SSA.
↖ Which Color is Best?
| Hive Color | Cost | Passive Required | Verdict |
|---|---|---|---|
| Blue | Low | Pop Star | Start here. It is cheap, macro-friendly, and makes trillions without expensive double-passives. |
| Red | High | Scorching Star | Requires precise gameplay and expensive Mythics (Precise/Spicy). |
| White | Extreme | Gummy Star | Only for the ultra-rich. Requires Gummy Baller to be viable. |
My Recommendation: Go Blue Hive first. Buy the Tide Popper (or Petal Planter), macro for honey, and if you want to switch to Red or White later, use your Blue Hive billions to fund the switch.
↖ Frequently Asked Questions
Q: Can I skip the Petal Belt and get the Wand first?
A: You can, but it's less efficient. The Wand is a tool; the Belt is a stat-stick for your whole hive. The Belt provides better returns on investment in the modern game.
Q: I don't macro. Is Blue Hive still good?
A: Yes. While Blue excels at macroing, it is still the most budget-friendly option. You can do manual Bucko Bee quests and still outperform a cheap Red hive.
Q: How do I get Mythic Bees?
A: Don't rely on luck early on. Focus on Black Bear's questline (gives a Mythic Egg) and killing Commando Chick 50 times. Later, you will use Royal Jellies in bulk.
Q: When should I buy the Glider?
A: As soon as 5 million honey feels cheap to you. Usually, this is right after you buy your 30-33 hive slots.
↖ Final Thoughts
Progression in Bee Swarm Simulator is a marathon, not a sprint. The players who quit are usually the ones who try to force a Red Hive too early or waste their Diamond Eggs on the sticker printer.
Stick to the plan: King Beetle early -> Porcelain Dipper at 152M -> Bubble Mask -> Petal Belt -> Blue Hive.
If you follow this roadmap, you won't just be playing the game; you'll be dominating the leaderboards. Good luck, and happy honey making

Most Popular Posts
- Bee Swarm Simulator Progression Guide: Best Gear Order from Early Game to Endgame
- Bee Swarm Simulator Bee Bear Quest Guide: Best Fields, Blooms, Stickers & Petal Cub Tips
- Bee Swarm Simulator Planters Guide: Best Fields, Nectar, Growth Times, and Buying Order
- How to Make 20B+ Pollen in Hive Hub as a Blue Hive in Bee Swarm Simulator
- Bee Swarm Simulator Best Mythic Bee: Ranked for Every Hive
- BSS Beesmas Update This Week: BBM Quest, Honeyday, Timer Extension, and Best Prep Guide
Popular Category Lists
- Grow a Garden / (286)
- ARC Raiders / (266)
- CoD: Black Ops 7 / (166)
- Monopoly Go / (146)
- MLB 26 / (145)
- Star Citizen / (116)
- Steal a Brainrot / (89)
- ARK Survival Ascended / (74)
- Sailor Piece / (68)
- Forza Horizon 6 / (63)
- Diablo IV / (61)
- Blox Fruits / (60)
- CoD: BLACK OPS 6 / (55)
- Adopt Me / (53)
- Path of Exile 2 / (48)
- Monster Hunter Wilds / (46)
- Windrose / (44)
- Grow a Garden 2 / (42)
- Path of Exile / (40)
- Bee Swarm Simulator / (36)


