


 0
0Bee Swarm Simulator Tide Popper Crafting: The Practical Blue Hive Guide & Material Breakdown
- WYNN
- Share
- Bee Swarm Simulator
- 01/14/26
- 2548
Getting the Bee Swarm Simulator Tide Popper isn't just about staring at a shopping list and suffering—it's about supply chain management. If you try to brute force every single ingredient through the blender, you are effectively choosing the slowest, most expensive path possible.
From our experience rushing endgame tools, the biggest trap players fall into is the Full Crafting Fallacy. They look at the requirements, open the blender, and watch their fruit reserves evaporate. The math we are about to show you is intimidating (hello, six-figure blueberry counts), but understanding it is the key to beating it.
Let's break down exactly what you need, verify the heavy math so you can trust the numbers, and then lay out the actual fastest route that relies on smart sourcing rather than endless crafting.
- 1. The Sticker Price (Final Deliverables)
- 2. The Math Check: Verifying the Insane Numbers
- The Purple Potion Load
- The Hidden Blue Extract Cost
- The Soft Wax Reality (The Common Confusion)
- The Royal Jelly Count (~116,175)
- 3. The Worst Case Scenario: If You Craft Everything
- 4. The Fastest Real Plan (What We Actually Do)
- 4.1 Swirled Wax: The Drop Strategy
- 4.2 Super Smoothies: Buy First, Craft Last
- 4.3 Tropical Drinks: The Cooldown Game
- 4.4 Stingers: The Vicious Cycle
- 4.5 Bucko Quests: The Hidden Wall
- 5. Your Living Checklist
- FAQ
- Final Thoughts
↖ 1. The Sticker Price (Final Deliverables)
These are the items the game physically asks you to hand over to craft the tool. This is your baseline.
| Requirement | Amount | Why it matters |
|---|---|---|
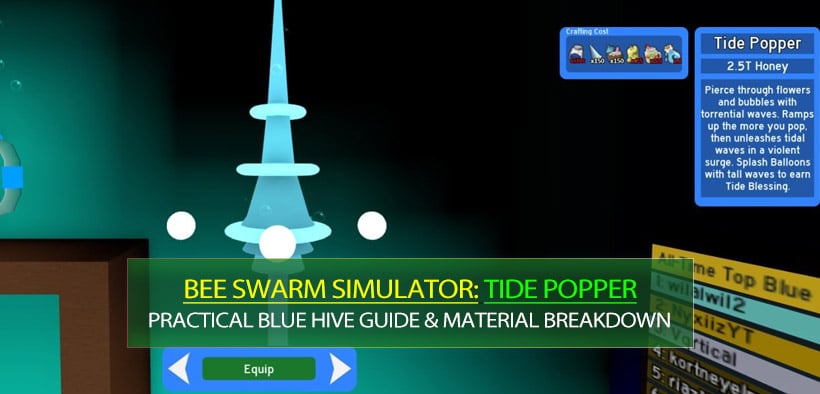
| Honey | 2.5T | The easy part. Plan your boosts around Blue rotations. |
| Blue Extracts | 1,500 | Direct payment. This is separate from extracts used inside other crafts. |
| Stingers | 150 | Time-gated by Vicious Bee spawns. |
| Tropical Drinks | 150 | Don't panic; the Coconut Crab helps here. |
| Swirled Wax | 75 | The Boss. The single biggest bottleneck for most players. |
| Super Smoothies | 50 | Expensive to craft, better to buy or earn. |
| Comforting Vials | 3 | A minor nectar chore if planned early. |
| Bucko Bee Quests | 250 | The true time gate. Consistency is king here. |
↖ 2. The Math Check: Verifying the Insane Numbers
We've crunched the numbers based on a Full Decomposition model. This assumes you are crafting Swirled Wax from scratch (using Purple Potions, Hard Wax, and Soft Wax) and crafting those components from base fruits.
If you are wondering if your calculations are correct, here is our validation:
↖ The Purple Potion Load
For Super Smoothies: 50 Smoothies × 3 Potions = 150
For Swirled Wax: 75 Wax × 6 Potions = 450
Total Purple Potions Needed:600
↖ The Hidden Blue Extract Cost
Direct Cost: 1,500
Hidden in Purple Potions: 600 Potions × 3 Extracts = 1,800
Total Blue Extracts:3,300 (This is why your blueberries disappear).
↖ The Soft Wax Reality (The Common Confusion)
People often ask if we are double-counting here. We aren't.
Directly into Swirled Wax: 75 × 9 Soft Wax = 675
Hidden in Hard Wax: 75 Swirled need 225 Hard Wax. Each Hard Wax needs 3 Soft Wax. (225 × 3) = 675.
Total Soft Wax: 675 + 675 = 1,350.
↖ The Royal Jelly Count (~116,175)
This figure is correct only if you are crafting every component that requires Royal Jellies (Extracts, Glue, Star Jelly for Smoothies, Moon Charms). It aggregates every single jelly spent in the chain.
↖ 3. The Worst Case Scenario: If You Craft Everything
This table represents the Do Not Do This strategy. It shows the total raw materials required if you refuse to use drops or shops and rely 100% on the blender. Use this to understand the scale of the challenge, not as a shopping list.
| Raw Material | Total Count | Source Breakdown |
|---|---|---|
| Blueberries | 603,750 | Extracts + Gumdrops chain |
| Strawberries | 528,750 | Red Extracts + Gumdrops chain |
| Pineapples | 495,000 | Moon Charms + Gumdrops chain |
| Coconuts | 4,500 | Tropical Drinks |
| Neonberries | 1,950 | Potions + Smoothies |
| Honeysuckles | 6,750 | Soft Wax |
| Enzymes | 2,925 | Drinks + Wax chain |
| Oils | 2,250 | Drinks + Wax chain |
| Glues | 1,800 | Purple Potions |
| Royal Jellies | ~116,175 | All sub-crafts combined |
Why this matters:
If you try to craft 75 Swirled Wax, you trigger a chain reaction that demands 1,800 Glues and nearly 3,000 Enzymes. This is the bottleneck. The moment you reduce the need to craft Swirled Wax, this entire list shrinks dramatically.
↖ 4. The Fastest Real Plan (What We Actually Do)
We are optimizing for speed, not for crafting completionism. Here is the practical roadmap to cutting those massive numbers down.
↖ 4.1 Swirled Wax: The Drop Strategy
Target: 75
Strategy: Treat this as a drop target, not a craft target.
Every single Swirled Wax you find (via Puffshrooms, Beesmas events, or high-tier planters) saves you:
6 Purple Potions
18 Soft Wax
And all the fruits attached to them.
If you find you are short: Only craft the final few needed to cross the finish line. Do not start crafting them at 0/75.
↖ 4.2 Super Smoothies: Buy First, Craft Last
Target: 50
Strategy: Shop > Craft.
Crafting a Smoothie is painful because it eats Star Jellies and Glitter.
Buy them from the Bee Bear Catalog (during Beesmas) or bundle packs if you are a spender.
If you must craft them: Be aware this will drain your Tropical Drinks and Star Jellies rapidly.
↖ 4.3 Tropical Drinks: The Cooldown Game
Target: 150 (Direct) / 450 (If crafting Smoothies)
Strategy: Passive Accumulation.
Keep the Coconut Crab on strict cooldown.
If you notice your Oil and Enzyme counts hitting zero, it's usually because you are over-crafting Tropical Drinks. Rely on the Crab drops to sustain this stack.
↖ 4.4 Stingers: The Vicious Cycle
Target: 150
Strategy: Active Farming.
There is no shortcut here other than checking the Vicious Bee spawns regularly.
Pro Tip: Do not buy Stingers with tickets unless you are literally 10-20 short and desperate. The ticket cost is astronomical compared to the effort of server hopping for spawns.
↖ 4.5 Bucko Quests: The Hidden Wall
Target: 250 Quests
Strategy: Consistency over Perfection.
You can have all the materials in the world, but if you only have 150 quests done, you aren't getting the tool.
If you get a difficult quest: Don't spend days on it. Use your macro settings or manual play to cycle through it. The goal is quest completion volume, not honey per hour.
↖ 5. Your Living Checklist
Copy this table. Update it weekly. It focuses on the Gap—the only number that matters.
| Category | Need | Have | Gap | Fastest Source | Craft Only If... |
|---|---|---|---|---|---|
| Swirled Wax | 75 | Puffs / Events | Gap is small & Oils are high | ||
| Super Smoothies | 50 | Shops / Bundles | You have excess Star Jellies | ||
| Tropical Drinks | 150 | Coconut Crab | You are blocked on Smoothies | ||
| Blue Extract | 1,500 | Macro / Crafting | Always (for the direct cost) | ||
| Stingers | 150 | Vicious Bee | Never (unless <10 left) | ||
| Bucko Quests | 250 | NPC Cycle | N/A |
↖ FAQ
Q: Is the 116,175 Royal Jelly number real?
A: Yes, but only under the specific model where you craft everything from scratch, including the Glues, Extracts, and Moon Charms. In reality, you will likely loot many of these intermediate items, so your actual Royal Jelly spend will be lower.
Q: Did we double count the Soft Wax?
A: No. The recipe for Swirled Wax requires Soft Wax directly (9) and Hard Wax (3). Since Hard Wax is made of Soft Wax (3 each), the total math is 9 + (3*3) = 18 Soft Wax per Swirled Wax.
Q: Why focus on Swirled Wax first?
A: Because it is the parent ingredient. If you eliminate the need to craft one Swirled Wax, you eliminate the need for 6 Purple Potions. This cascades down the chain, saving you thousands of Blueberries and Gumdrops.
Q: Should I use the Blender for Blue Extracts?
A: Yes. Unlike Swirled Wax, Blue Extracts are a base-level craft. You will likely need to macro Blueberries and craft these continuously to hit the 1,500 (or 3,300) target.
↖ Final Thoughts
The math for the Tide Popper is undeniably heavy, but it assumes a worst-case scenario where you have zero luck and zero event participation.
The secret to getting this tool insanely fast isn't about having 600,000 Blueberries. It's about realizing that Swirled Wax and Super Smoothies are the leverage points. If you can source those two items from Puffs, events, or shops, the rest of the material list collapses into something entirely manageable. Stop looking at the mountain; start chipping away at the wax.

Most Popular Posts
- Bee Swarm Simulator Progression Guide: Best Gear Order from Early Game to Endgame
- Bee Swarm Simulator Bee Bear Quest Guide: Best Fields, Blooms, Stickers & Petal Cub Tips
- Bee Swarm Simulator Planters Guide: Best Fields, Nectar, Growth Times, and Buying Order
- How to Make 20B+ Pollen in Hive Hub as a Blue Hive in Bee Swarm Simulator
- Bee Swarm Simulator Best Mythic Bee: Ranked for Every Hive
- BSS Beesmas Update This Week: BBM Quest, Honeyday, Timer Extension, and Best Prep Guide
Popular Category Lists
- Grow a Garden / (286)
- ARC Raiders / (262)
- CoD: Black Ops 7 / (166)
- Monopoly Go / (146)
- MLB 26 / (144)
- Star Citizen / (111)
- Steal a Brainrot / (89)
- Sailor Piece / (68)
- ARK Survival Ascended / (66)
- Diablo IV / (61)
- Forza Horizon 6 / (60)
- Blox Fruits / (60)
- CoD: BLACK OPS 6 / (55)
- Adopt Me / (53)
- Path of Exile 2 / (48)
- Monster Hunter Wilds / (46)
- Windrose / (44)
- Path of Exile / (40)
- Grow a Garden 2 / (38)
- Bee Swarm Simulator / (36)


