


 0
0ARC Raiders Hidden Bunker Guides: Antennas, Terminal Loot, and Best Mode
- KIVRI
- Share
- ARC Raiders
- 01/14/26
- 1598
Calling the Spaceport Hidden Bunker the best mode in ARC Raiders isn't just hype—it is a specific kind of value proposition. When this event pops, it compresses a 40-minute timer, high-tier cell farming, and blueprint hunting into one dense loop. The catch is simple: you are trading comfort for chaos. More players, more bots, and a shared objective mean you have to play this like a system, not a gamble.
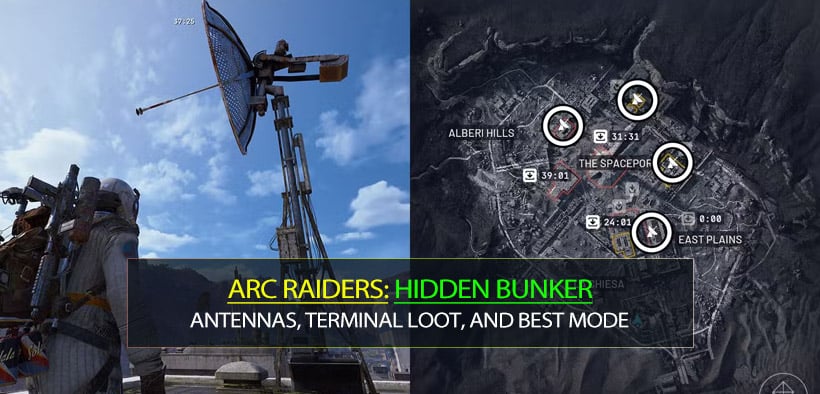
Whether you are chasing the Volcano shotgun blueprints, farming cells for upgrades, or trying to max out your Trial score, the bunker punishes indecision. Below is a structured guide based on what consistently works for us—from the specific double-interaction rule for antennas to the exact way we handle terminal downloads without getting wiped.
- 1. Is It Actually the Best Mode?
- Why it is special (The Mid-to-Late Game Goldmine)
- When to avoid it
- 2. Breaking In (The Antenna Mechanics)
- The Rule of 4 and Shared Progress
- The Double Interaction Trap
- Tactical Approach
- 3. Inside the Bunker (Terminals & Downloads)
- The Download Loop (Start → Hold → Collect)
- Our No-Drama Terminal Method
- 4. The Farm (Coins, Cells, and Blueprints)
- Objective 1: The Volcano Blueprint Hunt
- Objective 2: Elite Cell Farming
- Objective 3: Trial Max Score
- 5. Loadout Philosophy & Team Roles
- The One Weapon Principle
- The ROI Check (Economy)
- 6. Extraction: The Final Hurdle
- When to Leave
- Exit Strategy
- FAQ
- Summary
↖ 1. Is It Actually the Best Mode?
Before we break down the route, let's define if this event is actually for you. We judge value by three metrics: progress speed, risk per minute, and repeatability.
↖ Why it is special (The Mid-to-Late Game Goldmine)
Progress Density: You can stack multiple goals in one run. You get elite cells for upgrades, cash to fund ammo, and blueprint attempts all in one specific zone.
Shared Activation: The lobby unintentionally cooperates. Since antenna progress is shared, the bunker often opens even if we don't do every single step.
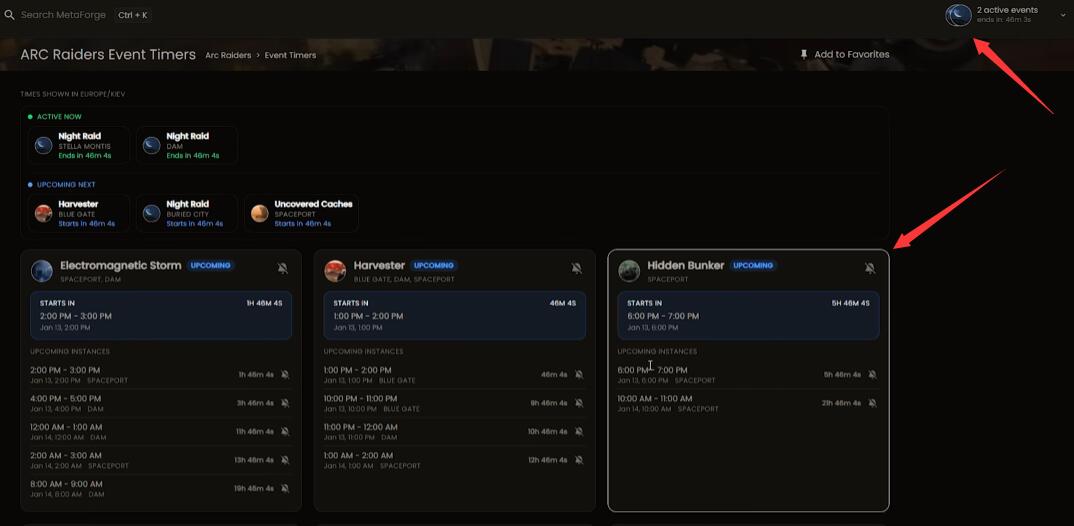
Time Extension: The map modifier effectively gives you up to 40 minutes. This allows for a Open → Farm → Extract loop that doesn't feel rushed—unless you waste time.
↖ When to avoid it
Early Economy: If you are under-geared, the bunker is a money sink. Rockets and medical tools are not charity. If you cannot afford to lose a kit, do not contest the interior.
The Sweat Factor: If your lobby is ultra-competitive, you might win the PvE fight but lose the run to a third-party squad camping the exit.
Practical Verdict: For mid-to-late progression—when you can afford real anti-armor ammo—Hidden Bunker is the best event loop on Spaceport. For early progression, treat it as a scav run: let others open it, loot the leftovers, and leave.
↖ 2. Breaking In (The Antenna Mechanics)
The bunker doesn't just open; the lobby has to earn it. This is where most teams fail because they misunderstand the trigger mechanism.
↖ The Rule of 4 and Shared Progress
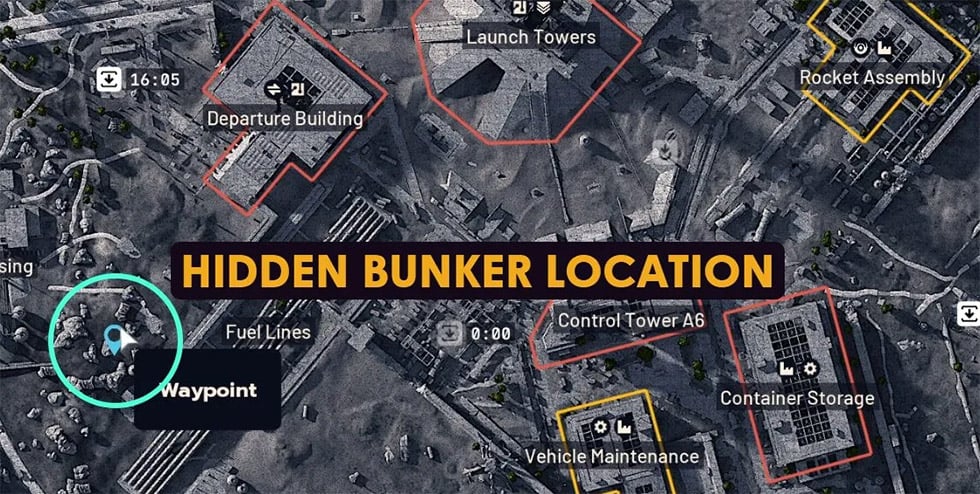
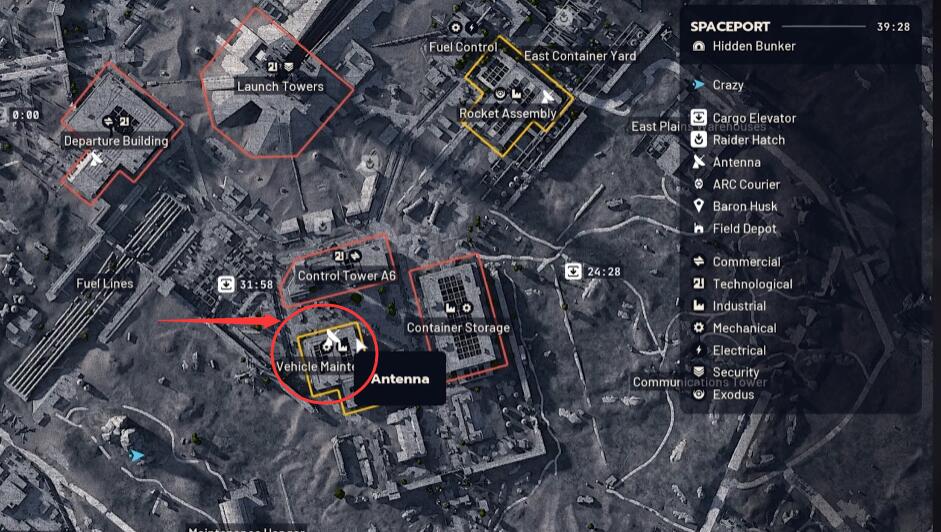
To reveal the bunker (located west of the Departure Building), four rooftop antenna dishes must be fully activated. These appear as icons on your map. The crucial detail is that progress is shared. One player can do all four, or four different squads can do one each.
↖ The Double Interaction Trap
This is the most common mistake we see. You cannot just press the button and leave. Each antenna requires two distinct interactions:
1. First Interaction: Triggers an alarm and spawns a wave of Wasps and a Hornet ARC.
2. The Fight: You must kill or de-aggro these threats. You cannot proceed while under direct attack.
3. Second Interaction: Once clear, you must interact again. Only then does the game display a completion message and remove the icon from the map.
If you only do the first interaction, you haven't helped. You have just left a rooftop full of angry drones for the next team.
↖ Tactical Approach
Spawn Check: Identify the nearest antenna. If it is safe, turn it on to build momentum.
The Pivot: If you see an antenna is already active, pivot immediately toward the bunker area.
Verticality: Bring zip lines or a snap hook. Some antenna roofs are death traps if you try to climb them manually under fire.
↖ 3. Inside the Bunker (Terminals & Downloads)
Once inside, the tempo flips. It is no longer about DPS; it is about positioning and timing. There are 8 data terminals available, and they operate on a strict cooldown system.
↖ The Download Loop (Start → Hold → Collect)
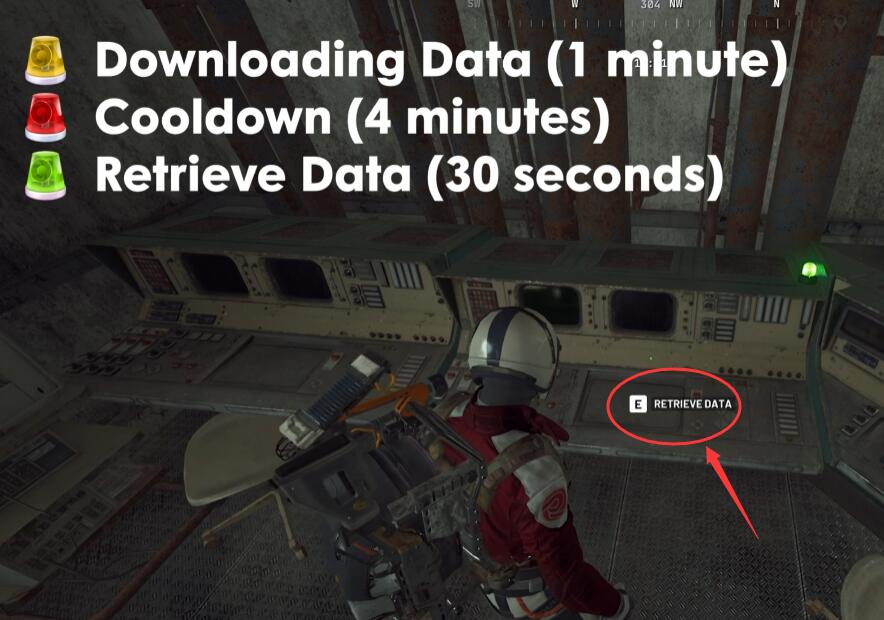
Downloads are not instant. They are a king of the hill mini-game.
1. Start (Yellow): Interact with a dormant terminal. The indicator turns yellow.
2. Hold: You must stay within a small radius of the terminal. If you wander off to loot a crate, the download fails.
3. Collect (Green): When complete, the screen turns green. You have a short window (approx. 30 seconds) to collect the data.
4. Cooldown (Red): After collection, the terminal enters a long cooldown (~4 minutes). You cannot reuse it immediately.
↖ Our No-Drama Terminal Method
We don't run around like headless chickens. We assign roles:
The Anchor: One player stays glued to the terminal radius. Their only job is to survive and secure the download.
The Overwatch: The other teammates watch the doors. If you hear footsteps, the Overwatch fights while the Anchor finishes the download.
Critical Rule: If you are being pushed by a squad mid-download, abandon it. A failed download costs 2 minutes; a squad wipe costs 40 minutes.
↖ 4. The Farm (Coins, Cells, and Blueprints)
This is where you make your profit. Depending on your goal, your behavior should change.
↖ Objective 1: The Volcano Blueprint Hunt
The rare Volcano shotgun blueprint can drop here.
Strategy: Speed is everything. Do not waste time on antennas if others are doing them. Get to the bunker entrances early.
Loot Priority: Hit the high-value containers first. Blueprint containers often have distinct visual cues. If you find it, extract immediately. Do not get greedy.
↖ Objective 2: Elite Cell Farming
The area outside the bunker is often patrolled by Bombardiers and Bastions.
Strategy: Use the bunker exterior as a kill box.
The Math: Only engage if you can secure the kill quickly. If you spend 4 rockets and 2 medkits to kill one Bastion and then get third-partied, you have lost Coins.
↖ Objective 3: Trial Max Score
Strategy: You need volume. You need to hit as many of the 8 terminals as possible.
Routing: Move in a circle. As soon as one terminal goes red (cooldown), move to the next. Do not backtrack until the cooldowns reset.
↖ 5. Loadout Philosophy & Team Roles
We don't win Hidden Bunker with bravery; we win it with role coverage. A squad with three assault rifles will lose to the first heavy armor unit they see.
↖ The One Weapon Principle
We bring at least one ground-melter (anti-armor) and at least one anti-air option.
| Role | What They Carry | Why It Matters |
|---|---|---|
| Anti-Armor Lead | Grenade Launchers / Rockets | Deletes Bastions/Bombardiers. Without this, fights drag on and attract third parties. |
| Anti-Air / Overwatch | Reliable Mid-Range / LMG | Clears the Wasps/Hornets from antennas and watches ridgelines for enemy players. |
| Utility / Anchor | Defibs + Scanners | Keeps the team alive inside the bunker and holds the download radius. |
↖ The ROI Check (Economy)
Ammo is expensive. Before you pull the trigger, ask:
Is this rocket an investment? If the target won't drop cells or cash equal to the cost of the ammo, we skip it unless it is a survival necessity.
↖ 6. Extraction: The Final Hurdle
We lose more successful runs on the way out than we do inside. The map modifier gives you time, but it also gives enemies time to set up ambushes.
↖ When to Leave
The Quiet Signal: If the bunker suddenly goes quiet, it usually means other squads have rotated to the exits. Leave immediately.
Inventory Weight: If you have the blueprint or the cells you needed, stop looting. One more box is how you die.
↖ Exit Strategy
Avoid the Center: The extraction point nearest the bunker is often a kill zone.
Go Wide: We prefer taking a longer hike to a perimeter extraction point. It takes 2 extra minutes, but the survival rate is significantly higher.
↖ FAQ
Q: Is Hidden Bunker the best way to farm cells?
A: For mid-to-late game players, yes. The density of elite targets (Bastions/Bombardiers) combined with the bunker loot outperforms normal roaming. However, if you cannot kill elites efficiently, you will lose money on ammo.
Q: Why do I sometimes find the bunker open but empty?
A: You were too slow. The shared progress means aggressive teams will camp the entrance as the fourth antenna is activated. If you are late, pivot to farming the elites outside rather than fighting over empty boxes inside.
Q: Can I collect a download if someone else started it?
A: Yes. If you kill an enemy who was holding a terminal, or if you sneak in during the Green window, you can steal the data pickup.
Q: Does the Volcano blueprint only spawn inside the bunker?
A: While the bunker is the primary source, reports suggest it can spawn in high-tier containers in the surrounding area during the event. However, the bunker interior remains your best statistical bet.
Q: What is the biggest mistake teams make?
A: Treating the bunker like a museum. They search every corner, read every screen, and linger too long. This is a heist, not a tour. Get in, get the specific loot you need, and get out before the map collapses on you.
↖ Summary
The Spaceport Hidden Bunker is a test of efficiency. It rewards teams who understand the double-interaction antenna rule, who respect the terminal cooldowns, and who have the discipline to extract early. Treat it like a repeatable operation: Open fast, kill efficiently, loot with a plan, and leave before the rest of the lobby decides to check the exits.

Most Popular Posts
- ARC Raiders Riven Tides Key Room Guide: Best Hotel Keys, Loot Routes, Secure & Crane Storage
- ARC Raiders Damage Fireflies Trial Guide: Best Farm Method on Buried City Night Raid
- ARC Raiders Riven Tides Update: New Map & Items, ARC Turbine, Rewards, and Best Early Strategy
- ARC Raiders Bettina Guide: Best Build, Buffs, and How to Use It Against ARC
- Arc Raiders Season 4 Riven Tides Update, Rewards, Safe Skins, and Release Timeline
- ARC Raiders Solo Search Supply Drops Guide: Best Buried City Route, Beacon Locations
Popular Category Lists
- Grow a Garden / (286)
- ARC Raiders / (262)
- CoD: Black Ops 7 / (166)
- Monopoly Go / (146)
- MLB 26 / (144)
- Star Citizen / (112)
- Steal a Brainrot / (89)
- Sailor Piece / (68)
- ARK Survival Ascended / (67)
- Diablo IV / (61)
- Forza Horizon 6 / (60)
- Blox Fruits / (60)
- CoD: BLACK OPS 6 / (55)
- Adopt Me / (53)
- Path of Exile 2 / (48)
- Monster Hunter Wilds / (46)
- Windrose / (44)
- Path of Exile / (40)
- Grow a Garden 2 / (40)
- Bee Swarm Simulator / (36)


