


 0
0Black Ops 7 Best Swordfish A1 Class Setup: Meta Build, Attachments, and One-Burst Guide
- JAMIE
- Share
- CoD: Black Ops 7
- 03/18/26
- 1877
The Swordfish A1 is one of those weapons that feels unfair the moment the build is right. Its strength is not just raw damage. It is the fact that a clean four-round burst can delete players so quickly that many fights barely start before they end. That is why this setup focuses on speed, consistency, and control rather than stacking unnecessary stats.
- Why the Swordfish A1 Is Meta
- What makes it strong
- Best Swordfish A1 Class Setup
- Attachment Breakdown
- Optic: Fang Hover Point ELO
- Barrel: 16.5 GAR XL Barrel
- Magazine: ROG Speed Mag
- Rear Grip: R1 Splendor Grip
- Stock: Bows-On Light Stock
- Recommended Full Class Setup
- How to Use It Properly
- Play to its strengths
- Why positioning matters
- Practical takeaway
- Common Mistakes
- Overbuilding for damage range
- Ignoring ADS speed
- Forcing every fight
- FAQ
- Is the Swordfish A1 top tier in BO7?
- What is the most important attachment?
- Do we need extra range?
- Is Speed Mag better than extended mags?
- Is it easy to use?
- Final Takeaway
↖ Why the Swordfish A1 Is Meta
The Swordfish stands out because it is both lethal and stable. In real matches, that means we can hold lanes, punish rotations, and chain streaks without needing a maxed-out weapon.
↖ What makes it strong
- Fast one-burst potential when all four bullets land
- Excellent mid-range control, where most objective fights happen
- Low setup cost, because the best version does not need every slot overbuilt
- Strong snowball effect, especially in Domination and Hardpoint
From practical use, this is the kind of rifle that starts taking over once you get into a rhythm. If you are winning first shots consistently, the lobby can collapse fast.
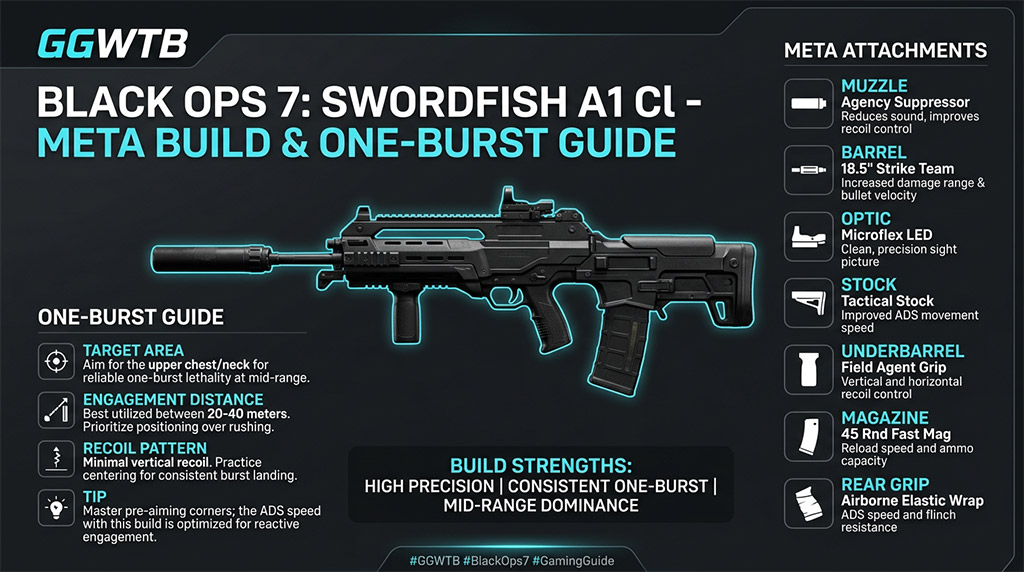
↖ Best Swordfish A1 Class Setup
| Slot | Attachment / Pick | Why We Use It | Priority |
|---|---|---|---|
| Optic | Fang Hover Point ELO | Clean sight picture, open frame, easy target tracking | High |
| Muzzle | None | Recoil help is not essential here; better to save the slot | Low |
| Barrel | 16.5 GAR XL Barrel | Improves bullet velocity so bursts register faster at range | High |
| Magazine | ROG Speed Mag | Faster reloads without overinvesting in ammo count | Medium |
| Rear Grip | R1 Splendor Grip | Boosts ADS speed, which fixes one of the weapon's main weaknesses | Essential |
| Stock | Bows-On Light Stock | Increases aim-walking movement speed for better pre-aim duels | High |
This build works because every attachment points in the same direction: faster first burst, smoother handling, better follow-up pressure.

↖ Attachment Breakdown
Let's keep it simple: the Swordfish does not need much help killing. What it needs is help getting on target faster and staying clean in repeat fights.
↖ Optic: Fang Hover Point ELO
This sight is open and easy to track with. On burst weapons, that matters more than people think because visual clarity helps us place the whole burst more consistently.
↖ Barrel: 16.5 GAR XL Barrel
This is one of the best picks on the class. Because the weapon already hits hard, bullet velocity gives more practical value than forcing extra damage range. Shots land faster, and that leads to cleaner one-bursts.
↖ Magazine: ROG Speed Mag
We do not need a huge mag if bursts are landing. Faster reload is more useful because it keeps momentum going between multi-kill fights.
↖ Rear Grip: R1 Splendor Grip
This is the must-have. The Swordfish can feel a little slow on the raise. ADS speed fixes that and makes the weapon much safer in real lobbies.
↖ Stock: Bows-On Light Stock
This helps in those pre-aim duels where staying slightly mobile keeps us alive. It is not flashy, but it wins fights.
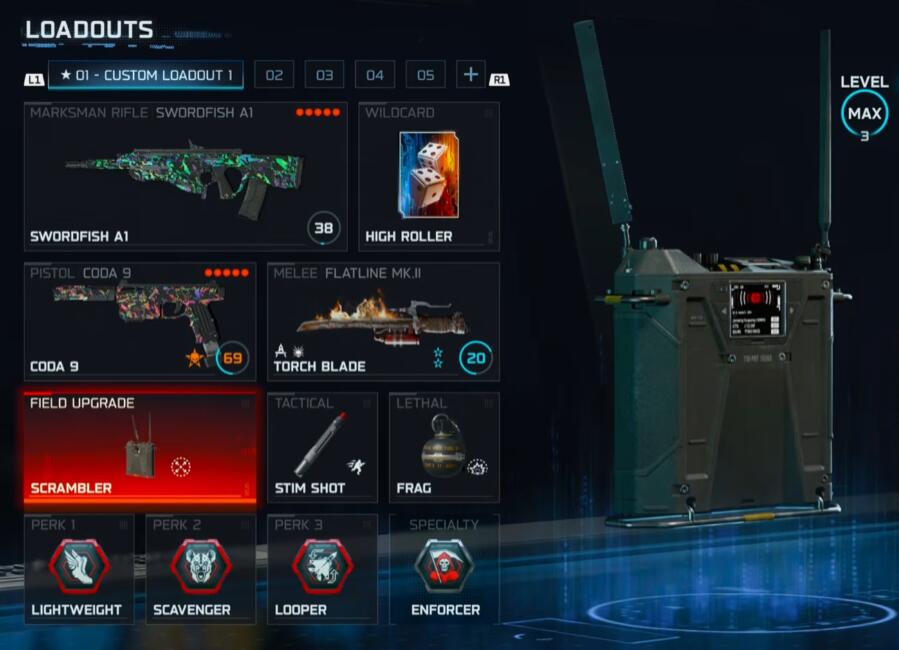
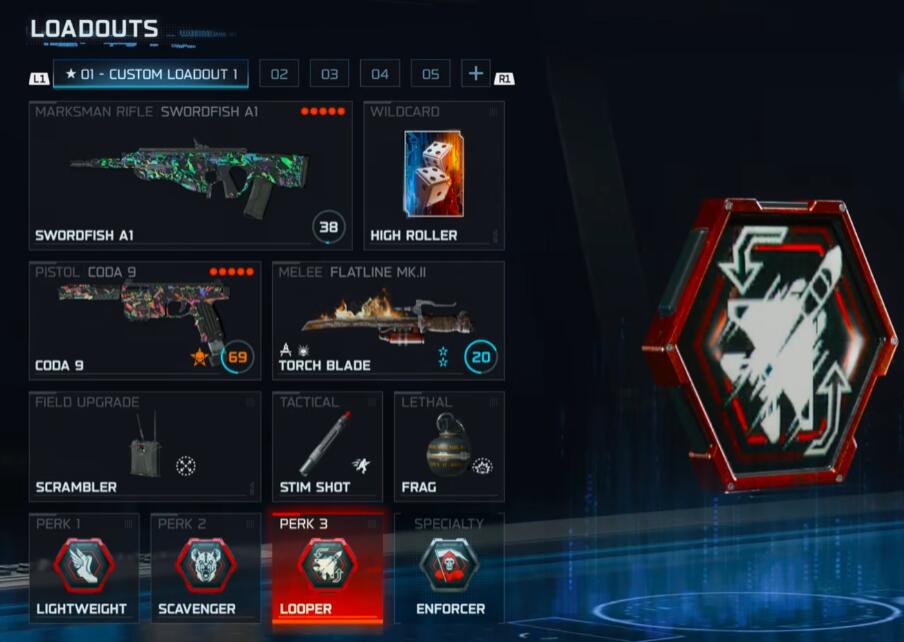
↖ Recommended Full Class Setup
| Category | Recommended Pick | Purpose |
|---|---|---|
| Primary | Swordfish A1 | Main lane-control and burst-kill weapon |
| Secondary | Code 9 | Fast backup for close-range panic fights |
| Tactical | Stim Shot + Performance Boost | Re-challenge faster and keep streaks alive |
| Lethal | Frag Grenade + High Density Explosive | Area denial and objective pressure |
| Field / Utility | Scrambler | Disrupts enemy minimap awareness |
| Perks | Lightweight / Scavenger / Looper | Mobility, ammo sustain, utility uptime |
| Combat Bonus | Enforcer | Faster movement and health regen after kills |
This class is built for players who want to hold control of the map without giving up tempo.
↖ How to Use It Properly
The Swordfish is strongest when we stop treating it like a generic AR.
↖ Play to its strengths
- Pre-aim lanes
- Hold medium range
- Take clean bursts instead of panic spraying
- Use the secondary if someone crashes your space
If you find close-range fights messy, then do not force them. That is exactly why the backup weapon is here.
↖ Why positioning matters
This rifle rewards discipline. On maps with longer sightlines or predictable routes, it can feel oppressive. On tighter maps, it still works, but only if we play corners intelligently and avoid sprinting blind into SMGs.
↖ Practical takeaway
If you can land the full burst, the Swordfish is absurdly efficient. That means even average aim can look strong if your positioning is good.
↖ Common Mistakes
↖ Overbuilding for damage range
A lot of players assume more range equals more power. On this weapon, that is usually wasted value. Velocity and handling matter more.
↖ Ignoring ADS speed
If your rifle feels clunky, your first burst comes late. And if that burst comes late, the whole build falls apart.
↖ Forcing every fight
This is not a run-straight-forward weapon. It is a control weapon. Play it that way, and it rewards you.
↖ FAQ
↖ Is the Swordfish A1 top tier in BO7?
Yes. It is one of the strongest rifles in the current meta because of how reliably it can secure fast burst kills.
↖ What is the most important attachment?
R1 Splendor Grip. ADS speed is the biggest quality-of-life upgrade on the weapon.
↖ Do we need extra range?
Usually no. Bullet velocity tends to help more in actual matches.
↖ Is Speed Mag better than extended mags?
For most players, yes. The reload speed supports streaking better than extra bullets.
↖ Is it easy to use?
Yes, if you play smart. If you pre-aim and avoid reckless close fights, it becomes very consistent.
↖ Final Takeaway
The best Swordfish A1 setup works because it does not overcomplicate the weapon. We are not trying to fix everything. We are simply improving the few areas that matter most: ADS speed, bullet velocity, mobility while aiming, and reload flow.
That is why this build feels so strong in live matches. If you play lanes, keep your bursts controlled, and pick your fights well, the Swordfish A1 can easily feel like one of the best guns in Black Ops 7.

Most Popular Posts
- Black Ops 7 Endgame Exotic Affinity Weapons Guide: Best Bonuses, Full Weapon List, and Farming Tips
- Black Ops 7 Zombies Totenreich Easter Egg Guide: Fast Solo & Co-Op Main Quest Walkthrough
- Black Ops 7 Cherry Fizz Guide: Fastest Illicit Cargo Event Route for Season 4
- Black Ops 7 Season 04 Endgame META: Best 5 Weapons After the XR3 Ion Nerf
- Black Ops 7 Season 4 Release Date, Maps, Weapons, Zombies, Warzone, and MW4 Reveal Prep
- Black Ops 7 Zombies Fast KOWAKUJO Easter Egg Guide: Cat Wonder Weapon, Evidence Puzzles
Popular Category Lists
- Grow a Garden / (286)
- ARC Raiders / (262)
- CoD: Black Ops 7 / (166)
- Monopoly Go / (146)
- MLB 26 / (145)
- Star Citizen / (112)
- Steal a Brainrot / (89)
- Sailor Piece / (68)
- ARK Survival Ascended / (67)
- Diablo IV / (61)
- Forza Horizon 6 / (60)
- Blox Fruits / (60)
- CoD: BLACK OPS 6 / (55)
- Adopt Me / (53)
- Path of Exile 2 / (48)
- Monster Hunter Wilds / (46)
- Windrose / (44)
- Path of Exile / (40)
- Grow a Garden 2 / (40)
- Bee Swarm Simulator / (36)


