


 0
0Black Ops 7 Zombies Paradox Junction Boss Guide: Best SG12 Loadout to Melt the Boss Fast
- JAMIE
- Share
- CoD: Black Ops 7
- 03/20/26
- 2771
If the Paradox Junction boss fight is still ruining your runs, the fastest solution right now is a very specific SG12 shotgun build. The weapon is strong on its own, but the real reason it dominates is the combination of Slug rounds, Double Tap augments, Deadshot crit bonuses, and Frenzied Guard timing.
After testing multiple boss setups, the biggest takeaway is simple: SG12 only feels truly broken when the build is complete. Without the right attachment and augment pairing, it's just decent. With them, boss phases can disappear in seconds.
- Best Weapon Setup
- Why Slugs are mandatory
- Best Perks, Augments, and Field Upgrade
- Why this setup works
- How to Play the Boss Fight
- Early phases
- Damage phase
- Final phase
- Common Mistakes
- Why SG12 Is Meta for Paradox Junction
- FAQ
- Is SG12 still worth using without Slugs?
- Is Frenzied Guard required?
- What is the biggest downside of this build?
- Is this good in cursed difficulty too?
- Final Thoughts
↖ Best Weapon Setup
The SG12 is currently one of the strongest boss-killing weapons for this fight because it compresses damage into a very short window. That matters in Paradox Junction, where longer phases usually mean more mistakes, less armor, and more pressure.
| Category | Best Pick | Why It Matters |
|---|---|---|
| Weapon | SG12 | Top-tier close-range burst damage |
| Ammo Type | 12 Gauge Slugs | The most important damage boost |
| Key Attachment | MFS Pulse Fire Prestige Laser | Helps fire faster and smoother in burst windows |
| Tactical | Kazimir / Decoy / Monkey | Creates breathing room during objectives |
| Lethal | Molotov | Great for controlling add pressure |
↖ Why Slugs are mandatory
This is the part many players miss.
Without Slugs, the SG12 is not the same weapon.
In practical runs, the difference is obvious:
- better single-target damage
- stronger weakpoint punishment
- much faster boss phase clears
If your SG12 feels weak, this is the first thing to check.
↖ Best Perks, Augments, and Field Upgrade
The weapon gets the attention, but the perk synergy is what makes the setup reliable.
| System | Best Choice | Purpose |
|---|---|---|
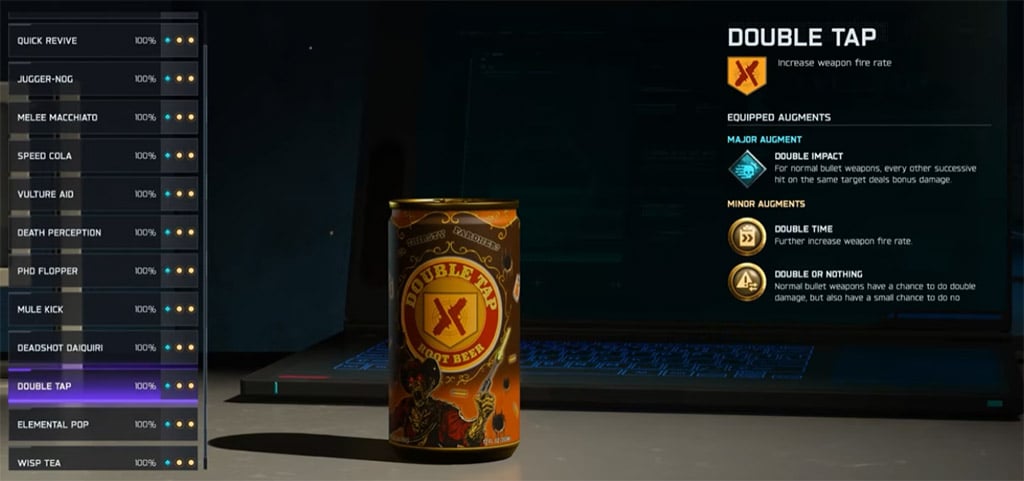
| Double Tap | Double Impact | Boosts shotgun damage |
| Double Tap | Double or Nothing / Double Time | Adds burst potential and faster fire rate |
| Deadshot Daiquiri | Dead Head | Raises critical hit damage |
| Deadshot Daiquiri | Dead Break / Dead Set | Improves consistency on boss weakpoints |
| Field Upgrade | Frenzied Guard | Best damage-phase support tool |
| Frenzied Guard Augments | Frenzy Fire, Repair Boost, Extension | More damage, more armor value, more uptime |

↖ Why this setup works
We're stacking three things at once:
1. Higher base shotgun damage
2. Stronger crit scaling
3. Safer burst windows during Frenzied Guard
That combination is what turns a strong shotgun into a real boss-delete setup.
↖ How to Play the Boss Fight
The fight becomes much easier when we break it into simple priorities instead of forcing damage at every moment.
↖ Early phases
Focus on:
- filling objectives cleanly
- protecting armor
- keeping ammo stocked
- using tacticals before the arena gets out of control
A lot of failed runs happen because players arrive at the damage phase already low on armor or resources.
↖ Damage phase
When the boss opens up:
1. get close enough for SG12 damage to hold up
2. aim for crits
3. pop Frenzied Guard
4. unload immediately
This matters because the build is strongest at close range inside a short timed window. If you hesitate or stand too far back, the damage drops hard.
↖ Final phase
Before committing:
- buy ammo
- top up armor if possible
- make sure Frenzied Guard is ready
From experience, this is where consistency comes from. The SG12 has more than enough damage. Most failed finishes happen because the setup is ready, but the player enters the phase unprepared.
↖ Common Mistakes
Here are the errors that make this strategy feel worse than it is.
| Mistake | What Happens | Fix |
|---|---|---|
| No Slug rounds | Damage feels poor | Equip 12 Gauge Slugs |
| Fighting too far away | Shotgun loses value | Play much closer in damage windows |
| Missing crits | Lower burst output | Focus weakpoints with Deadshot |
| Wasting Frenzied Guard | Weak final phase timing | Save it for real boss damage |
| Poor ammo management | Fight stalls late | Refill before each major phase |
↖ Why SG12 Is Meta for Paradox Junction
Not every strong Zombies weapon is a strong boss weapon. Paradox Junction rewards fast, concentrated burst damage, and that is exactly what this SG12 build delivers.
| Weapon Type | Boss Performance |
|---|---|
| Assault Rifles | Safe and consistent, but slower |
| SMGs | Good mobility, weaker burst |
| Utility weapons | Situational |
| SG12 Slug Build | Best burst option for this fight |
That's why this loadout stands out. It doesn't just deal high damage—it deals it fast enough to reduce risk.
↖ FAQ
↖ Is SG12 still worth using without Slugs?
Not for this strategy. Slugs are the main reason the weapon performs so well against the boss.
↖ Is Frenzied Guard required?
For the cleanest and fastest version of this setup, yes. It gives the safest and strongest damage window.
↖ What is the biggest downside of this build?
Ammo. The damage is excellent, but you need to manage refills carefully.
↖ Is this good in cursed difficulty too?
Yes, but cursed punishes poor armor and positioning much harder, so execution matters more.
↖ Final Thoughts
The best way to beat the Paradox Junction boss right now is to build around SG12 Slugs + Double Tap + Deadshot + Frenzied Guard. That combo gives you one of the fastest and most reliable damage setups available in Black Ops 7 Zombies.
The practical takeaway is simple: if your build is correct, the fight gets much shorter; if your build is incomplete, the SG12 loses most of its edge. That's what makes this setup feel so strong in real runs—it's not hype, it's synergy.

Most Popular Posts
- Black Ops 7 Endgame Exotic Affinity Weapons Guide: Best Bonuses, Full Weapon List, and Farming Tips
- Black Ops 7 Zombies Totenreich Easter Egg Guide: Fast Solo & Co-Op Main Quest Walkthrough
- Black Ops 7 Cherry Fizz Guide: Fastest Illicit Cargo Event Route for Season 4
- Black Ops 7 Season 04 Endgame META: Best 5 Weapons After the XR3 Ion Nerf
- Black Ops 7 Season 4 Release Date, Maps, Weapons, Zombies, Warzone, and MW4 Reveal Prep
- Black Ops 7 Zombies Fast KOWAKUJO Easter Egg Guide: Cat Wonder Weapon, Evidence Puzzles
Popular Category Lists
- Grow a Garden / (286)
- ARC Raiders / (262)
- CoD: Black Ops 7 / (166)
- Monopoly Go / (146)
- MLB 26 / (145)
- Star Citizen / (112)
- Steal a Brainrot / (89)
- Sailor Piece / (68)
- ARK Survival Ascended / (67)
- Diablo IV / (61)
- Forza Horizon 6 / (60)
- Blox Fruits / (60)
- CoD: BLACK OPS 6 / (55)
- Adopt Me / (53)
- Path of Exile 2 / (48)
- Monster Hunter Wilds / (46)
- Windrose / (44)
- Path of Exile / (40)
- Grow a Garden 2 / (40)
- Bee Swarm Simulator / (36)


