


 0
0BO7 Fast XP Farming New Guides: Open Matchmaking Infinite Chain Method
- JAMIE
- Share
- CoD: Black Ops 7
- 11/17/25
- 3981
If your old zombie AFK spots got closed and traditional farm exploits vanished, what's next? The answer isn't hunting for new glitches—it's wiring BO7's legit, mutually reinforcing systems into a looping XP machine. This guide centers on three moves: get your first intel fast (Scout Pulse/UAV), convert team actions into your passive score, and chain streaks so the snowball keeps rolling. In open matchmaking Quickplay, this feels smoother, more stable, and more forgiving as the match goes on.
- Why this approach shines right now
- Loadout backbone: turn available points into guaranteed points
- Perk logic (accelerate the chain + keep it looping)
- Streak setup: show the map first, then roll the snowball
- From spawn to snowball: a 1-minute match script
- Not high enough level? Substitutes and token priorities
- Experience and expectations: why it outpaces pure slay
- Modes and maps that magnify the method
- Three micro tips that matter
- FAQ
- Closing
↖ Why this approach shines right now
This section explains the current environment and why this method fits.
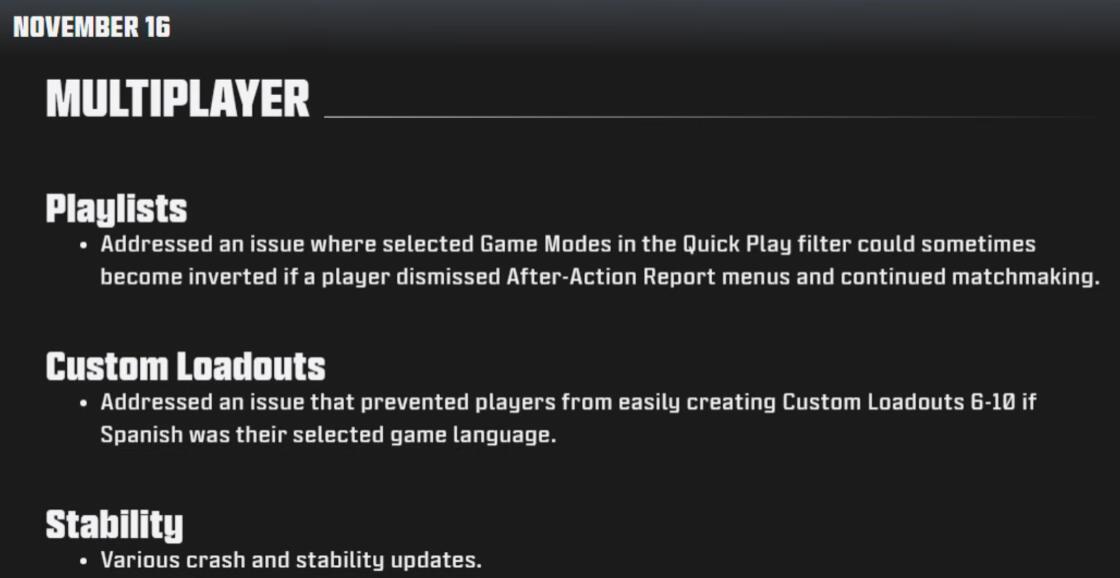
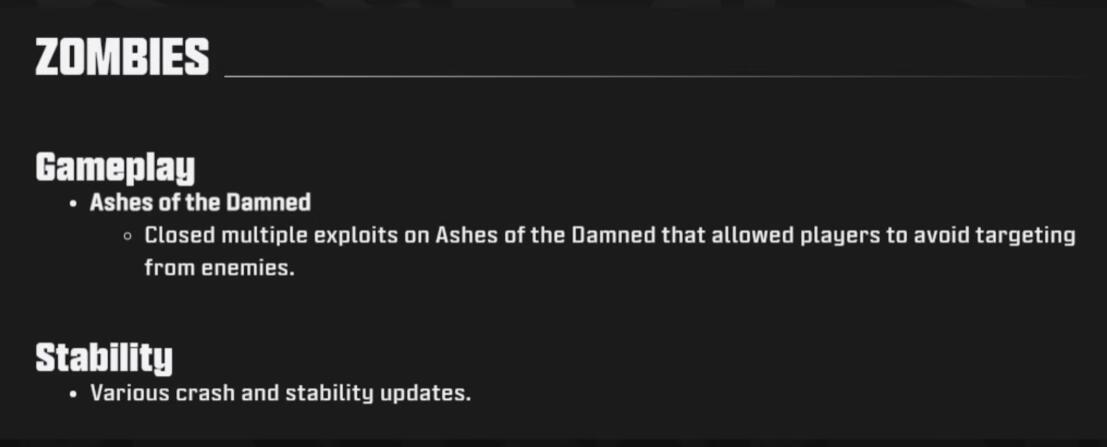
- Patch context: Devs closed zombie untouchable exploits and pushed stability fixes. That means passive AFK-style farms are unreliable; system-legal score chaining is the stable path.
- Matchmaking note: Quickplay uses open matchmaking with minimal skill consideration and persistent lobbies. For intel-driven play, that's good news—fewer sweat walls, more payoff from information and assists.
- Practical meaning: You don't need cracked multikills. Once the first chain lights up, intel, assists, and area control start feeding you score without demanding hero plays.
↖ Loadout backbone: turn available points into guaranteed points
This section gives the core build and the why behind each pick.
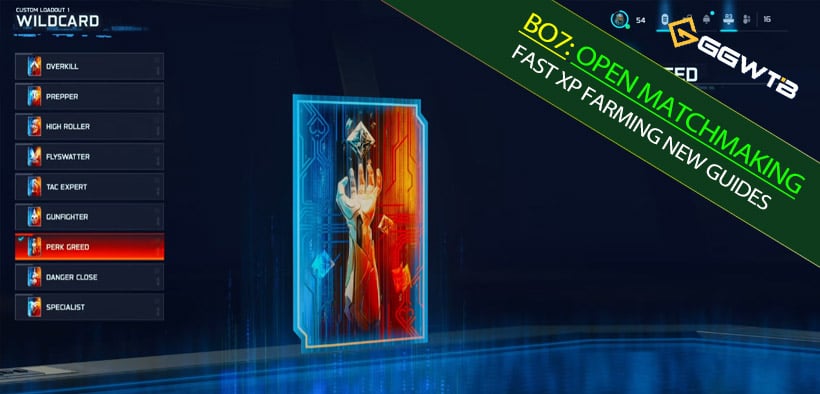
Wild Card and secondary
- Wild Card: Perk Greed (grants an extra perk slot—the glue for the chain accelerator).
- Secondary: Launcher (farm enemy streaks/equipment for free score and progress launcher camos; it also speeds your first streak thresholds).
Area control and doubling pieces
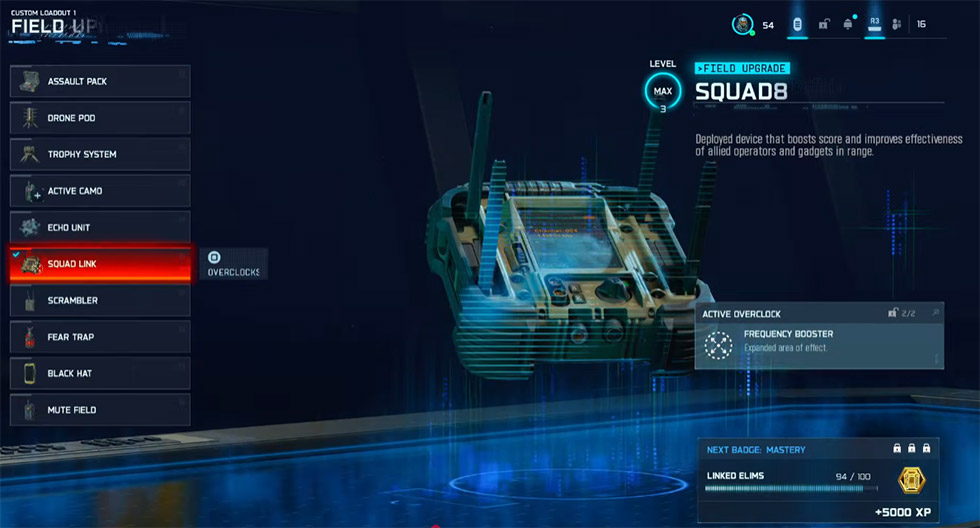
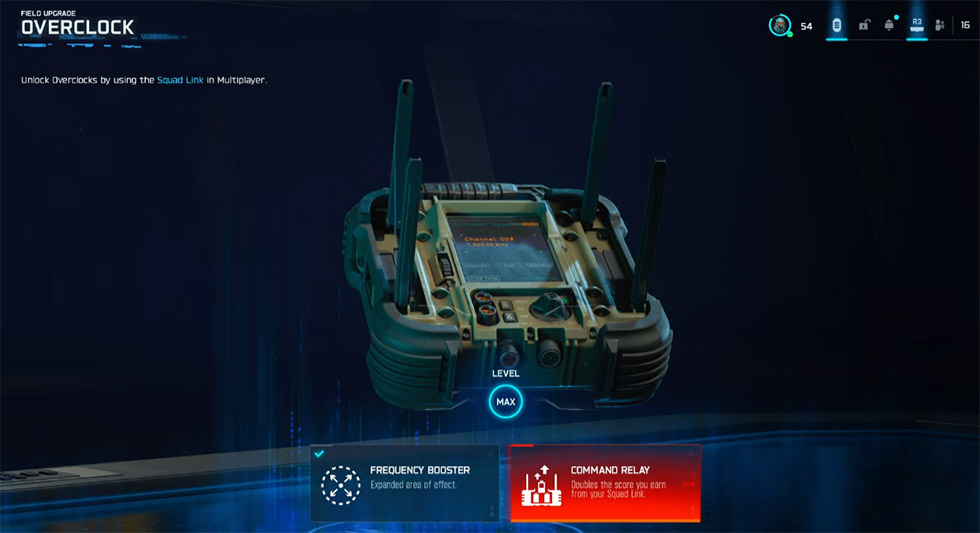
- Field Upgrade: Squad Link (drop on objectives—Hardpoint/Domination—to convert ally actions in the zone into your passive score).
- Overclock: Command Relay (doubles score flowing from your Squad Link; think of it as a turbocharger on your passive income).

Throwables
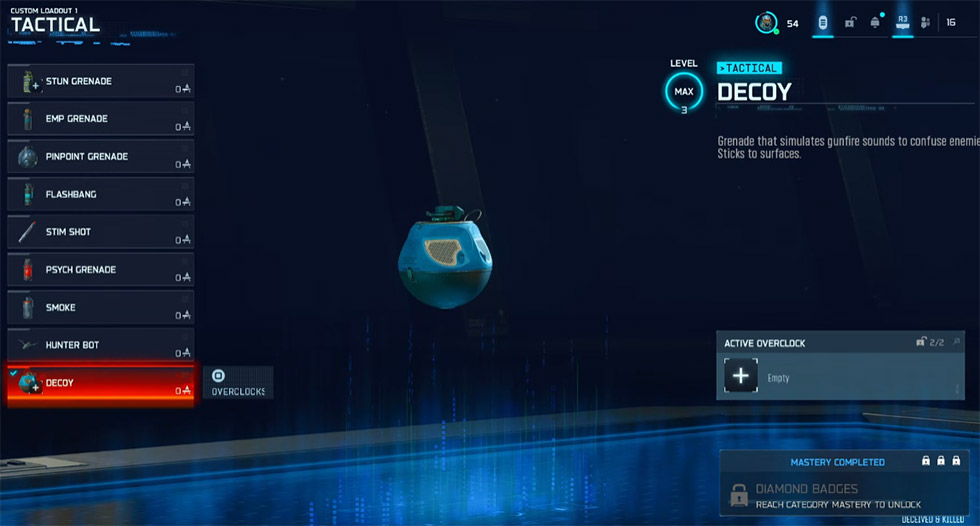
- Tactical: Decoy preferred (unlocks late). Until then, use Pinpoint/Stun—throw often to trigger passive score.
- Lethal: Point Turret (mini sentry on chokepoints/objectives; chips damage, secures kills, and, crucially, keeps trickling score while you move).
↖ Perk logic (accelerate the chain + keep it looping)
| Perk Slot | Perk | Effect | Why It Matters | Impact on XP Chain |
|---|---|---|---|---|
| Perk 1 | Gearhead | Grants two Field Upgrade charges | Keeps Squad Link active more often | Higher passive score uptime → steadier assists |
| Perk 2 | Fast Hands | Faster handling (swap/reload/use) | Maintains fight tempo and reduces downtime | More consistent first picks to start chains |
| Perk 3 | Bankroll | +150 score toward streak thresholds | Cuts time-to-first-intel (Scout Pulse/UAV) | Earlier snowball → faster streak cycling |
| Perk Greed extra | Looper | Automatically loops scorestreaks | No need to die to reset streak ladder | Continuous chain → minimized downtime |
Tip: Before Looper, run one full ladder → intentionally reset on death → start over. It's still strong; Looper just makes it seamless.
↖ Streak setup: show the map first, then roll the snowball
This section explains why information is score.
Recommended order:
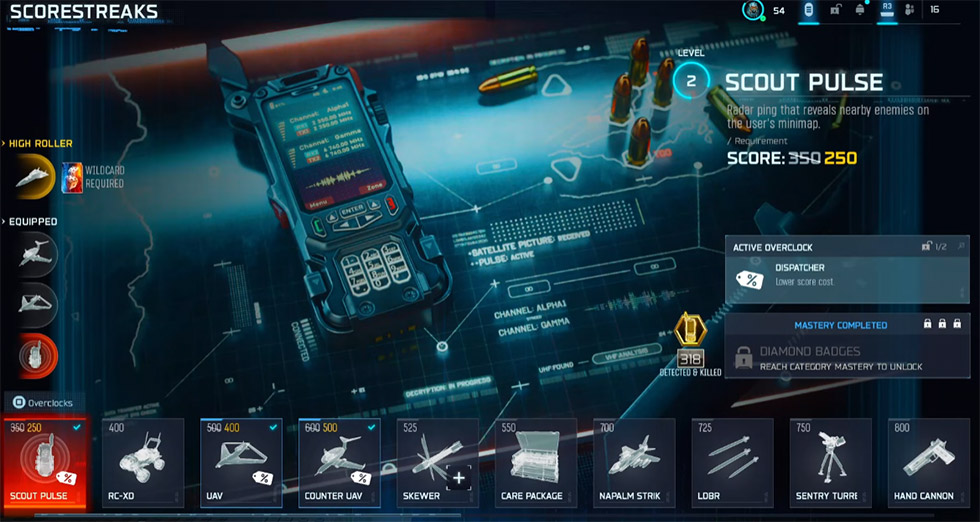
- 1) Scout Pulse with Dispatcher overclock (cost reduction). With Bankroll, 1 kill often equals instant Pulse;
- 2) UAV with Dispatcher (target ~400 cost);
- 3) Counter UAV with Dispatcher (steady assist income and enemy disruption).
Core idea: Secure detection first; expand ally participation in kills. UAV/CUAV casts a scoring net—no matter where you are, assists keep ticking.
↖ From spawn to snowball: a 1-minute match script
This section offers a repeatable playbook.
- Opening: Off spawn, grab an early pick to pop Scout Pulse. What really matters is getting that first intel—you stop fighting blind.
- Set the stage: Drop Squad Link on/near the objective, trigger Command Relay, toss Tactical/Lethal. Rather than chase, stand near your score generator.
- Chain it: Once UAV → CUAV are up, your screen will ping assists non-stop. Anchor around fights and objectives so you stay inside the scoring bubble.
- Sustain: Gearhead keeps Squad Link almost continuous. With Looper, your streaks rearm on their own; without it, complete a ladder, then find a safe moment to die and reboot the cycle.
- Weapon leveling: Passive score credits the weapon you're holding. If you're grinding a gun, keep it in hand while the points flow.
↖ Not high enough level? Substitutes and token priorities
This section covers low-level paths that still work.
- No Looper (≈54): Run single-ladder cycles. When you feel assists drop off, either push for picks to re-spark intel or take a death to reset cleanly.
- No Decoy (≈50): Use Pinpoint/Stun. The goal is frequency—throw often to keep passive triggers rolling.
- No Perk Greed (≈33): Use three-perk core first; prioritize Bankroll + Gearhead, with Fast Hands as the comfort slot.
- No Bankroll (≈23): Lean harder on Dispatcher cost cuts and early launcher takedowns to sprint to first intel.
- Unlock token priority (strongly recommended):
1) Looper → 2) Perk Greed → 3) Bankroll
This gets you into the looping economy earlier each prestige/reset.
↖ Experience and expectations: why it outpaces pure slay
This section gives experiential anchors and reasonable targets.
- Field take: In ~10-minute Hardpoint/Domination, passive/assist score can be 35–55% of personal total. When teammates play the hill, Squad Link + intel streaks multiply your invisible income.
- Throughput feel: If you previously averaged 300–400 score/min from raw kills, expect 450–650 SPM with this method in stable lobbies; good maps/teams push even higher.
- Risks and counters:
- Heavy enemy EMP/clears: Prioritize UAV uptime; place Turret in semi-covered angles to avoid instant deletion.
- Focused pressure on your zone: Slide your Squad Link forward by half a lane—stay safe while remaining near the fight cluster.
- When hard-countered: Shift back to early pick → Pulse micro-cycles until your chain gets momentum again.
↖ Modes and maps that magnify the method
This section helps you find good economy lobbies fast.
- Modes: Hardpoint/Domination first (objective zones maximize Squad Link); Kill Confirmed is workable by farming routes; pure TDM is fine but less consistent.
- Maps: Mid/close-range, chokepoint-heavy layouts favor Turret and Tactical triggers. Long-sight maps still pay via UAV/CUAV, but yields dip slightly.
- Spawns: Rotate to the first contested hill early; don't lap the outside lanes. The earlier your first intel goes live, the earlier the snowball starts.
↖ Three micro tips that matter
This section gives quick wins you can apply right away.
- Turret placement: Watch a line, don't sit in the open. Cover a crossing more than the hill's exact center.
- Tactical cadence: Throw after every engagement; with Squad Link active, toss on its edge to expand triggers.
- Launcher value: It's not just for air. Deleting enemy Turrets/equipment is free score and accelerates your first ladder.
↖ FAQ
Q1: Is Quickplay truly minimal SBMM, and what does that mean for me?
- Dev messaging indicates open matchmaking with minimal skill weighting and persistent lobbies. For you, that means intel/assist-centric play stays reliable. Even vs. strong squads, the info chain recovers some economy.
Q2: How much worse is it without Looper?
- You lose the endless loop smoothness, but one-ladder cycles with planned resets still produce strong XP/min. When you add Looper, you'll feel assist income stop cutting out between ladders.
Q3: Is Decoy worth waiting for?
- Yes. In chaotic modes, Decoy's trigger density is excellent—throw and profit. Until then, Pinpoint/Stun are adequate stand-ins.
Q4: I'm grinding a gun—should I still bring a launcher?
- If lobbies regularly spawn air streaks or deployables, the launcher pays for itself by speeding the first ladder. If not, swap to a comfort secondary, but keep an eye out for free destruction points.
Q5: Could this be nerfed?
- Prior titles have reduced passive/assist values before. If you notice UAV/CUAV assist points dropping, bias toward faster first pick → Pulse micro-cycles and rely slightly more on direct picks to jump-start the chain.
↖ Closing
What drives your leveling speed isn't raw kill count—it's whether you light up every legitimate source of passive score and make them amplify each other. Perk Greed bridges Bankroll and Looper; Squad Link with Command Relay becomes your score amplifier; and Scout Pulse, UAV, and Counter UAV provide the intel backbone. Even at low levels, the substitute path and token order let you start the engine early. Once that first chain spins up, chaos works in your favor—the messier the fight, the steadier your XP flow.

Most Popular Posts
- Black Ops 7 Endgame Exotic Affinity Weapons Guide: Best Bonuses, Full Weapon List, and Farming Tips
- Black Ops 7 Zombies Totenreich Easter Egg Guide: Fast Solo & Co-Op Main Quest Walkthrough
- Black Ops 7 Cherry Fizz Guide: Fastest Illicit Cargo Event Route for Season 4
- Black Ops 7 Season 4 Release Date, Maps, Weapons, Zombies, Warzone, and MW4 Reveal Prep
- Black Ops 7 Season 04 Endgame META: Best 5 Weapons After the XR3 Ion Nerf
- Black Ops 7 Zombies Fast KOWAKUJO Easter Egg Guide: Cat Wonder Weapon, Evidence Puzzles
Popular Category Lists
- Grow a Garden / (286)
- ARC Raiders / (262)
- CoD: Black Ops 7 / (166)
- Monopoly Go / (146)
- MLB 26 / (144)
- Star Citizen / (111)
- Steal a Brainrot / (89)
- Sailor Piece / (68)
- ARK Survival Ascended / (66)
- Diablo IV / (61)
- Forza Horizon 6 / (60)
- Blox Fruits / (60)
- CoD: BLACK OPS 6 / (55)
- Adopt Me / (53)
- Path of Exile 2 / (48)
- Monster Hunter Wilds / (46)
- Windrose / (44)
- Path of Exile / (40)
- Grow a Garden 2 / (38)
- Bee Swarm Simulator / (36)


