0
0Garden Tower Defense: How to Beat Impossible Survival With Starter Units?
- Jolly
- Share
- Garden Tower Defense
- 09/03/25
- 2818
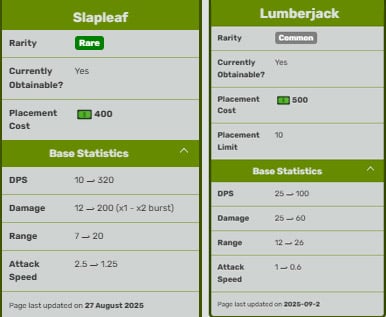
Garden Tower Defense is a game that challenges your strategic thinking and patience. But what if we told you that you can beat its hardest mode, Survival Impossible, using only beginner units? No overpowered units, no late-game unlocks—just starter units. Sounds impossible, right? Today, we'll walk you through journey across the Garden, Jungle, Tropical, and Toxic maps using just two starter units: Slapleaf and Lumberjack.
↖ Starter Units That Pack a Punch
Before diving into each map, let's talk about the two MVPs of this strategy:
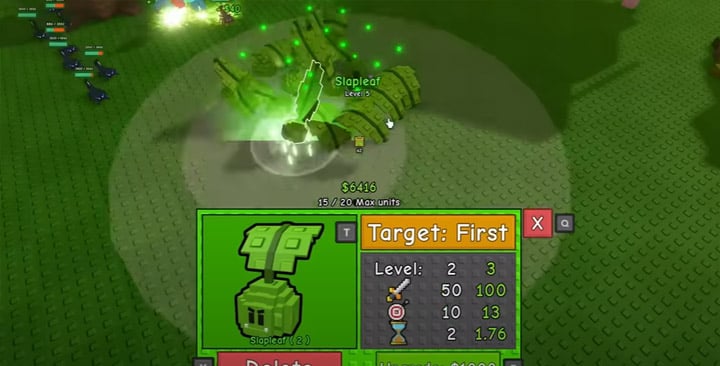
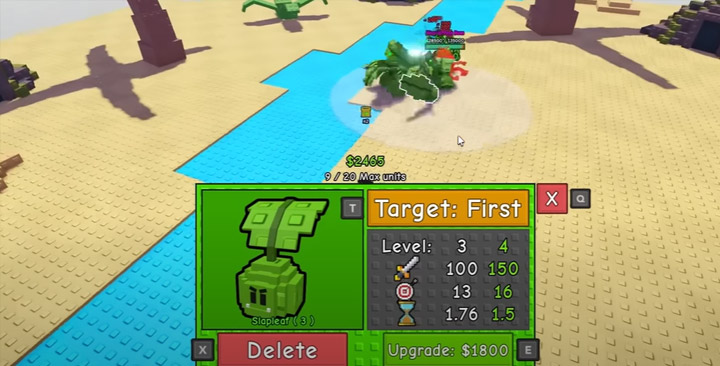
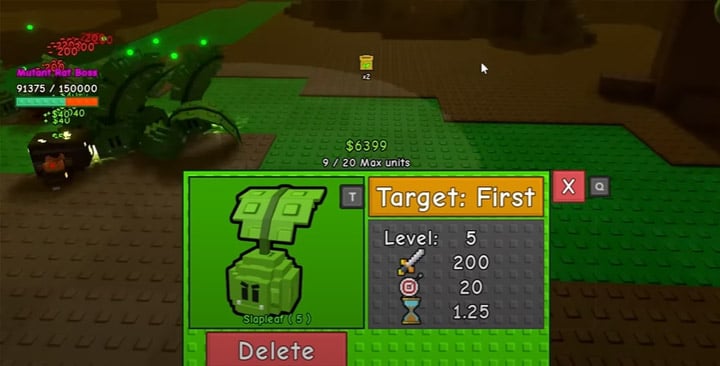
- Slapleaf: A versatile unit with a DPS that scales from 10 to 320. It costs only 400 to place down and has no placement limit. Perfect for crowd control.
- Lumberjack: A beginner unit with 25 DPS and impressive range. At just 500 placement cost, it's excellent for picking off enemies from afar.
Using a combination of these 2 units, we tackled each map systematically. Let's break it down.
↖ Map 1: Garden
Garden is the starting point, and thanks to a recent nerf to enemy damage, it's now easier than ever. Here's how we tackled it:
| Wave | Enemies | Strategy |
|---|---|---|
| Wave 10 | Little snails | Place Slapleafs near open areas for maximum coverage. |
| Wave 20 | Chicken jockeys | Add more Slapleafs to handle fast-moving enemies. |
| Wave 30+ | Bosses & jockeys | Move around the edges to kite enemies into Slap Leaf zones. |
By wave 40, the strategy boiled down to going in circles to keep enemies within range of my towers. While it took some time to finish off the bosses, the combination of Slap Leaf and Lumberjack proved effective.

↖ Map 2: Jungle
Jungle surprised me—it was easier than Garden in some ways. The enemies had higher health but were fewer in number, making crowd control simpler.
| Wave | Enemies | Strategy |
|---|---|---|
| Wave 5 | Bugs | Slap Leaf handles them easily; focus on placement efficiency. |
| Wave 25+ | Scorpions | Use Lumberjack's long range for precision targeting. |
| Wave 40 | Final boss | Kite the boss while maintaining tower coverage. |
The scorpions were the most annoying enemies here, but with strategic placement and patience, I managed to clear all waves without losing. Pro tip: Jungle rewards careful tower positioning over brute force.
↖ Map 3: Tropical
Tropical brought in new challenges with snakes and octopuses that required quick decision-making.
| Wave | Enemies | Strategy |
|---|---|---|
| Wave 15 | Snakes | Keep moving in circles; use Slapleafs to maximize area damage. |
| Wave 20 | Octopus (boss) | Focus fire with Lumberjack; patience is key here. |
| Wave 30+ | Crabs & snakes | Juke enemies into open spaces to avoid crowding. |
While Tropical has visually appealing synchronization among enemy movements, it also demands constant repositioning of your towers. The octopus boss took longer to kill due to its high health, but persistence paid off.
↖ Map 4: Toxic
The final map, Toxic, was a grind. With its dark and dreary aesthetic, this map tests your endurance more than anything else.
| Wave | Enemies | Strategy |
|---|---|---|
| Wave 15 | Spiders | Spam Slapleafs; they're great for handling swarms. |
| Wave 28+ | Turtle-shell rollers | Kite enemies in circles; avoid their shell attacks. |
| Wave 40 | Final boss | Use the circle technique; ensure all towers are hitting consistently. |
This map took me over two hours to complete due to the sheer number of waves and the high health of enemies like crabs and rollers. The circle technique—moving enemies into tower range while dodging attacks—was essential here.
↖ Is It Worth It?
After spending over 2 hours on Toxic alone and nearly seven hours across all maps, we can confidently say that beating Survival Impossible with starter units is possible—but it’s not for the faint-hearted. Here’s what we learned:
- Patience Is Everything: Starter units lack the firepower of advanced towers, so expect longer battles.
- Tower Placement Matters: Position your Slapleafs in open areas and use Lumberjack for long-range precision.
- Movement Is Key: Learn how to kite enemies effectively to maximize tower efficiency.
Beating Survival Impossible in Garden Tower Defense with starter units is not only doable but also a rewarding challenge for those who love strategy games. While it may take hours of gameplay and endless circling around your towers, the satisfaction of proving it can be done is worth the effort.
Most Popular Posts
- Garden Tower Defense All Redeem Codes, Faster Sunflower Economy & Three Limited Flowers
- Garden Tower Defense Ooga Booga Strongest AoE Slow Core in Triple-Flower Patch
- Garden Tower Defense: How to Beat Impossible Survival With Starter Units?
- Garden Tower Defense OP Laser Team Guide: Back Garden Strategy, Wave Control
- How to Farming Garden Tower Defense Fast Flowers?
- Garden Tower Defense Codes: Unlock the Latest Free Rewards
Popular Category Lists
- ARC Raiders / (304)
- Grow a Garden / (286)
- CoD: Black Ops 7 / (166)
- MLB 26 / (152)
- Monopoly Go / (148)
- Star Citizen / (133)
- ARK Survival Ascended / (93)
- Steal a Brainrot / (92)
- Sailor Piece / (68)
- Forza Horizon 6 / (68)
- Diablo IV / (62)
- Blox Fruits / (62)
- Grow a Garden 2 / (59)
- Adopt Me / (58)
- CoD: BLACK OPS 6 / (55)
- Path of Exile 2 / (48)
- Monster Hunter Wilds / (46)
- Windrose / (44)
- Path of Exile / (40)
- Donut SMP / (37)