0
0Garden Tower Defense OP Laser Team Guide: Back Garden Strategy, Wave Control
- Jolly
- Share
- Garden Tower Defense
- 09/17/25
- 2413
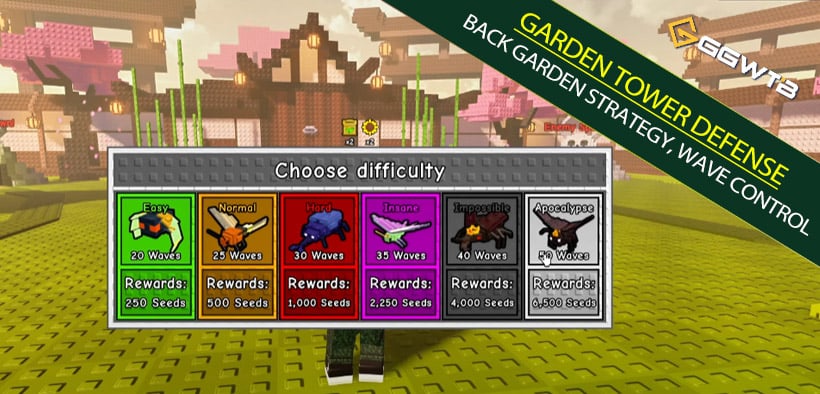
You jumped into Dojo on Insane with a pure laser meme squad, got folded before momentum existed, then retreated to Back Garden hoping to finally clear a wall you keep smashing into. Sound familiar? Single-target beam comps feel amazing when numbers pop, yet suddenly a chunky 8k HP runner or a swarm just walks past while half your plants stare into space. Let's unpack what actually happened, why Rainbow Tomato surprisingly fits the early economy puzzle, where the structural weaknesses are, and how you can convert a fragile novelty lineup into a disciplined clear attempt—especially in Back Garden Hard / edging toward Insane.
- What Counts as the Laser Team (and Why Rainbow Tomato Is In)
- Roster Deep Dive (Practical Role Sheet)
- Map Choice: Dojo Failure vs Back Garden Control
- Wave Phase Breakdown
- Root Causes of Failure
- Operational Strategy Blueprint
- Resource & Progression Advice
- Mindset & Micro Review Loop
- Scaling Toward Insane / Hybrid Future
- FAQ
- Summary
↖ What Counts as the Laser Team (and Why Rainbow Tomato Is In)
Question: Why are we counting Rainbow Tomato as laser when it's not literally a beam turret? Answer: Because in this context we define laser unit by three shared traits: single-target bias, linear or narrow firing behavior, and scaling that depends on keeping enemies within sustained uptime rather than burst AoE. Rainbow Tomato functions as a hyper-cheap early bridge: ultra-fast full upgrade cycle + low placement cost + occupies early target funnel while you save for real anchors. That means your early leak pressure lowers, buying the tempo window for Pedal Ray or Astro Blossom.
↖ Roster Deep Dive (Practical Role Sheet)
| Unit | Role | Advantage | Weakness | When to Deploy | Upgrade Priority |
| Rainbow Tomato | Early economy stabilizer / disposable lane sponge | Extremely low upgrade curve; rapid fielding density | Falls off abruptly; unit cap (10) blocks further spam value | Waves 1–7 (Hard) or 1–5 (Insane trial) | High early, then zero |
| Pedal Ray | Mid-game sustained single-target anchor | Reliable scaling, stable tracking, strong per-slot efficiency | Spin-up before upgrades; can't patch swarms alone | First core after 2–4 Tomatoes | High |
| Laser Plant | Supplemental lane finisher | Clean pick-off, pairs with slowing or stacking lanes | Marginal if placed late; doesn't solve HP spikes alone | After first Pedal Ray tier 2 | Medium |
| Spider Lily | Hybrid pressure + range coverage | Extends kill window, synergizes with beam sustain | Underwhelming if delayed too late; opportunity cost vs Blossom | Transition segment (Waves 12–18 Hard) | Medium-Low |
| Rose Beam | Late mid-game reinforcement | Good beam uptime on bosses when properly positioned | Feels weak under-leveled; must avoid wasted range segments | After first Astro Blossom is stable | Medium |
| Dual Blaster Bud | Flexible slot filler / coverage for split path or second lane | Dual targeting increases consistency against staggered rushes | Still fundamentally single-target; can't replace a true AoE | Plugging leaks after Wave 17 | Medium |
| Astro Blossom | Primary late-game core / boss shredder | Highest end scaling ceiling in this beam cluster | Expensive ramp; delays cause mid-game gap | Target first placement before Wave 14 (Hard) or Wave 10 (Insane attempt) | Very High |
↖ Map Choice: Dojo Failure vs Back Garden Control
Dojo punishes any slow ramp (tight lanes + bursty HP spikes + early elite speed). Back Garden grants longer pathing → more ticks per beam → increased effective DPS per upgrade dollar. That means a single-core beam comp can stabilize if you stagger upgrades intelligently. If you keep dying just before the last boss, it usually signals under-investment in a second fully-tiered core by Wave 23–24 or mis-timed auto-skip leading to cash starvation mid-upgrade.
↖ Wave Phase Breakdown
Opening (Waves 1–5 Hard / 1–4 Insane)
Threat: Trickle mobs; tempo race.
Pain Point: Over-upgrading first Tomato delays anchor.
Action: Field 2–3 Rainbow Tomatoes rapidly; fully upgrade only 1–2, then hard save.
Auto Skip: ON (unless first leak risk appears prior to anchor cash).
Checkpoint: By Wave 5 you want 1 Pedal Ray placed (or enough bank to drop immediately at start of 6).
Early Mid (Waves 6–10 Hard / 5–9 Insane)
Threat: First HP spike unit (~4k→8k fast target).
Pain Point: Single core not yet at tier 2 causes leaks; panic Tomato spam wastes slots.
Action: Pedal Ray tier 2 before the fast 8k; keep Tomatoes only as filler (do not exceed 6 active unless desperate).
Auto Skip: Turn OFF just before the first fast high-HP wave if Pedal Ray is still tier 1.
Checkpoint: Before Wave 10 you should have: Pedal Ray tier 2 + at least 1 Laser Plant OR enough bank to rush Astro Blossom base.
Mid Plateau (Waves 11–17 Hard / 10–15 Insane)
Threat: Mixed clusters + intermittent elites; DPS uptime variance.
Pain Point: Targeting anomalies (units ignored) amplify risk; losing tempo if you chase too many sidegrades.
Action: Place Astro Blossom; keep upgrade focus linear (Blossom > finish Pedal Ray tier gap > first Rose Beam).
Auto Skip: OFF during any wave where Blossom is un-upgraded and next wave spawns elite speed; ON once Blossom hits mid tier.
Checkpoint: By Wave 17 you ideally field 2 fully relevant cores (e.g., Pedal Ray mid-high tier + Astro Blossom mid tier).
Late Setup (Waves 18–24 Hard / 16–22 Insane)
Threat: Sustained HP stacking; attrition risk; leak trains from previously softened enemies.
Pain Point: Overcommitting to new placements instead of finishing key upgrades.
Action: Cap Astro Blossom; insert Rose Beam + Dual Blaster Bud for smoothing. Remove or ignore excess early Tomatoes (replace only if slot freed).
Auto Skip: Toggle OFF around Wave 22 if any core still two upgrades from cap.
Checkpoint: Wave 24 needs 3–4 serious beam contributors (not counting Tomatoes).
Boss Prep (Waves 25–29 Hard / 23–29 Insane)
Threat: High-HP boss pathers + side escort units.
Pain Point: Single-target lock leads to escorts walking through if retarget bug appears.
Action: Spread second-layer beams slightly staggered down path to create serial kill zones instead of one clump.
Auto Skip: OFF for fine control; only ON again if you have full caps and no cash bottleneck.
Checkpoint: Enter Wave 29 with max Astro Blossom + near-max Pedal Ray + at least two supplemental beams (Rose Beam / Dual / Laser Plant) upgraded.
Final (Wave 30)
If you fail with boss at >25% HP remaining at bend two: indicates insufficient earlier compounding (late Astro Blossom). If fail with escort leak while boss still engaged: indicates you never diversified modestly into lane layering—adjust placements forward + backward for overlapping coverage.
↖ Root Causes of Failure
- Single-target stacking without stagger: All beams front-loaded = overkill on first unit, no coverage later in path.
- Late core conversion: Spending on extra Tomatoes after Wave 7 displaces earlier Blossom window.
- Auto Skip greed: Skipping during upgrade gap leaves you mid-wave with half-finished core vs fast elite.
- Targeting / lock anomaly: Some encounters where units weren't shot—mitigate by adding forward scout placement (one mid-path beam) so at least one turret acquires target earlier, waking the chain.
- Resource starvation psychology: Panic multi-placing cheap units reduces long-run DPS per slot.
↖ Operational Strategy Blueprint
Opening Time Table (Hard)
Wave 1: Place Tomato #1 (full upgrade quickly).
Wave 2: Tomato #2 (light upgrade).
Wave 3: Tomato #3 OR start saving—stop at 3 unless RNG pathing rough.
Bank Target by Wave 5 End: Enough for Pedal Ray + first upgrade (roughly mid-three-digit seed equivalent—adjust to current patch).
Transition:
If by Wave 8 you lack Pedal Ray tier 2, pause Auto Skip, funnel all cash.
Astro Blossom Timing:
Hard: Aim initial placement ≤ Wave 14. If later, boss phase DPS curve flattens.
Insane Attempt: Force earlier (≤ Wave 10) by cutting Tomatoes at 2.
Upgrade Priority Path (Template)
1. Pedal Ray tier 2
2. Astro Blossom base → tier 2
3. Finish Pedal Ray high tier
4. Astro Blossom max
5. Rose Beam mid tier
6. Dual Blaster Bud situational (split path coverage)
7. Late Laser Plant polishing
Stop-Upgrading Rule:
If an upgrade leaves you <50% of cost away from the next critical tier before a known elite wave, hold cash instead (prevents half-finished power spikes).
Auto Skip Decision Triggers
Turn OFF if:
- Fast unit next wave and core mid-upgrade
- Two or more leaks occurred previous wave
- You're about to place first Blossom or max it
Turn ON if:
- All cores stable & next 2 waves are low swarm / no elite tag
- You need accelerated income to hit Blossom final tier before Wave 25
Placement Geometry
- Front Third: 1–2 Tomatoes (early only) + first Pedal Ray (gains max uptime).
- Mid Path Bend: Astro Blossom + Rose Beam (capitalizes on path curvature).
- Rear Third: Dual Blaster Bud + cleanup Laser Plant (salvages stragglers / escorts).
Why stagger? Avoid synchronized overkill; extend effective time-on-target chain.
Leak Triage Protocol
If HP chunk enters rear segment at >40% life:
- Pause Auto Skip.
- Drop emergency Dual Blaster Bud behind (only if no slot locked by obsolete Tomato).
If repeated:
- Next run, cut one early Tomato to accelerate Blossom schedule.
↖ Resource & Progression Advice
Seed Economy Pressure: Feel of under-reward arises because pure active waves outpace passive systems currently. If you feel stuck:
- Rotate 2–3 efficient Hard clears instead of brute forcing Insane fails (net more stable seed/hour).
- AFK / Endless: Treat as supplemental, not core; still start a manual high-yield map once you log in.
- Event Grind Fatigue: Set session caps (e.g., 5 Back Garden runs) then switch mode; reduces burnout and maintains mechanical sharpness.
↖ Mindset & Micro Review Loop
After each failed run, jot 3 items:
A. Wave death occurred
B. Which core upgrade was missing
C. Did you toggle Auto Skip within 1 wave of a spike?
If same failure pattern appears twice (e.g., late Blossom), force structural change next run (earlier save, less filler).
↖ Scaling Toward Insane / Hybrid Future
To push Insane more consistently:
- Introduce at least one quasi-AoE or control unit (slow / multi-hit arcs) to smooth swarm variance.
- Replace Rainbow Tomato by reducing early filler to 1–2 units maximum.
- Earlier dual-core timing: Both Pedal Ray + Astro Blossom operational (not maxed, but contributing) before the first 8k runner equivalent.
- Consider splitting beams across two elevation segments if map geometry allows (prevents simultaneous retarget loss).
↖ FAQ
Q1: Why does single-target laser damage feel like it falls off late?
Because enemy effective HP scales faster than your incremental per-upgrade DPS once you delay second/max core; overkill waste early magnifies later deficit. If you notice escorts surviving at >30% HP into rear third, you needed earlier staggered cores.
Q2: Is Rainbow Tomato worth keeping long-term?
Only as an opener. If by mid-game (Wave 15+) you still have more than 2 occupying slots, you're sacrificing high-tier DPS multiplicatively.
Q3: When should you just abandon a run?
If by Wave 14 (Hard) / Wave 10 (Insane) Astro Blossom isn't placed AND Pedal Ray isn't mid tier; mathematically your end boss TTK window shrinks below survival threshold.
Q4: Where exactly to pause Auto Skip?
Common choke markers: Before first 8k fast unit; before first Astro Blossom placement; before Wave 22 if any core missing final upgrade; before Wave 29 if adjusting spread.
Q5: How does a pure single-target comp handle swarms?
You manufacture virtual AoE by elongating kill time: multiple staggered beams along path ensures each enemy spends longer under fire. If you cluster everything front, you lose 40–60% potential total ticks.
Q6: Is Dojo good for resource farming?
Not for this comp; volatility + early elite density punishes ramp. Use it only once you incorporate control/AoE or higher-evolved beam synergy.
Q7: What about targeting bugs / not firing issues?
Mitigate by: placing at least one mid-path turret (earlier acquisition), avoiding all units jammed on a single tile edge, and testing reduced speed (1x) during suspect waves to verify retarget.
↖ Summary
If you implement the timing discipline (early save, staggered cores, controlled auto-skip), the laser meme morphs into a stable clear candidate rather than a frustration loop. Go run it again—this time treat every slot and every wave skip as an economic lever, not a reflex. Good luck; may your beams finally stop that last boss.
Most Popular Posts
- Garden Tower Defense All Redeem Codes, Faster Sunflower Economy & Three Limited Flowers
- Garden Tower Defense Ooga Booga Strongest AoE Slow Core in Triple-Flower Patch
- Garden Tower Defense: How to Beat Impossible Survival With Starter Units?
- Garden Tower Defense OP Laser Team Guide: Back Garden Strategy, Wave Control
- How to Farming Garden Tower Defense Fast Flowers?
- Garden Tower Defense Codes: Unlock the Latest Free Rewards
Popular Category Lists
- ARC Raiders / (304)
- Grow a Garden / (286)
- CoD: Black Ops 7 / (166)
- MLB 26 / (152)
- Monopoly Go / (148)
- Star Citizen / (133)
- ARK Survival Ascended / (93)
- Steal a Brainrot / (92)
- Sailor Piece / (68)
- Forza Horizon 6 / (68)
- Diablo IV / (62)
- Blox Fruits / (62)
- Grow a Garden 2 / (59)
- Adopt Me / (58)
- CoD: BLACK OPS 6 / (55)
- Path of Exile 2 / (48)
- Monster Hunter Wilds / (46)
- Windrose / (44)
- Path of Exile / (40)
- Donut SMP / (37)