


 0
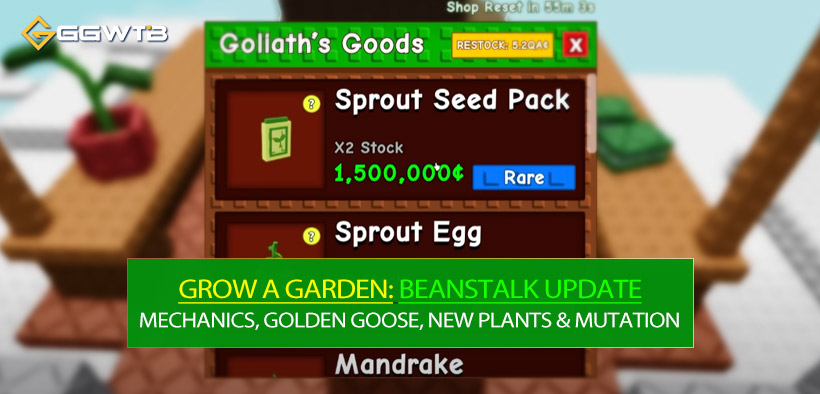
0Grow a Garden Beantock Update: Event Mechanics, Golden Goose, New Plants ROI & Mutation Strategy
- Cecila
- Share
- Grow a Garden
- 08/17/25
- 3954
Short on time? Spam Strawberries + Blueberries to push 7 total Grow a Garden Beantock completions (full shop + portal), then reach 9–10 for the Beantock Gate skin. Don't burn rainbow/silver fertilizer early—reserve for multi‑fruit or high base value plants (Canary Melon clusters / Amber Heart single value / bloom stacks). Golden Goose = ~12M+ Fortune egg potential every 10 min (top passive income). Finish early Garden Guide achievements to unlock cooking → craft Hot Dogs → Pet Pouches → expand pet slots toward 50 cap. Mutation priority: Fortune > Bloom ≈ Friendbound > Sandy / Chilled > Windstruck / Wet (context dependent). Avoid paid spam refresh; use the 1‑hour free shop cycle. This means your core loop should be Contribution → Mutation → Shop timing → Achievements → Passive income compounding.
- Update Core Snapshot: What You Gain
- Beantock Event Overview
- Contribution & Point Farming Strategy
- Reward Layers
- Top Shop Value Assessment
- Fertilizer System & Timing
- Garden Guide System (Achievements + Level)
- Achievement Path & Pet Slot Expansion
- New Plant Value Analysis
- Mutation Strategy
- New Pets & Passive Roles
- Golden Goose Deep Dive
- 60-Minute Daily Loop Example
- Common Mistakes & Avoidance
- Advanced Efficiency Checklist
- FAQ
↖ Update Core Snapshot: What You Gain
- - New collaborative Beantock growth event (server delivers requested plant category).
- - Climbable vine with orb pickups (fertilizers, sprinklers, sprays, seed packs).
- - Top shop unlocks fully at 7 contributions; gate skin around 9–10.
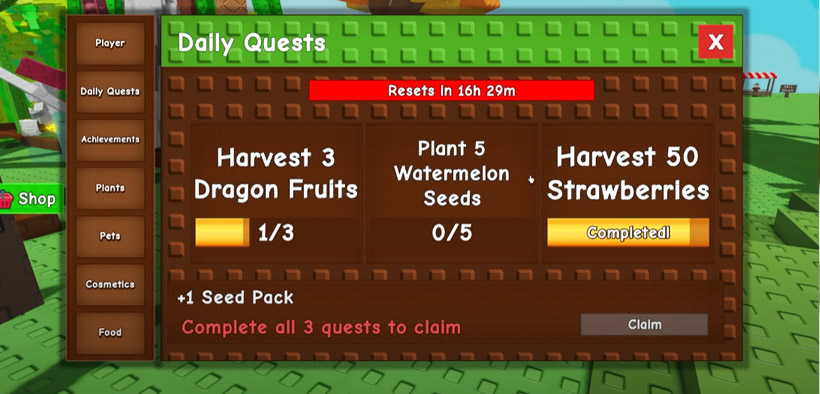
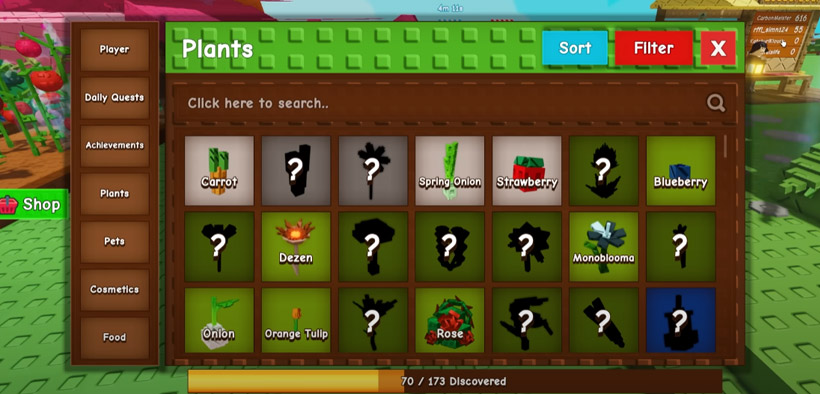
- - Garden Guide panel: achievements, garden level, plant/pet index, daily quests relocated.
- - New plants: Mandrake (single use), Canary Melon, Amber Heart, Seed Pack family, ultra‑rare Princess Thorn, unobserved Prismatic Romanesco (speculative).
- - New pets: Dairy Cow, Jackalope, Seedling, Golem, Sprien, Golden Goose.
- - New resources: silver / rainbow fertilizer, sprout seed packs, mutation sprays (incl. Bloom).
This means entering early compounds your resource snowball.
↖ Beantock Event Overview
Cycle: Vine resets → NPC announces category (Berry / Fruit / Woody etc.) → players submit → progress fills → vine grows → climb.
Category tags come from plant index (Strawberry = Berry + Fruit; Coconut = Woody + Fruit + Tropical).
Scoreboard tracks points; any >0 participation grants orb + shop access. First place currently grants 3 Sprout Seed Packs.
This means casual participation still yields meaningful rewards.
↖ Contribution & Point Farming Strategy
Early (0–3 completions):
- Goal: Speed to 7 total completions.
- Use Strawberries + Blueberries: ultra fast growth, cheap, constant supply.
Mid (4–7):
- Add Grapes or occasional higher base fruit to pad ranking if needed.
Late (post 7):
- Minimum token contributions to keep cycles moving; stash a few high mutation fruits to defend first place if desired.
Low population server:
- Dense berry grid + spaced slow-value slots (Amber Heart / Canary) reserved for mutation/fertilizer testing.
Active server:
- If others push progress, you pivot to mutation prep + shop timing.
This means points per minute > raw single fruit value early on.
↖ Reward Layers
- - Bottom NPC: contribution + ranking bundle.
- - Vine orbs: Reclaimer, Master/Godly Sprinkler, Mutation Sprays (Bloom), silver/rainbow fertilizer, Sprout crates, seed packs.
- - Top shop: staged unlock; 7 for full inventory; ~9–10 for gate.
- - Portal: unlocks at 7 (time save ~30–60s per cycle).
This means 7 completions is your first milestone finish line.
↖ Top Shop Value Assessment
- - Mandrake (single use): early mutation experiment / achievement filler; buy a few, not stockpiles.
- - Sprout Seed Pack / Egg: early priority for expanding plant/pet pools.
- - Amber Heart: slow, single high-value fruit (~150–315K base, scales higher with mutations) = prestige + anchor asset.
- - Canary Melon: multi-fruit (3–5) medium cycle; no mutation ~80–100K; double mutation ~1M; ideal for Bloom/Friendbound stacking.
- - Sprout Crate (cosmetic): delay unless chasing décor achievements.
- - Fertilizers: hoard early; rainbow only when you have a planned ROI window.
Refresh Strategy:
- - Free every 60 min; paid refresh escalates (empirical expectation).
- - Only pay if a clear high-value target (e.g., scarce Prismatic) justifies opportunity cost.
Warning: escalating refresh cost erodes margin if spammed. This means deliberate refresh pacing preserves long-term profitability.
↖ Fertilizer System & Timing
- - Silver (2h temporary silver effect): put on ultra-fast farm clusters (berries) for leaderboard sprints.
- - (Gold if added later) likely mid-tier; reserve for multi-fruit moderate cycles.
- - Rainbow (2h): best on multi-fruit + showpiece + classification clarity (easier spotting), or timed with mutation pushes.
ROI rough: Gain ≈ (extra harvest cycles during buff × avg sale × mutation multiplier) – fertilizer scarcity cost. If remaining rainbow duration <50% when primary plant enters prime yield phase, pivot to silver next time. Warning: don't apply to single-use Mandrake. This means fertilizer becomes a time multiplier only if aligned with yield cadence.
↖ Garden Guide System (Achievements + Level)
Panel holds: level, achievements (Common→Prismatic), plant & pet index, décor, food, dailies. Achievement rewards: permanent colored seed packs + functional unlocks (Cooking Kit). Level under your sign = social trust signal in trades. This means achievements unlock both aesthetics and progression mechanics.
↖ Achievement Path & Pet Slot Expansion
Cooking unlock: finish Common tier (e.g., shovel 100 plants, sell 500 Strawberries) → Cooking Kit. Pet Pouches: 1 Hot Dog = 1 pouch (slot +1, max +50). Flow: ingredients → cook → craft pouches.
Plan:
- - Day 1: Finish Common + partial Uncommon → cook 10 hot dogs → 10 pouches.
- - Day 2–3: Push Rare/Legendary → reach ~25 slots.
- - Later: scale to 50 for multi-pet synergy builds (Sprien + Cow + mutation supports).
This means earlier slot expansion accelerates compound passive effects.
↖ New Plant Value Analysis
- Mandrake: 50–75K baseline; single-use; mutation sandbox.
- Canary Melon: 80–100K no mutation; dual mutation up to ~1M; multi-fruit synergy with Bloom/Friendbound.
- Amber Heart: 150–315K no mutation; slow; ideal for premium mutation stacking.
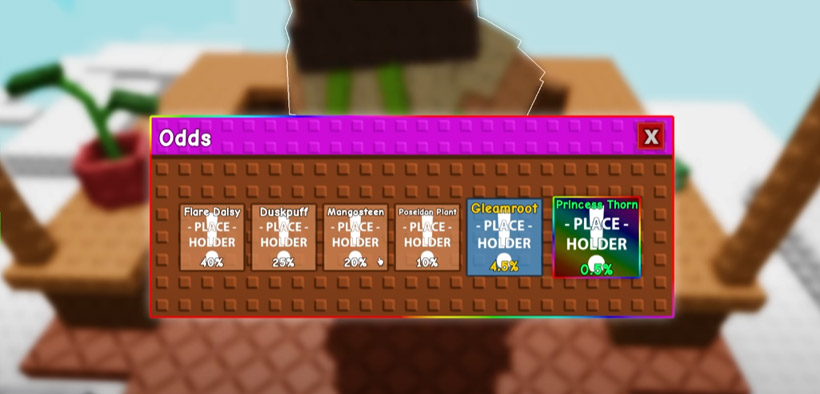
- Seed Pack Set:
- Flare Daisy: volatile (22K → 1.8M+); multi-mutation amplifier.
- Dusk Puff: base 30–60K; high mutation 2M+; trunk-mushroom model.
- Mangosteen: 50–100K steady; silver fertilizer candidate.
- Poseidon: 59–98K range; pairs with wet-type mutation themes.
- Gleam Root: 73K base; Friendbound leaps to millions; long cycle patience.
- Princess Thorn (0.5%): massive scale; multi-mutation can reach hundreds of billions (observed 609B). Prestige + negotiation leverage.
- Romanesco (Prismatic, unobserved): expect rare refresh + high base + good mutation scaling; defer bulk buying until data.
Unconfirmed: actual Romanesco frequency/base price. This means you separate compounding plants (multi-fruit / multi-mutation scaling) from prestige anchors.
↖ Mutation Strategy
Priority (economic context):
- 1) Fortune (direct value surge; golden eggs start with it)
- 2) Friendbound (large scaling on long-cycle plants)
- 3) Bloom (multi-fruit multiplicative growth)
- 4) Sandy / Chilled (situational utility)
- 5) Windstruck / Wet (support/bridge mutations)
Operational:
- - Keep Jackalope away from premium row to avoid unwanted Sandy rolls.
- - Use Seedling as pre-lock test bed before settling final mutation set.
- - Deploy Golem only during concentrated mutation machine sessions.
If a plant misses top mutations after multiple sprays, liquidate for capital recycle. This means mutation management equals capital allocation discipline.
↖ New Pets & Passive Roles
- Dairy Cow: 1.3× growth within 10.36 studs; core velocity engine for berry grids.
- Jackalope: ~99s interval, 16% chance apply Sandy to nearby fruit; confine to expendable zone.
- Seedling: every 5 min swaps mutations between two random fruits (ignores favorites); experimental pivot tool.
- Golem: every 6m36s advances mutation machine by 41.76s; only worthwhile in batch mutation windows.
- Sprien: every ~21.6 min, 15.29% Bloom chance within 30.59 studs; synergy with multi-fruit clusters.
- Golden Goose: every ~10.1 min lays Fortune golden egg (≈12M potential with Fortune; 241K base no mutation; 1.4M+ with mid-tier secondary mutations; scales further with high-tier).
Stack concept: outer growth (Cow) + mid-layer Bloom injection (Sprien) + core passive cash (Goose). This means pet roles must complement, not simply stack rarity.
↖ Golden Goose Deep Dive
Cycle: 10.1 min → instantly mature Fortune egg → harvest → eligible for further non-conflicting mutations (Friendbound, Wet, Windstruck etc.).
Hourly income rough: 6 eggs × (0.8M–12M realistic) = 4.8M–72M potential range.
Tips: leave clear drop zone; record base (no mutation) vs mutated values to compute true multipliers; use cleaning spray for baseline audit.
Warning: loan scams common—avoid lending unless real-life trust. Anti-scam: never accept screenshot collateral, record on-site drop for proof.
This means safeguarding the Goose preserves the game's premier passive revenue stream.
↖ 60-Minute Daily Loop Example
| Time (min) | Actions |
|---|---|
| 0–10 | Check current required category; rapid harvest Strawberries/Blueberries; make first submission. |
| 10–15 | Climb the vine; collect orbs; review top shop rotation and note desired items. |
| 15–25 | Run batch mutation attempts; activate Golem only if doing a concentrated mutation session. |
| 25–30 | Cook Hot Dogs; convert to Pet Pouches; expand pet slots. |
| 30–40 | Plant new high-value seeds (Canary Melon / Flare Daisy / Dusk Puff); apply silver fertilizer to fast harvest lane. |
| 40–50 | Clean up achievements (gifts, shoveling quota, targeted harvest requirements) to progress Garden Guide tiers. |
| 50–60 | Second category submission; collect Golden Goose egg; stage layout and inventory for the next 60‑minute cycle. |
This means structured time slicing prevents passive idle loss.
↖ Common Mistakes & Avoidance
- Rainbow on single-use Mandrake → waste.
- Spam paid refresh chasing unverified Romanesco → liquidity drain.
- Let Jackalope roam premium mutation hub → contamination.
- Lending Golden Goose for test → theft risk.
- Ignoring achievements → delayed cooking → pet slot bottleneck.
- Spreading silver fertilizer thinly → diluted ROI.
This means avoidance of negative margin actions is a zero-cost upgrade.
↖ Advanced Efficiency Checklist
- Day 1: Complete Common achievements → Cooking Kit
- Reach 7 contributions (portal + full shop)
- Reach 9–10 (Beantock Gate skin)
- Build dual-zone layout (fast harvest lane + high-value mutation lane)
- Craft 20+ Pet Pouches (target mid-game 25 slots)
- Establish high-value mutation roster (Bloom / Fortune / Friendbound)
- Log first golden egg base vs Fortune value
- Set rainbow fertilizer deployment schedule (record 30-min differential)
↖ FAQ
1. Do I get vine orbs with only one tiny submission?
Yes, any >0 contribution grants climb/orb access (ranking reward excluded).
2. How do I know category changes?
Vine resets downward; NPC updates requirement; confirm tags via Garden Guide index.
3. What counts as Woody?
Confirmed: Coconut, Pine Cone (future plants may expand list).
4. Can rainbow and silver fertilizer stack?
No, latest application overwrites effect.
5. Can the golden egg be traded?
Currently it behaves as an on-garden harvest object, not a separate tradeable item (test observation).
6. Can the golden egg mutate further?
Yes—starts with Fortune, can add non-conflicting mutations.
7. Where does Romanesco come from?
Prismatic slot of top shop; not yet observed in test; await live data.
8. Should I stockpile Mandrake?
No—single-use; buy a few for mutation trials/achievements.
9. Do Sprien and Jackalope conflict?
No; Bloom and Sandy are distinct; non-conflicting mutations can coexist.
10. Permanent silver seed vs temporary silver fertilizer?
Permanent is infinite duration from achievement; fertilizer lasts 2 hours.
11. When to use Mutation Spray?
High base or multi-fruit candidates (Amber Heart, high-potential Gleam Root, Bloom Canary clusters) when you have backup seeds.
12. When should I refresh the shop?
Align with natural hourly reset; during cooldown do mutation/cooking; avoid multi paid refreshes without a concrete target.

Most Popular Posts
- Grow a Garden 2 Release Date Guide: Why Saturday Is the Likely Launch Window
- Grow a Garden Bizzy Bee Event: Honey Coins, Bee Eggs, Seeds, Upgrades, and Rewards
- Grow a Garden Bee Dungeon Guide: Best Wave 100 Strategy, Bee Shards, and Team Setup
- Grow A Garden Best Pet Mutations 2026: Ranked Guide for Power, Trading, and AFK Farming
- Grow a Garden Bee Stats Guide: Best Bees Ranked by Damage, HP, and DPS
- Grow a Garden Busy Bee Part 2 Guide: Royal Jelly, Best Pets, New Seeds, and Prep Strategy
Popular Category Lists
- Grow a Garden / (286)
- ARC Raiders / (285)
- CoD: Black Ops 7 / (166)
- MLB 26 / (149)
- Monopoly Go / (148)
- Star Citizen / (128)
- Steal a Brainrot / (90)
- ARK Survival Ascended / (85)
- Sailor Piece / (68)
- Forza Horizon 6 / (66)
- Diablo IV / (62)
- Blox Fruits / (62)
- Adopt Me / (57)
- Grow a Garden 2 / (56)
- CoD: BLACK OPS 6 / (55)
- Path of Exile 2 / (48)
- Monster Hunter Wilds / (46)
- Windrose / (44)
- Path of Exile / (40)
- Bee Swarm Simulator / (37)


