


 0
0How to Farm Infinite ELEPHANT Safari Eggs in Grow a Garden (Free-to-Play Friendly)
- Jordan
- Share
- Grow a Garden
- 11/06/25
- 1304
You don't need to chase every plant type or babysit the event timer to print Safari Eggs. By building a focused coconut mono-garden and syncing your harvest with the NPC's requested types, you can loop points at scale—enough to rival. Below is a step-by-step breakdown of why this works, how to set it up, and what to plant when the request rotates.
- Context & Core Insight
- Why Coconuts Are S-Tier
- Build the Mono-Garden
- Timing Windows & Shop Rotations
- Secondary Plants: When It's Not a Coconut Window
- Reward Mechanics & Probabilities
- Execution Flow (Battle-Tested)
- When to Ignore a Request Type
- Practical Micro-Tips
- Notes on Updates & Shop Items
- Action Checklist
- FAQ
- Summary
↖ Context & Core Insight
The Safari Harvest event rewards points when you submit plants matching the NPC's current requested types. Points scale by plant rarity and yield per plant instance. The Infinite Elephant idea hinges on:
- - Safari Eggs can be obtained from event rewards and the Safari Shop.
- - Elephants can hatch from Safari Eggs.
- - If you maximize submissions during favorable type windows, you effectively print Safari Eggs.
In practice, this means building one garden optimized for high-point plants that match multiple requested types—then dumping harvests during those windows with no submission cooldown.
↖ Why Coconuts Are S-Tier
Coconut basics:
- - Rarity: Mythical → 5 points per fruit.
- - Yield: 20 fruits per coconut tree.
- - Total: 100 points per tree per relevant request.
Field-tested leverage:
- - 80+ trees → ~8,000 points if fully harvested during Fruit/Tropical/Woody (and sometimes Leafy, if still counted) windows.
- - Compared with tomatoes (Rare, 3 points each, easier pick), coconuts deliver higher per-action throughput but require setup and vertical collection.
Key takeaway: One coconut mono-garden converts three to four request types into jackpot windows.

↖ Build the Mono-Garden
- - Choose one dedicated save slot for your Coconut Garden.
- - Plant at least 80 coconut trees; more is better if your device and inventory can handle the harvest.
- - Add climb aids (bamboos/structures) to streamline canopy collection.
- - Practice a harvest route: clockwise loops, then Harvest All if available, to reduce missed fruits.
When Fruit/Tropical/Woody pops, you'll turn 30 minutes into a points avalanche.
↖ Timing Windows & Shop Rotations
- - NPC Request Rotation: Updates every 30 minutes for a specific type (e.g., Fruit, Leafy, Woody, Tropical, Flower, Berry, Vegetable, Prickly, Stalky).
- - Submission Cooldown: None—spam-submit as fast as you can collect.
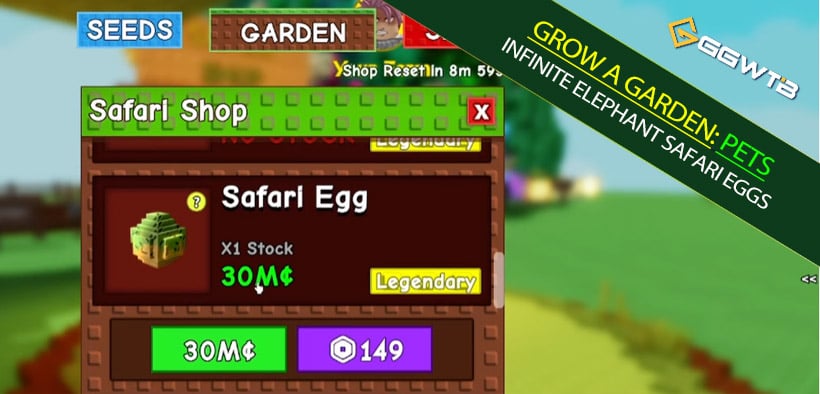
- - Safari Shop: Resets every 15 minutes, increased stock rates post-update. Good for topping up eggs but not infinite by itself.
↖ Secondary Plants: When It's Not a Coconut Window
You won't always land on a coconut-favored type. Here's an efficiency map based on availability and ease:
| Plant/Type | Best For | Why It’s Good | Caveats |
|---|---|---|---|
| Coconuts (Mythical) | Fruit, Tropical, Woody (Leafy if counted) | 100 pts per tree; multi-type coverage | Collection needs climbing, initial seed cost |
| Tomatoes (Rare) | Leafy, Vegetable | Easy to plant/harvest; decent backup | 3 pts each → need more volume |
| Celest Berry | Berry, plus Prickly/Leafy/Fruit tags | Fast growth; 3 berries per bush | Availability may vary |
| Candy Corn Flower | Flower, Stalky | Fast growth; dual coverage | Event-limited acquisition |
| Bean Stalks | Stalky, Vegetable (situational) | Good for Stalky if you have many | Growth/collection friction |
| Cactus/Dragon Fruit | Prickly | High ceiling for veterans | Hard to source; skill intensive |
Experience tip: If you lack broad inventory depth, skip Prickly and Stalky unless you own the right seeds; over-farming weak types wastes the 30-minute window.
↖ Reward Mechanics & Probabilities
- - Individual reward track includes Safari Eggs with approx. 4.23% (1 egg) and 0.85% (3 eggs) chances per roll.
- - High-volume submissions dramatically increase egg rolls.
- - Safari Shop stock is stronger post-update; hitting the 8M milestone buff boosts shop stock chance further.
Focus on type windows that let you bank thousands of points quickly, then let probability do the heavy lifting.
↖ Execution Flow (Battle-Tested)
1. Pre-load 80–100 coconut trees in a dedicated garden.
2. Keep a backup garden with tomatoes and one flexible set (Candy Corn Flower or Celest Berry) for awkward rotations.
3. When Fruit/Tropical/Woody appears, start a 30-minute sprint:
- Harvest route → submit → repeat, no cooldown.
- Aim for 6–8k points in one window with 80+ trees.
4. In off-windows, restock seeds, tidy routes, and scan Safari Shop every 15 minutes.
5. Track your yield: If your points/minute dip below tomato-spam benchmarks, optimize your climbing/harvest path.
Field note: The 8,000+ submission screenshots are consistent with a coconut mono-garden plus efficient routing. Inventory limits can be bypassed by harvest-submit cycling rather than hoarding.
↖ When to Ignore a Request Type
- - Berry: Only pursue if you have Celest Berry or equivalent speed.
- - Flower: Strong if you own Candy Corn Flower or Legs (rare), otherwise low ROI.
- - Prickly: Veteran-only; skip if your seed pool is shallow.
- - Stalky: Viable with Bean Stalks or Candy Corn Flower. If neither, skip.
If you find a request that doesn't match your planted strengths, then wait out the 30-minute rotation and prep your next coconut sprint.
↖ Practical Micro-Tips
- - Camera/lighting: Night/dark weather worsens missed fruits; boost brightness or switch time/weather if possible.
- - Movement tech: Bamboo ladders + side-hops on canopy edges cut collection time by ~20–30% in practice.
- - Submission rhythm: Short batches (e.g., 200–400 fruits) reduce overflow errors and keep you inside the window.
- - Device performance: Large gardens can lag. Trim decorative clutter during event hours.
↖ Notes on Updates & Shop Items
- - Pet Shark Jumbo: Cosmetic size effect for grow a garden pets per current wiki note; no direct farming boost.
- - Safari Shop Luck/Stock Milestone: Reaching 8M increases stock chance, indirectly improving egg acquisition between harvest sprints.
- - Bubble Bub sightings: RNG; don't bank strategies on a specific shop item appearing.
↖ Action Checklist
- - Build one coconut mono-garden (80+ trees).
- - Harvest only during Fruit/Tropical/Woody windows; spam-submit.
- - Use tomatoes for Leafy/Vegetable gaps; Candy Corn Flower or Celest Berry as flex picks.
- - Check Safari Shop every 15 minutes; milestone buffs improve stock odds.
- - Skip low-ROI types unless you own the right seeds.
↖ FAQ
Q1: Is this infinite or just very fast?
A: Functionally infinite over time—no submission cooldown + repeatable windows + shop restocks. Practically capped by your planting scale and 30-minute rotations.
Q2: Can Leafy still accept coconuts?
A: It has historically worked; if a patch removes Leafy tagging for coconuts, pivot to tomatoes for Leafy windows.
Q3: How do players submit 8,000 plants with a 200-plant inventory cap?
A: Harvest-submit cycling. You don't hoard 8,000 at once; you loop collection and immediate submission repeatedly within the 30-minute window.
Q4: I don't have Candy Corn Flower or Legs. Am I locked out of Flower/Stalky?
A: Not locked out, just less efficient. Either stock tomatoes for other windows or wait for coconut-aligned requests.
Q5: Free-to-play viable?
A: Yes. The core power is in garden design and timing, not premium boosts.
Q6: What if I can't climb coconut trees efficiently?
A: Build bamboo scaffolds, practice a canopy loop, and consider splitting your trees into rows with clear aisles. If mobility is still an issue, lean more on tomatoes until you refine the route.
↖ Summary
You're not chasing every category—you're engineering the board so three to four categories bend to your garden. A single coconut mono-garden turns Fruit/Tropical/Woody rotations into egg-printing sessions, while tomatoes and a couple of event plants cover awkward gaps. Time your 30-minute windows, keep your submission loop tight, and let probability shower you with Safari Eggs that can hatch Elephants.

Most Popular Posts
- Grow a Garden 2 Release Date Guide: Why Saturday Is the Likely Launch Window
- Grow a Garden Bizzy Bee Event: Honey Coins, Bee Eggs, Seeds, Upgrades, and Rewards
- Grow a Garden Bee Dungeon Guide: Best Wave 100 Strategy, Bee Shards, and Team Setup
- Grow A Garden Best Pet Mutations 2026: Ranked Guide for Power, Trading, and AFK Farming
- Grow a Garden Bee Stats Guide: Best Bees Ranked by Damage, HP, and DPS
- Grow a Garden Busy Bee Part 2 Guide: Royal Jelly, Best Pets, New Seeds, and Prep Strategy
Popular Category Lists
- Grow a Garden / (286)
- ARC Raiders / (285)
- CoD: Black Ops 7 / (166)
- MLB 26 / (149)
- Monopoly Go / (148)
- Star Citizen / (128)
- Steal a Brainrot / (90)
- ARK Survival Ascended / (85)
- Sailor Piece / (68)
- Forza Horizon 6 / (66)
- Diablo IV / (62)
- Blox Fruits / (62)
- Adopt Me / (57)
- Grow a Garden 2 / (56)
- CoD: BLACK OPS 6 / (55)
- Path of Exile 2 / (48)
- Monster Hunter Wilds / (46)
- Windrose / (44)
- Path of Exile / (40)
- Bee Swarm Simulator / (37)


