0
0Marathon Triage Guide: Abilities, Best Team Comps & Combat Medic Tactics
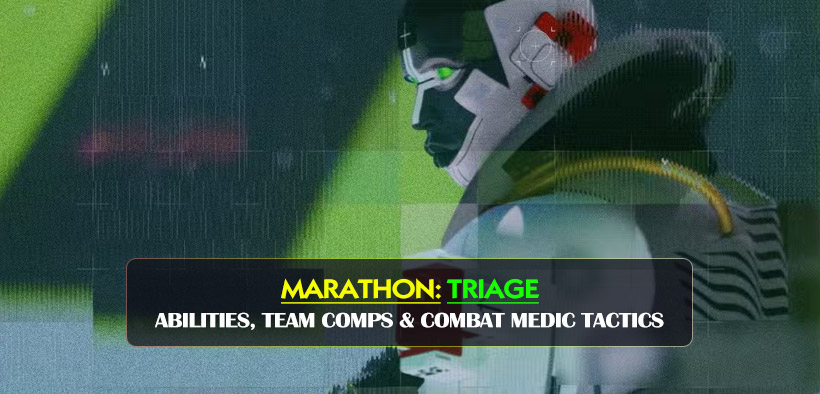
Here is a comprehensive breakdown of how to dominate as Triage, transforming from a passive healer into the frontline controller your squad desperately needs.
- The Reality of Triage: Redefining the Combat Medic
- Core Abilities: Sustaining the Frontline
- Active Ability Breakdown
- Passive Traits: The Economy Multiplier
- Trait Synergy & Impact
- Positioning and Playstyle: The Controller Mindset
- The Ideal Team Composition
- Frequently Asked Questions (FAQ)
- Final Tactics for the Field
↖ The Reality of Triage: Redefining the Combat Medic
When most players see the medic label, they immediately picture a fragile support character hiding in the backline, waiting to patch up mistakes. In Marathon, this mindset will get your squad wiped. Triage is not a passive healer; Triage is a frontline controller. You are the reason your crew survives the initial ambush, sustains the firefight, and ultimately lives long enough to extract.
What truly separates an average Triage from a master is understanding how to dictate the pace of an engagement. Your job is to make every fight last longer for your team and significantly shorter for your enemies. Below is a structured overview of the exact strategies, ability synergies, and team compositions we use to maximize Triage's potential in high-stakes raids.
↖ Core Abilities: Sustaining the Frontline
Triage's active abilities are designed to swing the momentum of a fight instantly. However, using them reactively instead of proactively is a common beginner trap.
↖ Active Ability Breakdown
| Ability Name | Primary Function | Advanced Tactical Use | What We Learned in Practice |
|---|---|---|---|
| Reboot | Ranged revive (Defib system) | Offensive EMP to strip enemy shields | Do not just use this to revive. If an enemy is pushing a downed teammate, firing Reboot revives your ally and strips the attacker's shields simultaneously. |
| Med Drone | Hovering heal/shield regeneration | Pre-engagement sustain | Deploy this on your frontline initiator (like a Destroyer) before they take damage, not after they are already critical. |
Why does the offensive capability of Reboot matter so much? Because in an extraction shooter with a fast time-to-kill, an unexpected EMP completely shatters an enemy squad's confidence. Hold onto your Reboot until you see the opening—whether the enemy thinks the fight is over, or they are hiding behind cover to heal. Fire it when it guarantees a momentum shift.
↖ Passive Traits: The Economy Multiplier
Triage's passive traits are where this shell goes from good to absolutely broken in the hands of a coordinated squad. These traits directly impact your team's economy and damage output.
↖ Trait Synergy & Impact
| Trait Name | Effect | Strategic Value |
|---|---|---|
| Battery Overcharge | Improves weapon performance; Battery weapons EMP on shield break | Turns weak battery weapons into terrifying crowd-control tools. Chaining shield breaks into EMPs locks down enemy movement. |
| Shareware | Allies with a Med Drone receive the benefits of your consumables | The ultimate economy hack. One healing item or stim instantly applies to multiple teammates. |
If you find your squad constantly running out of medical supplies during long raids, Shareware is your solution. What does this mean in practice? Before a major push or while contesting a highly populated extraction point, ensure your Med Drones are active on your allies. Then, pop your highest-tier consumable. You are effectively tripling the value of every item in your inventory, saving your teammates from wasting their own hard-earned credits.
↖ Positioning and Playstyle: The Controller Mindset
Don't hide in the back. You are the frontline anchor. However, you should not be the first person breaching a room.
Let your heavier shells initiate and draw the initial aggro. Once the enemy reveals their positions, you step in to lay down suppressing fire while managing your drones. If you are running battery weapons combined with the Battery Overcharge trait, focus entirely on stripping the shields of the most aggressive enemy player. Once their shield breaks and the EMP triggers, your team can easily clean up the kill.
Communication is your strongest weapon here. Your Reboot is only effective if your downed teammate knows it is coming and is ready to immediately start shooting the second they are revived. Call out your drone deployments, call out your consumable usage, and call out your EMPs.
↖ The Ideal Team Composition
While you can technically run any combination of shells, Marathon's brutal PvPvE environment heavily rewards specific synergies. Going into a high-tier raid without a Triage is a massive handicap.
Here is the most consistent three-stack composition we have tested:
| Shell Role | Function in the Squad | Synergy with Triage |
|---|---|---|
| Destroyer (Tank) | Pushes the frontline, absorbs initial damage, holds chokepoints. | The primary target for your Med Drone. A Destroyer with a Med Drone and Shareware buffs is nearly unkillable. |
| Recon (Scout) | Feeds information, flanks, dictates when and where to move safely. | Allows Triage to know exactly when to pre-pop consumables and where to aim offensive Reboots. |
| Triage (Controller) | Sustains the push, multiplies economy, revives from safety. | Keeps the Destroyer alive during the breach and ensures the Recon can safely retreat if flanked. |
↖ Frequently Asked Questions (FAQ)
Should I save my Med Drone for when my teammate is almost dead?
Never hoard your Med Drone for the perfect moment. The cooldown is fast enough that you should deploy it early and often. Put it on your initiator right as the firefight begins to mitigate incoming damage immediately.
Are battery weapons mandatory for Triage?
They are not mandatory, but they are highly recommended. Since Battery Overcharge allows these weapons to trigger an EMP upon breaking a shield, it gives you a massive utility advantage in 3v3 squad fights.
Can I use Reboot offensively if no teammates are down?
Yes. You can lock onto a hostile target from a distance. If you know an enemy is holding a tight angle with a high-tier shield, hitting them with Reboot will strip their defenses and allow your team to push aggressively.
↖ Final Tactics for the Field
Mastering Triage requires a shift in perspective. You are managing the flow of combat, manipulating the squad's economy through Shareware, and punishing overconfident enemies with well-timed EMPs. Communicate your consumable usage, push alongside your tanks, and never underestimate the psychological impact of reviving a teammate right in front of an enemy squad. Gear up, manage those drones, and secure that extraction.
Most Popular Posts
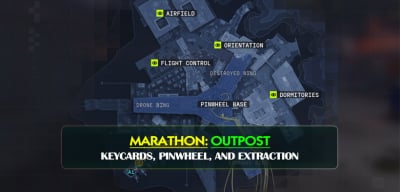
- Marathon Outpost Loot Guide: Best Keycard Route and Main Loot Path
- Marathon Outpost Solo Strategy Guide: Keycards, Pinwheel, and Extraction
- Marathon Faction Upgrades Guide: What to Rush for Every Faction (Fast, Practical, No Fluff)
- Marathon vs. Arc Raiders: Key Differences That Define the Genre
- Marathon Beginner Guides for Loadouts, Factions & Survival Strategies
- Marathon Triage Guide: Abilities, Best Team Comps & Combat Medic Tactics
Popular Category Lists
- Grow a Garden / (286)
- ARC Raiders / (262)
- CoD: Black Ops 7 / (166)
- Monopoly Go / (146)
- MLB 26 / (145)
- Star Citizen / (112)
- Steal a Brainrot / (89)
- Sailor Piece / (68)
- ARK Survival Ascended / (67)
- Diablo IV / (61)
- Forza Horizon 6 / (60)
- Blox Fruits / (60)
- CoD: BLACK OPS 6 / (55)
- Adopt Me / (53)
- Path of Exile 2 / (48)
- Monster Hunter Wilds / (46)
- Windrose / (44)
- Path of Exile / (40)
- Grow a Garden 2 / (40)
- Bee Swarm Simulator / (36)