0
0 Created: Oct 5,2026 | RuneScape: Dragonwilds
RuneScape Dragonwilds Skills Guide: Training Routes Toward Level 99

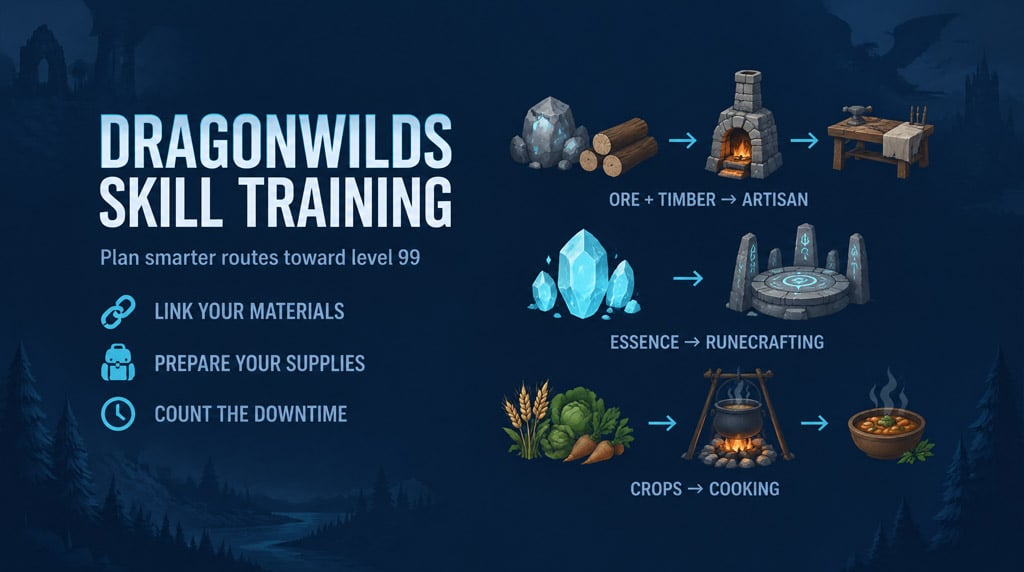
Train gathering and processing skills together, then choose combat and Agility routes that remain worthwhile after replenishment and recovery. We prioritize equipment materials, storage, and sustainable supplies before spending a large stockpile on a dedicated XP session.
- Choose a Route by Its Limiting Factor
- Compare Complete Cycles
- Gathering: Keep the Output Useful
- Mining and Woodcutting
- Farming
- Processing: Reserve Materials Before Training
- Cooking, Artisan, and Construction
- Runecrafting
- Combat and Agility: Include Recovery in the Result
- Attack, Ranged, and Magic
- Agility
- FAQ (Frequently Asked Questions)
- What is the fastest way to level skills in Dragonwilds?
- Which skill should we train first?
- Are higher-tier resources always better for training?
- Is manual Runecrafting better than automatic crafting?
- Should we use merchant loops or XP exploits?
Choose a Route by Its Limiting Factor
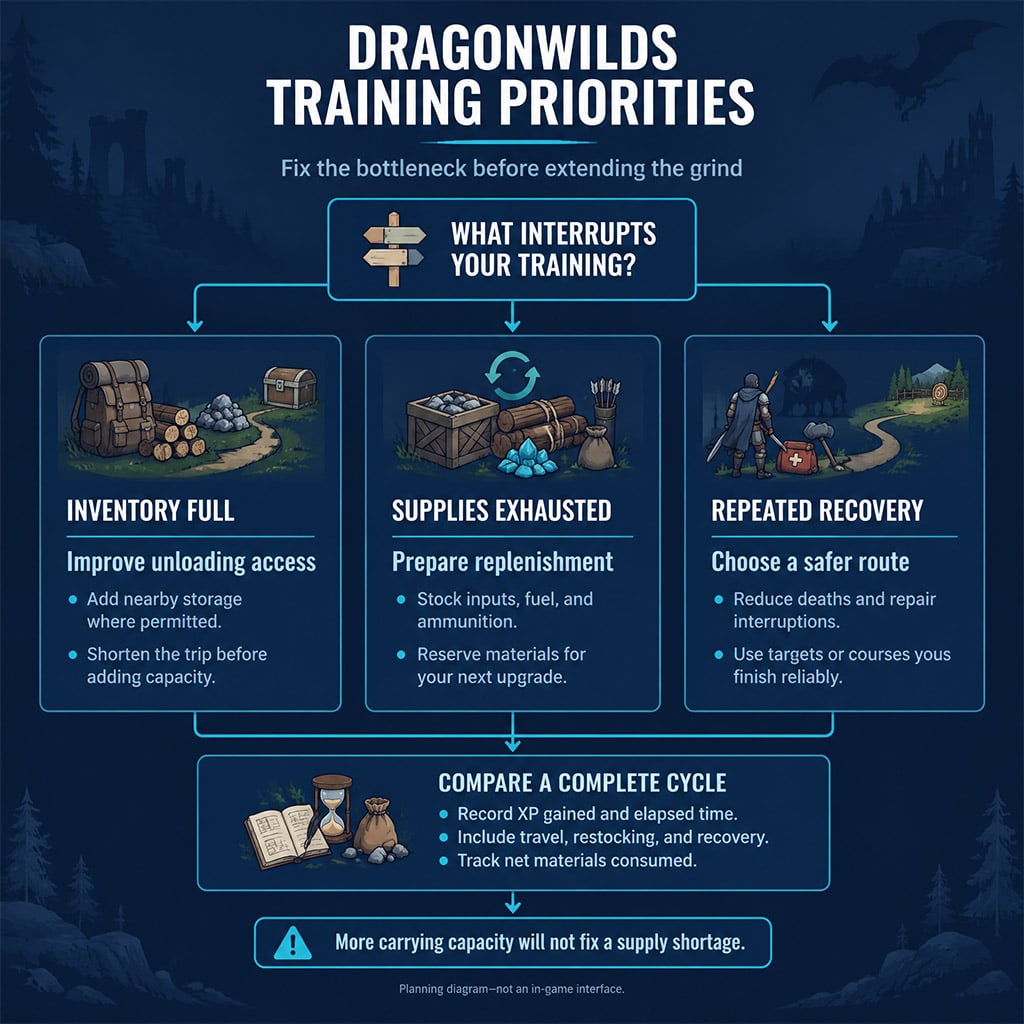
If your inventory fills before the route ends, improve unloading access. If supplies run out first, fix production; more carrying capacity will not solve that problem.
The Dragonwilds skill index lists the following 11 skills with progression pages through level 99. These are training recommendations, not measured fastest-method rankings.
| Skill | Training approach | Change the route when… |
|---|---|---|
| Mining | Gather clustered resources needed for upgrades | Waiting or travel dominates the circuit |
| Woodcutting | Gather useful timber; establish planted supply when available | Seeds or trunk processing become the bottleneck |
| Farming | Maintain crops between other activities | Finished crops sit idle or planting supplies run out |
| Cooking | Process abundant ingredients into useful food | Ingredient acquisition costs outweigh the recipe's value |
| Artisan | Process gathered materials across supplied stations | Fuel or secondary inputs repeatedly halt production |
| Construction | Build storage, workshops, and resource outposts | Further building provides little practical benefit |
| Runecrafting | Stockpile essence and compare complete crafting batches | Failures or essence consumption erase the apparent advantage |
| Attack | Fight durable targets you can handle consistently | Recovery costs exceed productive fighting time |
| Ranged | Use replaceable ammunition against reliable targets | Restocking consumes too much of the session |
| Magic | Fight manageable groups with adequate casting supplies | Survival or rune shortages interrupt casting |
| Agility | Repeat courses you complete reliably | A harder course produces better complete-session results |
Fix the limiting factor before replacing the entire method.
Compare Complete Cycles
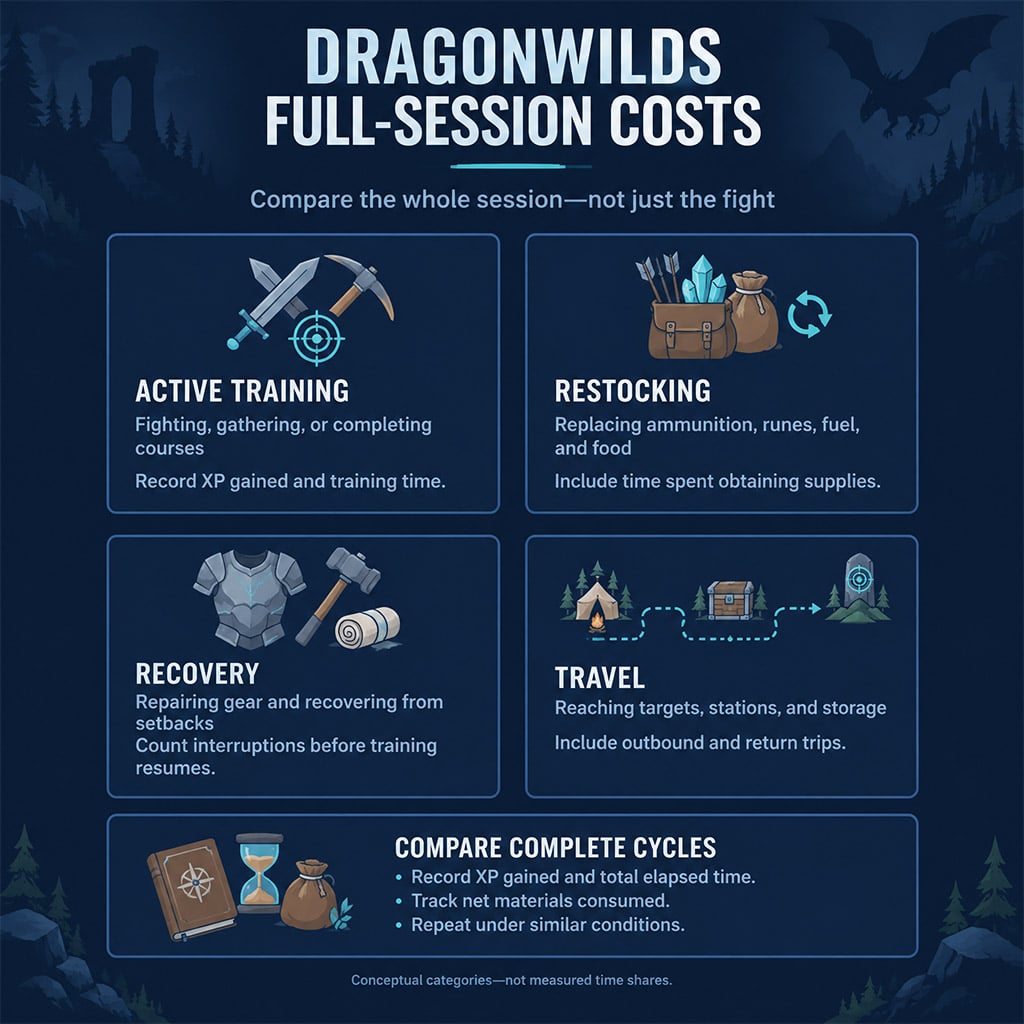
Record XP gained, elapsed time, and net resources consumed. Include travel, unloading, repairs, ingredient gathering, and ammunition production.
A short test can reject an awkward method. To choose between close alternatives, finish a full resource-refresh or production cycle and repeat under similar conditions.
Do not extrapolate a freshly stocked route into an hourly rate without accounting for replenishment.
Gathering: Keep the Output Useful
Gathering for XP alone can leave you short of progression materials. We reserve supplies for the next equipment or building upgrade before diverting them into training.
Mining and Woodcutting
For Mining, check resource and tool requirements first. Link several usable clusters rather than waiting beside one depleted deposit.
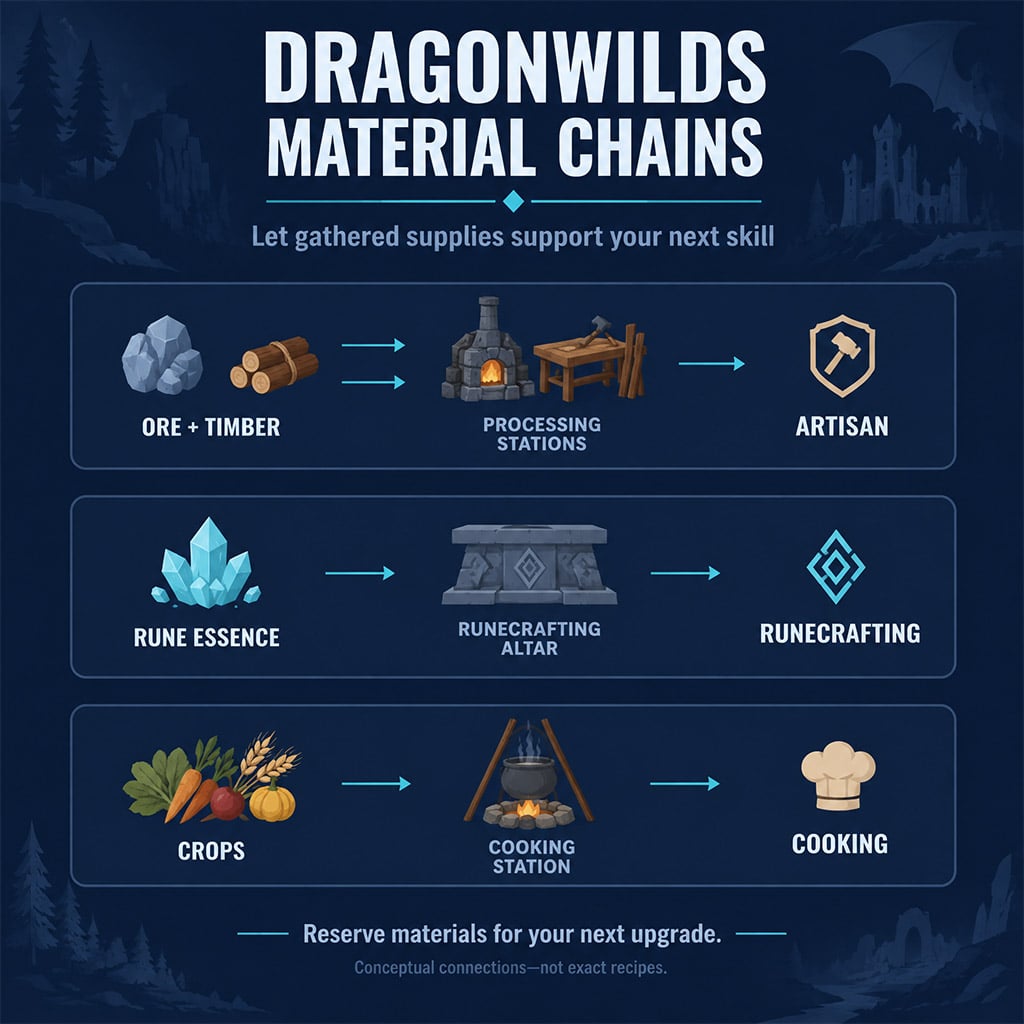
Compare routes by both XP and useful output. Essence can supply Runecrafting, while ore supports equipment and Artisan; the better choice depends on what you need next.
For Woodcutting, keep timber collection close to unloading. A planted supply becomes attractive when it removes more travel than it adds in seed acquisition and maintenance.
The skill index identifies Rocksplosion and Axtral Projection as utility spells. Read their current requirements and effects in-game rather than planning around unconfirmed damage, radius, or XP behavior.
Farming
Match farm size to your return schedule. Plant and maintain crops, complete another task, then return for harvesting and replanting.
Expand only when replacement supplies and harvest timing remain manageable. A larger farm that repeatedly sits ready does not guarantee more productive cycles.
Keep a portion of each input reserve for the next planting. Spending everything on one harvest can break the supply chain that supports Cooking.
Processing: Reserve Materials Before Training
A processing session fails when one missing ingredient stops every station. Prepare fuel and secondary inputs before committing valuable materials.
Cooking, Artisan, and Construction
We feed Cooking from available ingredients and Artisan from gathered materials, then use suitable processed outputs for equipment and Construction.
Prioritize food you will consume and components you still need. Producing unwanted items shifts the cost into storage rather than removing it.
For Construction, build useful infrastructure first. If you later test repetitive placement and dismantling, record actual refunds; do not assume full recovery or renewed XP eligibility after reloading.
Merchant transactions need the same discipline. Test one complete purchase, processing, and resale cycle before buying in bulk, including every ingredient and any stock limitation.
Runecrafting
Inspect the batch settings before gathering more essence. Compare manual and automatic options by successful output, XP, time, and essence consumed.
Choose a difficulty you complete reliably. A higher reward per success can lose its advantage through failed attempts.
Recycling only reduces costs when the full cycle supports that result. Returned essence is not evidence of an unlimited supply.
Combat and Agility: Include Recovery in the Result
A difficult encounter is not automatically a better training target. We compare the productive portion of the session with the time spent restoring supplies and returning to action.
Attack, Ranged, and Magic
For Attack, choose durable enemies with safe, repeatable attack windows.
For Ranged, include ammunition replacement. A stronger weapon is not necessarily faster overall if its supplies take much longer to produce.
For Magic, use manageable groups when your spells can effectively hit multiple targets. Do not weaken enemies with another style solely on the assumption that a finishing spell awards credit for the entire fight.
Avoid routes that depend on enemies becoming stuck behind doors or terrain. Those interactions are not a dependable training foundation.
Agility
Compare complete course runs, including failures and recovery. Move to a harder course only when its total result improves.
Carry-capacity benefits matter most when unloading interrupts other training. They offer less immediate value when resource availability is the actual constraint.
FAQ (Frequently Asked Questions)
What is the fastest way to level skills in Dragonwilds?
There is no verified universal fastest route established here. Combine material-producing skills with their processing skills, then compare complete sessions rather than isolated XP bursts.
Which skill should we train first?
Train the skill that removes your current progression constraint. Check equipment access, storage, and supply requirements before choosing a skill solely for its level-99 goal.
Are higher-tier resources always better for training?
No—tier alone does not establish training efficiency. Compare travel, gathering time, replenishment, and useful output before replacing an accessible route.
Is manual Runecrafting better than automatic crafting?
Choose based on complete-batch returns, not one successful attempt. Compare XP, output, time, failures, and essence consumption under the same conditions.
Should we use merchant loops or XP exploits?
Do not build a long training plan around an unverified shortcut. Test the complete interaction on your current build, record net costs, and keep a normal route available if its behavior changes.

I’m Amara Okafor, a Nigerian Contributing Writer at GGWTB covering sports, racing, and driving games, alongside casual mobile titles. My guides focus on timing a pass, finding a braking point, and choosing upgrades that suit your playstyle. For shorter sessions, I keep the priorities clear: less menu-hopping, more time playing.
Most Popular Posts
- RuneScape Dragonwilds: Dreaming Stone Shards Route & Puzzle Guide
- RuneScape: Dragonwilds Best Weapons by Power Level and Core Upgrade Priority
- RuneScape Dragonwilds Early Game Guide: What to Build & Upgrade First
- RuneScape Dragonwilds: Best Lodestone Locations and Fast Travel Routes
- RuneScape Dragonwilds Abyssal Whip Guide: Crafting Route & Upgrade
- RuneScape Dragonwilds Best Weapons: Tier Scaling & Upgrade Traps
Popular Category Lists
- ARC Raiders / (356)
- Grow a Garden / (294)
- CoD: Black Ops 7 / (167)
- Star Citizen / (163)
- MLB 26 / (159)
- Monopoly Go / (153)
- ARK Survival Ascended / (128)
- Steal a Brainrot / (99)
- Blox Fruits / (74)
- Adopt Me / (74)
- Forza Horizon 6 / (72)
- Sailor Piece / (68)
- Grow a Garden 2 / (68)
- Diablo IV / (62)
- CoD: BLACK OPS 6 / (55)
- Aion 2 / (53)
- Path of Exile 2 / (48)
- Monster Hunter Wilds / (46)
- Windrose / (44)
- COD: Modern Warfare 4 / (44)