0
0 Created: Jul 30,2026 | Star Citizen
Star Citizen 4.9.0: Fastest Way to Farm Size 3 NDB Repeaters - Combat Gauntlet 5 Guide

NDB Repeaters are the best Size 3 energy weapon you can't buy.
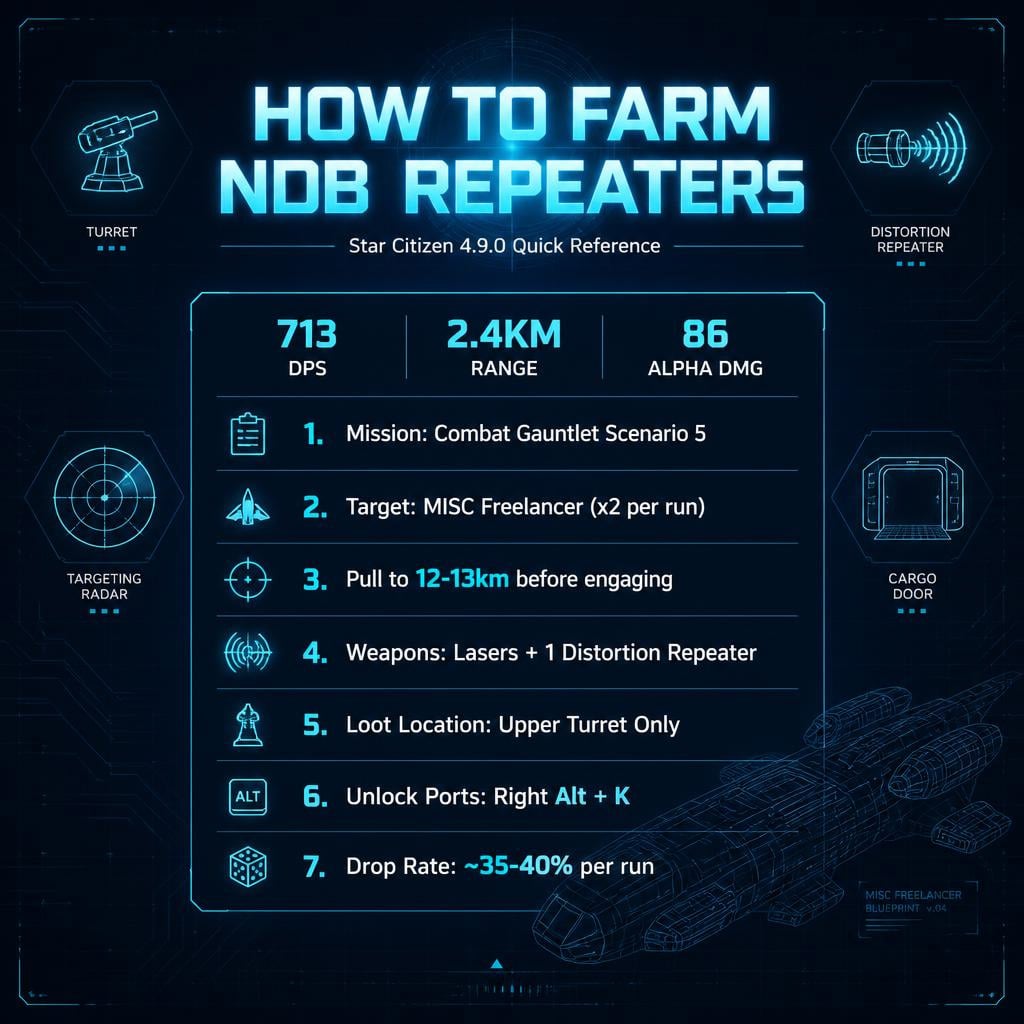
713 DPS. 2.4km range. 86 alpha damage. No shop sells them — you loot them off NPC Freelancers, or you don't get them at all.
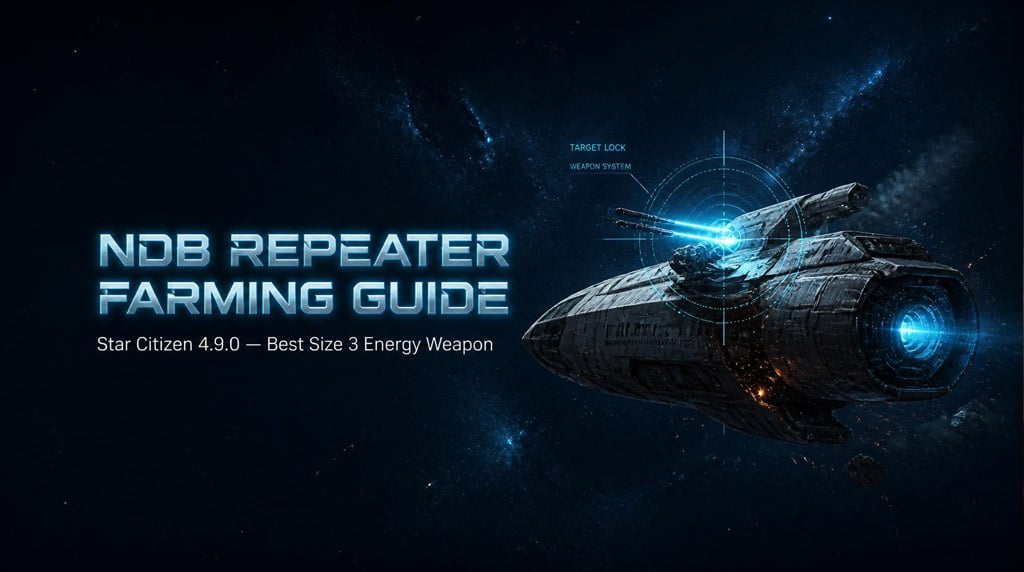
Here's the exact route: which mission, which ship to hunt, how to disable it without vaporizing your loot, and what drop rate to actually expect.
- Why Bother Farming These
- The Mission: Combat Gauntlet Scenario 5
- Ship Setup: Lasers + One Distortion Weapon
- Test Loadout
- The Farming Route
- 1. Trigger the Mission
- 2. Bait the Lock
- 3. Pull It Away — 12-13km
- 4. Disable, Don't Destroy
- 5. Check the Upper Turret
- Wave 2: Kill Order Matters
- Real Drop Rate: ~35-40%
- Looting: Don't Rush This Part
- The Full Loop
- Mistakes That Kill Your Run
- FAQ
- What are NDB Repeaters in Star Citizen 4.9.0?
- Can we buy NDB Repeaters from shops?
- What's the best mission to farm them?
- Where do NDB Repeaters spawn on the Freelancer?
- What's the actual drop rate?
- Summary
Why Bother Farming These
| Weapon | DPS | Range | Alpha | Shop? |
|---|---|---|---|---|
| NDB Repeater | 713 | 2.4km | 86 | ❌ Not sold |
| Standard S3 Repeater | Lower | Shorter | Varies | � |
Usually |
No ammo cost. Strong shield pressure. Long effective range. If you're running Size 3 hardpoints, these are end-game.
The Mission: Combat Gauntlet Scenario 5
MobiGlass → Contracts → Mercenary → Combat Gauntlet Scenario, under Gilley's Fight School (Stanton).
You need Scenarios 1–4 cleared first. They're easy — any half-decent fighter clears them.
Scenario 5 matters because of the Freelancers:
| Wave | Enemies | Loot Value |
|---|---|---|
| 1 | 1x MISC Freelancer | Check #1 |
| 2 | 1x Sabre Firebird, 1x Vanguard, 1x Freelancer | Check #2 |
Two Freelancer checks per run. That's the whole reason this mission beats the alternatives.
Ship Setup: Lasers + One Distortion Weapon
The rule: don't kill what you're trying to loot.
- Lasers strip shields cleanly, no overkill risk
- At least one distortion repeater for the actual disable
- Skip heavy ballistics — they punch through hull too fast and torch the loot
Test Loadout
| Hardpoint | Weapon | Job |
|---|---|---|
| S4 x2 | M6A Laser Cannon | Main damage |
| S3 x2 | M5A Laser Cannon | Controlled DPS |
| S3 x2 | XG3 Distortion Repeater | Disable |
One distortion weapon is enough. Swap the second for a laser if you want faster clears.
The Farming Route
1. Trigger the Mission
Fly to the marker (~8km). Wave 1 spawns on approach.
2. Bait the Lock
Let the Freelancer target you — wait for the red lock indicator. Don't rush it near the objective.
3. Pull It Away — 12-13km
Distance matters. Kite the Freelancer to roughly 12-13km from the marker before engaging.
Why? Disable it too close, and Wave 2 spawns while you're still boarding. We've eaten a full squad mid-loot because of this exact mistake. Died. Respawned. Kept going — never abandon the contract.
4. Disable, Don't Destroy
Strip shields with lasers → switch to distortion → target dead-in-space, not dead.
5. Check the Upper Turret
NDB Repeaters only spawn on the upper turret — never saw them anywhere else across 10+ runs.
Scan first if you can. No NDBs? Kill it and move to Wave 2. Don't waste time boarding an empty ship.
Wave 2: Kill Order Matters
| Target | Priority | Why |
|---|---|---|
| Sabre Firebird | 1st | Missile spam, kill it fast |
| Vanguard | 2nd | Tanky, ignore-at-your-peril |
| Freelancer | 3rd | Save for controlled disable |
Close distance fast — sitting back just gives them more missile windows. Reset and re-engage if it gets messy, but don't turn it into a long-range missile duel.
Real Drop Rate: ~35-40%
Across 10-12 runs, roughly 35-40% of missions produced at least one NDB Freelancer out of the two checks. Not official numbers — field data.
| Runs | What to Expect |
|---|---|
| 1-2 | Maybe. Don't count on it. |
| 3-5 | Good odds you've seen one |
| 6+ | RNG evens out, mostly |
RNG's got a mean streak. Grind through it.
Looting: Don't Rush This Part
1. Shoot the rear cargo door with light laser fire until it opens
2. Park tight, board through the rear
3. Clear the cockpit — kill the pilot first
4. Sit in the pilot seat, press Right Alt + K — unlocks the ship ports
5. Head to the upper turret, pull both NDB Repeaters, transfer to your ship
That Right Alt + K step is non-negotiable. Skip it and the weapons won't budge.
The Full Loop
| Step | Action |
|---|---|
| 1 | Accept Scenario 5 |
| 2 | Trigger Wave 1 |
| 3 | Pull Freelancer to 12-13km |
| 4 | Scan/disable, check turret |
| 5 | Loot if NDBs present |
| 6 | Clear Wave 2 (Firebird → Vanguard) |
| 7 | Disable second Freelancer, repeat check |
| 8 | Finish, requeue |
Mistakes That Kill Your Run
| Mistake | Fix |
|---|---|
| Disabling too close to marker | Pull to 12-13km first |
| Ballistic-heavy loadout | Lasers + distortion only |
| Ignoring Wave 2 missiles | Rush the Firebird immediately |
| Forgetting Right Alt + K | Sit in pilot seat before trying |
| Skipping the scan | Scan first, save time |
| Abandoning after death | Respawn, contract stays active |
FAQ
What are NDB Repeaters in Star Citizen 4.9.0?
Size 3 energy repeaters with 713 DPS, 2.4km range, and 86 alpha damage — among the strongest S3 options in the game right now.
Can we buy NDB Repeaters from shops?
No. Zero shop availability. Farming NPC Freelancers is currently the only source.
What's the best mission to farm them?
Combat Gauntlet Scenario 5, Gilley's Fight School, Stanton. Two MISC Freelancers per run means two loot checks.
Where do NDB Repeaters spawn on the Freelancer?
Upper turret only, based on repeated testing. Check there first, every time.
What's the actual drop rate?
Roughly 35-40% chance per mission that one of the two Freelancers carries NDBs, based on 10-12 test runs. Not guaranteed — budget for multiple attempts.
Summary
Farm Combat Gauntlet Scenario 5. Target both MISC Freelancers. Pull the first one to 12-13km before disabling. Run lasers + one distortion weapon. Check the upper turret. Unlock ports with Right Alt + K. Expect roughly 35-40% odds per run.
Grind a few runs, get your pair, and never think about Size 3 loadouts the same way again.

Most Popular Posts
- Star Citizen 4.9 Hull C Cargo Hauling Guide: Make Millions aUEC Without Autoload
- Star Citizen 4.9 Alleso Money Guide: Best Pyro Trade Route for Fast aUEC
- Star Citizen 4.9 Battaglia Missions: CQ7 Rifle Locations, Loot Routes & Bug Fixes
- Star Citizen 4.9 Best C-788 Cannon Combos: Fastest TTK Loadouts
- Star Citizen 4.10 Quantum Drive Guide: Best Drives for Speed, Range, and Crafting
- Star Citizen 4.9 Rare Gun Attachments Farm: Echo Isles Loot Guide
Popular Category Lists
- ARC Raiders / (354)
- Grow a Garden / (294)
- CoD: Black Ops 7 / (167)
- Star Citizen / (163)
- MLB 26 / (159)
- Monopoly Go / (153)
- ARK Survival Ascended / (128)
- Steal a Brainrot / (99)
- Blox Fruits / (74)
- Adopt Me / (74)
- Forza Horizon 6 / (72)
- Sailor Piece / (68)
- Grow a Garden 2 / (68)
- Diablo IV / (62)
- CoD: BLACK OPS 6 / (55)
- Aion 2 / (52)
- Path of Exile 2 / (48)
- Monster Hunter Wilds / (46)
- Windrose / (44)
- Maplestory Classic / (42)