0
0 Created: Sep 13,2026 | Star Citizen
Star Citizen Delivery Missions: Box Courier Guide & Fixes

A single delivery contract can earn you clean starter capital—or strand you on an outpost pad with a glitched 1/8 SCU box clipped through your ship's hull. To guarantee your payout, track the active objective via mobiGlas, verify whether your box spawns in a freight elevator or an Admin wall dispenser, secure it against physics grid desync, and manually execute the contextual Place command at the drop point.
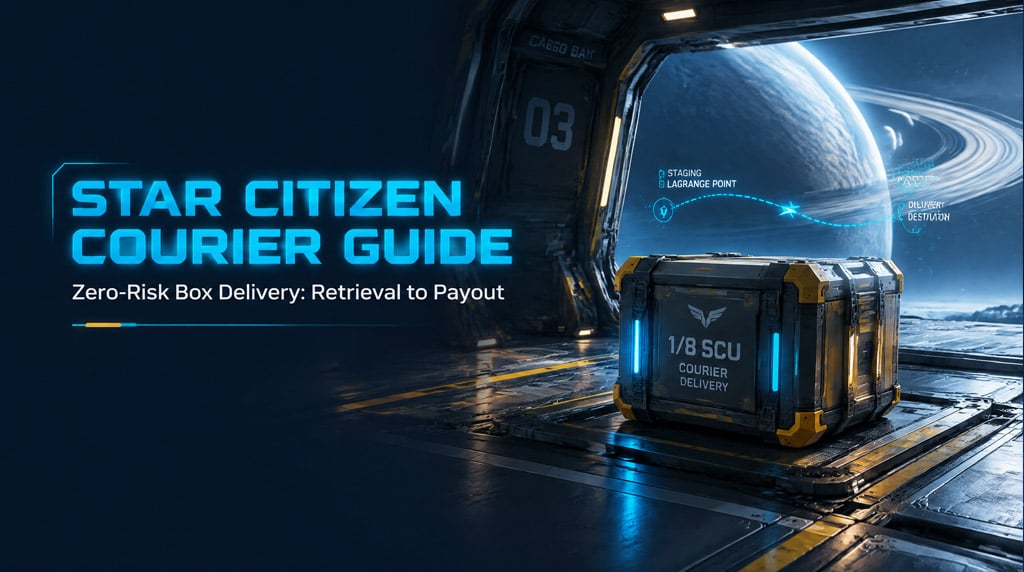
Here is the exact operational sequence to run courier contracts cleanly, prevent geometry bugs, and recover bugged drop-offs before abandoning your mission.
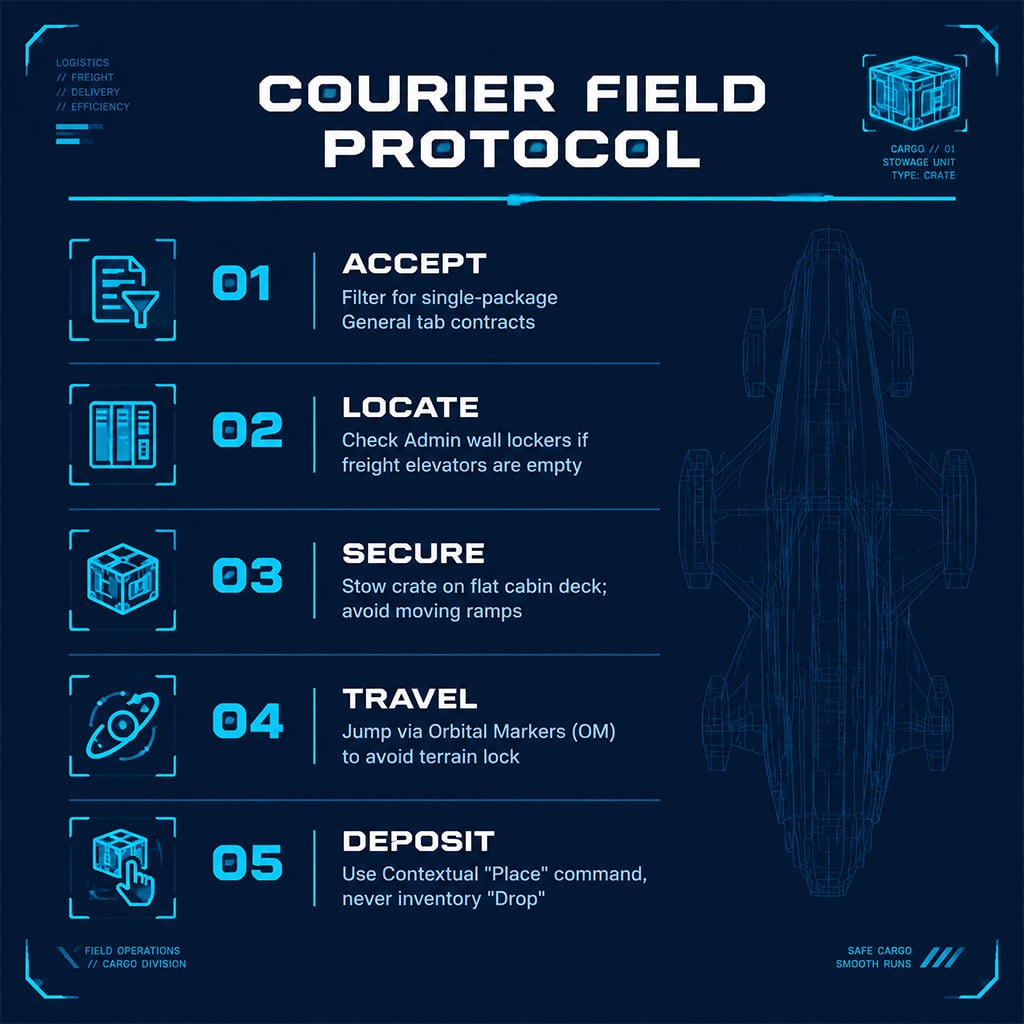
- Filter and Select Low-Risk Contracts
- Contract Risk Assessment Matrix
- Ship Staging and Gear Setup
- Equipment Loadout
- Station Arrival and Package Retrieval
- Finding the Package: Cargo Elevator vs. Admin Dispenser
- Securing Cargo for Transit
- Hull Placement Rules
- Quantum Routing and Planetary Approaches
- Descent and Parking Protocol
- Completing the Delivery Sequence
- Troubleshooting Broken Courier Missions
- The crate fell through the ship floor or hangar terrain
- The HUD objective marker disappeared
- The delivery shelf or locker will not accept the box
- The pickup machine keeps cycling without dispensing
- FAQ (Frequently Asked Questions)
- Can you complete Star Citizen delivery contracts with any ship?
- Where is the package if the cargo elevator is completely empty?
- Why does my delivery package marker point through a solid wall?
- Should I turn off my ship completely when landing at outposts?
- What should I do if a delivery shelf ignores the package?
Filter and Select Low-Risk Contracts
The Contracts Manager tab under mobiGlas regularly displays courier offers ranging from basic intra-system runs to multi-box operational loops. High-paying courier contracts look tempting, but they drastically increase your point-of-failure risk: if one box glitches through a floor on a three-crate route, you forfeit the payout for the entire mission.
mobiGlas (F1) ➔ Contracts Manager ➔ Delivery ➔ General Tab
Before accepting, audit these mission parameters:
- Package Count: Stick strictly to single-package runs until your route discipline is solid.
- Jurisdiction & Legality: Reject any contract routed under the Personal tab unless you are intentionally running an illegal playthrough. Unverified packages can trigger security scans, CrimeStat rating spikes, and immediate station turret aggro.
- Drop-off Environment: Identify whether the delivery point is a standard orbital station, a fortified distribution center, or an unmonitored planetary outpost.
Contract Risk Assessment Matrix
| Contract Profile | Box Count | Primary Operational Risk | Recommended Action |
|---|---|---|---|
| Standard Courier | 1 | Low payout efficiency | Take it. Cleanest route for solo pilots. |
| Multi-Drop Route | 3–5 | Marker desync, mixed destinations | Hold until single runs are effortless. |
| Derelict Recovery | 1–3 | Hostile AI cutlasses, rough terrain | Bring a sidearm and a tractor beam. |
| Distribution Center | 1+ | Trespassing bugs, complex elevator networks | Check local faction standing before entry. |
| Unlawful Smuggling | Variable | Station scanning, immediate CrimeStat | Avoid unless running dedicated stealth hulls. |
Ship Staging and Gear Setup
You do not need a multi-crew freighter for handheld courier contracts, but flying an open-cockpit fighter (like an Aegis Gladius or an RSI Aurora without cabin access) will force you to exploit buggy inventory ladders.
Fly a hull with a physical walk-in cabin, a low exterior ramp, and enough flat floor space to isolate the crate from animated doors. Reliable starter platforms include the Avenger Titan, Cutter, Nomad, or Pisces C8X.
Equipment Loadout
Pack light. Routine station deliveries rarely require heavy combat armor:
- Undersuit + Helmet: Non-negotiable. Outposts and exterior pads expose you to immediate atmospheric decompression or toxic gas.
- Multi-Tool with Tractor Beam Attachment: Mandatory for pulling crates that drop through ship seats, ramps, or ground geometry.
- MedPen (x2): Stowed in suit quick-slots to patch terrain fall damage.
- Skip Heavy Armor: Bulky armor reduces stamina, slows sprint speed inside stations, and costs unnecessary aUEC to replace if a collision bug downs you.
Station Arrival and Package Retrieval
When approaching your pickup station, avoid high-speed decoupling maneuvers near the docking rings. Request landing clearance at 3–4 km out (Left Alt + N or your mapped ATC comms hotkey).
Follow this landing procedure:
1. Burn toward your assigned hangar entrance using spacebrake (X) to stabilize your velocity vector.
2. Cycle landing gear down (N) well before the shield threshold.
3. Descend straight down; do not sweep forward across hangar warning lights.
4. Kill engine power (I) while leaving ship systems online (U). This grounds the ship against physics physics drift while maintaining shield barriers.
Finding the Package: Cargo Elevator vs. Admin Dispenser
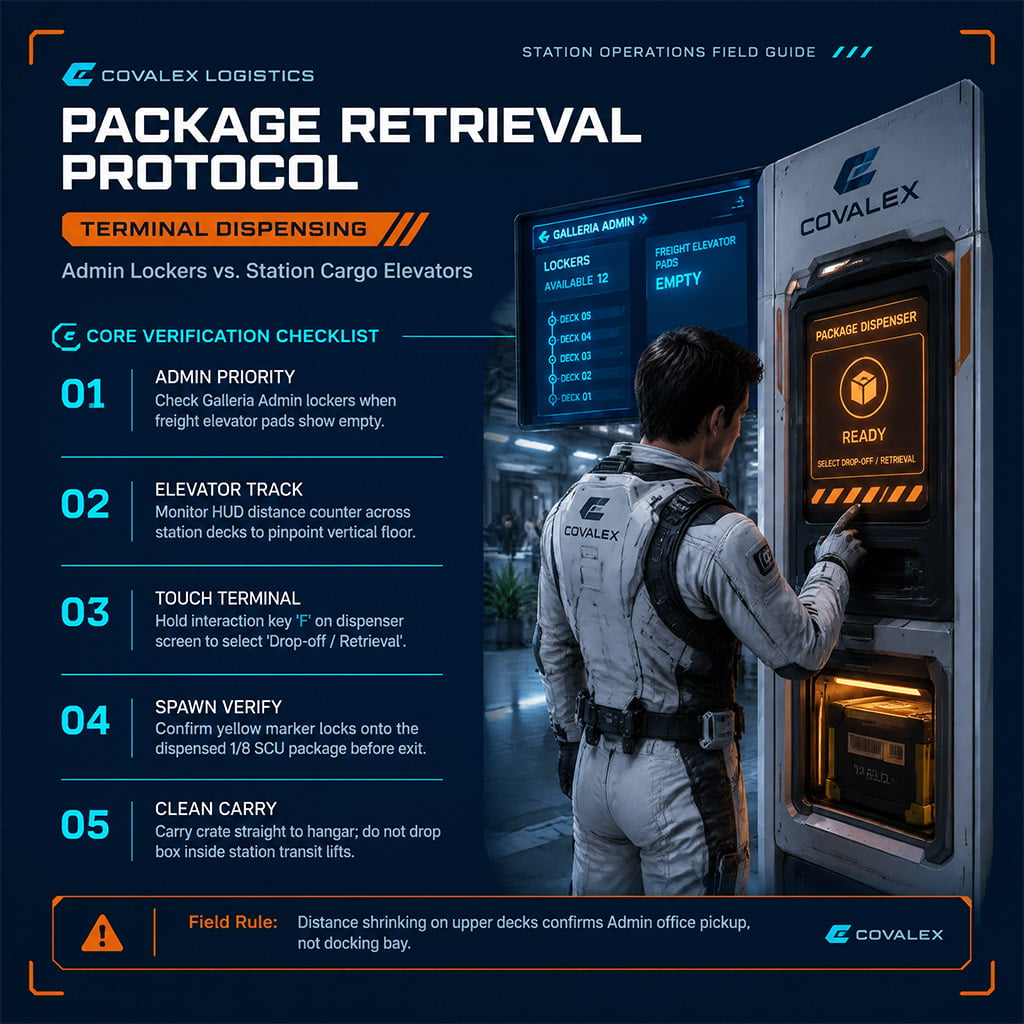
A common point of failure occurs when players check the wrong station terminal and assume the contract is broken. Star Citizen splits courier items across different retrieval terminals depending on the patch cycle and location.
Hangar Bay ➔ Station Elevator ➔ Galleria / Admin Hub ➔ Package Dispenser
- Check the Freight Elevator Terminal First: If your mission specifically designates physical freight, call the cargo elevator to the surface.
- Check the Admin Office / Covalex Dispenser: If the marker sits near the commercial galleria, head directly to the Admin desk. Locate the small wall-mounted automated package machine, approach the screen, hold
Fto enter Interaction Mode, and click Drop-off / Retrieval. - Track Distance Numbers Vertically: If the HUD marker points into blank floor space, step into a station elevator. Watch the distance counter: if it drops rapidly while ascending to the Habitation or Galleria decks, your crate is in an upper logistics room, not the docking bay.
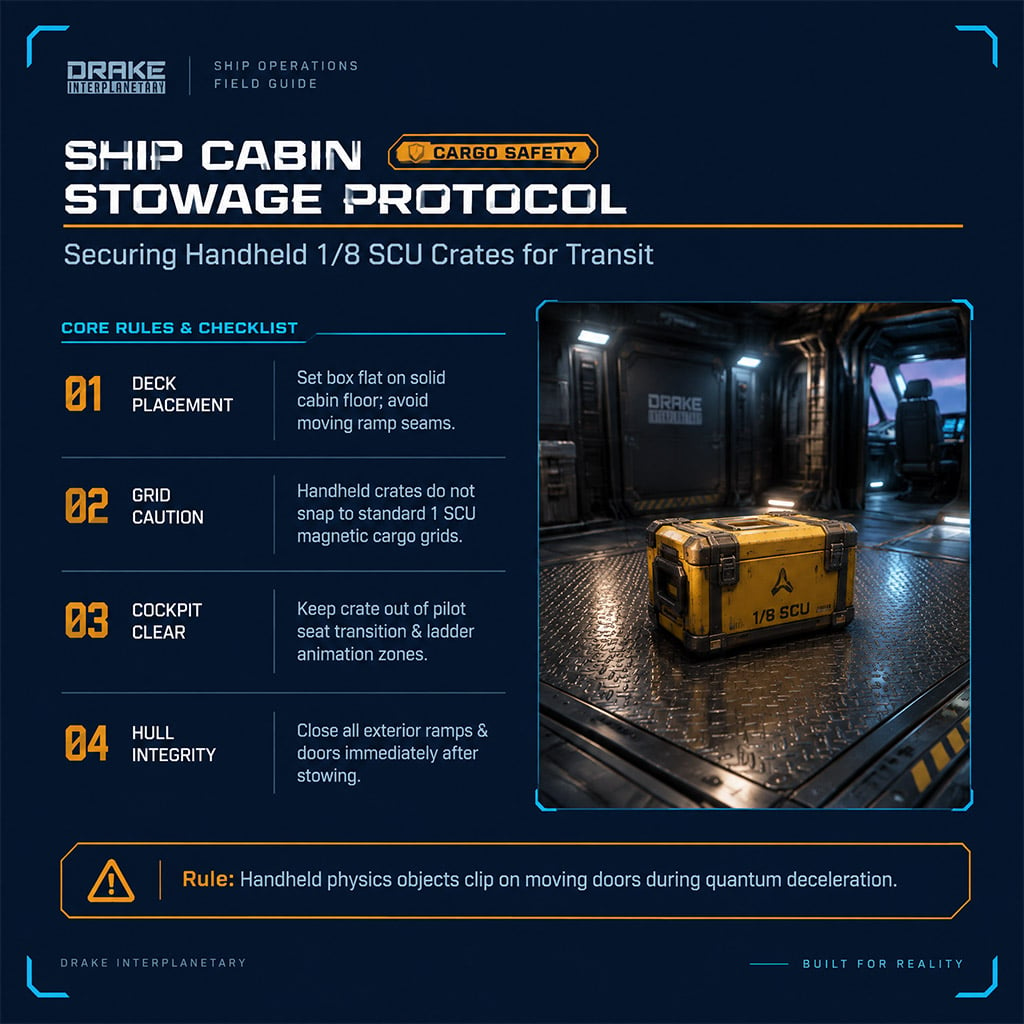
Securing Cargo for Transit
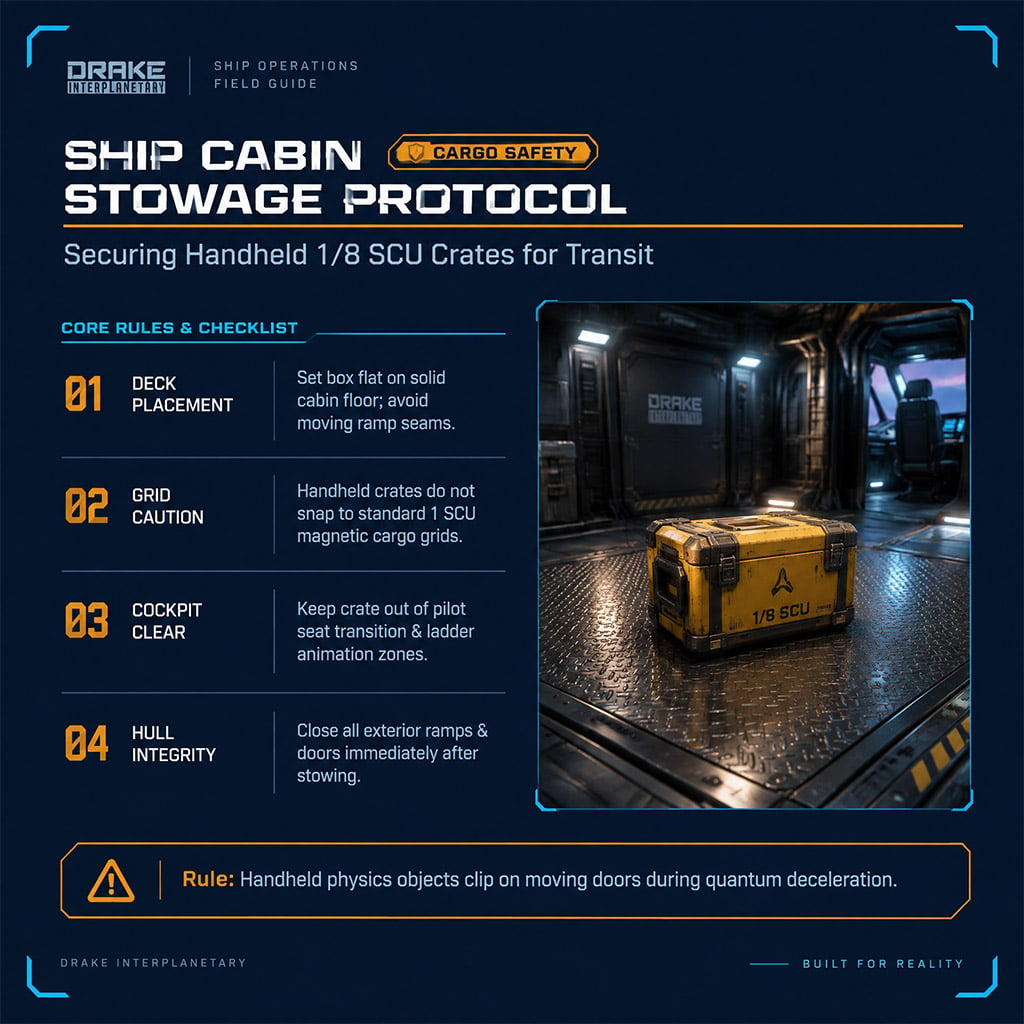
Once you pick up the crate, carry it straight to your ship. Do not cycle weapons, do not open mobiGlas while sprinting, and do not drop the box inside station transit elevators—elevators can phase through unanchored physics objects.
Hull Placement Rules
1. Walk into your cargo area and select Place (hold F, look down, select the highlighted floor outline).
2. Never drop the box on ramps or lift doors: Transition seams between animated doors and ship hulls can swallow the crate's collision model.
3. Keep it off the pilot seat threshold: Objects set too close to the cockpit can block seat entry animations or get stuck behind flight consoles.
4. Understand Grid Snapping: Handheld 1/8 SCU boxes do not always snap to standard magnetic cargo grids designed for 1 SCU freight containers. Secure the box on a flat interior deck away from all moving parts.
5. Close your exterior doors (Open/Close Doors ship binding) immediately to prevent unauthorized boarders.
Quantum Routing and Planetary Approaches
Planetary delivery destinations frequently sit on the far side of a moon or planet. If your ship's navigational computer fails to plot a direct jump, avoid flying manually through hundreds of kilometers of atmosphere.
Surface Target Blocked ➔ Quantum to Orbital Marker (OM-1 to OM-6) ➔ Recalibrate Jump to Outpost
Descent and Parking Protocol
- Spool the Drive: Align with the destination, activate the Quantum Drive (
B), wait for calibration and spooling to hit 100%, and initiate the jump. - Clear Atmospheric Deceleration: Cut your quantum jump safely above the terrain, throttle back, and maintain manual control through thick atmospheric drag.
- Scan the Outpost Pad (
Tab): Red markers indicate hostile ground personnel or active pirate ships. Multiple parked civilian hulls signal player activity; prepare for immediate egress. - Park Close, Cut Engines: Land on the designated pads or immediately outside the main airlock doors. Cut engine power (
I) immediately upon touchdown. Leaving your thrusters hot on planetary surfaces can allow wind storms to flip lightweight ships across the outpost.
Completing the Delivery Sequence
Carrying your cargo to the objective zone requires precise interaction handling. Physics bugs are most common at the final transition point.
1. Pick up the box from your cabin floor.
2. Enter the outpost airlock, cycle the inner door, and find the mission marker.
3. Verify the Endpoint Interface:
- Manual Drop Shelf: Walk directly up to the highlighted shelf, hold
F, move your cursor until the green holographic preview appears on the shelf surface, and choose Place. Do not hitDropfrom your personal inventory wheel. - Automated Covalex Machine: Select Drop-off on the machine screen, wait for the mechanical hatch to cycle open, position the box inside using Place, and step back while the door seals.
4. Keep the contract tracked on your HUD until you receive the mission-complete audio prompt and witness the aUEC payout deposit in the upper-right corner of your screen.
Troubleshooting Broken Courier Missions
The crate fell through the ship floor or hangar terrain
Do not attempt to walk down through broken geometry. Draw your tractor beam multi-tool, toggle into tether mode, lock onto the package mesh through the floor seam, and pull it directly toward an open airlock or clear terrain.
The HUD objective marker disappeared
Open mobiGlas (F1), select the Contracts Manager, open the Accepted tab, and toggle your active mission to Untrack, then immediately switch it back to Track. This resets the spatial locator waypoint on your UI.
The delivery shelf or locker will not accept the box
Ensure the package is not rotated upside down. Pick the box back up, back out of the room to unload the local interaction zone, return to the shelf, and use the contextual Place command again. If the terminal remains completely unresponsive, the local server shard is likely suffering from tick-rate degradation; server hop to a fresh region.
The pickup machine keeps cycling without dispensing
If an Admin wall locker displays an error or fails to drop a crate, open the Contracts Manager and check the objective state. If the status remains stuck on Retrieve Package, file a ticket on the Star Citizen Issue Council and abandon the contract to free up your mission buffer.
FAQ (Frequently Asked Questions)
Can you complete Star Citizen delivery contracts with any ship?
You need an enclosed walk-in interior with a physical cabin or cargo deck. Single-seat fighters with exterior access ladders (like the Hornet or Arrow) do not support carrying handheld crates into the cockpit without physics grid collision glitches.
Where is the package if the cargo elevator is completely empty?
Courier packages often spawn in wall-mounted Covalex delivery lockers inside the station's Admin office or Galleria deck rather than the heavy cargo lift. Track your HUD marker's distance counter across station elevators to pinpoint the exact floor.
Why does my delivery package marker point through a solid wall?
Star Citizen's HUD markers highlight direct Euclidean line-of-sight coordinates rather than dynamic navigation waypoints. Use local transit elevators, stairs, and external ramps to route your character around interior bulkheads until the distance counter drops.
Should I turn off my ship completely when landing at outposts?
Turn off your engines (I) to prevent wind gusts from flipping your ship, but leave your power systems and shields online (U). This maintains maximum shield health against stray fire while protecting your stowed cargo from atmospheric turbulence.
What should I do if a delivery shelf ignores the package?
Never use the raw inventory Drop option; pick the crate up, hold F to open the contextual wheel, hover over the shelf surface until the outline turns green, and select Place. If the trigger fails to fire, toggle the contract off and on in mobiGlas to re-sync server-side tracking.

I’m Benjamin Walsh, an Australian Senior Copy Editor at GGWTB focused on survival crafting, open-world exploration, and extraction games. My guides weigh base locations, supply routes, and what deserves the last slot in your backpack. When editing, I look for skipped prerequisites and unclear directions—a useful guide shouldn’t send you across the map without the right tools.
Most Popular Posts
- Star Citizen 4.9 Hull C Cargo Hauling Guide: Make Millions aUEC Without Autoload
- Star Citizen 4.9 Battaglia Missions: CQ7 Rifle Locations, Loot Routes & Bug Fixes
- Star Citizen 4.10 Quantum Drive Guide: Best Drives for Speed, Range, and Crafting
- Star Citizen 4.9 Rare Gun Attachments Farm: Echo Isles Loot Guide
- Star Citizen Alpha 4.10 Guide: Recco Battaglia Missions, Siege of Orison, Regen Crisis
- Star Citizen 4.10 PTU, 4.9 Hotfixes, Server Outage: What Actually Matters This Week
Popular Category Lists
- ARC Raiders / (354)
- Grow a Garden / (294)
- CoD: Black Ops 7 / (167)
- Star Citizen / (163)
- MLB 26 / (159)
- Monopoly Go / (153)
- ARK Survival Ascended / (128)
- Steal a Brainrot / (99)
- Blox Fruits / (74)
- Adopt Me / (74)
- Forza Horizon 6 / (72)
- Sailor Piece / (68)
- Grow a Garden 2 / (68)
- Diablo IV / (62)
- CoD: BLACK OPS 6 / (55)
- Aion 2 / (53)
- Path of Exile 2 / (48)
- Monster Hunter Wilds / (46)
- Windrose / (44)
- COD: Modern Warfare 4 / (43)