



 0
0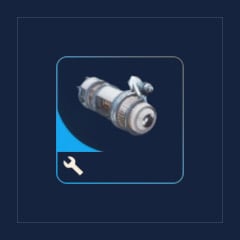
Sentinel Firing Core
ARC Raiders Sentinel Firing Core: Buy & 6-Stop Farm Route
XBOX/PS/PC
In Stock
3
- 3
- 6
- 9
- 12
- 15
- 18
$3.58
You May Also Be Interested In:
In Stock
Buried City Hospital Key / Key
In Stock

![[BP] Vulcano](https://img.ggwtb.com/uploads/productimg/Vulcano79.jpg)
[BP] Vulcano / BluePrint

XBOX/PS/PC
In Stock
3
Got the Items in seconds. Worked.
Quick replies and accurate delivery.
Instant delivery, very convenient.
Instant delivery, smooth.
Item arrived; safety fine, service not.
Sentinel Firing Cores gate early weapon bench upgrades, but hunting random ARC spawns will bleed your stash. Farm these cores systematically by running a tight 6-stop sweep around Marano Park in Buried City, breaking sniper targeting beams before impact, and securing accessible perches.
Sentinels are stationary ceiling and wall-mounted sniper turrets that guard high-value transit zones. Check the Marano Park cluster based on your immediate spawn location, sweep the remaining nodes in sequence, and extract. Do not cross the entire map to chase unverified gunfire.
| Location Node | Perch & Line of Sight | Pre-Shot Loot Plan | Tactical Risk |
|---|---|---|---|
| Town Hall | Upper rooftop arch overlooking the plaza | Identify climbable maintenance ladders before firing | Exposed to crossfire from players entering via northern roads |
| Highway Overpass | Underside concrete supports south of Town Hall | Ground recovery; drops straight down onto road | Limited cover from prowling ground units |
| Western Walkway | Underbelly or frame of the pedestrian bridge | Look for low railings to catch the debris | Chokepoint for scavengers heading toward extraction |
| Piazza Roma | Second-story building ledge | Trace a route across exterior awnings or balconies | Narrow alleys trap you during targeting locks |
| Marano Park Fountain | Top central spire of the dry fountain | Clear open ground recovery | Completely exposed; kill local ARC trash first |
| The Galleria | Upper atrium rim and external skylight ledges | Ensure zipline or interior stair access | Multi-level interior echoes shots across the sector |
Sentinels deal massive kinetic damage capable of stripping shields and health in a single round. Surviving the encounter requires fighting the targeting mechanic rather than trying to out-DPS the turret.
1. Spot the Beams: Target identification begins with converging red targeting lasers sweeping your sector.
2. Anchor Hard Cover: Position behind concrete barriers, thick pillars, or door frames. Corrugated metal sheets will not absorb a direct blast.
3. Pique and Blast: Step out, land one heavy round into the core eye, and duck back before the dual targeting beams merge into a single solid beam (roughly 1.5 seconds).
4. Account for Drop Physics: When the turret explodes, physics apply immediately. Destroying a turret anchored to a sheer vertical wall often kicks the loot cylinder down into street clutter or onto inaccessible ledges.
| Loadout Setup | Best For | Pros | Cons |
|---|---|---|---|
| Hullcracker (Heavy) | Speed runs | 1-to-2 shot takedown; limits exposure time | Expensive ammo; draws the entire lobby to your noise |
| Ferro / Anvil (Medium) | Budget / Zero-to-hero raids | Accessible; controlled peek-shooting | Requires 3 to 5 clean peeks; higher mistake window |
| Snap Hook Utility | Rooftop recovery | Reaches wrecks caught on high ledges instantly | Takes up a vital utility slot otherwise used for meds |
If Buried City is crowded with hostile teams, redirect to Dam Battlegrounds.
Sentinel Firing Cores drop exclusively from destroyed Sentinel sniper turrets mounted on structural walls and rooftops. They do not drop from light roaming drones or ground-based spider units.
Upgrading the Gunsmith workbench to Level 3 requires 4 Sentinel Firing Cores along with your standard refined metal crafting materials.
Yes, every documented spawn point features a conventional path via ladders, stairwells, or parkour mantling. However, bringing a Snap Hook prevents losing loot when explosive physics kick the wreckage onto an unreachable awning.
Check the ground for scorched metal debris; if another player cleared it, the node is dead for that raid. Complete your remaining checks in the Marano Park cluster and head straight to an extraction point to reset your instance.
The Ferro or Anvil rifle delivers the best balance of cost and heavy-impact precision. Both allow you to peek from hard cover, deliver single-shot damage, and break targeting lock without burning high-tier kinetic munitions.

We use cookies to ensure website functionality and enhance your experience. Click "Accept All" to consent, or "Customize" to manage your preferences. See our Privacy Policy.