0
Created: Oct 28,2026 | ARC Raiders
MW4 DMZ Items Farming Guide: Legendary Materials & Irradiated Containers

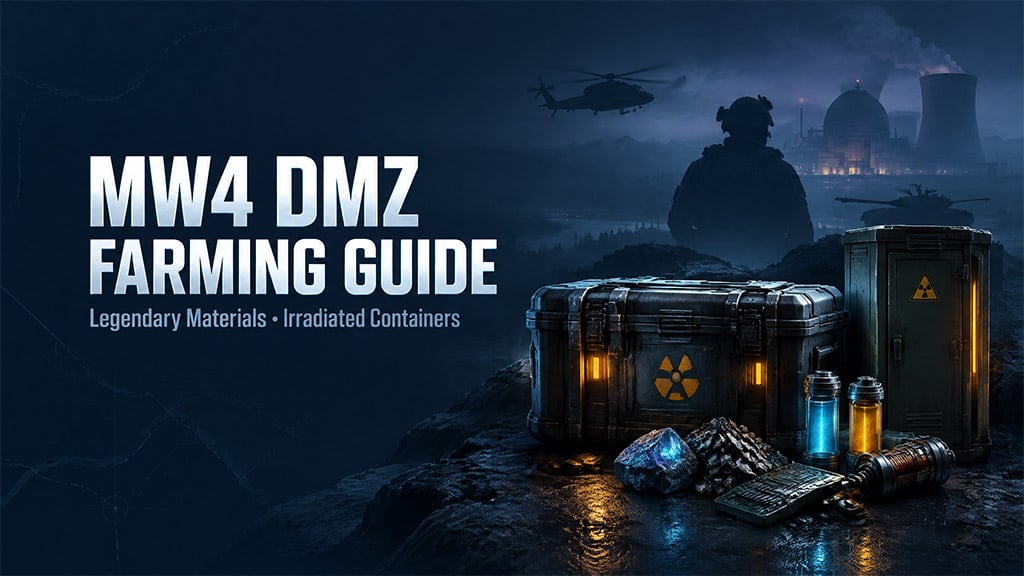
We target Colossus, Death Stalkers, and tanks for legendary materials, then search chemical storage lockers for irradiated containers. Choose one primary objective per raid, prepare for its collection risks, and extract before an optional fight jeopardizes your progress.
Farm the shortfall.
Loot counts and costs below are planning references, not guaranteed yields or independently tested current-patch values. Your current upgrade menu takes priority.
- Legendary Materials: Fight the Right Commander
- Material sources and farming priorities
- Colossus: remove flankers before committing damage
- Death Stalker: choose the crash area before firing
- Tanks: budget the resupply loop
- Ingredient Printing: Manufacture Only What You Need
- Search the right ingredient locations
- Follow the printing dependency chain
- Irradiated Containers: Maximize Accessible Locker Searches
- Start at the air-base clinic when prepared
- Choose stops by access cost
- Cap fire-station and hospital key searches
- Process only when the raid supports it
- Prepare protection, then process in Reactor 2
- FAQ (Frequently Asked Questions)
- Which bosses drop legendary materials in MW4 DMZ?
- What is the best route for irradiated containers?
- Do irradiated containers appear every raid?
- Do irradiated containers always give weapon manuals?
- How many ingredients should we print for an upgrade?
Legendary Materials: Fight the Right Commander
Random boss hunting burns ammunition without necessarily advancing your next upgrade. We choose the missing material before deployment, establish a safe collection area, and leave once the requirement is covered.
Material sources and farming priorities
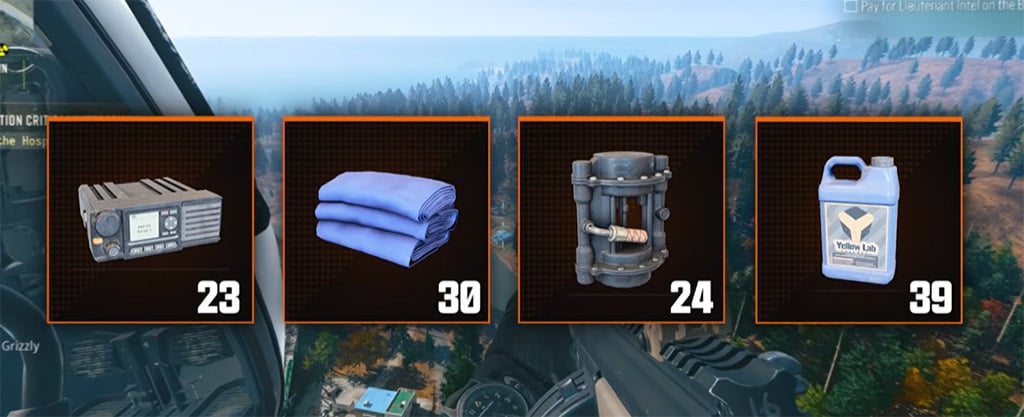
Use this target list to keep the raid focused.
| Material | Farming target | Priority | Main failure point |
|---|---|---|---|
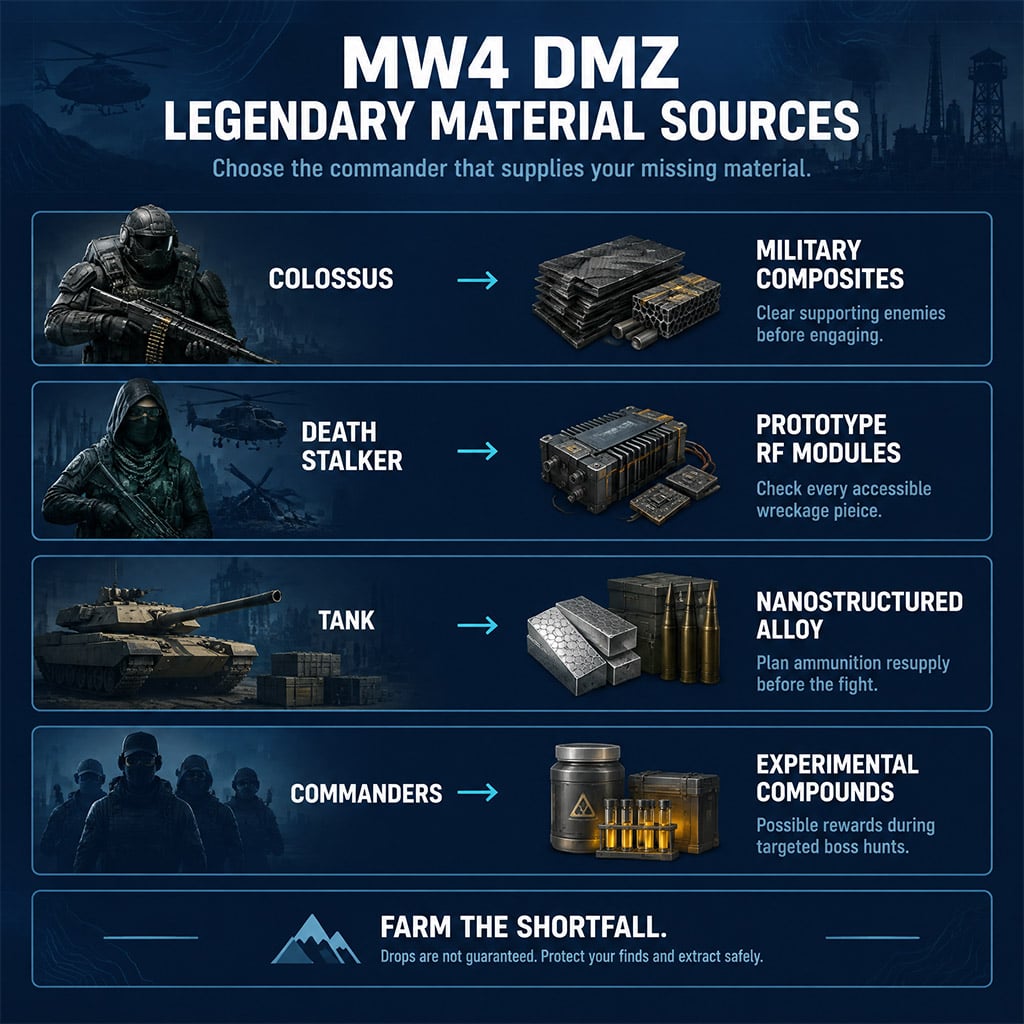
| Military Composites | Colossus | Printing and gunsmith requirements | Supporting enemies overwhelm your cover |
| Prototype RF Modules | Death Stalker helicopters | Collect early for RF-dependent upgrades | Wreckage becomes inaccessible |
| Nanostructured Alloy | Tanks | Farm against a specific upgrade requirement | Ammunition and resupply time |
| Experimental Compounds | Possible commander drops | Retain during targeted hunts | No dedicated best target established |
Choose the target that supplies your missing ingredient; do not assume every kill guarantees its material.
Colossus: remove flankers before committing damage
Colossus is much harder to manage when armored enemies attack from another angle. We clear those threats first rather than spending the entire ammunition reserve on the boss.
1. Identify supporting enemies and nearby commanders.
2. Clear anything that can flank your cover.
3. Establish a firing position with a retreat route.
4. Attack while retaining ammunition for ground threats.
5. Collect the loot and reassess extraction.
If you cannot maintain cover or afford the ammunition bill, skip the fight. Circling an obstacle is situational cover play, not a guarantee that Colossus cannot track you.
Death Stalker: choose the crash area before firing
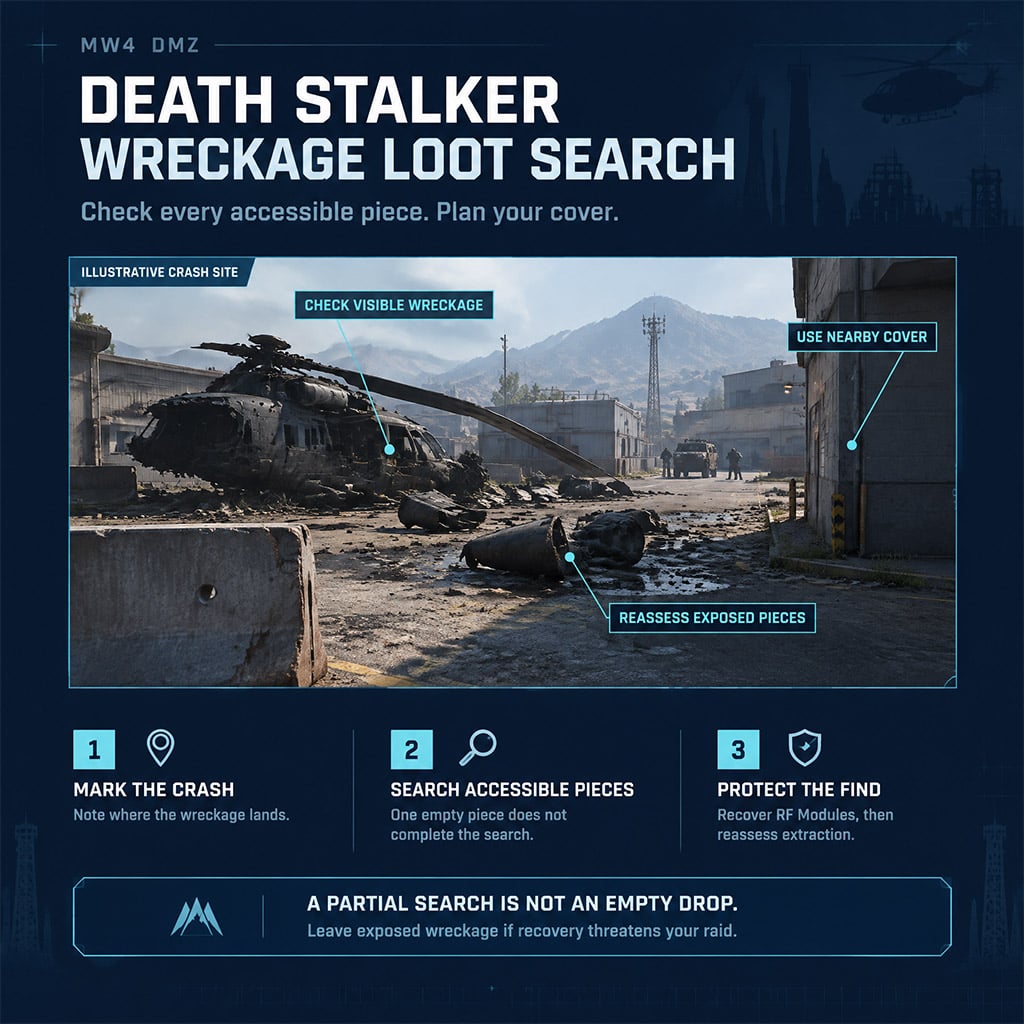
Why win the helicopter fight above a street you cannot safely search? We prioritize recoverable wreckage over the fastest possible kill.
Bring an RPG, a ground-defense weapon, ammunition support, armor supplies, and recovery equipment. Fight from cover with safe access to surrounding terrain; avoid stacking the encounter above a tank, Colossus, or dense enemy group.
Plan the landing.
Treat two-RPG takedowns as a reference, not a fixed damage rule. If the helicopter survives, reload behind cover instead of exposing yourself to force the finish.
After destruction, mark the crash and inspect every accessible piece. Returning to missed wreckage is worthwhile only if the area remains manageable.
Use this distinction when tracking results.
| Outcome | Meaning | Next action |
|---|---|---|
| Complete search, no module | No RF Module recovered | Find another helicopter |
| Missing or unreachable pieces | Search remains incomplete | Mark the site and reassess |
| RF Module recovered | Objective loot is secured | Consider extraction |
| Wreckage under overlapping boss fire | Collection is unsafe | Leave rather than force the interaction |
A partial wreckage search is not evidence of an empty drop.
Tanks: budget the resupply loop
A safe tank fight can still be inefficient if every ammunition refill requires a long detour. We establish hard cover, accessible resupply, a retreat route, and extraction time before attacking.
Once the vehicle is disabled, inspect all accessible loot points, including its front and rear sections. Do not assume one empty section represents the entire reward.
If your alloy requirement is already covered, another tank is optional loot—not mandatory progression.
Ingredient Printing: Manufacture Only What You Need
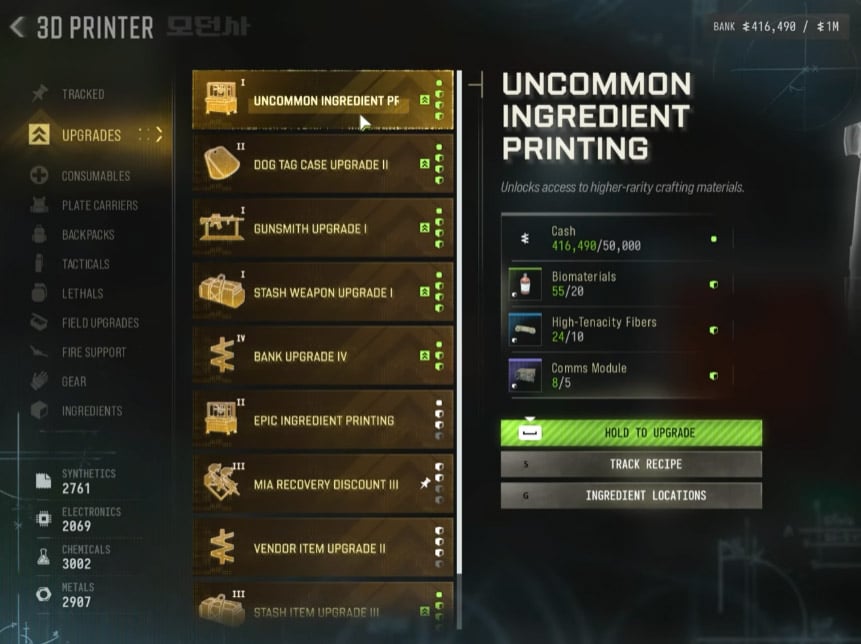
Supporting ingredients become their own bottleneck when several upgrades compete for the same materials. We prioritize printing capabilities, retain useful inputs, and manufacture only the next upgrade's shortfall.
Search the right ingredient locations
These stops give each ingredient search a clear purpose.
| Ingredient | Search area | Execution | Yield reference |
|---|---|---|---|
| Comms Modules | Array building near the hospital | Search floor by floor, including server racks | 2 in one extensive sweep |
| High-Tenacity Fibers | Military rooftops | Check tables and military loot placements | 2 at one rooftop stop |
| High-Tenacity Fibers | Air-base military areas | Search containers and duffel bags | Variable |
| CPUs | Electronics-heavy buildings | Retain for available printing recipes | Variable |
Stop when your requirement is covered; these example yields are not spawn guarantees.
A building can produce valuable secondary loot while remaining slow for your target ingredient. Keep CPUs and other needed inputs, but do not confuse profitability with farming efficiency.
Follow the printing dependency chain
Check these reference requirements against your current menu before collecting.
| Upgrade | Planning reference | Our priority rule |
|---|---|---|
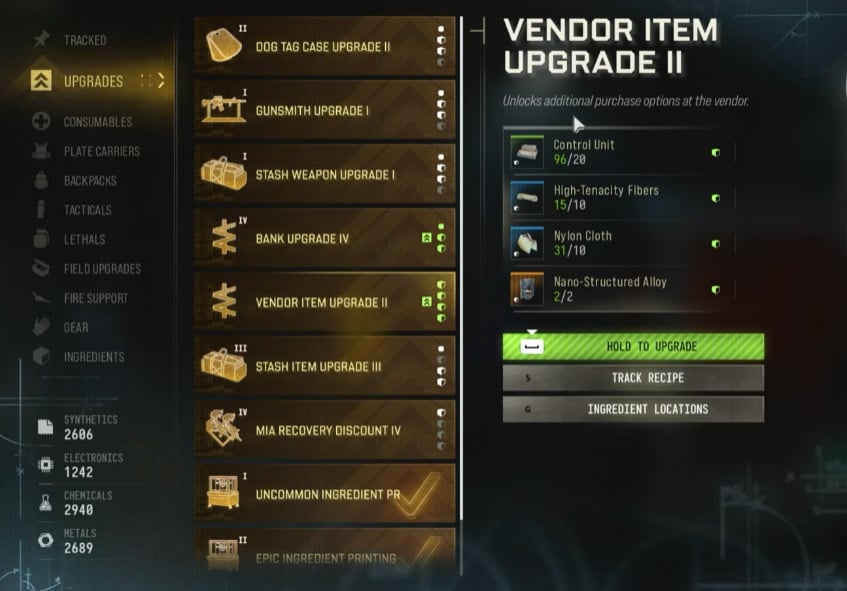
| Uncommon Ingredient Printing | 5 Comms Modules, 10 High-Tenacity Fibers, 50,000 cash, plus Biomaterials | Prioritize when supporting inputs block progress |
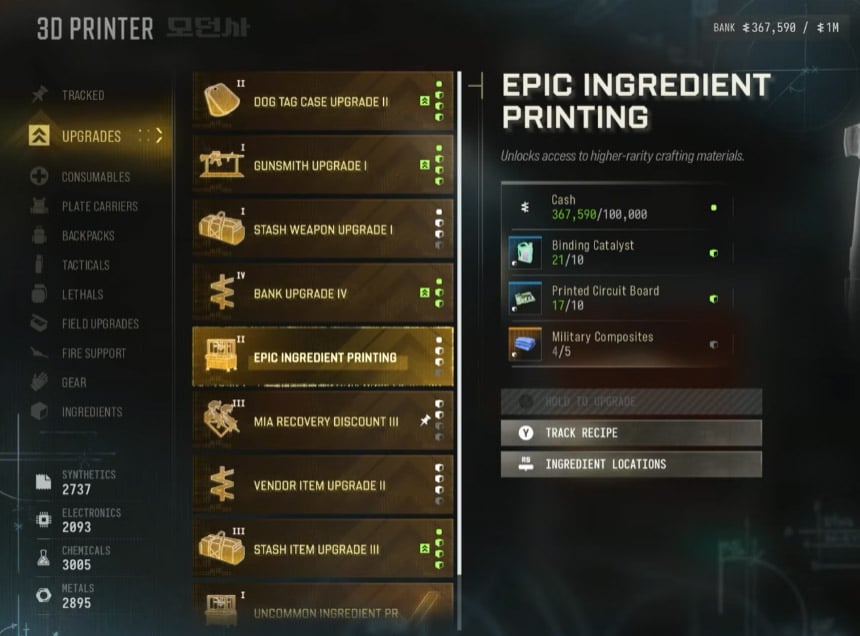
| Epic Ingredient Printing | 5 Military Composites, plus other requirements | Prioritize before repeated epic-input searches |
| MIA Recovery Discount | A later tier requires 10 RF Modules | Buy when operator recovery is a recurring expense |
| Stash Capacity | One tier adds 18 slots for 100,000, plus materials | Buy when storage pressure forces useful items out |
Printing removes repeated ingredient searches; recovery and storage upgrades should solve a problem you actually have.
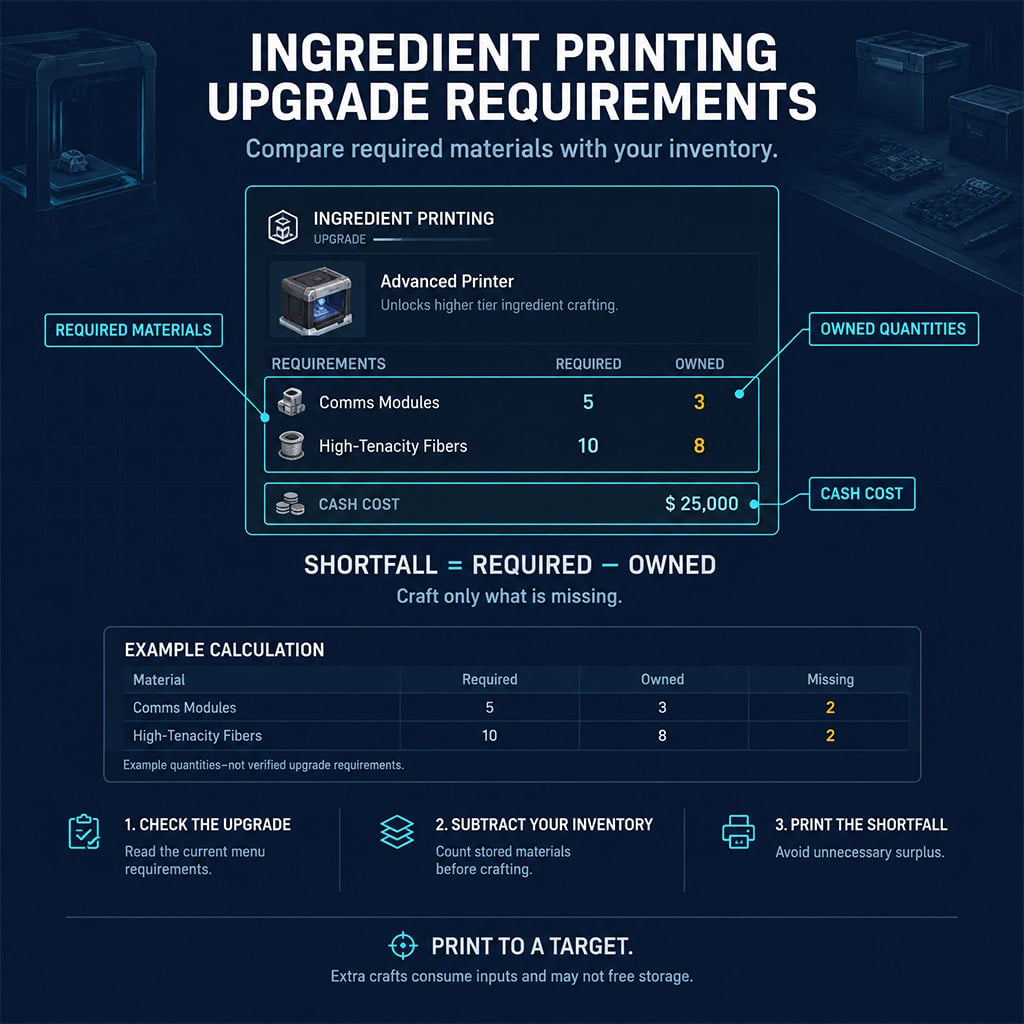
Before deployment, subtract stored materials from the displayed requirement. After returning, print exactly the remainder.
Six missing means six crafts.
Crafting does not automatically create storage space: outputs and leftover inputs may still occupy separate stacks. Inspect the recipe before converting materials solely to clear your stash.
Irradiated Containers: Maximize Accessible Locker Searches
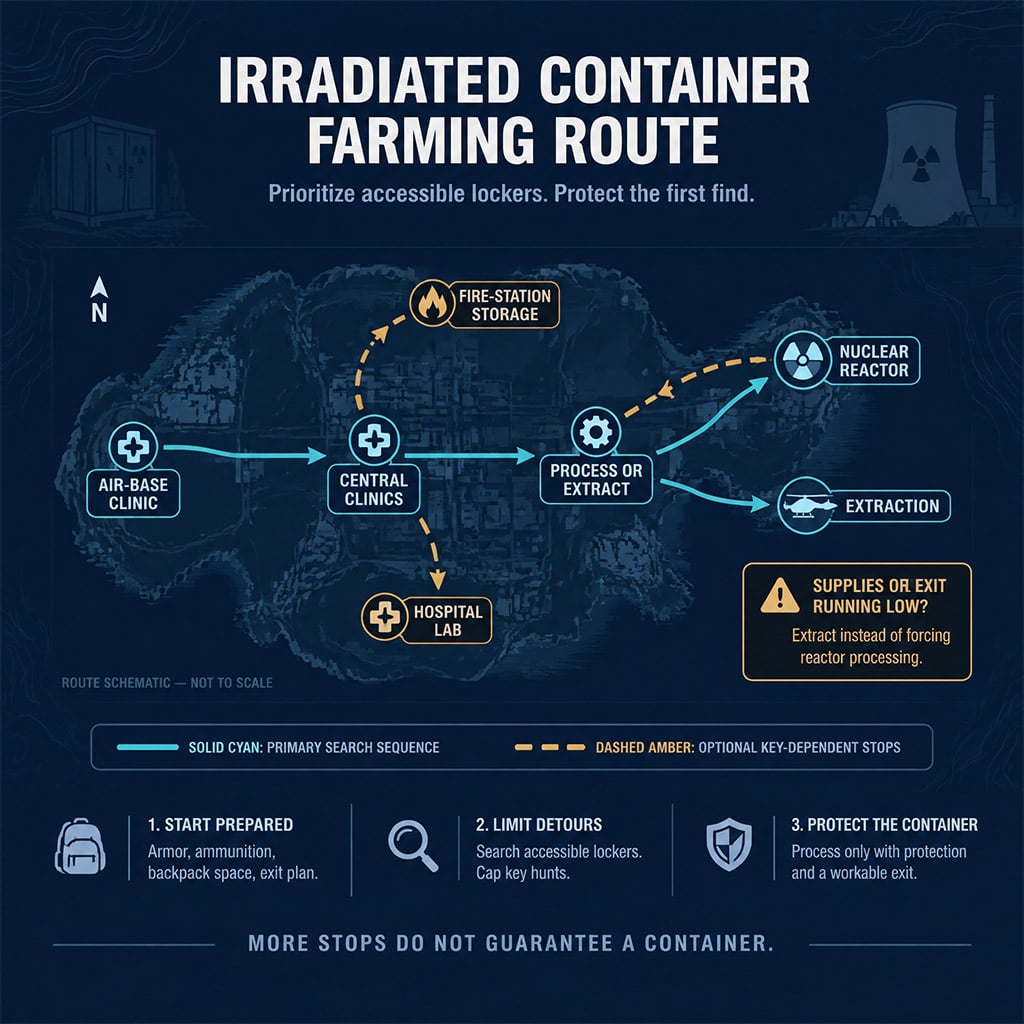
Container runs depend on chemical lockers, not commander kills. We favor dense stops, cap key searches, and switch from searching to protecting the raid immediately after finding a container.
Start at the air-base clinic when prepared
Operation Iron Citadel is associated with Chang-san Air Base and a fixed insertion in the mission listing. If it is available, use that position to begin the clinic sweep.
Prepare armor, ammunition, backpack space, and an exit route. Search Laboratory rooms downstairs, then check the two upstairs lockers.
Even an eight-locker opening can produce nothing. Density creates opportunities, not certainty.
Choose stops by access cost
These locker counts are route-planning references.
| Stop | Locker count | Our judgment | Obstacle |
|---|---|---|---|
| Air-base clinic | 8 | Strong prepared opening | Heavy AI pressure |
| Three western clinics | 1 each | Optional detour | Travel for limited searches |
| Central clinics | 2 each | Prioritize clustered stops | Player traffic |
| Eligible fire-station storage | 2 | Search when access is straightforward | Local key search |
| Hospital laboratory | 1 after entry, plus 3 locked | Conditional branch | Multiple keys |
| Nuclear reactor | Multiple | Processing and optional searches | Radiation and exit distance |
Skip isolated one-locker detours when a nearby two-locker clinic offers a safer search.
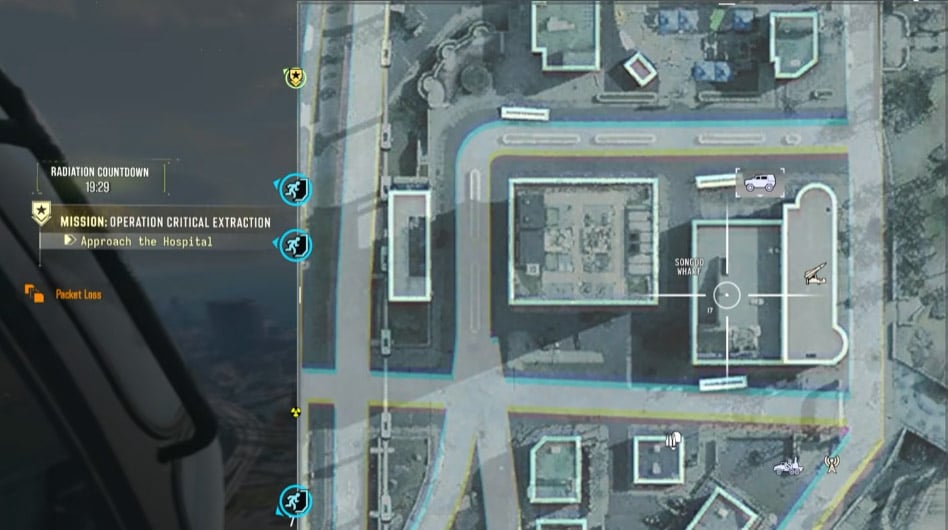
Measure accessible lockers against travel, fighting, and key-search time. A longer itinerary is not automatically a better farm.
Cap fire-station and hospital key searches
At eligible fire stations, locate the upstairs storage door, then search ground-floor tables, shelves, and side rooms for its key. Open the storage room if accessible, check its chemical lockers, and take a durable gas mask if available.
A locked door does not prove the key is still inside. Another player may have taken it without opening the room.
For the hospital:
1. Locate the locked chemical laboratory.
2. Search the three seventh-floor offices for its entry key.
3. Open the laboratory and search the accessible locker.
4. Follow Laboratory/Morgue signage to search for additional locker keys.
Entry key first.
Internal locker keys do not advance the route if you cannot enter the laboratory. Allow one thorough search, then reassess; keyed access alone does not establish better container odds.
Process only when the raid supports it
Once the container is secured, choose from your remaining resources—not your unfinished itinerary.
| Situation | Action | Reason |
|---|---|---|
| Container secured; protection, ammunition, and exit available | Proceed toward processing | Resources support the objective |
| Container secured; extraction deteriorating | Extract | Protect the find |
| No container; accessible clinics remain | Continue the clustered sweep | Avoid premature reactor risk |
| No container; supplies depleted | Extract with useful materials | Preserve raid value |
Another search must justify risking the container already in your backpack.
Check inventory-retention rules before planning to carry an unprocessed container into another deployment.
Prepare protection, then process in Reactor 2
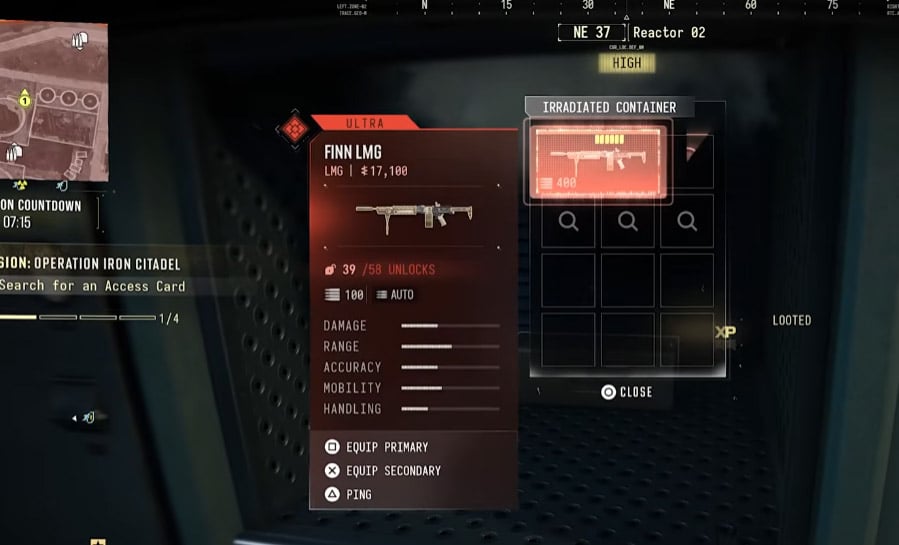
Hazmat search areas include reactor tents, elevated approach positions, upper-floor corners, and the wall near the story-mission walkway. Treat these as places to check, not guaranteed spawns or unlimited protection.
We clear the processing area, confirm the container is carried, interact with the Reactor 2 machine, and collect every output. Recheck protection and extraction before extending the search.
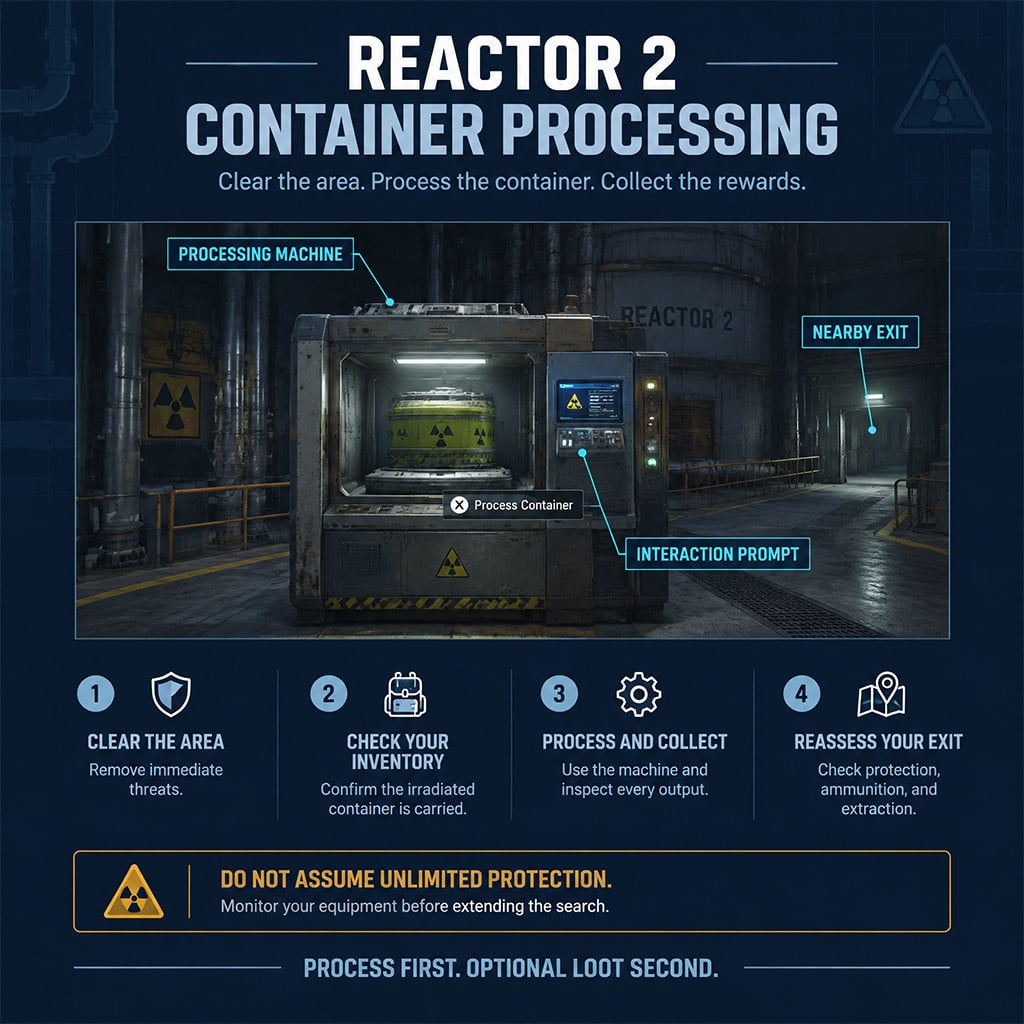
Leave the optional underwater search until after processing—and skip it if protection or extraction is becoming uncertain. More loot is not useful when you cannot bring it home.
FAQ (Frequently Asked Questions)
Which bosses drop legendary materials in MW4 DMZ?
Colossus is the farming target for Military Composites, Death Stalkers for Prototype RF Modules, and tanks for Nanostructured Alloy. We collect Experimental Compounds as possible commander rewards and do not assume any individual kill guarantees the desired material.
What is the best route for irradiated containers?
We start with the air-base clinic, prioritize clustered central clinics, and add accessible fire-station storage rooms before heading toward the reactor. If the air base is contested or your kit is weak, bypass it rather than forcing the eight-locker opening.
Do irradiated containers appear every raid?
No—there is no established every-raid guarantee. A five-run example produced containers in three runs, but we do not treat that small sample as a reliable drop rate.
Do irradiated containers always give weapon manuals?
Weapon manuals are a demonstrated processing reward, but a universal guarantee has not been established here. We check the current machine description or reward information before planning around a specific output.
How many ingredients should we print for an upgrade?
Print exactly the quantity missing from your current upgrade requirement after subtracting stored materials. We avoid surplus crafts unless another planned recipe needs them, because unnecessary conversions consume inputs and may not free storage.

I’m Chloe Whitaker, a British Fact Checker at GGWTB focused on Currency farming, pet collecting, and management games, alongside Minecraft sandbox content. I check the details that shape your next move: growth timers, unlock requirements, and whether a reward is still obtainable. An old event tip shouldn’t cost you an evening chasing a pet you can no longer get.
Most Popular Posts
- ARC Raiders Update 1.42: Phantom Targets Farming Guide (Glitched Wasps, Rewards, Regional Conditions)
- ARC Raiders Best Pop Trigger Strategy: Fast Phantom Targets Damage Guide
- ARC Raiders Subway Skin Guide: Unlock the Subterranean Outfit
- ARC Raiders Medium & Heavy Gun Parts Blueprint Guide: Best Farm Route, Locations, and Refiner Crafting
- ARC Raiders Ascending the Mountain: Fast Loot Routes and Item Guide
- ARC Raiders Frozen Trail Update Guide: Pendola Pass, Frigate & Meta Loadouts
Popular Category Lists
- ARC Raiders / (359)
- Grow a Garden / (295)
- CoD: Black Ops 7 / (167)
- Star Citizen / (163)
- MLB 26 / (159)
- Monopoly Go / (153)
- ARK Survival Ascended / (128)
- Steal a Brainrot / (99)
- Blox Fruits / (74)
- Adopt Me / (74)
- Forza Horizon 6 / (72)
- Sailor Piece / (68)
- Grow a Garden 2 / (68)
- Diablo IV / (62)
- CoD: BLACK OPS 6 / (55)
- Aion 2 / (55)
- Path of Exile 2 / (48)
- Monster Hunter Wilds / (46)
- Windrose / (44)
- Maplestory Classic / (44)