1
1 Created: Oct 17,2026 | ARC Raiders
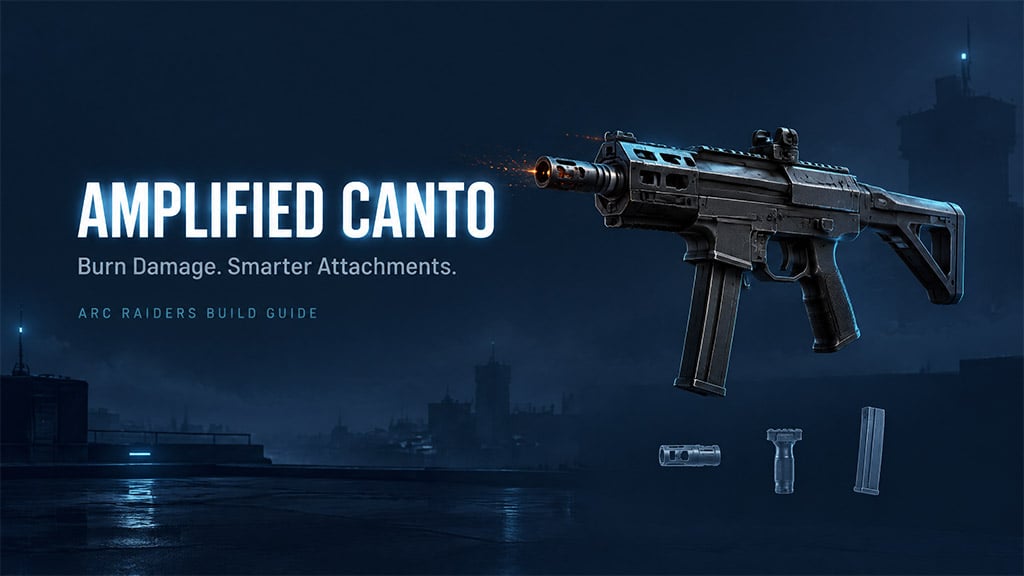
ARC Raiders Amplified Canto Build: Best Attachments, Burn TTK & Stats

- Best Attachments for Your Miss Pattern
- Why Extended Medium Mag III Is Mandatory for Heavy Shields
- Incendiary Rounds: Exploit the 2-Second Burn Window
- Carbine Conversion Mechanics and Range Limits
- FAQ (Frequently Asked Questions)
- What is the best Amplified Canto build for PvP raids?
- Does Incendiary Rounds burn damage stack on repeated hits?
- Should I use Compensator III or Muzzle Brake III on the Canto?
- Can the Carbine Conversion Canto shoot while sprinting?
- Is you better off selling or recycling an extra Amplified Canto?
Missing three shots with the baseline Incendiary Rounds + Carbine Conversion Amplified Canto leaves a Heavy Shield raider alive while you reload. Pairing Extended Medium Mag III with Compensator III or Muzzle Brake III fixes your exact miss pattern and secures one-mag knockdowns.
Best Attachments for Your Miss Pattern
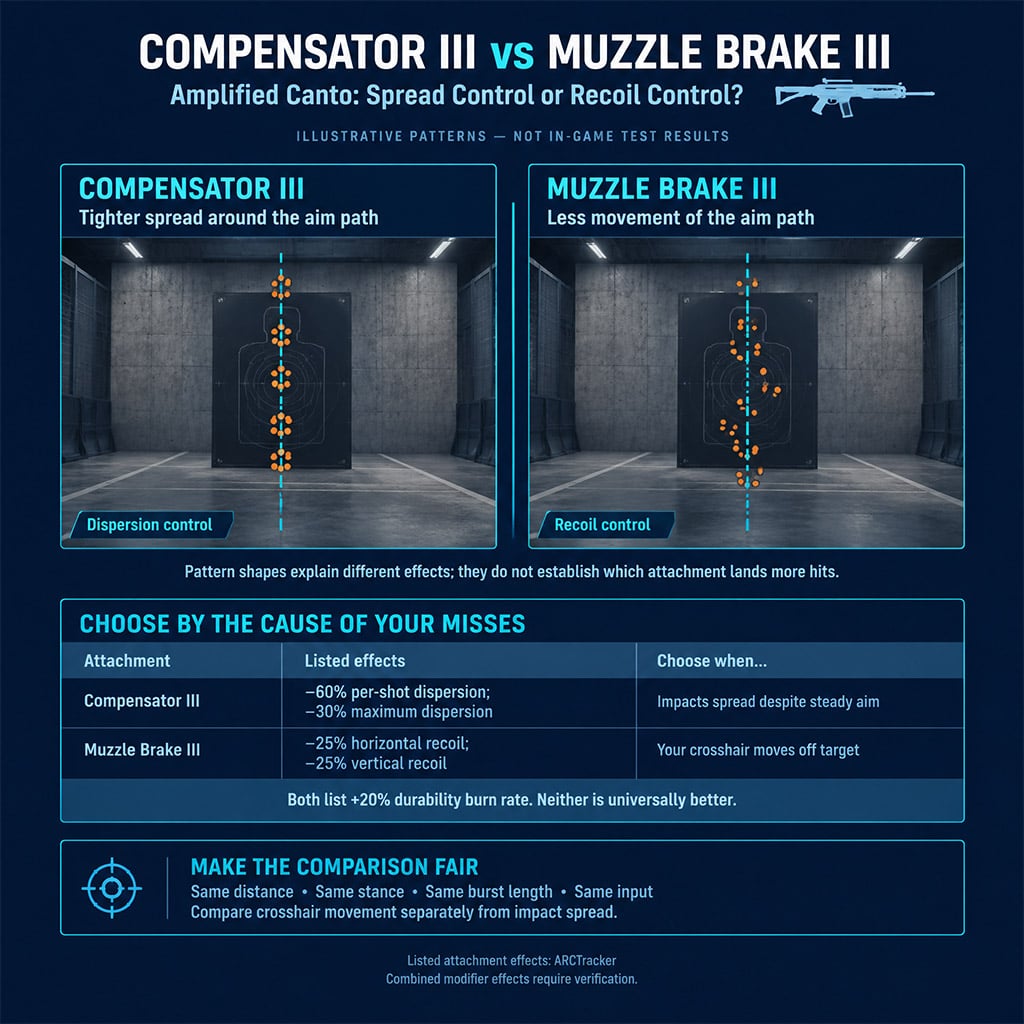
Diagnose whether your bullets miss due to reticle climb (recoil) or bullet bloom around a centered crosshair (dispersion) before slotting Tier III mods.
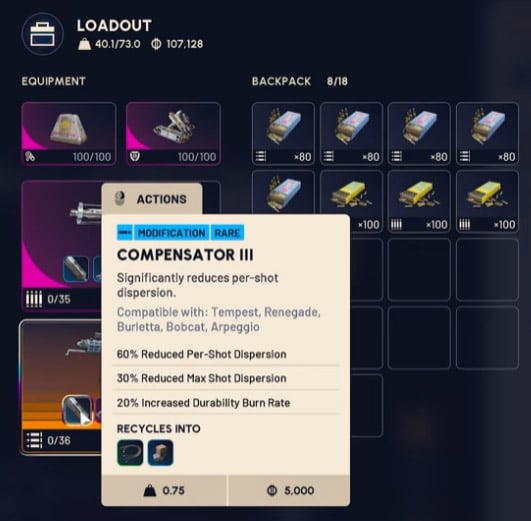
Even though the Carbine Conversion variant includes an intrinsic 45% reduction to maximum shot dispersion, sustained full-auto fire at 51 fire rate still widens bullet groups at mid-range. Compare the exact attachment modifiers below to match your combat habits:
| Attachment | Verified Effect | Penalty / Trade-Off | Tactical Trigger (Equip When…) |
|---|---|---|---|
| Compensator III | -60% per-shot dispersion; -30% max dispersion | +20% durability burn rate | Your crosshair tracks the target, but bullets bloom wide during sustained bursts. |
| Muzzle Brake III | -25% horizontal and vertical recoil | +20% durability burn rate | Initial kick or horizontal bounce pulls your reticle off upper-torso targets. |
| Horizontal Grip | -30% horizontal and vertical recoil | -30% ADS speed | You pre-aim angles and hold corridors rather than taking reactive sprint peeks. |
| Extended Medium Mag III | +12 magazine capacity (36 rounds total) | +0.75 kg weight | Fighting Medium/Heavy shields or engaging multiple raiders per reload cycle. |
Prioritize Extended Medium Mag III first, select your muzzle based on reticle control, and drop Horizontal Grip if slow ADS loses close-quarters openings.
Sources: Compensator III, Muzzle Brake III, Horizontal Grip, Extended Medium Mag III, Amplified Canto Compatibility.
Why Extended Medium Mag III Is Mandatory for Heavy Shields
At 10 meters, the Amplified Canto deals 6.5 base damage per shot with a 1.75x critical hit multiplier. Body-shot Time-to-Kill (TTK) data proves how unforgiving the baseline 24-round magazine is against armored raiders:
- No Shield: 1.1 seconds (15 shots)
- Light Shield: 1.3 seconds (17 shots)
- Medium Shield: 1.5 seconds (20 shots)
- Heavy Shield: 1.6 seconds (21 shots)
Downing a Heavy Shield target with body shots requires 87.5% accuracy on a stock magazine—missing just four bullets forces a reload mid-fight. Equipping Extended Medium Mag III pushes capacity to 36 rounds, giving you a 15-bullet buffer to finish knockdowns or suppress a pushing teammate. While this variant features an intrinsic 43% reduced reload time, reloading in an open doorway still hands the enemy a free push window.
Incendiary Rounds: Exploit the 2-Second Burn Window
Hitting a target applies 5 burn damage per second for 2 seconds (10 total burn damage after the final bullet lands). Because weapon telemetry does not stack independent burn timers or multiply tick rates on consecutive hits, treat incendiary damage as a post-hit finisher and healing delay rather than an exponentially scaling DoT.
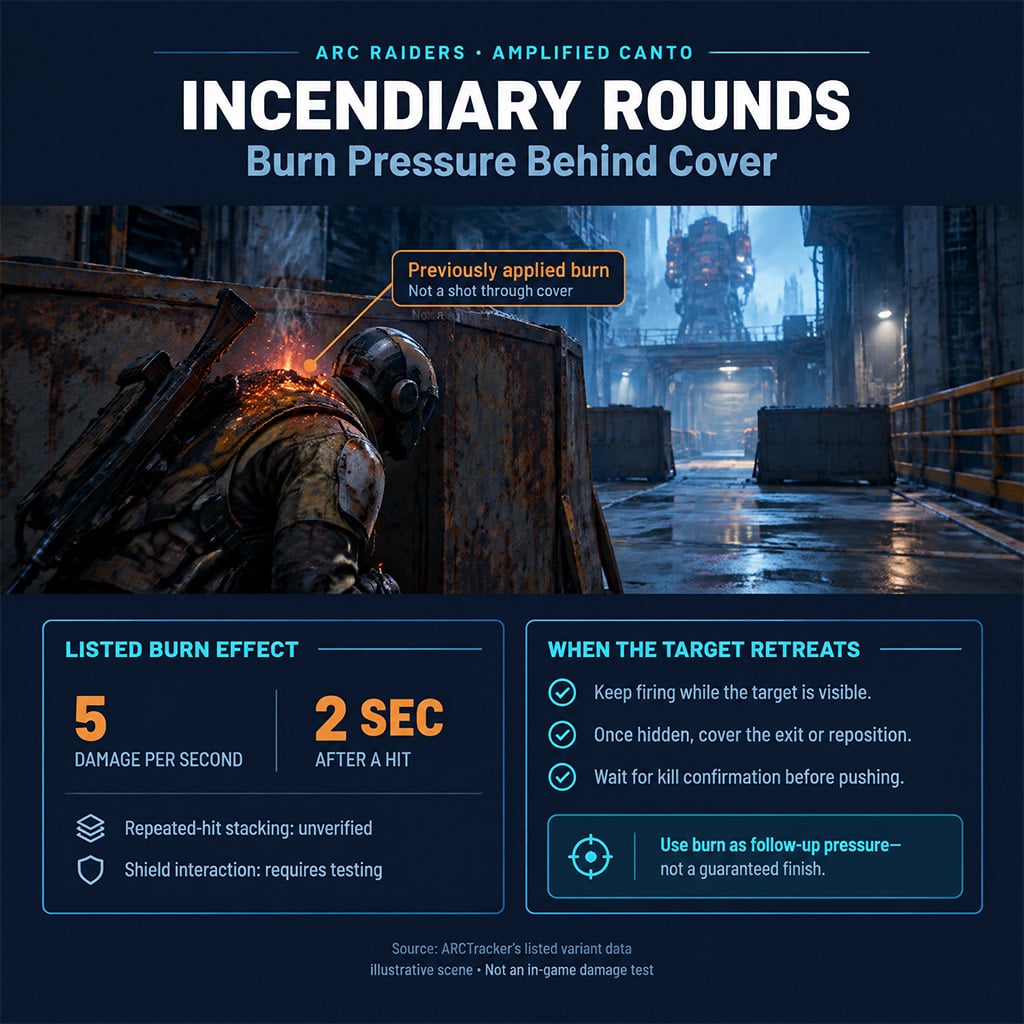
Apply these three rules when trading against armored squads:
1. Stop over-chasing low-health targets: If you land 19 to 20 body shots on a Heavy Shield raider before they duck behind cover, the remaining 10 burn damage can secure the knockdown without exposing you to a bait angle.
2. Hold the exit lane: Keep your reticle locked on their cover exit during the 2-second burn window instead of sprinting blindly around the corner.
3. Reset during line-of-sight breaks: Use the gun's built-in 43% faster reload the moment the enemy breaks sight, ensuring a full 36-round magazine before they re-peek.
Carbine Conversion Mechanics and Range Limits
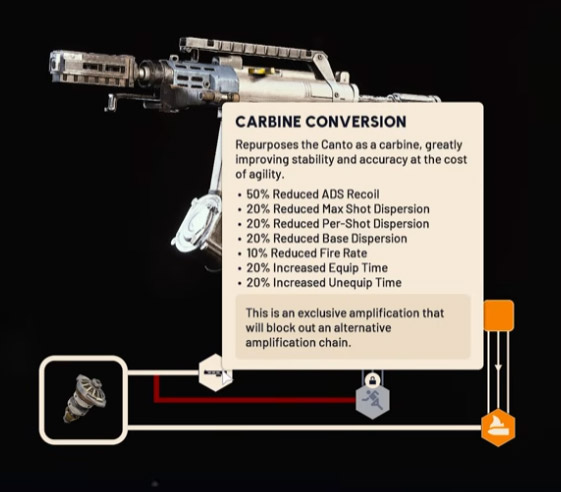
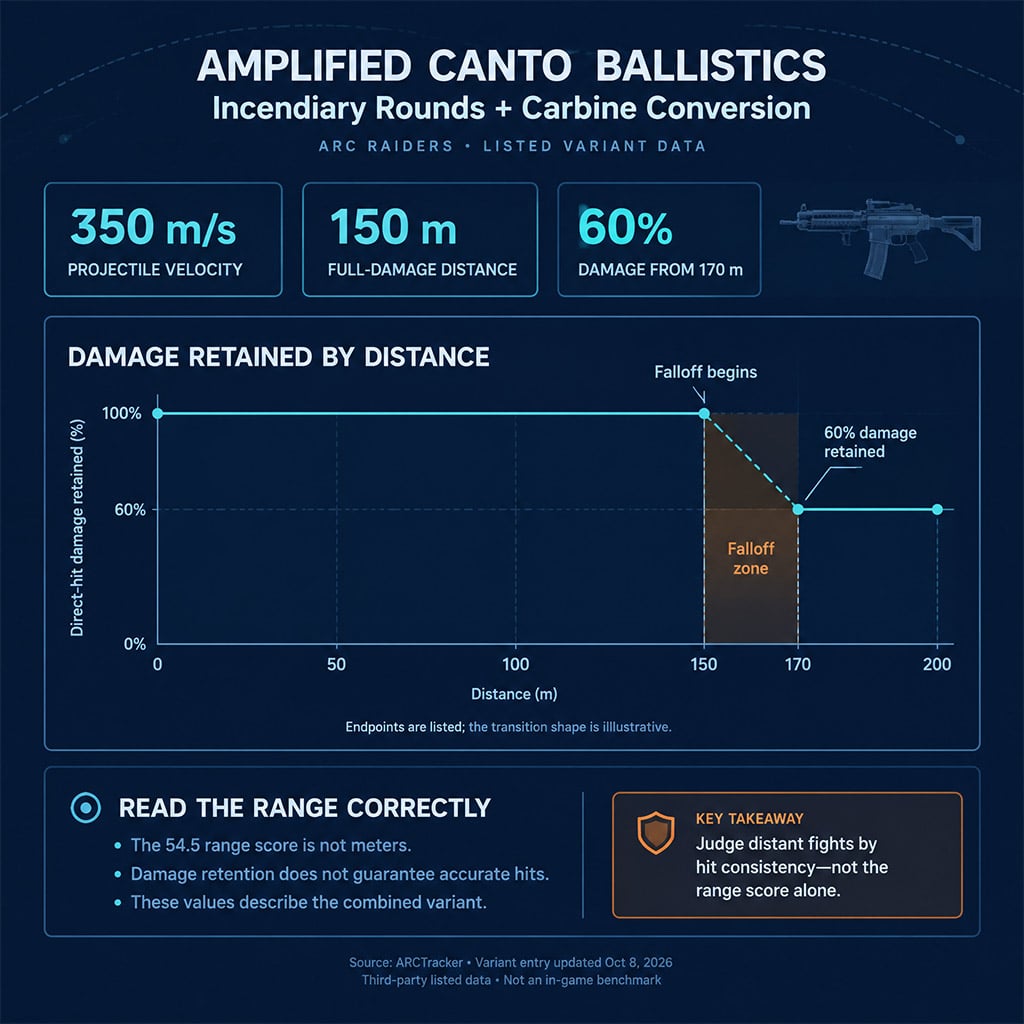
Cross-checking Raidex and ARCTracker confirms this variant runs fully automatic fire, Medium Ammo, 350 m/s bullet velocity, and Moderate ARC Armor Penetration.
Avoid two costly mechanical traps when running this specific drop:
- Carbine Conversion is not Sprint Shooting: Unlike the Sprint Shooting amplification, this variant cannot fire while sprinting. Pair that limitation with Horizontal Grip's 30% ADS penalty, and getting caught mid-sprint in tight corridors will get you eliminated before your sights align.
- Ignore the 150m falloff trap: The UI stat card lists a 54.5 range score, while ballistic data shows full damage out to 150 meters (dropping to 60% damage at 170 meters). However, a 350 m/s bullet speed combined with SMG recoil makes full-auto tracking past 40 meters unreliable. Fire controlled 4-to-5 round bursts at mid-range rather than wasting an attachment slot on an Extended Barrel.
FAQ (Frequently Asked Questions)
What is the best Amplified Canto build for PvP raids?
Equip Compensator III, Extended Medium Mag III, and Horizontal Grip if you hold angles and pre-aim common push lanes. Swap to Muzzle Brake III if vertical or horizontal kick pulls your crosshair off target, and remove the grip completely if you play an aggressive entry role requiring fast ADS reaction times.
Does Incendiary Rounds burn damage stack on repeated hits?
No verified game mechanic stacks multiple independent burn instances on consecutive bullets. The weapon applies 5 burn damage per second for 2 seconds after a hit, acting as a steady damage-over-time finisher after you stop firing rather than a compounding burst multiplier.
Should I use Compensator III or Muzzle Brake III on the Canto?
Equip Compensator III (-60% per-shot dispersion, -30% max dispersion) if your reticle stays centered on the enemy chest but bullets spread wide during full-auto fire. Choose Muzzle Brake III (-25% horizontal and vertical recoil) if the camera and crosshair physically climb off target during sustained bursts.
Can the Carbine Conversion Canto shoot while sprinting?
No, Carbine Conversion tightens max shot dispersion by 45% and speeds up reloads by 43%, but it does not grant fire-from-sprint capability. You need the separate Sprint Shooting Amplified Canto variant if your playstyle relies on run-and-gun hipfire pressure.
Is you better off selling or recycling an extra Amplified Canto?
Always sell duplicate copies for 20,800 credits rather than breaking them down unless you urgently need crafting parts. Recycling yields 17 Amplified Fragments worth 8,500 credits—losing you 12,300 credits in net value—while salvaging in-raid drops only 12 fragments.

I’m Sofia Bergström, a Swedish Managing Editor covering FPS, competitive shooters, and extraction shooters for GGWTB. My guides focus on loadout trade-offs, positioning, and when to commit—or cut your losses. A weapon’s stats tell only part of the story; I focus on how it fits your role and the fight ahead.

Most Popular Posts
- ARC Raiders Update 1.42: Phantom Targets Farming Guide (Glitched Wasps, Rewards, Regional Conditions)
- ARC Raiders Hullcracker Blueprints: Fastest Way to Complete The Major's Footlocker
- ARC Raiders Best Pop Trigger Strategy: Fast Phantom Targets Damage Guide
- ARC Raiders Subway Skin Guide: Unlock the Subterranean Outfit
- ARC Raiders Looting Mk. 3 Survivor Blueprint Guide: Best Blue Gate Route and Drop Locations
- ARC Raiders Medium & Heavy Gun Parts Blueprint Guide: Best Farm Route, Locations, and Refiner Crafting
Popular Category Lists
- ARC Raiders / (351)
- Grow a Garden / (294)
- CoD: Black Ops 7 / (167)
- Star Citizen / (162)
- MLB 26 / (159)
- Monopoly Go / (152)
- ARK Survival Ascended / (127)
- Steal a Brainrot / (99)
- Blox Fruits / (74)
- Adopt Me / (74)
- Forza Horizon 6 / (72)
- Sailor Piece / (68)
- Grow a Garden 2 / (68)
- Diablo IV / (62)
- CoD: BLACK OPS 6 / (55)
- Aion 2 / (50)
- Path of Exile 2 / (48)
- Monster Hunter Wilds / (46)
- Windrose / (44)
- Donut SMP / (41)