0
Created: Oct 24,2026 | ARC Raiders
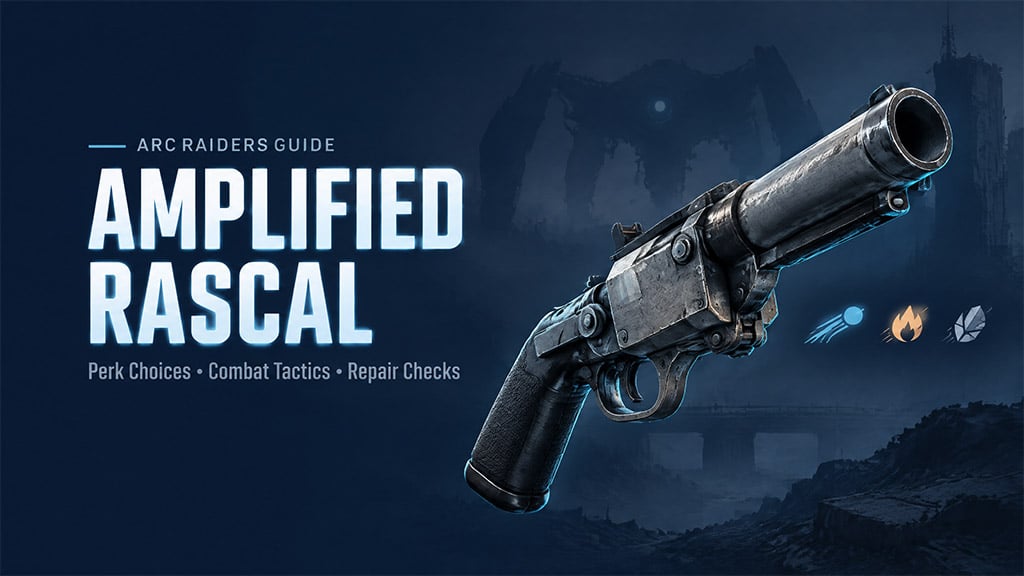
ARC Raiders Amplified Rascal Guide: Best Perks, Damage & Repair Checks

Prioritize High Velocity on your ARC Raiders Amplified Rascal if moving ARC targets are making you waste shots. Add mobility or incendiary perks only for a specific job—not because filling every available slot must produce a better weapon.
- Best Amplified Rascal Perks: Fix Misses First
- High Velocity Reduces Lead, Not Aim Error
- Bombardier Tactics: Solve the Spotter Problem
- Use Cover That Matches the Attack
- Sprint Shooting Is a Route Tool
- Incendiary Damage: Measure Kills, Not Isolated Numbers
- Test the Entire Damage Window
- When to Leave Incendiary Out
- Repair Costs and Hullcracker Choice: Compare the Right Numbers
- Check Repair Quotes at Equal Wear
- Rascal vs Hullcracker
- FAQ (Frequently Asked Questions)
- What is the best ARC Raiders Amplified Rascal perk?
- Is Sprint Shooting worth buying for the Rascal?
- Do Incendiary Rounds deal more Rascal damage?
- How much does an Amplified Rascal cost to repair?
- Is the Rascal better than the Hullcracker for Bombardiers?
Best Amplified Rascal Perks: Fix Misses First
Missed grenades erase any theoretical damage advantage. We recommend improving projectile delivery before spending materials on situational effects.
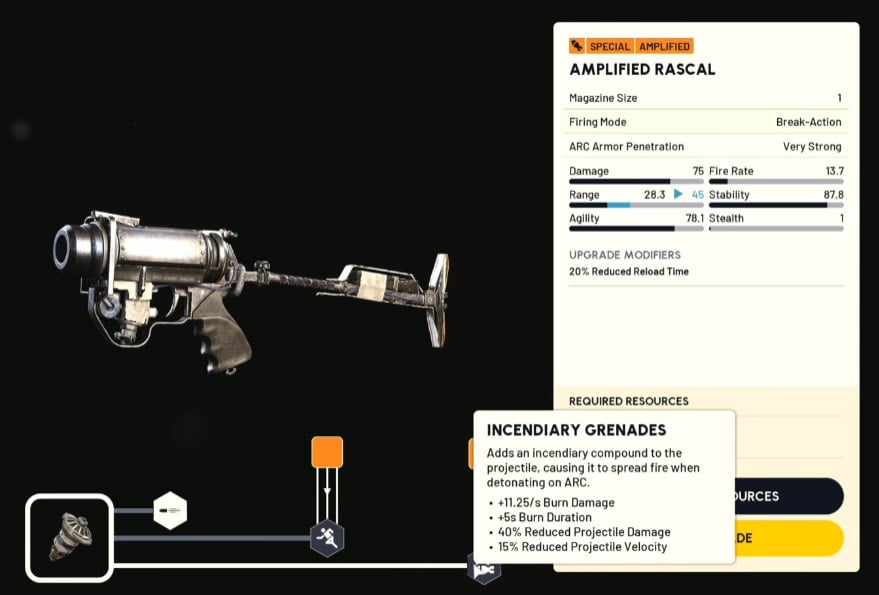
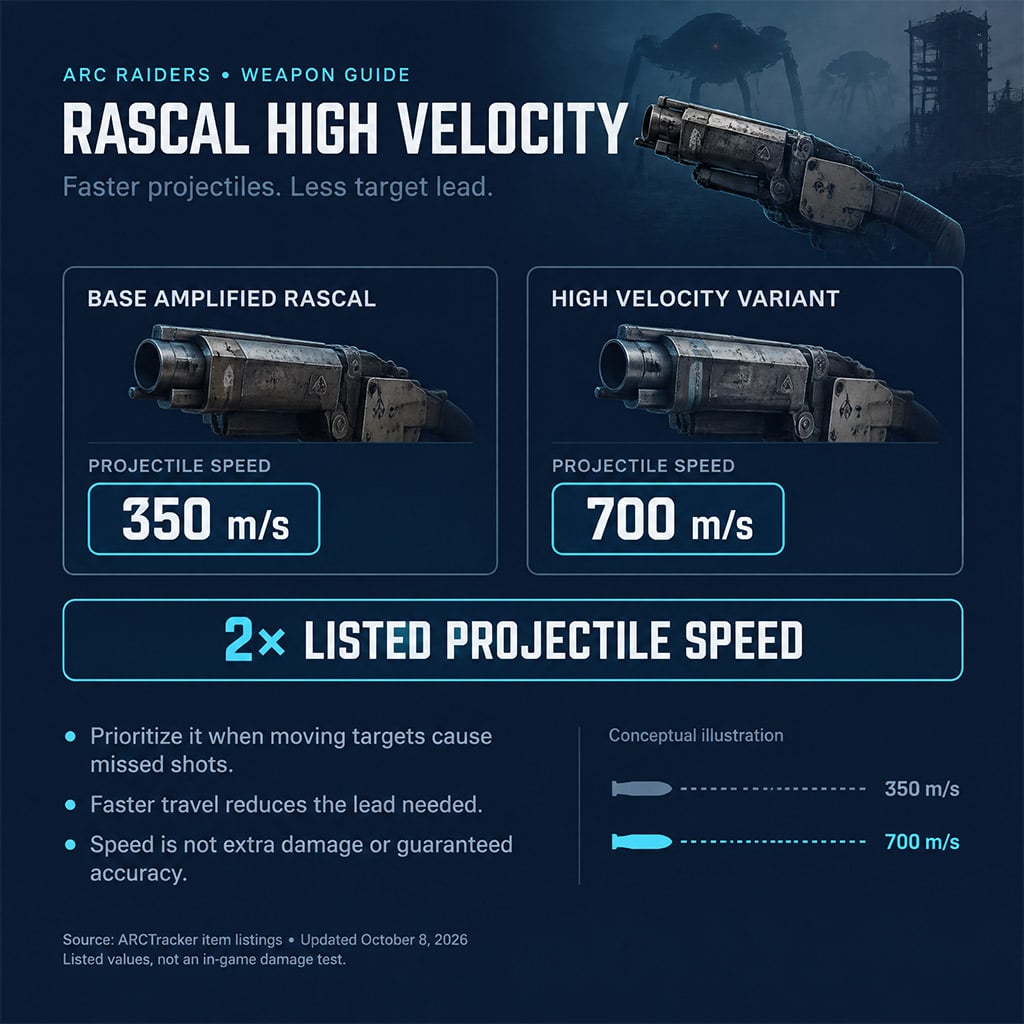
We checked ARCTracker's base and High Velocity entries, both dated October 8, 2026: listed projectile speed rises from 350 to 700 m/s. That supports faster delivery—not guaranteed weak-point hits, zero drop, or a verified dispersion bonus.
Use this table to match your next purchase to the problem you actually have.
| Perk | Verified Listing | Requirement / Cost | Our Recommendation |
|---|---|---|---|
| High Velocity | 700 m/s, versus 350 m/s without it | 2 Pneumatic Actuators | First choice when projectile travel causes misses |
| Sprint Shooting | Sprint-fire option; listed speed remains 350 m/s | Mobile-Fire Grip Fittings research; 2 Fluted Rotor Cores | Buy for moving shots, not extra damage |
| Incendiary Rounds | Listed projectile speed: 298 m/s | Compact Combustion Charges research | Reserve for controlled sustained-damage comparisons |
Buy the perk that fixes your failed shots; research access alone is not a reason to spend.
High Velocity Reduces Lead, Not Aim Error
At a constant listed speed, a projectile covers 70 meters in roughly 0.20 seconds at 350 m/s and 0.10 seconds at 700 m/s. These are travel-time estimates, not measured in-game trajectories.
What this means: a moving target has less time to leave your aim point. If you still miss, shorten the distance or wait for a predictable movement window rather than stacking more perks.
Faster is not hitscan.
Bombardier Tactics: Solve the Spotter Problem
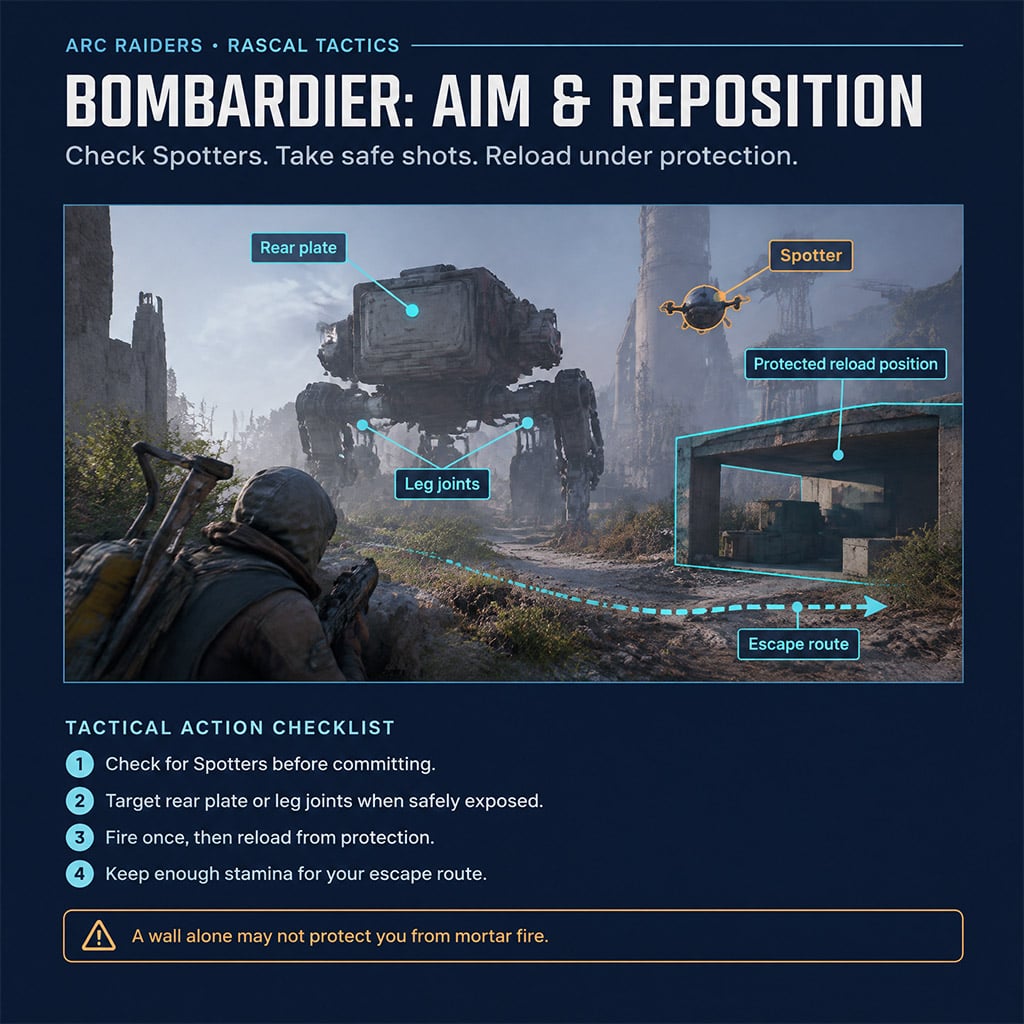
A mobility perk will not rescue an engagement with no safe reload position. The Bombardier uses mortar fire, has a shockwave, and is often accompanied by Spotters that relay targeting information.
We checked the Bombardier Wiki entry: its listed vulnerable areas are the rear plate and leg joints. That is a more useful aiming rule than the draft's unsupported recommendation to target generic top armor.
Use Cover That Matches the Attack
A wall that blocks direct sight is not automatically protection from incoming mortar fire. Choose a position with substantial protection, a usable escape route, and enough room to avoid trapping your squad together.
1. Check for Spotters before committing. Destroy them when practical; do not assume breaking sight with the Bombardier alone ends tracking.
2. Fire, then reload from protection. The Rascal's single-shot, break-action cycle makes standing exposed between shots a poor trade.
3. Take rear-plate or leg-joint shots when available. Do not cross an open lane just to manufacture a better angle.
4. Reposition before you lose your escape reserve. The original 30% stamina rule is not a verified breakpoint; save enough stamina for your actual route.
If your position keeps receiving mortar impacts, move before firing again. A slightly slower kill beats losing the weapon during a reload.
Sprint Shooting Is a Route Tool
Use Sprint Shooting when movement would otherwise cost you a clear shot. If a small component demands precision, stop long enough to aim rather than treating sprint-fire access as a damage bonus.
For a fleeing Surveyor, pursue only while you retain a safe return route. Maintaining pressure is not worth sprinting into unfamiliar enemies with a single-shot launcher.
Incendiary Damage: Measure Kills, Not Isolated Numbers
The draft's 259 versus 464 damage comparison does not establish an incendiary advantage. It lacks a named target, repeatable hit location, armor state, and a defined burn-measurement window.
We cross-checked the incendiary listing against the base entry: speed falls from 350 to 298 m/s, while both show 20 impact damage. The available listing does not substantiate the claimed 40% direct-damage penalty; impact damage also must not be mistaken for the complete explosive damage event.
Test the Entire Damage Window
If you are deciding whether incendiary is worth the investment, compare shots to kill and time to kill against the same enemy—not one large floating number.
Keep these conditions fixed:
- Target and hit zone: Match the enemy type and exact component.
- Armor state: Do not compare intact plating against an already exposed component.
- Burn window: Separate immediate damage from damage recorded after waiting.
- Other damage sources: Exclude teammate fire and environmental damage.
- Repeated application: Check whether another shot refreshes, stacks, or replaces the burn before assuming repeated burns add together.
Here is the catch: a burn can increase total damage without reducing the number of grenades needed. If it does not save a shot or shorten the encounter, it has not proved its value for that fight.
When to Leave Incendiary Out
Skip it for short encounters until you have evidence that it improves the kill breakpoint. Against moving targets, its lower listed speed also demands more lead.
Do not assume High Velocity plus Incendiary produces a particular combined speed. Confirm the available combination and resulting tooltip in your workbench before paying for it.
Repair Costs and Hullcracker Choice: Compare the Right Numbers
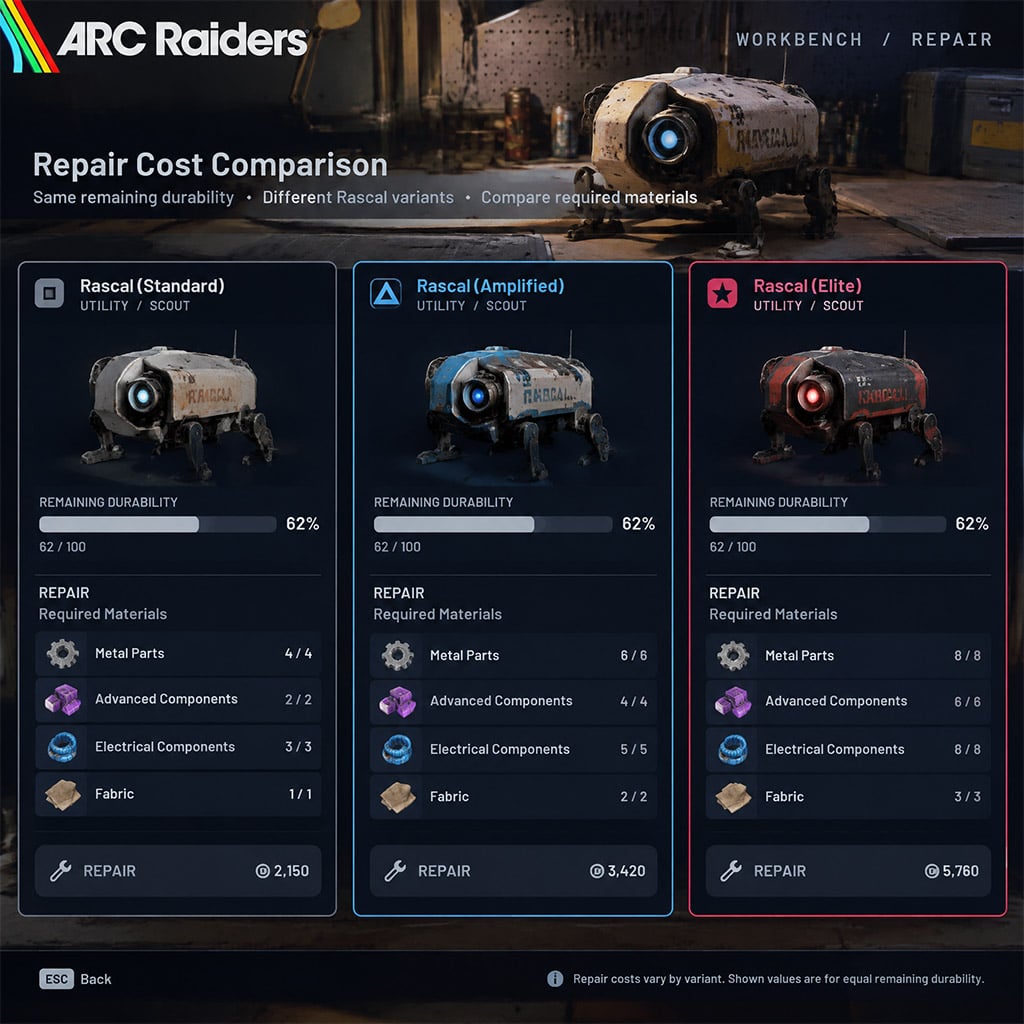
The draft's 20, 33, and 41 fragment repair prices are not reliable budgeting figures without matching wear and workbench evidence. Recycling returns are a different mechanic and must not be used as repair quotes.
ARCTracker lists the following material returns for individual variants.
| Variant | Recycling Return | Salvaging Return |
|---|---|---|
| Amplified Rascal, no added perk | 7 Amplified Fragments | 5 Amplified Fragments |
| High Velocity variant | 13 Amplified Fragments | 9 Amplified Fragments |
| Sprint Shooting variant | 13 Amplified Fragments | 9 Amplified Fragments |
| Incendiary Rounds variant | 11 Amplified Fragments | 8 Amplified Fragments |
Do not scrap a useful launcher merely because its perk increases the fragment return.
Check Repair Quotes at Equal Wear
Before committing to an expensive setup, compare workbench quotes at the same remaining durability. Record the exact variant and required materials; a more worn weapon cannot establish that its perk caused the higher bill.
If the added perk is not improving hit rate, shots to kill, or survival, keep the simpler setup. That gives you an actual economic decision instead of a guessed cost per mod.
Rascal vs Hullcracker
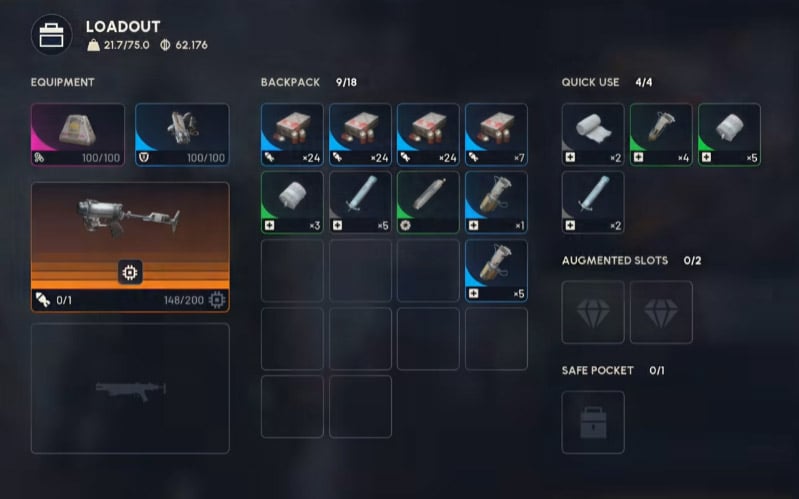
The useful distinction is 4 kg and break-action for the Rascal versus 7 kg and pump-action for the Hullcracker. Choose the Rascal when carrying capacity and deliberate single-shot peeks fit your route; favor the Hullcracker when its firing cycle better suits repeated attacks.
Both weapons use projectiles that detonate on ARC hits. Carry a suitable secondary for Raider encounters rather than relying on either launcher for dependable explosive PvP damage.
FAQ (Frequently Asked Questions)
What is the best ARC Raiders Amplified Rascal perk?
High Velocity is the best first choice when projectile travel is causing misses. Its listed speed is 700 m/s versus the base amplified variant's 350 m/s; it does not guarantee accuracy or increase verified per-hit damage.
Is Sprint Shooting worth buying for the Rascal?
Sprint Shooting is worth buying when firing during movement solves a recurring problem on your route. It requires Mobile-Fire Grip Fittings research and 2 Fluted Rotor Cores, so skip it if you mainly fire from stationary cover.
Do Incendiary Rounds deal more Rascal damage?
A universal damage increase is not established by the available evidence. Compare complete damage windows and shots to kill on matching targets; the draft's 259-versus-464 figures lack enough testing detail to guide a purchase.
How much does an Amplified Rascal cost to repair?
The 20-, 33-, and 41-fragment repair figures are unverified; use your workbench's quote for the exact weapon and wear level. Recycling and salvaging returns are not repair prices, and comparisons require equal remaining durability.
Is the Rascal better than the Hullcracker for Bombardiers?
Neither is proven universally better; choose around your reload windows and firing rhythm. The Rascal is lighter but single-shot, while the Hullcracker is heavier and pump-action; with either weapon, manage Spotters and attack the rear plate or leg joints from a safe position.

I’m Sofia Bergström, a Swedish Managing Editor covering FPS, competitive shooters, and extraction shooters for GGWTB. My guides focus on loadout trade-offs, positioning, and when to commit—or cut your losses. A weapon’s stats tell only part of the story; I focus on how it fits your role and the fight ahead.
Most Popular Posts
- ARC Raiders Update 1.42: Phantom Targets Farming Guide (Glitched Wasps, Rewards, Regional Conditions)
- ARC Raiders Hullcracker Blueprints: Fastest Way to Complete The Major's Footlocker
- ARC Raiders Best Pop Trigger Strategy: Fast Phantom Targets Damage Guide
- ARC Raiders Subway Skin Guide: Unlock the Subterranean Outfit
- ARC Raiders Looting Mk. 3 Survivor Blueprint Guide: Best Blue Gate Route and Drop Locations
- ARC Raiders Medium & Heavy Gun Parts Blueprint Guide: Best Farm Route, Locations, and Refiner Crafting
Popular Category Lists
- ARC Raiders / (355)
- Grow a Garden / (294)
- CoD: Black Ops 7 / (167)
- Star Citizen / (163)
- MLB 26 / (159)
- Monopoly Go / (153)
- ARK Survival Ascended / (128)
- Steal a Brainrot / (99)
- Blox Fruits / (74)
- Adopt Me / (74)
- Forza Horizon 6 / (72)
- Sailor Piece / (68)
- Grow a Garden 2 / (68)
- Diablo IV / (62)
- CoD: BLACK OPS 6 / (55)
- Aion 2 / (53)
- Path of Exile 2 / (48)
- Monster Hunter Wilds / (46)
- Windrose / (44)
- COD: Modern Warfare 4 / (43)