0
0 Created: Feb 12,2026 | ARC Raiders
ARC Raiders The Best PvE Loot Locations in Buried City and Dam Battlegrounds

We see an extraction ARC Raiders point and start rushing it, while other players do the same and load up on the forges that tend to have nothing, while we ignore the building on the right that could have a schematic, and a building on the left that could hav
We provide a loot rundown for the entire map, starting with Buried City, focusing on the unique loot spots that most players overlook, including weapons, blueprints, and high-tier items like the coveted Magnetic Accelerator.
- Buried City
- 1. Two Towers Entry South and North
- 2. Pharmacy At Piazza Aristo
- 3. The Red Tower (Near Extraction)
- 4. Hospital Roof & Adjacent Building
- 5. Abandoned Highway Camp Building
- Dam Battlegrounds: Top-Tier Crafting
- The Unmarked Water Tower Room (A Must Go)
- Power Generator Complex
- Spaceport: Fast Weapon Crates
- FAQ: Optimizing Your Loot Runs
- Summary
Buried City
The verticality Buried City provides is a common misconception regarding the height and the various loot locations that are found at high elevations.
1. Two Towers Entry South and North (the usual key is not needed)
Players usually don't go to South Trench Tower because they don't have keycards.
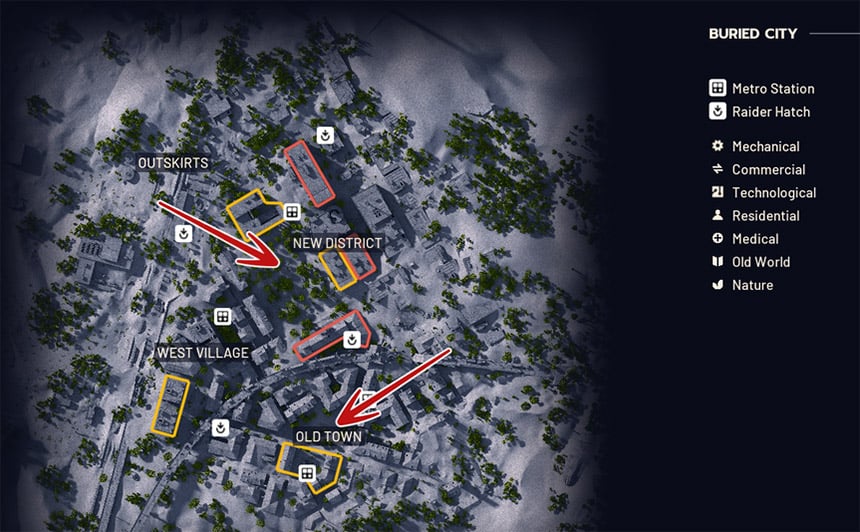
keys are not needed if you have vertical movement.
Entrance: You can either use a Zipline or a Snap Hook to get to the roof. There is a small entrance that directly drops you into the room.
Loot: This place is rarely looted. Expect to find some un-looted containers and maybe some silencers. Loot the weapon crate on the roof.
Extra Rotation: After looting the roof of South Tower, throw a zipline to the North Trench Tower and go to the back, you will find another weapon crate and you can loot the down area. This route is usually safe even with 14 min left.
2. Pharmacy At Piazza Aristo
There is a pharmacy building located at Piazza Aristo that requires only a simple door breach.
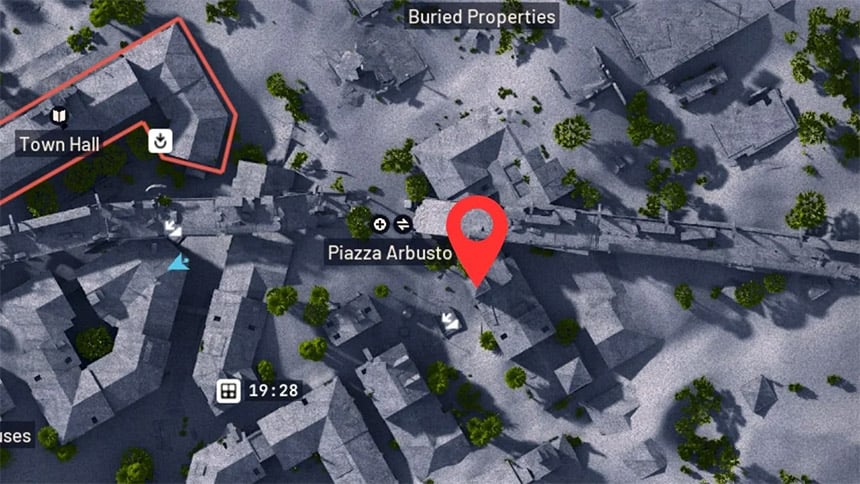
What is here:
This is a perfect place to go for staggered raid spawns.
What to grab:
You have some loot on the shelves and on the container located in the entrance. The real treasure is upstairs, a Security Breach container that is located in the corner.
3. The Red Tower (Near Extraction)
The Red Tower is located right next to the extraction point. It is a multi-level goldmine.
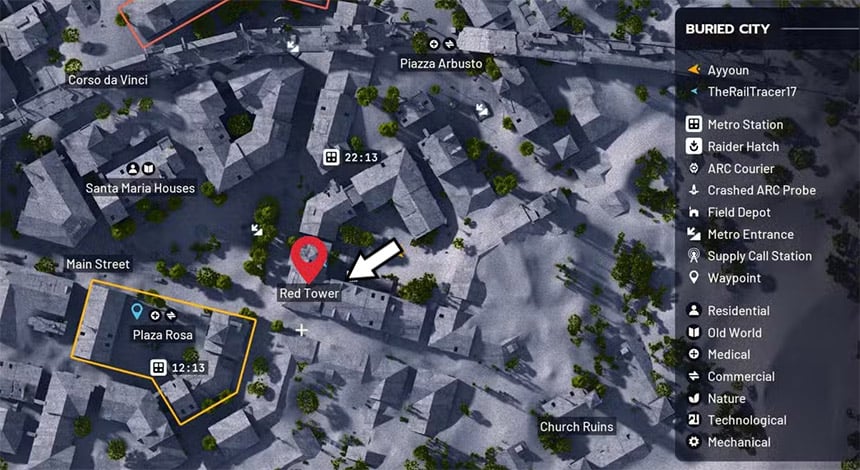
Ground Floor: Check the table right in front of you - Remote Controls or Lance's Mixtapes can spawn here.
Upstairs: Red Coral jewelry and several containers can be found here.
The Jackpot: There is always a weapon crate and a breachable container here, and don't forget to go all the way to the roof as there is a breachable container often containing heavy ammo, and several other crates.
4. Hospital Roof & Adjacent Building
This is a technical spot, so come with two ziplines.
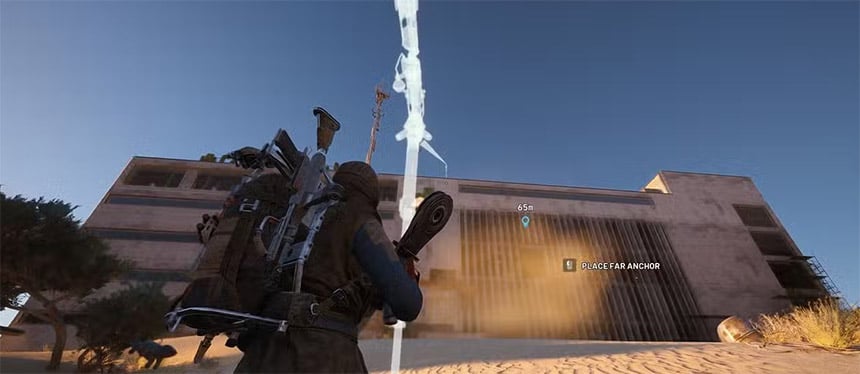
The Setup: Zipline to the hospital roof. Go through the hole in the doorway to find a backpack and a possible Security Breach spawn. This is one of the best places for Night Raids or Cold Snap events.
The Rotation: Use the second zipline to get to the adjacent building. There's another weapon crate there.
5. Abandoned Highway Camp Building
There is a building directly across the camp with a breachable door upstairs.
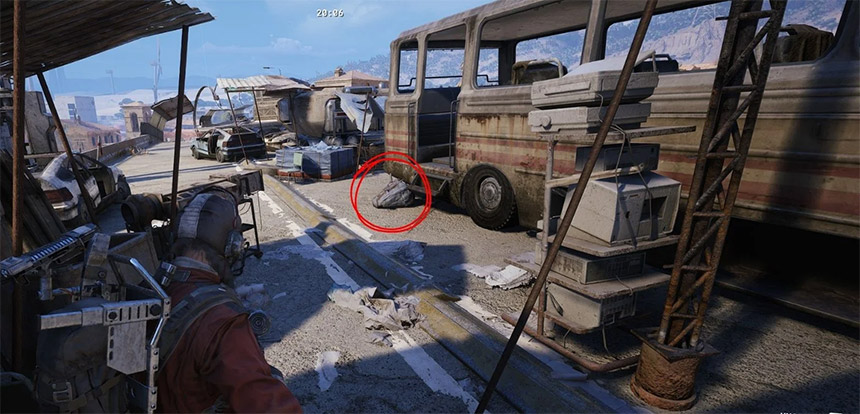
The Loot: High chance for Extended Barrel blueprints and several backpacks.
The Exit: The most exciting feature? The ability to jump through windows and directly drop onto an extraction hatch. A perfect hit and run spot.
Dam Battlegrounds: Top-Tier Crafting
The Dam map has one of the most reliable unmarked room locations if you need specific epic components to finish your crafting.
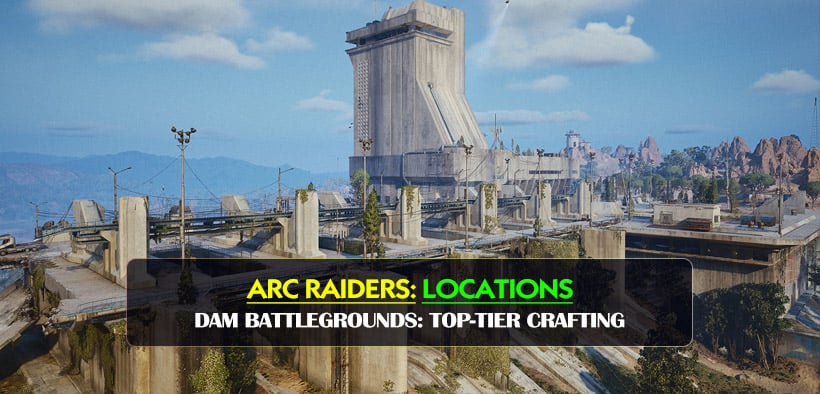
The Unmarked Water Tower Room (A Must Go)
At the bottom of the map near the Water Towers and next to an extraction point.
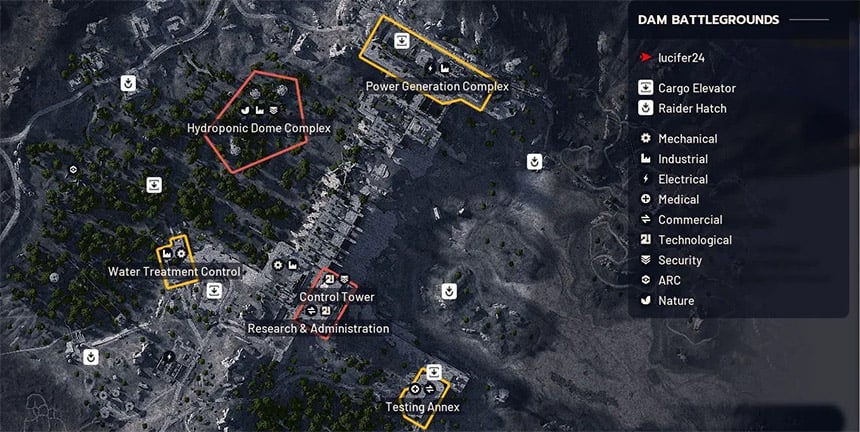
The Secret: This room is magic when it comes to RNG and contains red containers with a very high chance of containing Magnetic Accelerators and Exodus Models.
Consistency: On average, we have pulled one or both of these items from this room 99% of the time. Do not leave the raid without visiting this room, no matter if you are at the beginning or the end.
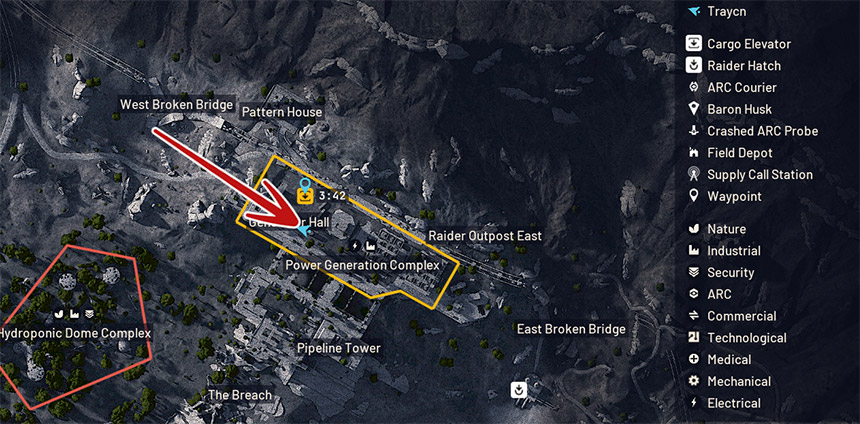
Power Generator Complex
This area is accessible by spending one Power Rod.
Why use a Power Rod? The amount of red containers here is leading.
Target Loot: This room is filled with breachable containers containing Sensors, Processors, Heat Sinks, and Wires.
Pro Tip: To get the most value from the loot, hit the location during a Night Raid or Electromagnetic Storm event.
Spaceport: Fast Weapon Crates
Spaceport is quite open, but there are ways you can farm weapon crates quickly without a lot of fighting.
| Location | Specific Spot | Loot Highlight |
|---|---|---|
| East Container Yard | Bottom corner of the yard | Weapon Crate |
| Fuel Storage | Behind the mechanical ball object | Weapon Crate |
| South Checkpoint | Middle toll booth | Weapon Crate (Hidden inside) |
| Fuel Lines | Inside the broken, upward-flipped pipe | Weapon Crate |
| Arrival Building | On the roof (climb from car park side) | Weapon Crate, Ammo Box, Medic Bag |
| Vehicle Maintenance | Roof (requires Snap Hook) | Ammo Box / Backpack behind door |
| Rocket Assembly | Bottom scaffolding (climb down from old roof) | Grenade Case, Bag |
FAQ: Optimizing Your Loot Runs
Q: Do I need to bring keys for these spots?
A: Mostly, no. The South Trench Tower can be bypassed with a zipline. The Power Generator is the only major spot listed here that requires a consumable tool (Power Rod).
Q: For best results, when should I raid these spots?
A: While the Power Generator Complex and Hospital Roof give good loot at all times, they are vastly better during Night Raids and Cold Snap events thanks to loot multipliers.
Q: Can I loot these spots without being hunted by players?
A: Some locations, like the South Trench Tower and Unmarked Water Tower room, are ignored by players, so they are safer than POIs that are crowded. Still, check your corners, especially in the small pharmacy rooms. Always.
Summary
Looting in ARC Raiders is not about trying to get the biggest target. It's about being smart and efficient. You are not just filling your backpack by looting the ignored locations in your rotation. You are getting craft materials and blueprints that other players are leaving.
When you are at the Water Towers and Trench lines, spend an extra 30 seconds and look at the spots. You and your squad will get plenty of more loot.

Most Popular Posts
- ARC Raiders Update 1.42: Phantom Targets Farming Guide (Glitched Wasps, Rewards, Regional Conditions)
- ARC Raiders Hullcracker Blueprints: Fastest Way to Complete The Major's Footlocker
- ARC Raiders Best Pop Trigger Strategy: Fast Phantom Targets Damage Guide
- ARC Raiders Subway Skin Guide: Unlock the Subterranean Outfit
- ARC Raiders Spaceport Open Containers Guide: 19K+ Solo Trial Route
- ARC Raiders Looting Mk. 3 Survivor Blueprint Guide: Best Blue Gate Route and Drop Locations
Popular Category Lists
- ARC Raiders / (343)
- Grow a Garden / (292)
- CoD: Black Ops 7 / (167)
- Star Citizen / (160)
- MLB 26 / (159)
- Monopoly Go / (152)
- ARK Survival Ascended / (126)
- Steal a Brainrot / (98)
- Blox Fruits / (74)
- Adopt Me / (73)
- Forza Horizon 6 / (72)
- Sailor Piece / (68)
- Grow a Garden 2 / (68)
- Diablo IV / (62)
- CoD: BLACK OPS 6 / (55)
- Path of Exile 2 / (48)
- Monster Hunter Wilds / (46)
- Aion 2 / (45)
- Windrose / (44)
- Donut SMP / (41)