


 0
0ARC Raiders Shared Watch Guide: Fastest XP Farming, Queen Spots, and Full Rewards List
- KITE
- Share
- ARC Raiders
- 02/11/26
- 1093
ARC Raiders is usually defined by the paranoia of a bullet in the back. But the Shared Watch update has flipped the script, creating arguably the most refreshing experience we have had in the game so far.

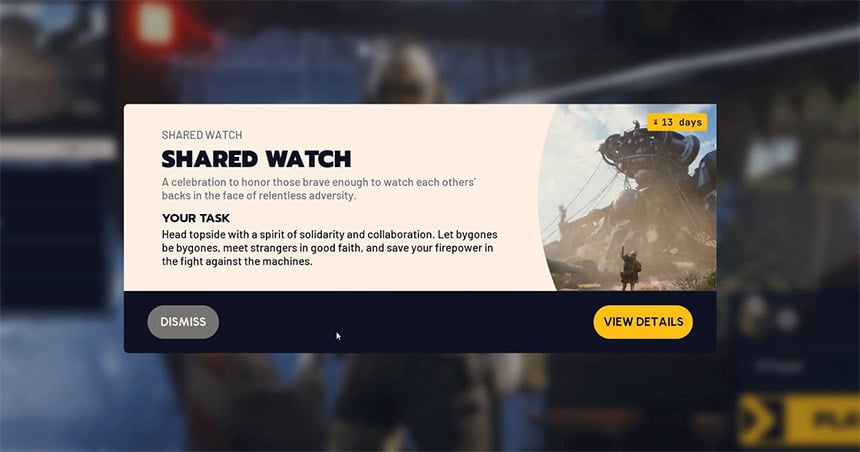
The premise is simple but effective: head topside, let bygones be bygones, and save your ammo for the machines. Whether you are here for the spirit of solidarity or just desperately want that ridiculous batting helmet for Scrappy (the chicken), this event rewards cooperation over conflict.
Below, we have combined our field testing data to bring you the ultimate guide on maximizing Merit, the exact math behind the XP, and how to finish this event in under two hours.
- The Merit System: How It Works
- The Rewards Roadmap
- The Queen Farming Strategy (Fastest Method)
- Why This Works
- The Spaceport Maintenance Hanger Spot
- Mob Farming: XP Values & Best Maps
- Enemy XP Breakdown
- The New Social Meta: Armed Neutrality
- The Good Faith Rules
- Dealing with Rats
- Recommended Loadouts
- FAQ: Shared Watch Event
- The Verdict
↖ The Merit System: How It Works
The event runs from February 10th to the 24th. The core loop revolves around Merit. Unlike standard gameplay where loot is king, Merit is the only currency that matters for unlocking event exclusives.
Here is the critical math you need to know:
1 Merit = 100 XP (derived from Arc destruction, assist damage, or direct damage).
Total Goal: You need 1,050 Merits to unlock the final reward.
PvP Rule: There is zero Merit gained from PvP encounters.
This means the entire event boils down to dealing approximately 105,000 points of damage to machines. You can do this slowly over two weeks, or you can optimize your loadout and speedrun it.
↖ The Rewards Roadmap
We have compiled the full progression path so you know exactly what you are grinding for.
| Merit Points | Reward Item | Category | Notes |
|---|---|---|---|
| 100 | 20 Coins | Currency | A quick start bonus. |
| 150 | Vita Spray | Consumable | Useful for mid-fight healing. |
| 200 | Tactical Free Healing Blueprint | Blueprint | Essential for sustain. |
| 250 | Grenade Attachment | Costume Mod | Visual upgrade for your rig. |
| 300 | Baseball Backpack Charm | Cosmetic | Themed for the Slugger set. |
| 350 | Raider Tokens | Currency | Standard progression currency. |
| 400 | Snap Hook (Grey/Yellow) | Tool/Cosmetic | A nice visual variant. |
| 550 | Chest Piece (Slugger Variant) | Cosmetic | The core of the baseball theme. |
| 650 | 20 Raider Tokens | Currency | More funds for your runs. |
| 700 | Sports Face Paint (Blue) | Cosmetic | Aggressive look. |
| 750 | Blue Glow Slugger Variant | Blueprint | High-tier visual upgrade. |
| 850 | 20 Raider Tokens | Currency | Stacking up for the late game. |
| 950 | Legendary Acoustic Guitar | Item | Perfect for campfire vibes. |
| 1050 | Chicken Hat | Cosmetic | The ultimate flex for Scrappy. |
↖ The Queen Farming Strategy (Fastest Method)
If you want to clear this event in roughly 8 runs, you need to ignore the small fry and focus on the biggest targets in the game: Queens and Matriarchs.
↖ Why This Works
In our testing, a single run focusing on a Queen yielded approximately 13,000 Arc Damage XP. This converts to 130+ Merits in one go. Considering the event cap is 1,050 Merits, you can mathematically finish the entire pass in about 7.5 successful Queen kills.
↖ The Spaceport Maintenance Hanger Spot
The safest and most efficient way to execute this is on the Spaceport map.
1. Locate the Maintenance Hanger: Head towards the large hanger structure.
2. The Ladder Play: Just inside, find the ladder and climb to the upper catwalk.
3. The Angle: From this elevated position, you can fire through the windows. The Queen's lasers struggle to track you here, and her physical attacks generally cannot reach you.
4. The Weapon: We recommend the Anvil with Hullcracker ammo or a Jupiter.
If you land your shots correctly, hitting the core can deal nearly 2,000 damage per shot. Even just sending it and hitting the body racks up 1,000+ damage instantly.
Warning: While the loot is great, the real reward here is the raw damage numbers. Even if you don't secure the loot, the XP contribution to your event pass is permanent.
↖ Mob Farming: XP Values & Best Maps
If you are not equipped to take down a Queen, or if you prefer running solo with lighter gear, you need to know which enemies offer the best return on investment.
We strongly recommend playing on Spaceport, Buried City, or Bluegate.
Avoid: Dam Battlegrounds (too spread out) and Stella (too few Arcs; usually only one Bastion).
↖ Enemy XP Breakdown
We have compiled the XP values based on our latest runs. Note that Explosive Kills often yield higher XP due to splash damage hitting multiple components.
| Enemy Type | Standard Kill XP | Explosive/Weakpoint XP | Notes |
|---|---|---|---|
| Queen/Matriarch | N/A | 13,000+ | Total damage output per full kill. |
| Hornet | ~400 | 600 - 700 | Aim for the main body, not wings. |
| Snitch | ~270 | 570 | Explosives maximize the XP here. |
| Wasp | ~150 | 430 | Group them up for explosive multikills. |
| Sentry Turret | ~340 | Higher for Snipers | Easy stationary targets. |
| Shredder | N/A | ~1,300 | Two Hullcracker shells usually finish them. |
| Bastion | N/A | ~1,000 | Surprisingly low XP compared to effort. |
| Ticks/Pops | ~80 - 110 | N/A | Not worth farming specifically. |
Pro Tip: If you are hunting flying Arcs (Wasps/Hornets), bring an Osprey or Renegade. Aim for the propellers to ground them quickly. However, remember that shooting the wings off often gives less XP than destroying the main body outright. For maximum event progress, destroy the unit completely.
↖ The New Social Meta: Armed Neutrality
What makes this mode fascinating is not just the numbers; it is the behavioral shift. If you are a PvE-focused player, you have probably had moments where you saw someone struggling against an Arc, helped them, and then went your separate ways. Now, the game formalizes that handshake.
↖ The Good Faith Rules
During our testing in the Grandio Apartments, we encountered scenarios that would usually end in a firefight. For example, we arrived at a loot room where another player was already active. Instead of throwing a grenade, we backed off.
Why? Because engaging him costs ammo and risks Merit, while helping him fight the inevitable reinforcement wave grants rewards.
If you see a player downed:
Do not instinctively finish them off. We witnessed a scenario where a player was crawling, offering their loot to be spared. The aggressor actually refused to kill them because they didn't have a defib to help, but also didn't want the penalty of the kill.
↖ Dealing with Rats
Does this mean PvP is gone? Absolutely not. There will always be rats—players who ignore the event objectives to prey on trusting raiders. Since this isn't a separate server but an overlay on the main game, the threat remains.
Our advice: Treat every encounter as armed neutrality. Keep your gun up, help with the machines, but do not turn your back until you are sure they are chasing Merit, not your loot.
↖ Recommended Loadouts
To speed this up, your choice of weapon dictates your playstyle.
1. The Event Speedrun Build:
Weapon: Anvil Launcher.
Ammo: Hullcracker (Heavy).
Strategy: This allows you to damage all Arc types heavily. It is the only way to efficiently farm Queens or two-shot Shredders for quick 1,300 XP bursts.
2. The Core Melter Build:
Weapon: Jupiter.
Strategy: Punches straight through to the cores of Bastions and Bombardiers. If you are good at aiming, this rivals the Hullcracker for DPS.
↖ FAQ: Shared Watch Event
Q: Do I need to be in a squad to earn Shared Watch Merits?
A: No. Despite the name suggesting cooperation, the Merit system is purely based on your* damage output to Arcs. You can do this entirely solo.
Q: Do I lose Merit for killing players?
A: While not explicitly detailed in the UI, gameplay observation suggests a hidden karma or simply an opportunity cost. If you kill a player, you gain zero Merit. If you help them kill an Arc, you gain Merit. The math heavily favors cooperation.
Q: When is the best time to farm?
A: Try to deploy during an Electromagnetic Storm or a Night Raid. The Arc spawn rates are significantly higher, giving you more targets per minute.
↖ The Verdict
Shared Watch is a bold experiment that rewards the good guys. It proves that you don't need to disable friendly fire to encourage teamwork; you just need to make cooperation more profitable than conflict.
Whether you choose to speedrun with Hullcrackers on the Spaceport or just enjoy the relaxed vibes of cooperative play, this event is a win for the community. Get out there, farm that Merit, and we will see you topside—hopefully wearing that Chicken Hat.

Most Popular Posts
- ARC Raiders Riven Tides Key Room Guide: Best Hotel Keys, Loot Routes, Secure & Crane Storage
- ARC Raiders Damage Fireflies Trial Guide: Best Farm Method on Buried City Night Raid
- ARC Raiders Riven Tides Update: New Map & Items, ARC Turbine, Rewards, and Best Early Strategy
- ARC Raiders Bettina Guide: Best Build, Buffs, and How to Use It Against ARC
- ARC Raiders Solo Search Supply Drops Guide: Best Buried City Route, Beacon Locations
- Arc Raiders Season 4 Riven Tides Update, Rewards, Safe Skins, and Release Timeline
Popular Category Lists
- Grow a Garden / (286)
- ARC Raiders / (266)
- CoD: Black Ops 7 / (166)
- Monopoly Go / (146)
- MLB 26 / (145)
- Star Citizen / (116)
- Steal a Brainrot / (89)
- ARK Survival Ascended / (75)
- Sailor Piece / (68)
- Forza Horizon 6 / (63)
- Diablo IV / (61)
- Blox Fruits / (60)
- CoD: BLACK OPS 6 / (55)
- Adopt Me / (53)
- Path of Exile 2 / (48)
- Monster Hunter Wilds / (46)
- Windrose / (44)
- Grow a Garden 2 / (42)
- Path of Exile / (40)
- Bee Swarm Simulator / (36)


