0
0Black Ops 7 Deadeye Drone Guides: Works, Best Overclock and Counter
- JAMIE
- Share
- CoD: Black Ops 7
- 12/22/25
- 3317
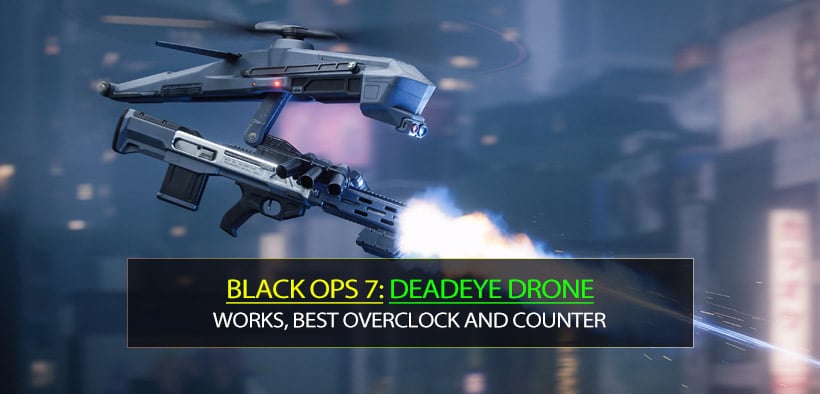
The Bo7 Deadeye Drone looks simple on paper—a controllable drone with a sniper rifle—but it plays very differently once you're in a real match with movement, latency, and enemies actively hunting it. I've been running it in live lobbies and custom tests, and the big takeaway is this: it's a low-cost streak with high kill potential, but it's also fragile and surprisingly sensitive to target movement.
- 1) What the Deadeye Drone Actually
- Key identity: low cost, high upside, high counterplay
- 2) Core Stats & What They Mean in Real Matches
- Deadeye Drone at-a-glance
- 3) Damage Model: One-Shot Zones
- The rule that decides your kill count
- 4) Accuracy, ADS, and the Why Did That Miss? Problem
- Why you still need to lead targets sometimes
- 5) Overclocks: Extended Ammo vs Grenadier
- Overclock comparison table
- 6) How I Use Deadeye Drone for Consistent Value
- Phase 1: Secure 2–4 easy picks first
- Phase 2: Hunt spawns and force movement
- Phase 3: Ammo empty? Switch to recon mode
- 7) Counterplay: How to Beat Deadeye Drone
- The simplest counter: shoot it
- Best dedicated counters (ranked)
- Movement is counterplay too
- 8) Is Deadeye Drone Balanced?
- FAQ
- 1) How many shots does the Deadeye Drone get in Black Ops 7?
- 2) Does Deadeye Drone one-shot anywhere?
- 3) Does it have damage drop-off at long range?
- 4) Is it hitscan?
- 5) What's the best overclock for Deadeye Drone?
- 6) What's the fastest way to counter it?
- Summary
↖ 1) What the Deadeye Drone Actually
Deadeye Drone is a manually controlled aerial streak that lets you fly and take sniper shots at enemy players. Unlike fire-and-forget streaks, you're trading your own map presence for direct kill pressure.
↖ Key identity: low cost, high upside, high counterplay
- Score required: 575
- Duration: up to 40 seconds (unless destroyed)
- Default ammo: 8 sniper rounds
- Overclock 1 (Extended ammo): 10 rounds
- Overclock 2 (Grenadier): 1 grenade drop/launch for bombing
Why that matters:
- 575 is low enough that you can earn it frequently.
- The drone can realistically chain kills—but only if you treat each shot as a resource, not as spam.
↖ 2) Core Stats & What They Mean in Real Matches
Numbers are only useful if they change decisions. Here's the so what for each stat.
↖ Deadeye Drone at-a-glance
This table is the part you'll actually reference mid-grind.
| Category | Value | What it means in practice |
|---|---|---|
| Score cost | 575 | You can slot it as an early/mid streak without sacrificing higher streak routes. |
| Duration | 40 seconds | You have time to reposition, hunt spawns, and still switch into recon mode later. |
| Ammo | 8 (10 w/ Overclock 1) | Ammo is your kill cap; Overclock 1 often equals +2 kills if you're clean. |
| Fire rate (max spam) | ~104 RPM | You can spam, but it's usually worse than taking controlled shots. |
| One-shot kill zones | Upper torso, upper arms, neck, head | Lower torso/legs = two-shot; you must aim with intent. |
| Range drop-off | None observed | Cross-map picks are viable if you can see and track. |
| Bullet velocity | ~1000 m/s (tested) | Feels near hitscan, but movement/latency still makes leading relevant. |
| After ammo is gone | Drone stays active | You can keep it as a recon/ping platform instead of ejecting instantly. |
↖ 3) Damage Model: One-Shot Zones
Yes, it one-shots—but not everywhere.
↖ The rule that decides your kill count
- One-shot kill: upper torso, upper arms, neck, head
- Two-shot kill: everything else on a full-health enemy
This changes your entire shot selection:
- If you're tempted to take a low-percentage shot to the hip while someone is sprinting, don't.
- If you can wait half a second for the enemy's chest to present, do it—your ammo economy improves instantly.
If you find yourself consistently getting hitmarkers, then you're probably taking easy shots to the wrong zone. Slow down and aim higher.
↖ 4) Accuracy, ADS, and the Why Did That Miss? Problem
In controlled testing, the shot goes pinpoint to the center of your screen, whether you ADS or not. So there's no classic bloom/spread decision.
↖ Why you still need to lead targets sometimes
Even with ~1000 m/s velocity, I've seen shots that should connect (center-mass on a moving bot/player) fail. The most consistent explanation in practice is:
- Scorestreak hit registration/lag compensation can feel different than gunfights as a player
- Moving targets can desync from where you see them at the moment you fire
What this means for you:
- If the enemy is strafing or slide-canceling, aim slightly ahead and time the shot like it's a fast projectile, not true hitscan.
- If the enemy is standing still or shooting someone else, you can be more center-screen confident.
A simple rule I use:
- Slow target = center chest
- Fast target = lead by a fraction + commit to upper torso
↖ 5) Overclocks: Extended Ammo vs Grenadier
Both are usable, but one is far more consistent.
↖ Overclock Comparison
| Overclock | What you get | Best for | Reliability | My pick |
|---|---|---|---|---|
| Overclock 1: Extended Ammo | 8 → 10 sniper rounds | Pure kill conversion, streak chaining | High | Default choice |
| Overclock 2: Grenadier | 1 grenade for aerial bombing | Forcing people off cover, finishing clustered fights | Medium/Low (bounce + delay) | Situational |
Why I lean Extended Ammo:
- Two extra rounds often equals two extra kills if you're aiming for one-shot zones.
- Grenadier's bounce + delay makes it inconsistent in live lobbies—especially if enemies are already moving unpredictably.
If you notice enemies turtling on a hardpoint behind headglitches, then Grenadier can be justified. Otherwise, ammo wins more games.
↖ 6) How I Use Deadeye Drone for Consistent Value
Deadeye Drone isn't just shoot until empty. The best runs have phases.
↖ Phase 1: Secure 2–4 easy picks first
Do this, then get fancy.
1. Fly high enough to avoid immediate SMG beams.
2. Look for enemies who are:
- Shooting teammates
- Re-challenging lanes
- Standing on predictable objectives
3. Take upper-torso-first shots only.
Why: early kills build confidence and reduce the temptation to spam.
↖ Phase 2: Hunt spawns and force movement
If you see a spawn flip or a teammate pushing deep, then rotate the drone to the next likely lane instead of hovering the old one.
I treat it like a mobile sniper tower:
- deny a lane
- punish re-peeks
- make them waste time looking up
↖ Phase 3: Ammo empty? Switch to recon mode
This is the sneaky value people waste.
If you're out of rounds, then stay in the drone and ping enemies:
- You keep pressure by feeding your team information.
- You can hover above routes and mark rotations.
That's why the streak still being active after ammo isn't a bug—it's a second job.
↖ 7) Counterplay: How to Beat Deadeye Drone
Because it's manually controlled, perks like Cold Blooded won't save you the way they might against AI targeting. You still need real counterplay.
↖ The simplest counter: shoot it
It doesn't have much health. In my tests, a typical SMG can delete it in a short burst (single-digit rounds in the right range).
Practical rule:
- If you hear it and see it, shoot it immediately.
- Don't wait for teammates to do it—this streak snowballs if ignored.
↖ Best dedicated counters (ranked)
| Counter | How it works | Why it's strong | Notes |
|---|---|---|---|
| EMP grenade | Throw near it; detonation destroys it | Doesn't need precise aim/line of sight | Great panic button |
| Hunterbot | Acquires line of sight and destroys it | Reliable automated denial | Forces drone to reposition or die |
| Black Hat | Destroys it efficiently | Fast, clean solution | Strong if you already run it |
↖ Movement is counterplay too
This matters more than people think.
If you're trying to gun it down, don't stand still.
Mix slides and lateral movement while shooting—because the drone operator often has to lead, your movement increases their miss chance dramatically.
↖ 8) Is Deadeye Drone Balanced?
This streak sits in a healthy place: high power potential for low score, but easy to counter when teams react correctly.
Here's the balance logic in plain terms:
- If players ignore it, it can farm.
- If players actively counter it (shoot/EMP/Hunterbot), it usually dies fast.
That punish complacency, reward response design is something I wish more streaks followed.
↖ FAQ
↖ 1) How many shots does the Deadeye Drone get in Black Ops 7?
It spawns with 8 sniper rounds by default, and 10 rounds with the first overclock (extended ammo).
↖ 2) Does Deadeye Drone one-shot anywhere?
No. It one-shots to upper torso, upper arms, neck, or head. Other areas are typically a two-shot on full-health enemies.
↖ 3) Does it have damage drop-off at long range?
In testing, I didn't observe range drop-off. If you hit a one-shot zone, it can still kill across the map.
↖ 4) Is it hitscan?
It behaves like a very fast projectile (tested around 1000 m/s), but in real matches you may still need to lead moving targets due to hitreg/latency quirks with scorestreak control.
↖ 5) What's the best overclock for Deadeye Drone?
For consistent results, Extended Ammo is the best. Grenadier is more situational due to bounce and delay.
↖ 6) What's the fastest way to counter it?
- Shoot it (it's not tanky)
- EMP grenade near it for an immediate destroy
- Hunterbot if it gets line of sight
↖ Summary
Deadeye Drone is a rare kind of streak: cheap enough to earn often, lethal enough to swing a hill, and interactive enough that both sides have real decisions to make. If you treat ammo like a limited resource, aim for upper-torso kills, and keep flying for recon pings after you're empty, it punches way above 575 score. And if you're on the receiving end, a quick burst of bullets, an EMP, or a Hunterbot turns it from nightmare into free scrap metal.

Most Popular Posts
- Black Ops 7 Zombies Totenreich Easter Egg Guide: Fast Solo & Co-Op Main Quest Walkthrough
- Black Ops 7 Endgame Exotic Affinity Weapons Guide: Best Bonuses, Full Weapon List, and Farming Tips
- Black Ops 7 Cherry Fizz Guide: Fastest Illicit Cargo Event Route for Season 4
- Black Ops 7 Season 4 Release Date, Maps, Weapons, Zombies, Warzone, and MW4 Reveal Prep
- Black Ops 7 Season 3 Meta Loadouts: Best Weapons Class Setups Right Now
- Best MK35 ISR Class Setup in Black Ops 7: Fast Meta Loadout, Attachments, and Tips
Popular Category Lists
- Grow a Garden / (283)
- ARC Raiders / (248)
- CoD: Black Ops 7 / (164)
- Monopoly Go / (145)
- MLB 26 / (133)
- Star Citizen / (99)
- Steal a Brainrot / (87)
- Sailor Piece / (67)
- CoD: BLACK OPS 6 / (55)
- Forza Horizon 6 / (54)
- Blox Fruits / (54)
- ARK Survival Ascended / (50)
- Path of Exile 2 / (48)
- Adopt Me / (47)
- Monster Hunter Wilds / (46)
- Diablo IV / (45)
- Windrose / (43)
- Path of Exile / (40)
- Battlefield 6 / (34)
- Bee Swarm Simulator / (32)