


 0
0Black Ops 7 Wildcards Perk Greed Best Meta Builds for Stealth, OBJ, Map Control & Streaks
- JAMIE
- Share
- CoD: Black Ops 7
- 12/27/25
- 2355
Perk Greed isn't one extra perk for fun—it's one extra lever that completes a build. In Black Ops 7, that matters because perks and hybrid specialties can cover weaknesses so cleanly that a class goes from fine to I can run this every match.
Below are 6 Perk Greed loadouts I've tested in real matches (OBJ, TDM/KC, and FFA pacing). Each one is built as a closed loop: goal → why it works → when to use → how to play → what causes it to fail.
- 1)Pick Your Playstyle
- 2) Stealth All-Rounder: Ghost + Scavenger + Cold Blooded + Ninja
- Why it works
- How to play it (repeatable loop)
- Common failure & fix
- 3)Flak Jacket + Tac Mask + Guardian + Cold Blooded
- Why it works
- What this means in practice
- Pilot tips
- 4) Cutoff / Map Control OBJ: Lightweight + Scavenger + Dexterity + Cold Blooded
- Why it works
- When to pick it
- Two musts or it underperforms
- 5) Streak Builder (Safe & Consistent): Ghost + Vigilance + Bankroll + Cold Blooded
- Why it works
- How to play it
- Mistake that makes this build feel slow
- 6) Anti-Camper Hunter: Ninja + Tac Mask + Tracker + Engineer
- Why it works
- How I clear a camper setup
- What you'll notice
- 7) Hyper Aggro UAV/CUAV Loop: Gung-Ho + Fast Hands + Bankroll + Looper
- Why it works
- How to not turn this into a feed class
- FAQ
- 1) If I only want one Perk Greed setup for everything, which is it?
- 2) I'm losing hardpoints to nade/tactical spam—what should I run?
- 3) Is Cold Blooded really worth crutching every class?
- 4) I run Bankroll but streaks still feel slow. Why?
- 5) Are Tracker + Engineer tryhard viable or just for fun?
- Closing
↖ 1)Pick Your Playstyle
Use this table to choose fast, then read the breakdown for how to pilot each setup.
| Build Goal | Perk Greed Combo (4 perks) | Best Modes/Maps | What You'll Notice |
|---|---|---|---|
| Silent flanks + survivable roaming | Ghost + Scavenger + Cold Blooded + Ninja | TDM/KC/DOM on medium-large maps | Harder to track, fewer out of nowhere deaths, you stay stocked |
| Soak the hill/flag under spam | Flak Jacket + Tac Mask + Guardian + Cold Blooded | Hardpoint/DOM choke-heavy maps | You don't get bullied off OBJ by nades/tacticals/AI |
| Cutoffs + map control (win before they reach OBJ) | Lightweight + Scavenger + Dexterity + Cold Blooded | DOM/HP where lanes matter | Faster takes, cleaner multi-kills, easier spawn pressure |
| Safe streak building (high streak attempts) | Ghost + Vigilance + Bankroll + Cold Blooded | Any mode; best when you're streaking | CUAV doesn't blind you, streaks start faster and die less to cheese |
| Anti-camper hunter | Ninja + Tac Mask + Tracker + Engineer | FFA/TDM/KC small-medium maps | Faster target acquisition; campers lose their setup advantage |
| Hyper-aggressive UAV/CUAV loop | Gung-Ho + Fast Hands + Bankroll + Looper | Small maps, fast lobbies | You chain intel streaks constantly and keep momentum high |
↖ 2) Stealth All-Rounder: Ghost + Scavenger + Cold Blooded + Ninja
This is my default good game setup because it solves the three things that kill flank players: getting pinged, running dry, and giving away audio.

↖ Why it works
- Ghost keeps you harder to track while moving—huge for long routes and repositioning.
- Ninja deletes footstep anxiety, so you don't have to play slow to stay quiet.
- Cold Blooded is a broad anti-detection/anti-AI insurance policy.
- Scavenger matters more than people admit: flanks often fail because you win 2 fights and then run out of ammo or stims/lethals.
↖ How to play it (repeatable loop)
1. Take an outer route early (don't slam mid).
2. Get 1–2 kills, then instantly relocate (don't live where you shot).
3. Re-enter from a new angle and repeat.
↖ Common failure & fix
If you get a kill and die to the immediate trade a lot, you're staying put too long. This build is strongest when you treat every kill as a cue to move.
↖ 3)Flak Jacket + Tac Mask + Guardian + Cold Blooded
This is the hold the hill / cap the flag under chaos kit. It's not glamorous, but it wins games.
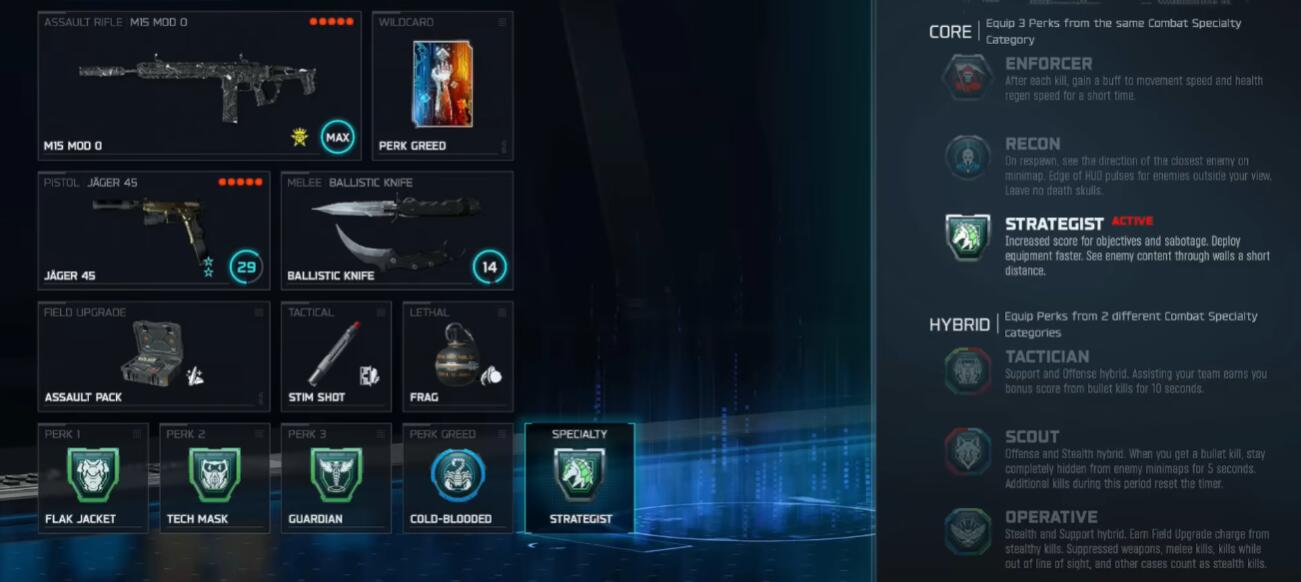
↖ Why it works
- Flak Jacket + Tac Mask covers the main OBJ death causes: explosives and tactical spam.
- Guardian gives you extra sustain while capturing/holding, which effectively converts objective time into survivability.
- Cold Blooded helps against thermal/scan-style counterplay (especially when smokes are involved) and reduces AI streak pressure on the objective.
↖ What this means in practice
You'll have more I should've died there moments—especially in late-hill situations where the enemy expects nade+tactical spam to clear you automatically.
↖ Pilot tips
- Don't stand dead-center on the OBJ. Anchor near cover with a retreat line.
- Use utility that helps you stay on the point (smokes, defensive tacticals, etc.), not just get kills.
↖ 4) Cutoff / Map Control OBJ: Lightweight + Scavenger + Dexterity + Cold Blooded
This is an objective class that doesn't look like an objective class—because you secure the hill by removing the enemy's ability to reach it.
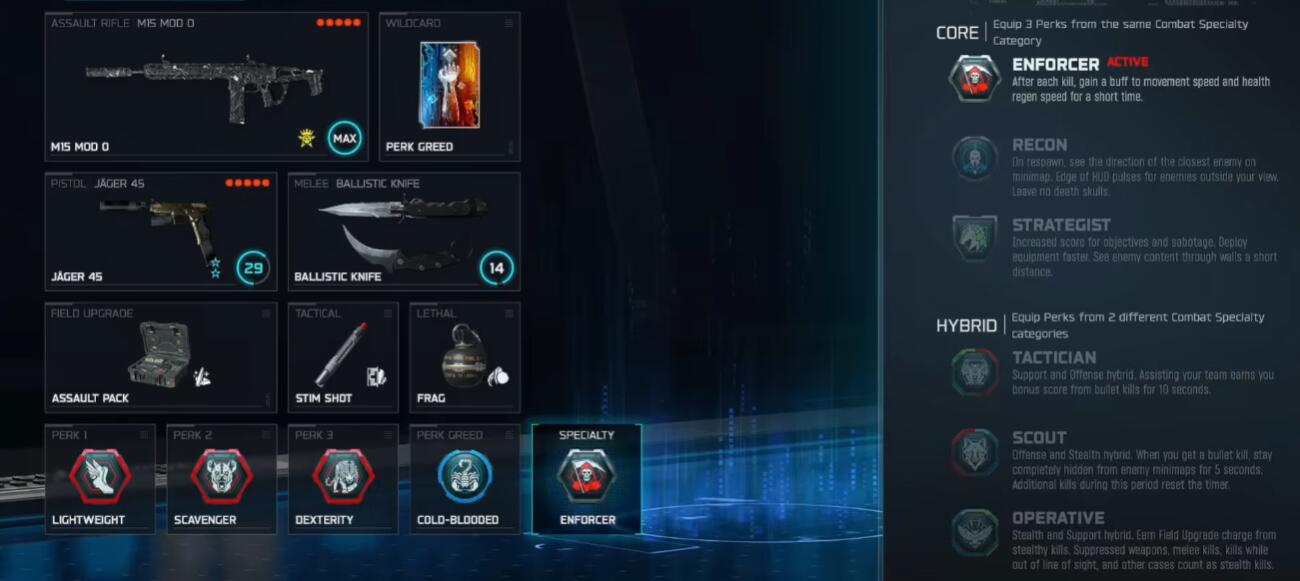
↖ Why it works
- Lightweight + Dexterity makes you faster and steadier when sliding, snapping corners, and taking quick lane fights.
- Scavenger keeps the chain going (ammo + equipment sustain).
- Cold Blooded prevents enemy streaks/AI pressure from forcing you off your forward position.
↖ When to pick it
If you notice your team is dying on the point over and over, you don't need more bodies on hill—you need lane ownership 10–20 meters out.
↖ Two musts or it underperforms
- Run stims (or your best sustain tool).
- Run enough mag capacity for multi-kills (cutoffs often mean 2–4 enemies in one wave).
↖ 5) Streak Builder (Safe & Consistent): Ghost + Vigilance + Bankroll + Cold Blooded
This is my go-to when I'm trying to play clean and stack higher streaks without getting ruined by info denial or random AI nonsense.
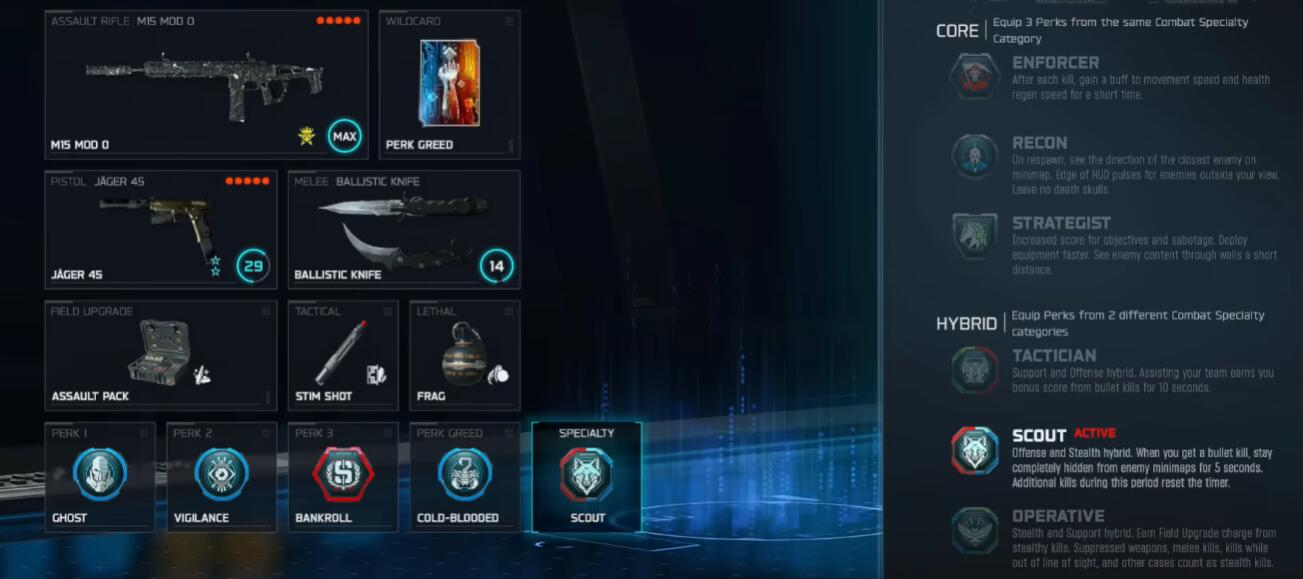
↖ Why it works
- Vigilance is a game-changer when CUAVs are common. Keeping your minimap is keeping your brain.
- Bankroll accelerates the first intel streak(s), which helps you snowball into bigger streaks.
- Ghost + Cold Blooded reduces cheap deaths that end runs.
↖ How to play it
- Favor controlled mid-range fights.
- Shoot, move, reset sightlines—don't anchor in one predictable spot.
- If you're using a suppressor, missed shots don't instantly broadcast you (big deal for streaking).
↖ Mistake that makes this build feel slow
Holding streaks too long. If your streak provides intel, deploy it—the assists and information are part of your streak economy.
↖ 6) Anti-Camper Hunter: Ninja + Tac Mask + Tracker + Engineer
In FFA/TDM/KC, the match is often decided by who wastes less time searching. This build turns searching into closing.
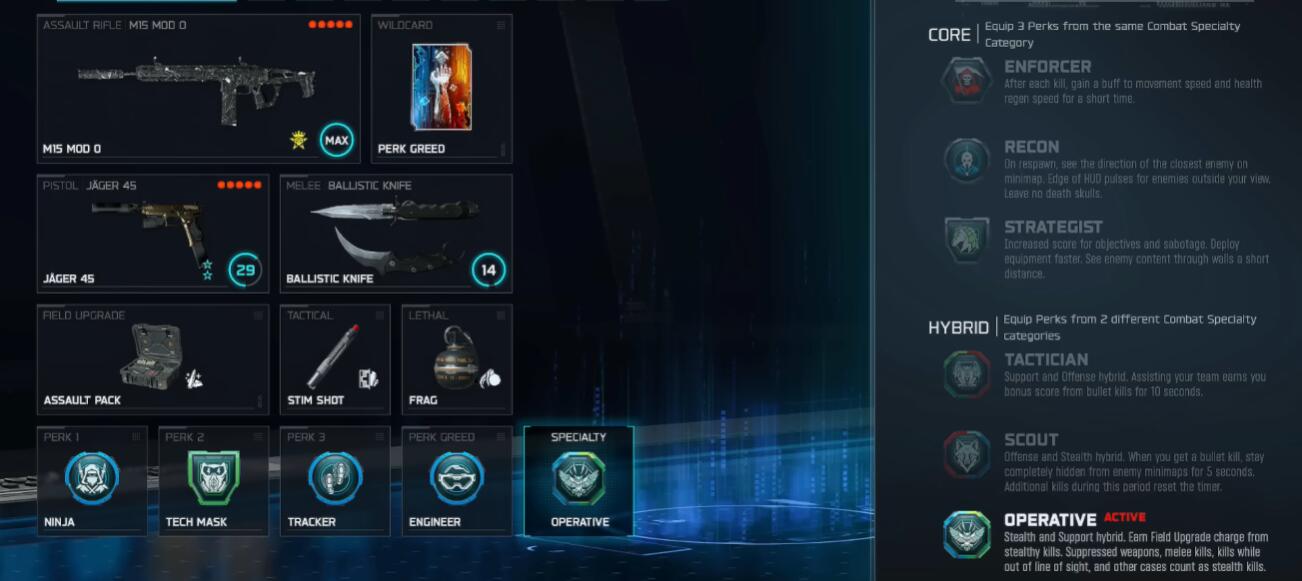
↖ Why it works
- Engineer exposes equipment patterns—campers are usually married to trophies/packs/mines.
- Tracker speeds up reads with footprints and target directionality.
- Ninja + Tac Mask helps you survive the classic camper toolkit: audio traps + tactical spam.
↖ How I clear a camper setup
1. Use Engineer to identify the fortified room/angle.
2. Follow Tracker info—but don't run straight in. Cut a side angle.
3. Clear the equipment first when possible, then commit.
↖ What you'll notice
Your time to find the fight drops dramatically. More fights per minute = more influence over the lobby.
↖ 7) Hyper Aggro UAV/CUAV Loop: Gung-Ho + Fast Hands + Bankroll + Looper
This is for shotguns, high-fire SMGs, dual-wield chaos, and anyone who plays like the minimap is optional.
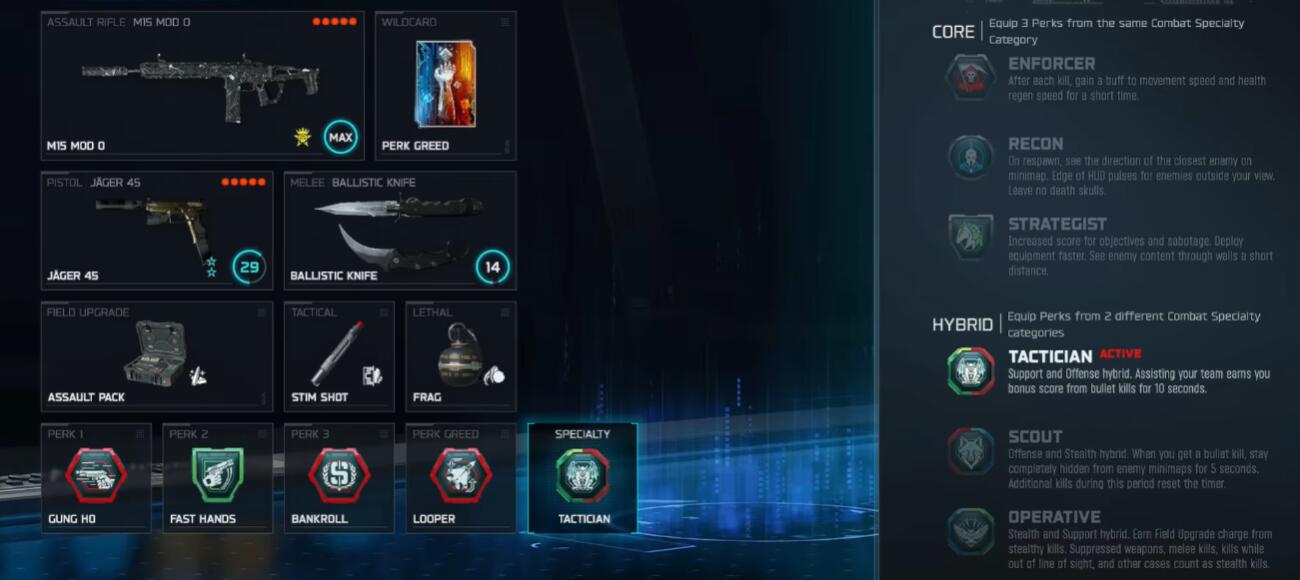
↖ Why it works
- Gung-Ho supports constant motion and close-range pressure.
- Fast Hands reduces lost fights caused by reload/throw/swap timing.
- Bankroll + Looper is the engine: start streaking earlier and cycle back into UAV/CUAV more often.
↖ How to not turn this into a feed class
- If you die twice at the same doorway/headglitch, route swap immediately. Aggro still needs variety.
- Pick streaks that don't force you to stop and pilot something for long; keep moving.
↖ FAQ
↖ 1) If I only want one Perk Greed setup for everything, which is it?
Ghost + Scavenger + Cold Blooded + Ninja.
It covers stealth, sustain, and anti-detection in one package and stays strong across modes.
↖ 2) I'm losing hardpoints to nade/tactical spam—what should I run?
Flak Jacket + Tac Mask + Guardian + Cold Blooded.
If you're still getting boxed in, swap to the cutoff build and control lanes outside the hill.
↖ 3) Is Cold Blooded really worth crutching every class?
Often, yes. BO7 has a lot of tracking/AI/scan pressure. Cold Blooded reduces non-gunfight deaths, which makes your performance more consistent and your mistakes easier to diagnose.
↖ 4) I run Bankroll but streaks still feel slow. Why?
Most players aren't converting early streak access into momentum. Use intel streaks early, collect assists, and take safer fights with that information. Bankroll works best when you spend the advantage.
↖ 5) Are Tracker + Engineer tryhard viable or just for fun?
They're viable in modes where players are spread out. Cutting search time and dismantling equipment-based setups increases your fights per minute and your control over the match flow.
↖ Closing
Perk Greed is strongest when the extra perk completes a system: stealth + sustain, OBJ + anti-spam, cutoff + mobility, streaking + info protection, hunting + detection, or aggro + looping. Pick the build that matches how you intend to win the next two minutes of the match—not just what sounds good on paper.

Most Popular Posts
- Black Ops 7 Endgame Exotic Affinity Weapons Guide: Best Bonuses, Full Weapon List, and Farming Tips
- Black Ops 7 Zombies Totenreich Easter Egg Guide: Fast Solo & Co-Op Main Quest Walkthrough
- Black Ops 7 Cherry Fizz Guide: Fastest Illicit Cargo Event Route for Season 4
- Black Ops 7 Season 4 Release Date, Maps, Weapons, Zombies, Warzone, and MW4 Reveal Prep
- Black Ops 7 Season 04 Endgame META: Best 5 Weapons After the XR3 Ion Nerf
- Black Ops 7 Zombies Fast KOWAKUJO Easter Egg Guide: Cat Wonder Weapon, Evidence Puzzles
Popular Category Lists
- Grow a Garden / (285)
- ARC Raiders / (260)
- CoD: Black Ops 7 / (166)
- Monopoly Go / (146)
- MLB 26 / (142)
- Star Citizen / (109)
- Steal a Brainrot / (89)
- Sailor Piece / (68)
- ARK Survival Ascended / (64)
- Forza Horizon 6 / (59)
- Diablo IV / (59)
- Blox Fruits / (59)
- CoD: BLACK OPS 6 / (55)
- Adopt Me / (51)
- Path of Exile 2 / (48)
- Monster Hunter Wilds / (46)
- Windrose / (44)
- Path of Exile / (40)
- Grow a Garden 2 / (37)
- Bee Swarm Simulator / (36)


