0
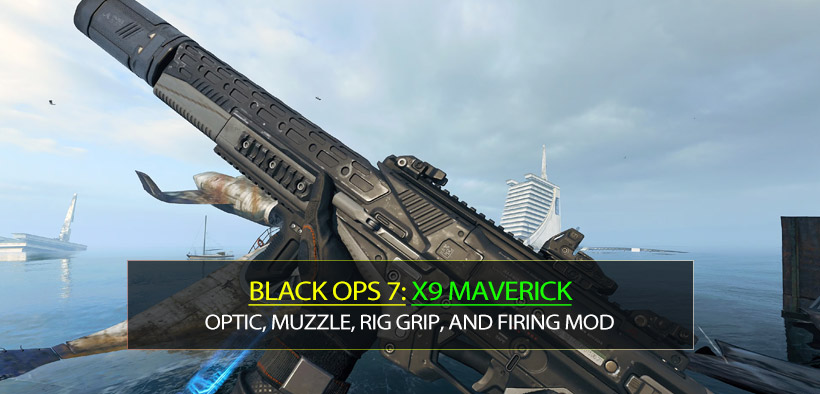
0Black Ops 7 X9 Maverick Loadout Guides: Optic, Muzzle, Rig Grip, and Firing Mod
- JAMIE
- Share
- CoD: Black Ops 7
- 12/25/25
- 773
The X9 Maverick is one of those guns that rewards discipline more than bravado. When I leaned into what it does best—clean mid-range beams, fast follow-up kills, and low-drama streak building—I chained three tactical nukes and logged 96–98 kill games, including a 63 gun streak on one run.
This guide is my repeatable blueprint: the attachment slots I used, how I moved around objectives, and the decision rules that kept me alive long enough to cash in the nuke.
- 1) What the X9 Maverick is for (and what it's not)
- 2) My X9 Maverick Class Setup (slot-by-slot)
- 3) The streak rhythm I used: information → pressure → nuke
- 4) The Nuke Path Playbook (how I actually moved)
- Phase A: Opening (0–8 kills) — build the first UAV safely
- Phase B: Midgame (8–20 kills) — farm spawns, not hero moments
- Phase C: Closing (20–Nuke) — your only job is not dying
- 5) Micro-rules that won me the 1vX moments
- 6) Common mistakes (the stuff that silently deletes nukes)
- FAQ
- 1) Is the X9 Maverick better for aggressive rushing or controlled slaying?
- 2) What's the single most important attachment slot?
- 3) How do you avoid dying to chaos (gas, random angles, streak spam)?
- 4) How did you turn high kills into nukes instead of dying at 20+?
- 5) Can I copy this even if my aim isn't cracked?
- Conclusion
↖ 1) What the X9 Maverick is for (and what it's not)
I treat the X9 Maverick like a streak engine: it's built to farm consistent kills while staying safe enough to stack UAV cycles and push into a nuke.
- Best lane: short-to-mid range where recoil control and time-to-kill feel stable.
- Worst habit: taking ego-challenges at long range because I tagged him first.
- Win condition: constant information + clean positioning + low deaths.
Why this matters: nukes don't come from one heroic fight—they come from 40 small correct choices that keep you alive.
↖ 2) My X9 Maverick Class Setup (slot-by-slot)
I'm keeping this faithful to the attachment structure I ran: optic, muzzle, rig grip, stock, firing mod. I'm not naming specific brand parts here because different builds/patches label them differently, but the function is what you should copy.
| Slot | What I Prioritize | What It Fixes | What You'll Feel In-Game |
|---|---|---|---|
| Optic | Clean 1.0–1.5x sight, low visual bounce | Target reacquisition | Faster snap-back between kills |
| Muzzle | Recoil smoothing / vertical control | Long spray drift | More head-level consistency in 6–12 bullet fights |
| Rig Grip | ADS stability + sprint-to-fire help | First-shot wobble | Fewer why did my gun jump? deaths |
| Stock | Strafe/ADS movement (or ADS speed) | Standing still in gunfights | You win more duels without overexposing |
| Firing Mod | Consistency mod (control/TTK stability) | Random-feeling engagements | More predictable beams, easier multi-kills |
My practical rule
If your X9 feels like it skips off target during sustained fire, prioritize muzzle + grip.
If you keep dying while already aiming, prioritize stock movement so you're harder to hit while shooting.
↖ 3) The streak rhythm I used: information → pressure → nuke
My best nuke games all followed the same cadence:
1. UAV first to turn the map into a live minimap puzzle.
2. Chain UAV uptime so every push is informed, not hopeful.
3. Use damage/pressure streaks to soften clusters and protect lanes.
4. Slow down at 20+ and stop donating your life to one more kill.
I leaned heavily on UAV loops and used pressure streaks (like HKD-style area denial / kill pressure) to keep enemies off comfortable routes.
This means: the X9 doesn't have to hard carry every fight. Your streak ecosystem carries the midgame, and you just stay alive and cash checks.
↖ 4) The Nuke Path Playbook (how I actually moved)
Here's the exact mental model that kept me from throwing high streaks.
↖ Phase A: Opening (0–8 kills) — build the first UAV safely
- I play one power lane and one escape lane.
- I don't sprint into the objective hill like I'm immortal.
If you notice your team is losing a flag early, then you anchor a nearby lane and farm the re-takes instead of diving into 3 guns.
↖ Phase B: Midgame (8–20 kills) — farm spawns, not hero moments
This is where most almost nukes die.
- I rotate one step ahead of spawn flips.
- I aim to catch enemies running, not enemies pre-aiming.
If you get a UAV ping behind you, then you don't finish this fight first. You break line-of-sight, reset, and re-peak on your terms.
↖ Phase C: Closing (20–Nuke) — your only job is not dying
At 20+ I stop caring about style.
- I stop wide-swinging corners.
- I stop chasing single kills into unknown rooms.
- I take the boring kill that keeps me alive.
If you're one gunfight away from tilt (gas, explosions, random deaths), then you slow your tempo by 15% and only take fights where you have cover within one step.
That's how those 96–98 kill nuke games happened: I didn't turn up, I tightened up.
↖ 5) Micro-rules that won me the 1vX moments
These are small, but they stack.
| Situation | My Rule | Why It Works |
|---|---|---|
| Multiple enemies near an objective | Don't enter first; hold the exit lane | You shoot runners, not crossfires |
| You get hit by tactical gas / vision clutter | Break LOS immediately, re-peak from a new angle | Staying put equals free pre-fire for them |
| You feel too safe on a streak | Rotate anyway after 2–3 kills | Safety becomes predictable, predictable becomes dead |
| Spawn flips feel random | Watch teammate triangles + killfeed, not just pings | Pings lie when UAV uptime dips |
| You're one off a key streak | Play cover-to-cover and stop jump-peeking | Your risk tolerance should drop, not rise |
↖ 6) Common mistakes (the stuff that silently deletes nukes)
- Over-chasing: One more kill turns into a spawn flip and a death.
- Reloading at the wrong time: If you can't reload behind cover, you don't reload yet.
- Tunnel vision on objectives: You can win the match and keep your streak by holding the approach lanes.
- Fighting without info: No UAV? I treat the map like it's full of traps.
If you're dying at 12–18 repeatedly, then your issue is usually tempo, not aim. Slow your pushes and let UAV timing guide you.
↖ FAQ
↖ 1) Is the X9 Maverick better for aggressive rushing or controlled slaying?
Controlled slaying. I still move a lot, but I'm not gambling. I'm rotating with purpose—pressure where they're weak, reset when info is gone.
↖ 2) What's the single most important attachment slot?
For me it's the muzzle or rig grip, because they reduce the randomness tax in sustained fights. When recoil feels consistent, your decision-making gets cleaner.
↖ 3) How do you avoid dying to chaos (gas, random angles, streak spam)?
I treat chaos like a timer. If the fight gets messy, then I disengage first and re-enter from a different angle. The goal isn't to win every messy fight—the goal is to stay alive long enough for the nuke.
↖ 4) How did you turn high kills into nukes instead of dying at 20+?
I changed my rules at 20+. No wide swings, no solo pushes into unknown rooms, no chasing. I play like every corner has a tax collector waiting for my streak.
↖ 5) Can I copy this even if my aim isn't cracked?
Yes, because this system is built around information, positioning, and low-risk gunfights. If your aim is average, the UAV loop and smart lanes do the heavy lifting.
↖ Conclusion
The X9 Maverick becomes a nuke machine when you stop treating it like a highlight tool and start treating it like a decision tool. I earned three nukes by keeping UAV uptime high, using pressure streaks to control space, and tightening my risk rules the moment the streak got real.

Most Popular Posts
- Black Ops 7 Zombies Totenreich Easter Egg Guide: Fast Solo & Co-Op Main Quest Walkthrough
- Black Ops 7 Endgame Exotic Affinity Weapons Guide: Best Bonuses, Full Weapon List, and Farming Tips
- Black Ops 7 Cherry Fizz Guide: Fastest Illicit Cargo Event Route for Season 4
- Black Ops 7 Season 4 Release Date, Maps, Weapons, Zombies, Warzone, and MW4 Reveal Prep
- Black Ops 7 Season 3 Meta Loadouts: Best Weapons Class Setups Right Now
- Best MK35 ISR Class Setup in Black Ops 7: Fast Meta Loadout, Attachments, and Tips
Popular Category Lists
- Grow a Garden / (283)
- ARC Raiders / (249)
- CoD: Black Ops 7 / (164)
- Monopoly Go / (145)
- MLB 26 / (133)
- Star Citizen / (99)
- Steal a Brainrot / (87)
- Sailor Piece / (67)
- CoD: BLACK OPS 6 / (55)
- Forza Horizon 6 / (54)
- Blox Fruits / (54)
- ARK Survival Ascended / (51)
- Path of Exile 2 / (48)
- Adopt Me / (47)
- Monster Hunter Wilds / (46)
- Diablo IV / (45)
- Windrose / (43)
- Path of Exile / (40)
- Battlefield 6 / (34)
- Bee Swarm Simulator / (32)