0
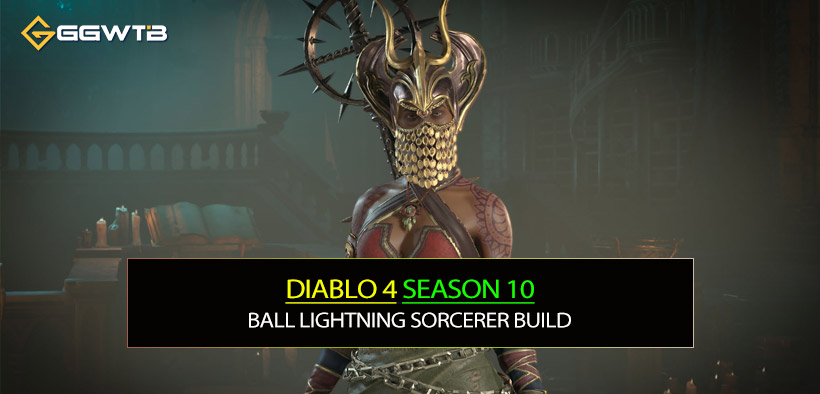
0Diablo 4 Season 10 Ball Lightning Sorcerer Build: Speed & High Pit Guides
If you watched early Season 10 PTR clips and wondered Is Ball Lightning really back?—yes, but with an asterisk: it is propped up almost entirely by a seasonal power stack that does not exist on Eternal. If you are on the Seasonal Realm and willing to micromanage mana, rank stacking, and a no‑defense action bar, you get a rolling lightning nuke that erases Pit bosses in under 2 minutes. If you are on Eternal: don't force it; core skill Sorc without the Season engine feels anemic. This article shows you not just what to equip, but why the whole engine works, what breaks it, how to adapt for speed farming vs high Pit pushing, and how to self‑audit mistakes.
- The Four‑Piece Engine Synergy
- Damage Math Snapshot
- Role Identity: Speed vs High Pit
- Gear Slot Breakdown (PTR-Oriented)
- Affix / Stat Priority
- Skill & Enchantment Configuration
- Mana Ecology: Make It Expensive
- Rotation & Position Geometry
- Surviving Without Unstoppable
- Paragon & Glyph Logic (Key Boards / Nodes)
- Hydra vs Ball Lightning (PTR Snapshot)
- Optimization Path 118 → 120
- Common Mistakes & Quick Self-Check
- Player Fit Profile
- Build LInk
- FAQ
- Summary
↖ The Four‑Piece Engine Synergy
- 1. Advanced Techniques: +20% (PTR value) multiplicative damage per rank; also inflates mana cost.
- 2. High Ball Lightning Rank Stack: Base + item ranks + Paragon + seasonal stacking = 45–55 realistic on PTR.
- 3. Crown of Lucion: Adds another layer of damage while further raising mana expenditure (good here).
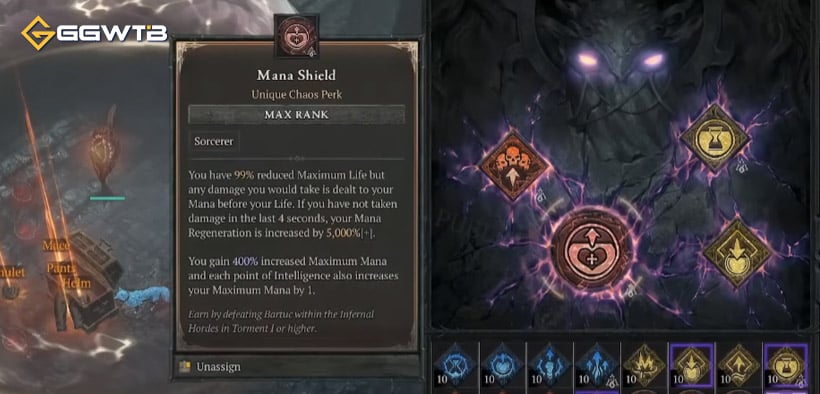
- 4. Banish Lord (unique): Spend the threshold (e.g., 275 mana) → next Core Skill auto Overpower + additive/unique bonus.
Mana Shield then treats mana as effective life, enabling you to overspend safely.
The loop: Inflate cost → hit spend threshold → guaranteed Overpower → multiplicative layers explode total output.
Why increasing cost is good: Each cast both (a) gets closer to the Banish Lord threshold and (b) benefits from enlarged damage multipliers tied to ranks. Damage, from cost.
↖ Damage Math Snapshot
Assume 50 total ranks and the PTR 20% per rank figure:
Advanced Techniques multiplier ≈ 1 + (50 × 0.20) = 11.0 (i.e., +1000%).
Stack other mult sources:
Teleport Enchantment Damage (Lightning) 40%
Ball Lightning Enchantment 20% (these are multiplicative tiers, effectively ≈ 1.4 × 1.2 = 1.68)
Aspect of Tenuous Destruction (no defensive skills) 75% → multiplier 1.75
Glyph / Paragon Vulnerable / Crit / Overpower buckets.
You then feed guaranteed Overpower hits (which leverage your scaling but are not crit-capped dependent) into large HP / resource pools for further Overpower damage scaling. Result: Bosses melt faster than dense elite packs because splash travel distance and Overpower focus burst down single targets.
Rank stacking here is worth exponentially more than a conventional +Core Skill Damage roll in an Eternal environment.
↖ Role Identity: Speed vs High Pit
Speed Pit (≤115–118):
- - Goal: Constant Teleport uptime, fluid map traversal.
- - Drop Banish Lord (don't need Overpower stacking); use mobility boots with Teleport cooldown reduction implicit.
- - Focus: Wide pulls, quick detonations, under 2 min clears.
High Pit Push (118–120+ prototype):
- - Equip Banish Lord + Crown of Lucion to chase permanent Overpower sequence.
- - Accept slower Teleport cadence; you reposition deliberately rather than spam.
- - Survival pressure increases: crowd control windows punish because no Unstoppable button.
↖ Gear Slot Breakdown (PTR-Oriented)
Helm: Crown of Lucion (mandatory for push). Affixes: +Ball Lightning Ranks, Mana %, Resource Gen, Cooldown Reduction (CDR).
Chest: Shroud (stat density for Paragon rare node activation). Consider Raiment variant only if mobility control changes.
Gloves: Aspect of Shredding Blade (Core Skill Ranks + Int + Attack Speed).
Pants: Defensive stats (Armor, Max Life, %DR from Close/Distant). These are your only real mitigation lines.
Boots:
- - Speed: Rare with implicit Teleport CD refund, Movement Speed, CDR, Mana Cost Reduction (careful not to over-reduce cost if pushing).
- - Push: Banish Lord boots (unique slot if boots carry it on your server build) or whichever slot houses that power; sacrifice Teleport spam.
Weapon: +Int, Overpower Damage, Core Skill Damage (if still present), Chance for Ball Lightning to cast twice (crucial), Max Mana if possible. Masterwork prioritizes multiplicative lightning/universal damage nodes.
Amulet: Aspect of Tenuous Destruction (75% damage with zero defensive skills). Affixes: CDR, +All Core Skill Ranks, Mana % / Resource Gen.
Ring 1: Galvanic (Elemental Synergy & Lightning scaling). Affixes: Crit Chance, Crit Damage (if Overpower crit synergy remains), Resource Gen, Vulnerable Damage.
Ring 2: Starless Sky (Core Skill Rank + cost interaction) or Tal Rasha if re-buffed (PTR shows nerf).
Off slots / Aspects: Strike of the Storm Horn (straight-path bowling Ball Lightning; enlarged size).
Optional Flex: If survivability tanks, you may have to abandon Tenuous Destruction and slot a defensive skill (losing 75% mult).

↖ Affix / Stat Priority
Phase 1 (Enable Loop):
- 1. Ball Lightning +Skill Ranks (everything that adds ranks)
- 2. Chance to Cast Twice (proc frequency = pseudo DPS multiplier + faster spend)
- 3. Max Mana % / Flat Mana
- 4. Cooldown Reduction (Teleport uptime + Unstable Current resets)
Phase 2 (Multiply Core Output):
- 5. Overpower Damage (since you force it)
- 6. Vulnerable Damage (from Lightning Spear / CC windows)
- 7. Crit Chance until effectively capped in scenario (some boards push near 100%)
- 8. Attack Speed (increases mana spend rate & hit frequency for procs)
Phase 3 (Survival & Smoothing):
- 9. Damage Reduction (Close / Distant / While Healthy)
- 10. Armor until near cap vs Pit tier
- 11. Resistances (Lightning/Poison typical threats; boss shade patterns)
- 12. Resource Generation (only if spend throttling occurs on bosses)
Avoid Over‑stacking: Too much Mana Cost Reduction can undermine Banish Lord threshold pacing; keep some cost high.
↖ Skill & Enchantment Configuration
Action Bar (Push):
- - Ball Lightning (Core)
- - Teleport
- - Unstable Current (Ultimate)
- - Familiar (passive damage + Elemental Synergy stack)
- - Ice Blades (Attack Speed + CDR interactions)
- - Lightning Spear (Vulnerable, Stun, CC layering)
Enchantments:
- - Ball Lightning (extra autonomous hits or effect as per PTR wording)
- - Teleport (movement injection per cast cycle)
Dropping a defensive skill unlocks Aspect of Tenuous Destruction (75% damage).
Tradeoff: zero innate Unstoppable. You depend on spacing and early kill speed to replace panic buttons.
If you're repeatedly dying to chains of stuns/root, reintroduce a defensive and accept the DPS loss.
↖ Mana Ecology: Make It Expensive
Higher mana per cast accelerates Overpower cadence (fewer casts to cross 275 spend) and scales multiplicative seasonal damage through higher ranks (indirectly via Crown + Advanced Techniques).
If you notice boss phases where mana dips dry:
- - Pre-pool before entering Arena (pause casting for 1–2 seconds after last elite)
- - Trigger Unstable Current right as threshold nears to piggyback extra procs
- - Avoid overusing Teleport (cost + animation tax) mid single-target burn
If you push and STILL starve: add Invigorating Conduit-like resource nodes or shift one ring affix to Resource Generation.
↖ Rotation & Position Geometry
Loop (Push):
- 1. Enter pack at mid distance, drop first Ball Lightning traveling through the cluster.
- 2. Maintain max effective range so the projectile's travel arc creates the wave/splash end effect (slight incremental damage).
- 3. Chain more casts until Banish Lord threshold reached (track mentally by mana bar chunking).
- 4. Guaranteed Overpower cast → reposition → repeat.
- 5. Press Unstable Current on large multi-elite pulls or boss start; weave Ice Blades / Lightning Spear on cooldown for attack speed + Vulnerable uptime.
Speed Variant: Hold Ball Lightning, spam Teleport via boot implicit to herd packs, fire through the densest lane, exit before retaliation.
Rule: If you're inside melee hitboxes longer than one Overpower cycle, you're giving crowd control a chance to lock you. Slide diagonally after each guaranteed Overpower.
↖ Surviving Without Unstoppable
Threats: Chain stuns / roots / shade explosions from certain bosses.
Mitigations:
- - Spacing (stay at outer edge of Ball Lightning lane)
- - Pre-move after elites begin windup animations; you cannot cleanse stuns reactively
- - Prioritize DR from Close if you routinely misjudge distance
- - Consider a single Elixir (Armor or Control Resistance) in high pushes
If deaths cluster around the same affix (e.g., Suppressor/Freezer combos), log them; if >3 in a session, adapt with a defensive slot swap rather than brute forcing.
↖ Paragon & Glyph Logic (Key Boards / Nodes)
Core Glyphs (as described in transcript style):
- - Tactician (damage cluster)
- - Enchantment Master (benefits dual lightning enchantments)
- - Elemental (broad damage scaling)
- - Destruction (crit interactions, though Overpower bypasses some dependency)
- - Frigid Fate (Vulnerable synergy even in lightning build)
- - Static Surge (mana generation + survivability through Mana Shield)
- - Unleash / related if present for mana return smoothing
Pathing Priorities:
- 1. Secure Rare Nodes that multiply lightning or core skill effectiveness when thresholding Int stat; Shroud chest helps meet those stat gates early.
- 2. Travel efficiency: Avoid overpathing to minor resist unless specific Pit mod punishes you.
- 3. Static Surge placement early so mana becomes effective HP buffer quickly.
↖ Hydra vs Ball Lightning (PTR Snapshot)
Hydra
- Pros: Stable, passive damage, tolerates movement, less CC risk.
- Cons: Slightly slower boss kill threshold on current PTR, less explosive Overpower abuse.
Ball Lightning
- Pros: Superior boss time (Pit 118–119 potential with optimization), flexible directional control, Overpower synergy leverages seasonal powers.
- Cons: Heavily seasonal-dependent, fragile action bar (no defense), requires precise mana cost management.
If you prefer set and manage over active lane aiming, Hydra still edges in comfort.
↖ Optimization Path 118 → 120
Potential Gains:
- - Tighter affix rolls (double-cast chance high end)
- - +1–2 additional Ball Lightning ranks (amulet, staff perfect rolls)
- - Better density fishing (elite pack chaining to keep Unstable Current procs overlapping)
- - Slightly delaying Overpower trigger to line with Vulnerable + attack speed spike
Risk: Any future nerf to Advanced Techniques % per rank or to guaranteed Overpower threshold trivialization removes a full tier of ceiling.
↖ Common Mistakes & Quick Self-Check
- Boss phases feel sluggish. Check: Are you casting Teleport mid single target, draining movement time but not adding damage?
- Mana starved every 3 packs. Check: Did you accidentally stack too much Mana Cost Reduction or fail to pick Static Surge early?
- Random deaths to stun chains. Fix: increase Control Resistance elixir + reposition earlier, or reinsert a defensive skill and drop Tenuous Destruction.
- Overpower not triggering predictably. Fix: Confirm actual mana spent per cast (Crown equipped?), avoid cost-reduction affixes on multiple slots.
- Packs linger at low HP. Fix: Ensure double-cast chance is present on weapon; missing it is a silent 15–25% real DPS loss.
↖ Player Fit Profile
Good For You If:
- - You enjoy high APM lane aiming and resource pacing.
- - You're comfortable sacrificing defensive safety nets for burst windows.
- - You plan to live on Seasonal Realm.
Not Ideal If:
- - You need reliable Unstoppable to feel safe.
- - You prefer autopilot turret play (Hydra wins).
- - You mainly play Eternal or expect to port builds post-season intact.
↖ Build LInk
↖ FAQ
Q1: Can I play this on Eternal anyway?
A: You can, but expect a dramatic drop (loss of ~1000% seasonal rank multiplier + cost synergies). It will feel undertuned versus Hydra/Frozen Orb archetypes.
Q2: What if Blizzard nerfs Advanced Techniques mid-season?
A: Priority pivot: Reintroduce a defensive, drop some mana inflation items, revert to a hybrid Hydra or Fireball secondary to retain mapping speed.
Q3: Is Overpower scaling worth stacking separate Overpower damage affixes?
A: Yes until diminishing opportunity: guaranteed triggers mean each Overpower inherits full multipliers. Past a threshold, Crit/Vulnerable might catch up; test with logs comparing average boss time.
Q4: Why not run a barrier skill just for emergencies?
A: Doing so breaks Aspect of Tenuous Destruction (−75% multiplicative). Only add it if deaths > time lost to slower clears.
Q5: Should I ever take Mana Cost Reduction?
A: Only on speed farm boots to sustain spam; remove for push to keep Banish Lord threshold efficient. Too much reduction lengthens the Overpower cadence.
Q6: Double-cast chance feels low—bug?
A: Check masterwork tiers and whether your weapon rolled the maximum line. Missing one tier visually feels like dead casts, especially in boss phases.
Q7: Why Familiar if I never press it?
A: Passive elemental tag stacks Elemental Synergy and contributes to additive buckets without occupying mental APM. Low opportunity cost.
Q8: Teleport feels desynced sometimes. Fix?
A: High cost + server lag in PTR Pit density: consider shaving one Attack Speed source to reduce animation overlap; also verify latency before labeling it mechanical failure.
↖ Summary
Season 10 PTR Ball Lightning Sorcerer is a purpose-built seasonal Overpower engine: inflate mana cost, force thresholds, detonate bosses. The catch: its power is artificially elevated by Advanced Techniques and related seasonal synergies that may not survive tuning. If you're entering Season 10 and want a high-ceiling, mechanically engaged sorc that erases guardians, start assembling rank gear now—and keep a backup Hydra setup in case the nerf bat swings.
Most Popular Posts
- Diablo 4 S13 Gear Guide: Fast Progression, Farms, Aspects, Ancestral Gear, and Mythic Uniques
- Diablo 4 Charms and Seals Guide: How to Get Better Rolls, Six Slots, and Unique Charms
- Diablo 4 S13 Leveling Guide: Best XP Farm, Charms, War Plans, and Torment 1 Prep
- Diablo 4 S13 Mythic Unique Farm Guide: Best Undercity, Mephisto, Sparks, and Boss Routes
- Diablo 4 Season 13 Fast Level 70 Route, Best Early Unlocks, and Smooth Endgame Start
- Diablo 4 S13 Endgame Fast Uniques, Ancestrals, Mythics, War Plans, and Torment Guides
Popular Category Lists
- Grow a Garden / (286)
- ARC Raiders / (268)
- CoD: Black Ops 7 / (166)
- Monopoly Go / (147)
- MLB 26 / (147)
- Star Citizen / (124)
- Steal a Brainrot / (89)
- ARK Survival Ascended / (79)
- Sailor Piece / (68)
- Forza Horizon 6 / (65)
- Diablo IV / (61)
- Blox Fruits / (61)
- Adopt Me / (56)
- CoD: BLACK OPS 6 / (55)
- Grow a Garden 2 / (50)
- Path of Exile 2 / (48)
- Monster Hunter Wilds / (46)
- Windrose / (44)
- Path of Exile / (40)
- Bee Swarm Simulator / (36)