0
0How to Beat the Origins Robot & Zombie T-Rex in Black Ops 7: Secret Dark Ops and Rewards
- ELSA
- Share
- CoD: Black Ops 7
- 12/10/25
- 4162
- 1. World Boss Basics: Understand the Rules Before You Min‑Max
- 2. Zombie T‑Rex: Portals, Riding, and Beating the Timer
- 3. Origins Robot (Colossus): Outside Swarm, Inside Core, Head Exfil
- 4. Turning Bosses into Your Long‑Term Progress Engine
- FAQ
- Summary
If you only see the zombie T‑Rex and the Origins robot in Black Ops 7 as late‑game world events, you're leaving a lot of value on the table.
they are some of the highest‑value moments in an entire match for:
- Weapon camo progress
- Moonstone and long‑term mastery progress
- Hidden Dark Ops unlocks
- Exotic skill drops and upgrades
Put simply:
- If you just kill them once, they're a cool set‑piece.
- If you treat them as fixed, once‑per‑match resource spikes, your account growth accelerates dramatically.
Here's how I'll break this down for you:
1. The rules behind world bosses and how the two fights differ
2. A clear, practical walkthrough of the T‑Rex chain: Toxic Tyrant → portals → riding → kill
3. A structured breakdown of the Origins robot: summoning → entering the mech → core destruction → head exfil
4. How to plug both fights into your camo/Moonstone/mastery grind so every match feels like boss + camos + profit
5. A short FAQ to clean up the most common pain points
If you've already had a few runs where the T‑Rex timed you out or the robot stomped you before you figured out the mechanics, this is where we turn that chaos into a repeatable plan.
↖ 1. World Boss Basics: Understand the Rules Before You Min‑Max
Before we talk how to win, you need to understand what the game guarantees you each match.
1.1 One world boss per match, but the type is random
From repeated runs and community experience, the pattern is stable:
- Each endgame match gives you exactly one world boss event
- It will be either the zombie T‑Rex chain (Toxic Tyrant → Haunted Activity)
- Or the Origins robot – Colossus of Avalanche
- You cannot get both T‑Rex and Colossus in the same match
- So if you see a T‑Rex announcement, that match is your T‑Rex run
- If you're chasing the robot, you'll get it in a different game
- There is a delay before the boss appears
- Typically somewhere around the 30–40 minute mark
- That dead time is exactly when you should be doing focused camo work, not wandering
So every match looks like this, whether you plan for it or not:
- Early → midgame: weapon leveling, base camo grinding
- Boss window: world event (T‑Rex or Colossus) + huge resource spike
- Late: cleanup challenges and exfil
If you build your plan around that skeleton, your efficiency goes way up.
1.2 T‑Rex vs Origins Robot: roles and differences
Here's a quick comparison so you know which boss is best for what.
| Aspect | Zombie T‑Rex (Haunted Activity) | Origins Robot – Colossus of Avalanche |
|---|---|---|
| Event chain | Toxic Tyrant → portals sealed → Haunted Activity → T‑Rex | Summon & sabotage Colossus → robot emerges → go inside |
| Typical zone | Left side Tier 3 area | Tier 2, with giant fingers/limbs erupting from the ground |
| Fight feel | Huge HP sponge, strict timer, moving safe circle | Multi‑phase mech: outside adds → inside core fight |
| Time pressure | High – easy to almost time out even with many players | Moderate – structured damage windows & more control |
| Best for grinding | Kills, explosives, AOE skills, no reload chains | Special/elite kills (GUILTECH/Titans), explosive multi‑kills |
| Key mechanics | Portals + Convergence Artifacts, circle, riding | GUILTECH swarms, multi‑entrance mech, red weak points, pads |
| Secret unlock angle | Riding the T‑Rex & clearing Haunted Activity | Killing Colossus and exfilling via its head |
| Spectacle factor | Full lobby beating a rideable dinosaur | Whole lobby inside a massive Origins robot's body |
The practical takeaway:
- If you need special/elite kills and GUILTECH, the robot is your best friend.
- If you need explosive kills, AOE kills, and chain kills, the T‑Rex fight is ideal.
Once you accept that, you can stop hoping for a specific boss and start planning around whichever one you roll.
↖ 2. Zombie T‑Rex: Portals, Riding, and Beating the Timer
The T‑Rex chain has two main parts:
1. Toxic Tyrant – the portal‑sealing, elite‑farming pre‑phase
2. Haunted Activity – the T‑Rex boss fight itself
If you treat the first part as just warm‑up, you're missing about half the value of the event.
2.1 Phase 1 – Toxic Tyrant: kill elites, grab artifacts, seal portals
The event usually starts with a prompt like:
- Toxic Tyrant detected
- Objective: Seal the portals
Here's the flow I use in games:
| Step | Action | Why it matters |
|---|---|---|
| 1 | Kill elites and Titan‑type enemies | They drop Convergence Artifacts (purple items) in large numbers |
| 2 | Pick up Convergence Artifacts | You can carry multiple at once; going down may drop them |
| 3 | Locate portals via sky beams | Portals are under giant columns of light, plus HUD markers |
| 4 | Interact: Deposit artifact(s) into portals | Each portal takes multiple deposits; text explicitly uses artifacts |
| 5 | Repeat until all portals are sealed | Only then will the T‑Rex boss phase trigger |
Why this pre‑phase is actually huge:
- Elite density is extremely high → perfect for kill X elites/specials weapon challenges
- The whole area is a natural camo farm → headshots, explosives, skill triggers, you name it
- You had to do it anyway to see the T‑Rex, so you might as well attach 1–2 weapon goals to this stage
If you tend to wait until the boss phase to start real grinding, you're wasting a massive window of easy progress here.
2.2 Phase 2 – Haunted Activity: T‑Rex, the moving circle, and time
Once the portals are sealed, you get the main event: Haunted Activity → T‑Rex.

What you'll see:
- A huge T‑Rex with a safe circle around it that moves with the boss
- A shared timer for the lobby
- A huge HP bar that's clearly scaled by player count
From practical runs, a few things stand out.
2.2.1 The moving circle and why your position matters
- The safe zone follows the T‑Rex as it roams the map.
- Circle = where you should be doing almost all your damage.
- Outside = more pressure, more revives, less actual DPS on the boss.
A simple rule I follow:
- My first priority is to be inside the circle contributing damage.
- My second priority is reviving, and I only commit to revives that won't pull me out of the circle for long.
If you notice the boss timer ticking down but the HP bar barely moving, it usually means:
Too many people are down or outside the circle, and your effective DPS is low—not that the boss has too much health.
2.2.2 Ammo crate control and lobby damage
There is usually an ammo crate in or near the fight zone. The problem is:
- The T‑Rex loves to wander away from it.
- If no one deliberately kites him back, the whole lobby ends up in a loop:
- I'm out of ammo. → run to crate → no one shooting → timer burns → panic.
The fix is surprisingly simple:
- Have 1–2 players hold the side of the circle nearest the ammo crate, so the Rex slowly gets pulled toward that area.
- Once the boss is near the crate, the lobby's uptime on damage shoots up, and suddenly the fight feels fair.
If you find yourself buying ammo 3–4 times and still feeling starved, you probably let the Rex live too far away from your ammo source.
2.2.3 Timer management: when to blow all your cooldowns
From multiple fights, you can think of the timer in two halves:
- First half – you can play more measured: test damage, adjust positions, rescue a bit
- Second half – if the boss is still above ~50% HP, you have a problem
At that point:
- Stop saving your gear and ultimates for later
- Dump all high‑impact skills, lethal equipment, and focus‑fire headshots into the Rex
- Consider swapping to your highest DPS loadout if you haven't already
If you wait until the last minute to panic and blow cooldowns, you'll often end up just short. Treat the mid‑fight as your go hard checkpoint instead of the last 30 seconds.
2.3 How to ride the T‑Rex (and why it actually matters)
The riding mechanic is not just for clips, it is strongly tied to a hidden Dark Ops unlock.
From repeated attempts, this is what works best:
1. Always interact from the air, not while standing
- Ground‑level interactions tend to whiff or phase through.
- You want to be midair, colliding with the Rex, then hit interact.
2. Use elevation to your advantage
- Rooftops, hills, vehicles—anything that gets your feet above his shoulders helps.
- Jump from high ground towards the upper body or back, not just the legs.
3. Avoid heavy animation windows
- Tail swipes, lunges, and other big animations can mess with hitboxes.
- If you keep missing, wait for a more neutral movement cycle, then jump.
Once you're on:
- You can stay mounted for a surprisingly long time if the boss doesn't immediately throw you.
- That's usually enough to satisfy the riding condition.
Based on how the unlocks behave, it's reasonable to map them like this:
| Unlock type | Likely condition | Visual hint |
|---|---|---|
| T‑Rex riding Dark Ops/card | Successfully ride the T‑Rex during event | Cowboy riding a Rex, no description |
| Haunted Activity completion | Complete the full T‑Rex event and kill it | Predator becomes prey style text |
So your best bet in a T‑Rex game is:
First, secure a ride at least once.
Then, stay and help kill the boss to secure the event completion unlock as well.
2.4 Why the T‑Rex fight is a camo and exotic skill goldmine
T‑Rex is nasty if you treat it as a pure boss DPS check, but it's fantastic if you treat it as a camo engine:
Explosive weapons – Rockets, launchers, bows:
- Easy to get 3+ kills with one shot with the density of mobs.
- Great for weapon challenges that care about direct impact or multi‑kills.
Chain‑kill challenges – 10 kills without reloading, X kills shortly after sliding/jumping:
- Use high‑capacity weapons near the ammo crate.
- Farm chains while your team keeps the circle stable.
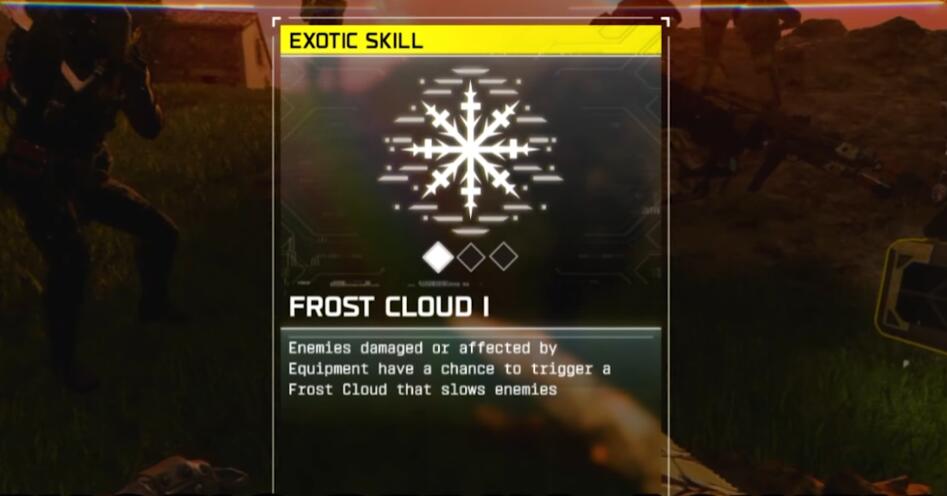
Skill‑trigger challenges – Frost Cloud, stun/slow fields, etc.:
- The constant flow of enemies makes these procs skyrocket.
- Killing the T‑Rex itself can give exotics like Frost Cloud, which then get upgraded in later events.
If you line up your challenges before the event, the T‑Rex fight becomes less stressful boss and more timed camo farm with a dinosaur in the middle.
↖ 3. Origins Robot (Colossus): Outside Swarm, Inside Core, Head Exfil
The Origins robot, Colossus of Avalanche, feels like a mini‑raid: clear robots outside, jump into its body, destroy the core, and then blast out through its head.

3.1 External phase: summoning the Colossus and farming GUILTECH
The event callout is usually:
- Colossus detected.
- Objective text along the lines of Summon and sabotage the Colossus.
The rhythm looks like this:
| Step | Action | Why it matters |
|---|---|---|
| 1 | Trigger event in/near Tier 2 | The HUD announces Colossus and marks the area |
| 2 | Fight waves of GUILTECH and zombified robots | Extremely high density of robotic specials |
| 3 | Watch as giant fingers and limbs emerge from the ground | Visual cue the mech is spawning |
| 4 | Robot fully emerges and stands up | New entrances to the interior appear |
From a grind perspective:
- This is one of the best places in the entire mode to do:
- Kill X GUILTECH enemies
- Kill X specials/elites
- You're not roaming the map chasing random elites; they come to you in steady waves.
If your weapon list shows several kill 20 specials tasks, this is where you should be planning to complete them, not in random Tier 3 street fights.
3.2 Getting inside: foot portal vs top portal
Once the Colossus stands up, you have at least two entrances:
Foot portal
- Accessible early and easily.
- Good if you just want to get into the mech quickly and start the interior fight.
Top/upper portal
- Appears near the top of the robot (people joke about it being in his ass).
- Requires some vertical movement—glider, high ground, whatever—to reach.
For basic clears:
- Any entrance into the mech is fine. Use whichever is safer and quicker at the time.
For secrets and style:
- You should be aware that the head/upper area is important for the exfil Dark Ops, so pay attention later when you're leaving.
3.3 Interior phase: red weak points and core shield
Inside the robot you'll see:
- A central core wrapped in a shield bubble
- Multiple red glowing weak points on structures around the room
- Several round platforms/pads you can stand on
- Constant waves of robotic and zombie enemies
The fight logic is simple once you've seen it:
1. Stand on the platforms
- Players spread naturally across them; being on them seems to help progress mechanics.
- At minimum, standing on pads does not hurt, and with a full lobby, they're almost always occupied.
2. Focus red lights when they appear
- Red glowing structures activate—those are your weak points.
- The more people focus them, the faster the shield phase ends.
3. Drop the shield, then nuke the core
- After enough red points are destroyed, the core shield drops temporarily.
- You dump all your DPS into the exposed core.
- With a large lobby, the core phases melt quickly.
4. Repeat until Colossus is defeated
- After enough cycles, you get a clear Colossus defeated notification and the event moves to rewards/extraction.
The fight looks intimidating the first time, but once you understand pads + red lights + core windows, it's actually more controlled than the T‑Rex timer race.
3.4 Head exfil and the robot Dark Ops secret
Here's where the Origins robot goes from cool boss to secret mechanic:
- After the core dies, you're moved toward the head section.
- There's a grapple or head exit point you can interact with.
- When you leave via this route, you see a short cinematic where you're inside the robot's head, looking out, and then you blast out.
This head exfil is the key to a specific Dark Ops‑style unlock:
- The event completion alone is not enough—the exit method matters.
- The Dark Ops condition appears to be:
- Kill the Colossus and exfil/exit through the head route.
So if you:
- Beat the core, but
- Leave via some generic exit or don't stick around for the head exit,
you're very likely missing that Dark Ops unlock without realizing it.
The safe rule is:
Whenever you're doing a Colossus run for secrets, stay all the way through the internal fight and use the head exit when prompted.
3.5 How Colossus feeds your camo grind
Colossus is arguably better than T‑Rex for elite/special‑based challenges:
External phase:
- Use weapons that explicitly need GUILTECH/special kills.
- In a good event, you can finish one or more of those challenges in just a few minutes.
Interior phase:
- Perfect for explosive multi‑kills and skill‑trigger challenges in confined spaces.
- You can also do deal X damage to elites style objectives on the core if they exist.
So if you roll Colossus this game, it's the perfect match to:
- Bring out your needs specials weapons, and
- Slot in an explosive or high‑AOE weapon for interior phases.
In other words, the robot is where you bring your hardest special kill tasks to die.
↖ 4. Turning Bosses into Your Long‑Term Progress Engine
Now let's zoom out from how to win the fights to how to make them fuel your mastery grind.
4.1 Multi‑goal matches: stack objectives instead of playing on autopilot
Most players enter a match with either kill stuff or level this one gun in mind.
I find it much more efficient to define 2–3 clear goals per match:
| Stage | Primary focus | Ideal actions |
|---|---|---|
| Early → midgame | Base kills & weapon leveling | Equip new weapons; do the first 100–200 kills; upgrade skills |
| Pre‑boss midgame | Specific tricky challenges | Slide kills, no‑reload streaks, jump kills in safe familiar areas |
| Boss = T‑Rex | Explosives + AOE + chain kills | Run rockets/bows, no reload streaks near ammo crates, trigger AOE skills |
| Boss = Colossus | Special/elite kills + explosive multi‑kills | Outside: GUILTECH/special kills; inside: explosive multi‑kills and core DPS |
| Post‑boss → exfil | Finishing remaining camo gaps | Swap to weapons that only need 20–50 more kills and polish them off |
If you approach each match like that, you stop coming out of full games with only 20% of a challenge done and start finishing 2–3 serious steps per run.
4.2 Binding Moonstone and master camos to boss events
A lot of people stall on master camos (and top‑tier Moostone/super mastery tracks) because they treat each weapon as an isolated grind.
The difference when you incorporate bosses is:
- You're using world events as reliable spike moments of progression.
- You compress what used to be several normal games into a couple of boss‑anchored matches.
A simple example of a multi‑weapon boss‑centric plan:
| Match phase | Weapon/Task | Why this phase |
|---|---|---|
| Early game | Nova‑line weapons → base kills + Moonstone | Lower tier zones, low pressure, perfect for the first 100–150 kills |
| Midgame | AR (e.g., Peacekeeper) → Gold challenges | Use walls, trees, and safe spots for slide kills, jump kills, no‑reloads |
| Boss = T‑Rex | Launcher / bow + AOE skill | High density to satisfy 3 kills with one shot and skill proc requirements |
| Boss = Colossus | Weapons needing special/elite kills | Outside: GUILTECH kills; inside: more specials + explosive multi‑kills |
| Late / cleanup | Weapons that are almost Moonstone | Tier 3/4 density makes last 20–30 kills trivial |
When you stick with this model, a single high‑quality match can:
- Complete Gold on one weapon
- Push Moonstone on another
- Knock out several elite/special tasks
- Unlock 1–2 Dark Ops from bosses
- Advance or upgrade an exotic skill
At that point, the T‑Rex and Colossus are not just content—they're your primary accelerators.
↖ FAQ
Q1: I keep failing to mount the T‑Rex. What's the most reliable setup?
Use this checklist:
1. Start from high ground (roof, hill, truck).
2. Wait for the T‑Rex to be close but not mid‑thrash (avoid big tail swings).
3. Jump towards the torso or back, not straight into the legs.
4. While you're midair and touching the model, press and hold your interact button.
5. If you phase through, change your angle or height and try again.
Do this a few times and you'll eventually grab a clean mount, which should be enough to satisfy the riding unlock.
Q2: Is riding the T‑Rex enough, or do I also need to kill it for the secrets?
From how the unlocks behave, there appear to be at least two distinct conditions:
- One associated with riding the T‑Rex.
- Another associated with completing the Haunted Activity and actually killing the boss.
If you want to be safe:
> Treat a perfect T‑Rex game as: mount it and stay to kill it.
That way you're not guessing which part you already checked off.
Q3: For the Origins robot Dark Ops, is killing the robot alone enough?
Very likely not.
The pattern points to a combined condition:
1. Kill the Colossus by completing the interior core fight.
2. Use the head exit (the special tip/head exfil) to leave the robot.
If you kill the core but leave via some generic method, don't be surprised if the Dark Ops doesn't trigger.
Q4: I don't fully understand the red lights inside the robot. What should I focus on?
Think of the interior fight in three priorities:
1. When red lights are active → shoot red lights first.
2. When the shield is up around the core → assume you haven't shot enough red lights.
3. When the shield drops → unload everything into the core.
Standing on the round platforms is generally positive, and with a full lobby, someone will always be on one. You don't have to overthink the puzzle; just follow red → core, and the event will progress.
Q5: Which boss is better for special/elite kill challenges?
The Origins robot wins by a mile for special/elite kills:
- External Colossus phase = massive waves of GUILTECH robots.
- Interior phase = many more robotic specials in a confined environment.
T‑Rex's Toxic Tyrant phase has elites, but if your priority is finish 20–50 special kills for several guns, Colossus runs should be your focus.
↖ Summary
For most players, the first encounter with the zombie T‑Rex or the Origins robot is just a wow moment:
- a rideable undead dinosaur,
- and a giant mech you can climb inside and blow up.
But if you look at them from a progression angle, their real value is much bigger:
- They're once‑per‑match resource spikes the game hands you for free.
- They concentrate specials, elites, and dense zombie packs in one spot.
- They gate Dark Ops secrets, exotic upgrades, and memorable rewards.
- And they can carry multiple weapons and camo lines forward in a single match.
All you really need to do is:
- In T‑Rex games: use Toxic Tyrant to farm elites, ride the Rex at least once, manage ammo boxes, and pour your explosive/chain‑kill challenges into the fight.
- In Colossus games: treat the outer phase as your GUILTECH farm, the interior as your explosive‑kill playground, and don't leave until you've taken the head exit.
- Across all matches: plan each stage (early, mid, boss, cleanup) around specific weapons and challenges, and think of bosses as accelerators, not distractions.
Once you play this way, you stop treating these bosses as one‑off attractions and start treating them as your main engines of growth. That's when the T‑Rex and the Origins robot stop being cool content and start being tools you own in your grind.

Most Popular Posts
- Black Ops 7 Zombies Totenreich Easter Egg Guide: Fast Solo & Co-Op Main Quest Walkthrough
- Black Ops 7 Endgame Exotic Affinity Weapons Guide: Best Bonuses, Full Weapon List, and Farming Tips
- Black Ops 7 Season 4 Release Date, Maps, Weapons, Zombies, Warzone, and MW4 Reveal Prep
- Black Ops 7 Cherry Fizz Guide: Fastest Illicit Cargo Event Route for Season 4
- Black Ops 7 Season 3 Meta Loadouts: Best Weapons Class Setups Right Now
- Best MK35 ISR Class Setup in Black Ops 7: Fast Meta Loadout, Attachments, and Tips
Popular Category Lists
- Grow a Garden / (283)
- ARC Raiders / (244)
- CoD: Black Ops 7 / (163)
- Monopoly Go / (145)
- MLB 26 / (128)
- Star Citizen / (93)
- Steal a Brainrot / (86)
- Sailor Piece / (67)
- CoD: BLACK OPS 6 / (55)
- Forza Horizon 6 / (52)
- Blox Fruits / (52)
- ARK Survival Ascended / (48)
- Path of Exile 2 / (48)
- Monster Hunter Wilds / (46)
- Diablo IV / (45)
- Adopt Me / (45)
- Windrose / (43)
- Path of Exile / (40)
- Battlefield 6 / (34)
- Bee Swarm Simulator / (31)