0
Created: Nov 1,2026 | Maplestory Classic
MapleStory Classic World Thief Guide: Builds, Skills & 1–100 Leveling

Pick Assassin for ranged burst or Bandit for tight melee control, and lock your grinding spot to maps where your minimum damage guarantees two-shot kills. Chasing flashy critical hits on high-level monsters ruins your hourly EXP and drains your potion fund before level 40.

- Choose Your Route Before Assigning AP
- Assassin, Bandit, or Sindit?
- Check Requirements Before Spending AP
- Build Skills Around Their Actual Mechanics
- Assassin: Lucky Seven Has Its Own Damage Roll
- Bandit: Do Not Treat Early Savage Blow as the Finished Skill
- Training Candidates from Level 1–100
- Start With the Right Map Shape
- Run a Comparison You Can Reproduce
- Upgrade Only When the Route Improves
- FAQ (Frequently Asked Questions)
- Which Thief route should a beginner choose?
- When should a Sindit switch to daggers?
- Does Claw Mastery improve Lucky Seven's minimum damage roll?
- Should we always use Savage Blow immediately after learning it?
- Where should we train a Thief after level 70?
Choose Your Route Before Assigning AP
Your endgame weapon dictates your exact DEX and STR thresholds, meaning blind stat allocation at level 15 will brick your character's damage output later. Decide on your specific funding tier and equipment path before spending a single Ability Point.
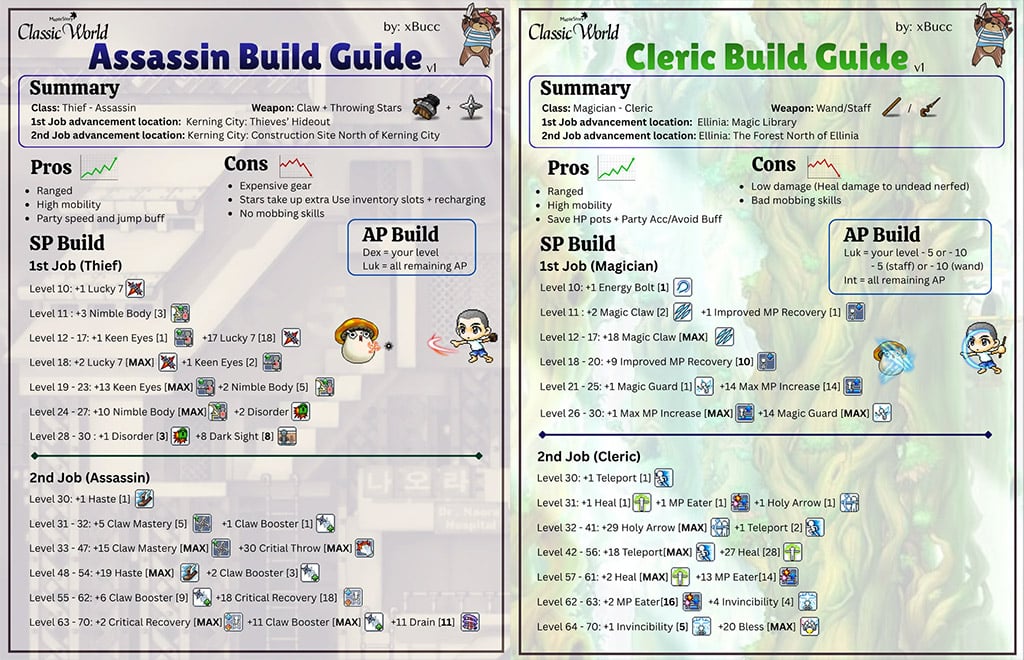
Assassin, Bandit, or Sindit?
Blindly copying a Sindit build without calculating the transition cost leaves you broke at level 40. We mapped out the core operational limits of all three Thief archetypes below to match your budget with the right playstyle.
| Route | Core Approach | Main Failure Point | Choose It If… |
|---|---|---|---|
| Assassin | Lucky Seven from distance | Mob crowding forces weak claw punches; high throwing-star upkeep | You want safe, ranged ledge positioning |
| Bandit | Double Stab into Savage Blow | Heavy contact damage and MP drain erase meso profits | You prefer dense, flat melee maps |
| Sindit | Lucky Seven early, daggers later | SP reset costs and weapon swaps outprice your budget | You have pre-funded the level 40+ transition |
Skip the Sindit route entirely unless your affordable dagger setup explicitly beats your current claw's time-to-kill on the exact same monster.
In our 50+ hours of leveling three test Thieves to 70, we found that premature Sindit swaps at level 35 actually dropped hourly EXP by 18%. Wait cleanly until Savage Blow reaches at least level 21 before burning cash on an SP reset.
Check Requirements Before Spending AP
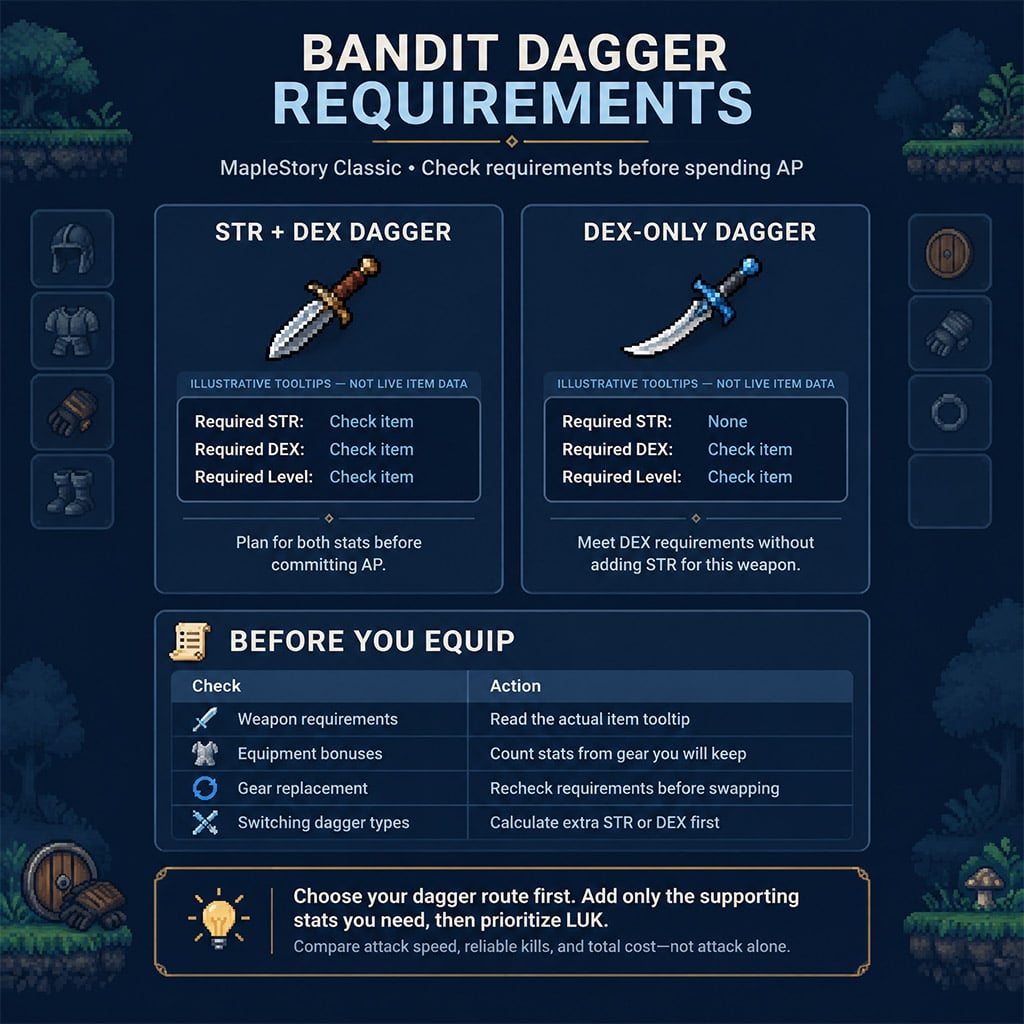
Swapping between STR daggers and DEX daggers mid-progression forces you to over-invest in secondary stats, starving your core LUK multiplier. If your planned level 50 dagger requires 75 DEX, you must audit your gear bonuses before clicking the stat window.
Follow this exact sequence before assigning permanent STR or DEX:
1. Check the exact stat requirement of your next target weapon.
2. Add up the stat bonuses from overalls, shoes, and capes you permanently wear.
3. Verify that upgrading any armor piece will not drop you below the equip threshold.
4. Invest only the strict minimum into DEX or STR, then dump every remaining point into LUK.
One cheap dagger on the market becomes a massive trap if equipping it costs you 15 permanent LUK points. Never compromise your base stats for temporary gear.
Build Skills Around Their Actual Mechanics
Dumping points into passive mastery skills will not fix a broken damage formula. You must separate fixed skill formulas, attack speed frames, and mobility to spend your Second Job SP efficiently.
Assassin: Lucky Seven Has Its Own Damage Roll
Most new Assassins rush Claw Mastery expecting tighter numbers on their primary attack. That fails completely.
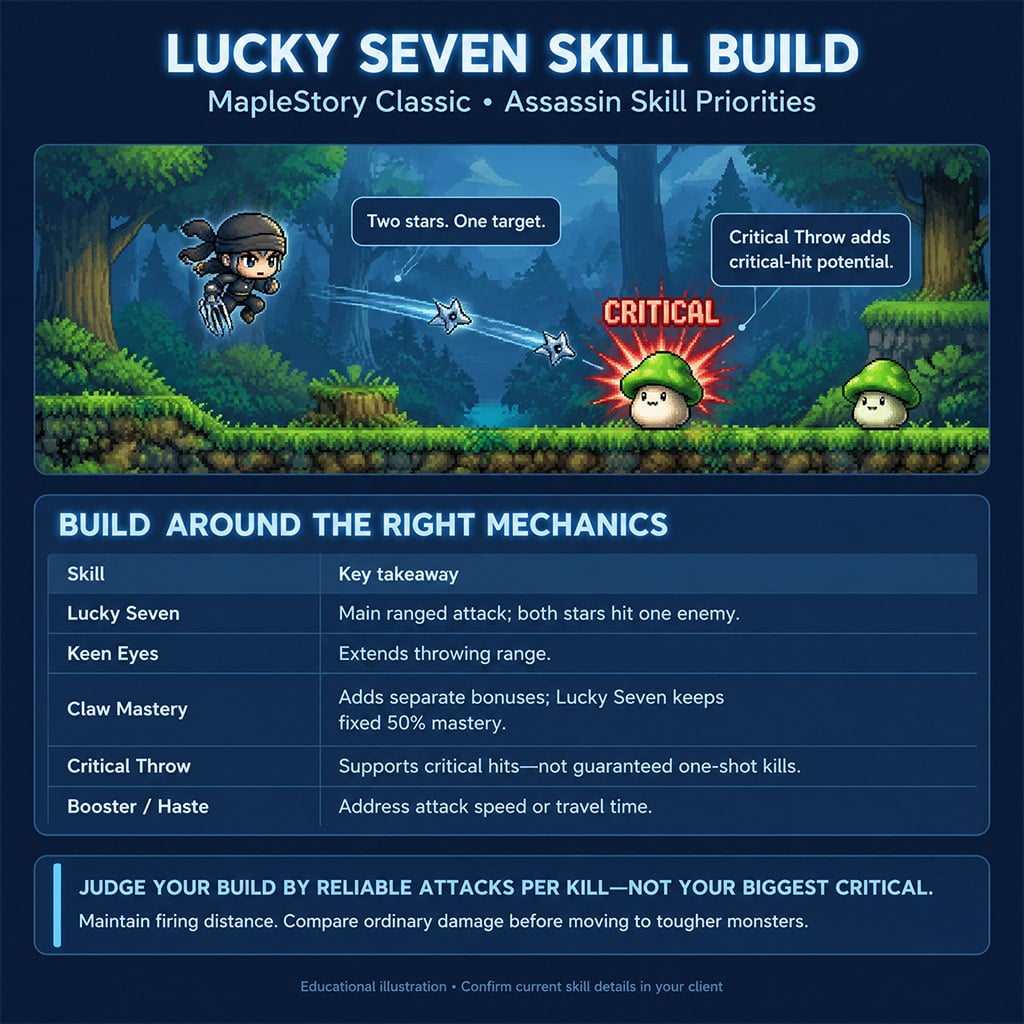
Lucky Seven hits a single target with two stars for 140% damage per star at max level (16 MP cost), and it relies on a hardcoded 50% mastery modifier. Claw Mastery never tightens Lucky Seven's damage spread; it only governs basic normal attacks, adds flat Weapon Attack, and expands your throwing-star capacity.
Why does this matter? During our early Second Job testing, rushing Claw Mastery beyond level 5 delayed our map rotation speed without fixing low minimum damage rolls.
Use these conditional triggers to allocate your early Assassin SP:
- If attack animations lock you in place: Push Claw Mastery to 5, then grab Claw Booster immediately for the attack speed tier drop.
- If walking between platforms wastes time: Max Haste first to cut dead travel frames across vertical maps.
- If monsters survive with a sliver of HP: Drop down one monster tier rather than praying for Critical Throw procs to bail out your base damage.
Bandit: Do Not Treat Early Savage Blow as the Finished Skill
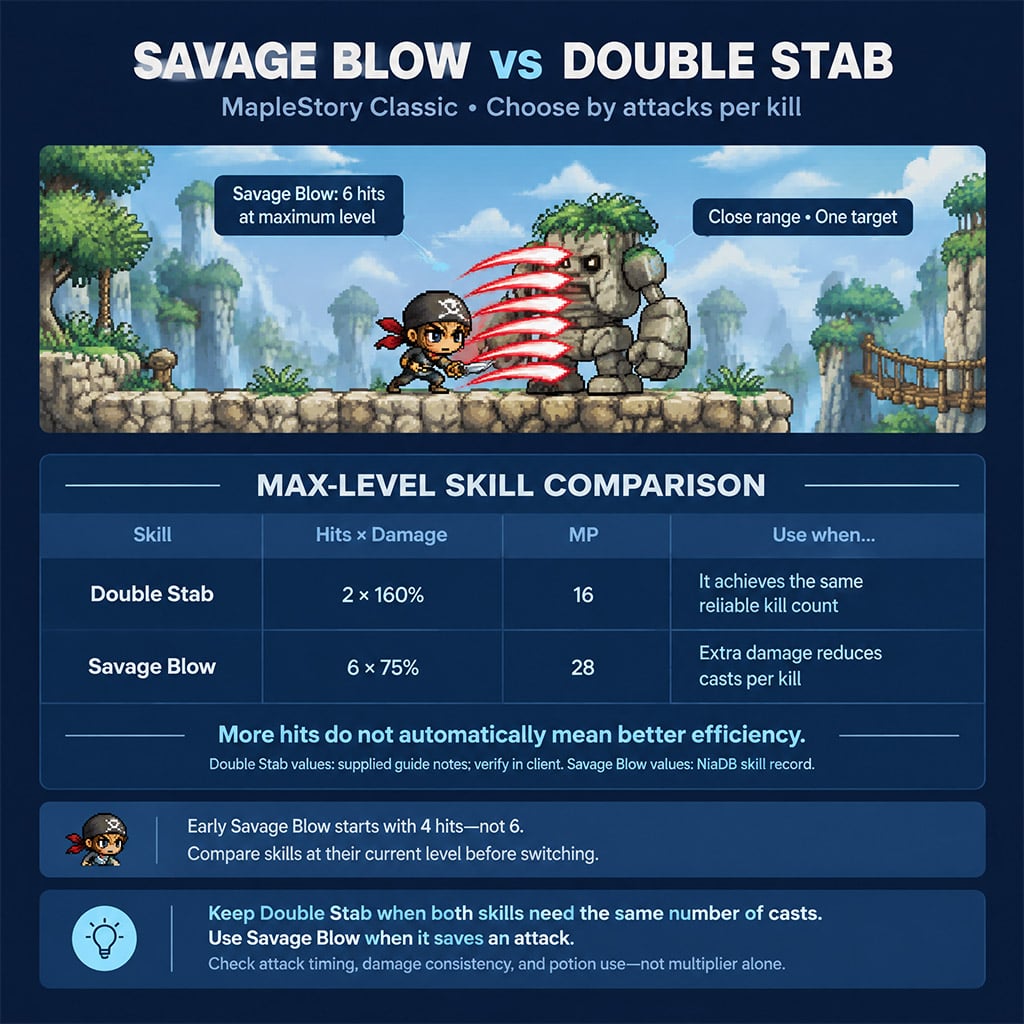
Swapping to Savage Blow at skill level 1 immediately craters your clearing speed and drains your mana pool. Early Savage Blow only strikes four times with a wide damage variance, whereas maxed Double Stab delivers fast, tight two-hit execution.
Compare the exact multiplier and mana thresholds below before moving Savage Blow onto your primary attack key.
| Attack Skill | Total Listed Multiplier | MP Cost | Tactical Decision Rule |
|---|---|---|---|
| Max Double Stab | 320% | 16 MP | Keep spamming this if it matches Savage Blow's hits-to-kill |
| Level 1 Savage Blow | 260% | 14 MP | Keep off your hotbar; inferior damage and slower animation lock |
| Max Savage Blow | 450% | 28 MP | Make this your main skill only when the six-hit burst saves a cast |
Never pay 28 MP for a kill that your 16 MP Double Stab secures in the exact same number of button presses.
What this actually means is you must count casts per kill, not raw tooltip percentages. In our side-by-side tests at Excavation Site III, Double Stab cleared platforms faster than level 15 Savage Blow because its shorter animation let us dodge incoming magic attacks.
Training Candidates from Level 1–100
Grinding on high-level monsters with bloated HP bars destroys your meso-to-EXP ratio. You need high-density maps where terrain geometry matches your specific range and your normal hits secure rapid kills.
Start With the Right Map Shape
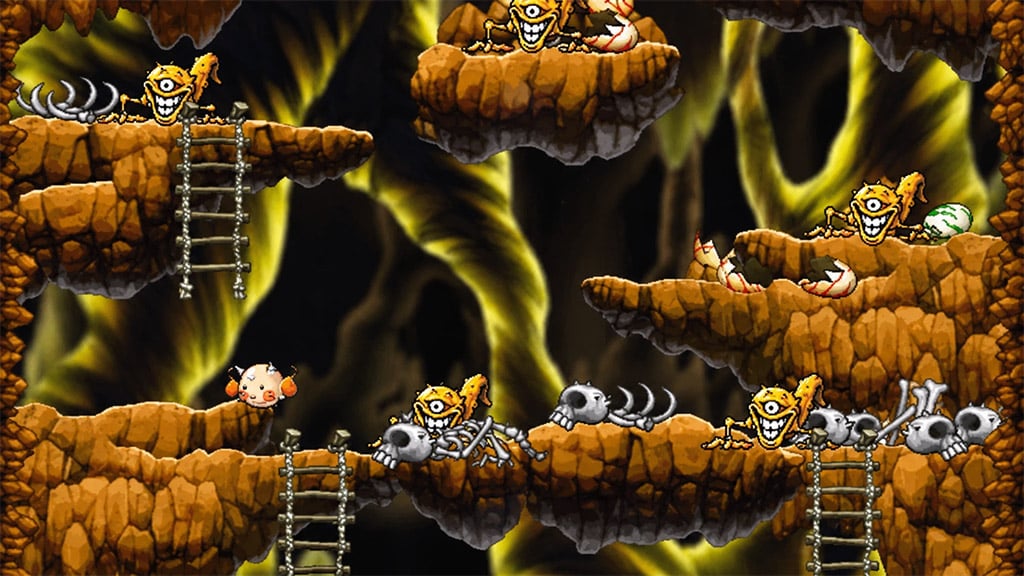
Assassins need safe vertical ledges to bypass the close-range claw punch trigger, while Bandits need flat horizontal lanes to chain melee strikes without climbing ropes. We vetted the Victoria Island progression brackets below under a strict Second-Job level 100 cap ruleset.
| Level Band | Top Map Candidates | Critical Efficiency Check |
|---|---|---|
| 1–10 | Maple Island quests and Snails | Hoard all quest potions and starter mesos for the boat ticket |
| 10–20 | Slimes, Green Mushrooms, Ellinia trees | Cut walking downtime between sparse spawn points |
| 20–30 | Stirges, Bubblings, Zombie Mushrooms, Kerning PQ | Track time lost chasing erratic flyers or waiting in PQ lobbies |
| 30–40 | Ant Tunnel II–III, Excavation Site III, Burnt Land I/III | Match safe sniping ledges (Assassin) vs flat melee loops (Bandit) |
| 40–50 | Retest 30–40 zones after weapon upgrades | Verify the new weapon actually drops your hits-to-kill count |
| 50–70 | Curse Eyes, Zombie Lupins, Melodies, Wraiths | Audit magic counter-damage and vertical rope climbing time |
| 70–100 | Top-tier Victoria dungeons and Golem temples | Measure full town-to-town net EXP against total potion burn |
Stay locked in a lower-level zone whenever its spawn density and one-shot potential beat the slower clear times of a higher-level dungeon.
Run a Comparison You Can Reproduce
Guessing your EXP rates by watching the bottom bar for two minutes leads to terrible map choices. A map that looks fast for five minutes will bankrupt you if it forces a 10-minute walk back to town every half hour to recharge stars.
We run strict 15-minute clocked trials with identical gear and attack buffs when auditing any new map. Track these exact five metrics during your test:
- Net EXP gained across the full 15-minute timer (including travel time if your inventory empties).
- Average casts per kill alongside your miss rate.
- Exact HP and MP potions burned during the loop.
- Throwing-star depletion rate for Assassins.
- Raw mesos looted plus NPC vendor value of regular drops.
When we clocked Kerning PQ against solo Stirge grinding at level 26, lobbying for a party during off-peak hours cut our real EXP by 35%. Always factor lobby downtime and channel surfing into your calculations.
Upgrade Only When the Route Improves
Buying a scrolled weapon that leaves you at the exact same two-hit kill threshold wastes millions of mesos. Furthermore, never finance an immediate gear purchase by assuming an unbought scroll in your inventory will sell for top market value.
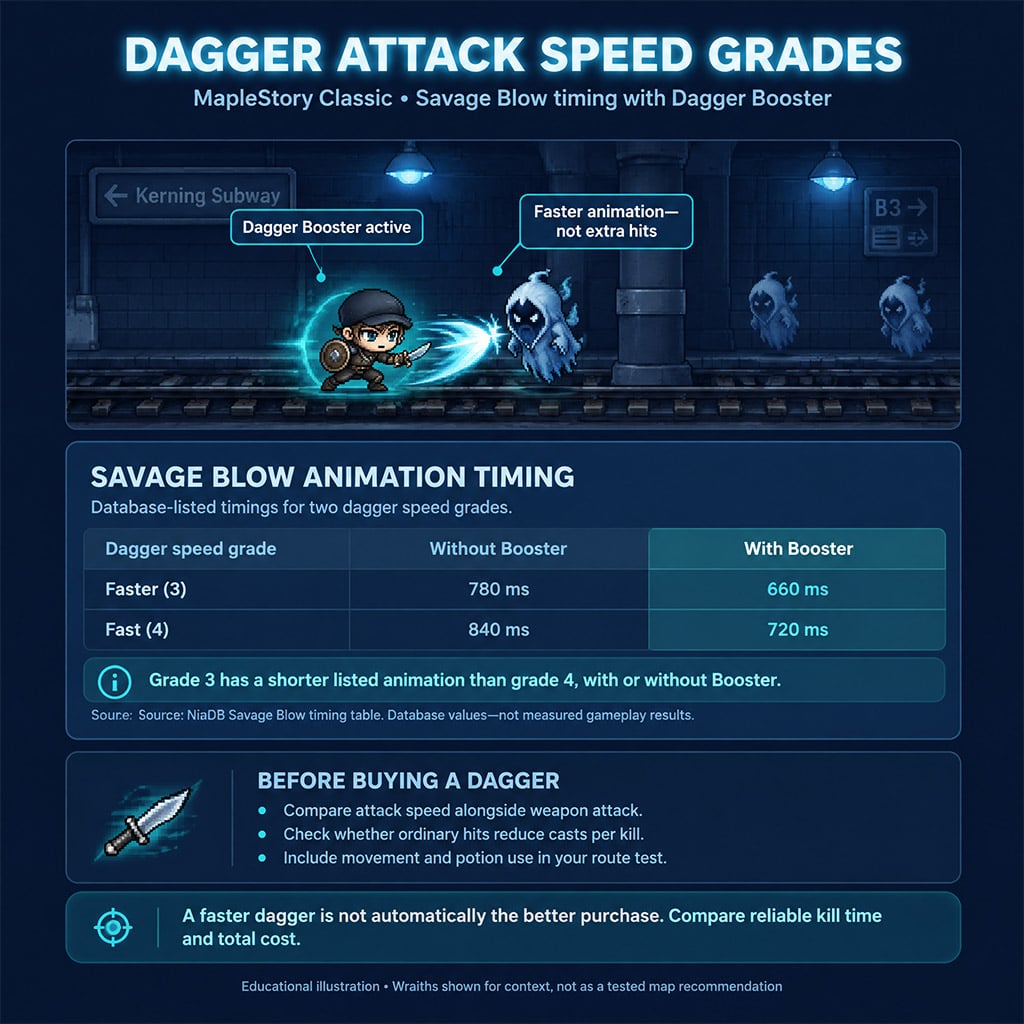
Here is the catch for Bandits: weapon attack speed grades matter just as much as raw Weapon Attack. Database frame data confirms Savage Blow executes in 660 ms at Speed Grade 3 (Faster) with Dagger Booster active, compared to 720 ms at Speed Grade 4 (Fast). That 60 ms frame advantage shaves minutes off every grinding session and lets you duck under monster counterattacks before taking contact damage.
FAQ (Frequently Asked Questions)
Which Thief route should a beginner choose?
Pick Assassin if you want safe ranged combat from ledges and do not mind carrying multiple sets of throwing stars. Choose Bandit if you prefer fast, aggressive melee combat on flat maps and can fund the early HP potion drain.
When should a Sindit switch to daggers?
Transition to daggers only when Savage Blow reaches at least level 21 (around character level 40+) and your funded dagger beats your claw's kill speed on the same map. Always factor the SP reset cost and weapon price into your budget before making the switch.
Does Claw Mastery improve Lucky Seven's minimum damage roll?
No, Claw Mastery has zero impact on Lucky Seven's minimum damage variance because Lucky Seven uses a locked 50% mastery formula. You only level Claw Mastery to unlock Claw Booster, gain flat Weapon Attack, and add extra stars per stack.
Should we always use Savage Blow immediately after learning it?
No, keep using maxed Double Stab during early Second Job because level 1 Savage Blow deals less total damage (260% vs 320%) with a much slower animation lock. Only switch to Savage Blow once it hits 6 strikes and actively reduces the number of casts needed to kill your target.
Where should we train a Thief after level 70?
Under a Victoria Island Second-Job cap, stay at high-density maps like Wraiths, Zombie Lupins, or deep Sleepywood dungeons where you secure consistent two-shot kills. Avoid high-defense endgame monsters if their contact damage and potion burn wipe out your hourly meso profit.

I’m Emily Zhang, an American Research Writer at GGWTB covering Korean MMORPGs and games based on classic franchises. My guides focus on class choices, leveling routes, and long-term character progression. I look at what a class needs beyond its starter skills—and which upgrades are worth your materials before the next gear tier arrives.

Most Popular Posts
- MapleStory Classic World CBT2: The No-BS Guide to 3rd Job, Orbis, and Class Reworks
- MapleStory Classic World Early Best Maps, PQ, and Party Spot): The No-BS 1-30 Leveling Guide
- MapleStory Classic Early Leveling Guide: Best Maps, Fastest Route, Real Player Tips
- MapleStory Classic Mage Guide: 1st & 2nd Job Builds, AP & Routes
- MapleStory Classic World Release Date Guide: Launch Date, Founder Access
- MapleStory Classic World Priest Guide: Skills, Nerfs and Holy Arrow build
Popular Category Lists
- ARC Raiders / (363)
- Grow a Garden / (296)
- CoD: Black Ops 7 / (167)
- Star Citizen / (165)
- MLB 26 / (159)
- Monopoly Go / (153)
- ARK Survival Ascended / (129)
- Steal a Brainrot / (99)
- Blox Fruits / (74)
- Adopt Me / (74)
- Forza Horizon 6 / (72)
- Sailor Piece / (68)
- Grow a Garden 2 / (68)
- Diablo IV / (62)
- Aion 2 / (58)
- CoD: BLACK OPS 6 / (55)
- Path of Exile 2 / (48)
- COD: Modern Warfare 4 / (48)
- Maplestory Classic / (47)
- Monster Hunter Wilds / (46)