0
Created: Oct 28,2026 | ARC Raiders
ARC Raiders Soul's Offering Guide: Requirements Materials and Fast Loot Routes

Finish Soul's Offering by submitting three material collections, then activating a Fireworks Box on the Santa Maria Houses rooftop in Buried City. Start with your stash, search Old Town for overlapping shortages, and save one of the three Fireworks Boxes awarded by Stage 3—you don't need to buy your way through the finale.

- All Soul's Offering Requirements
- Craft Flares Before You Risk Another Raid
- Old Town Route and Targeted Material Stops
- Clear Buildings, Not Scattered Containers
- Detour Only for a Remaining Shortage
- Santa Maria Houses: Finish the Rooftop Objective
- Use Your Stage 3 Fireworks Reward
- Keep Flowers for the Display Table
- FAQ (Frequently Asked Questions)
- How many Dead Flowers and Rock Salt does Soul's Offering need?
- Where should I search for Rock Salt and Dead Flowers?
- Do Fancy Plates appear outside containers?
- Does Soul's Offering require 300 ARC damage at Santa Maria Houses?
- Do I need to buy a Fireworks Box for the final stage?
All Soul's Offering Requirements
Missing later-stage materials forces repeat raids. We recommend reserving the entire project checklist before selling trinkets, especially Dead Flowers: the first offering takes one, but the second takes another three.
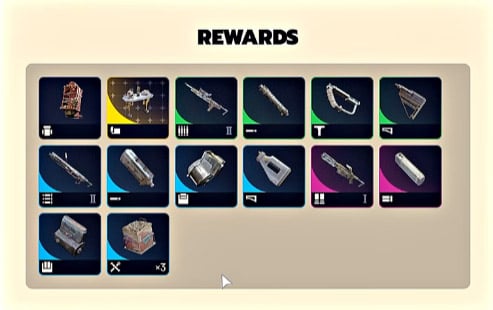
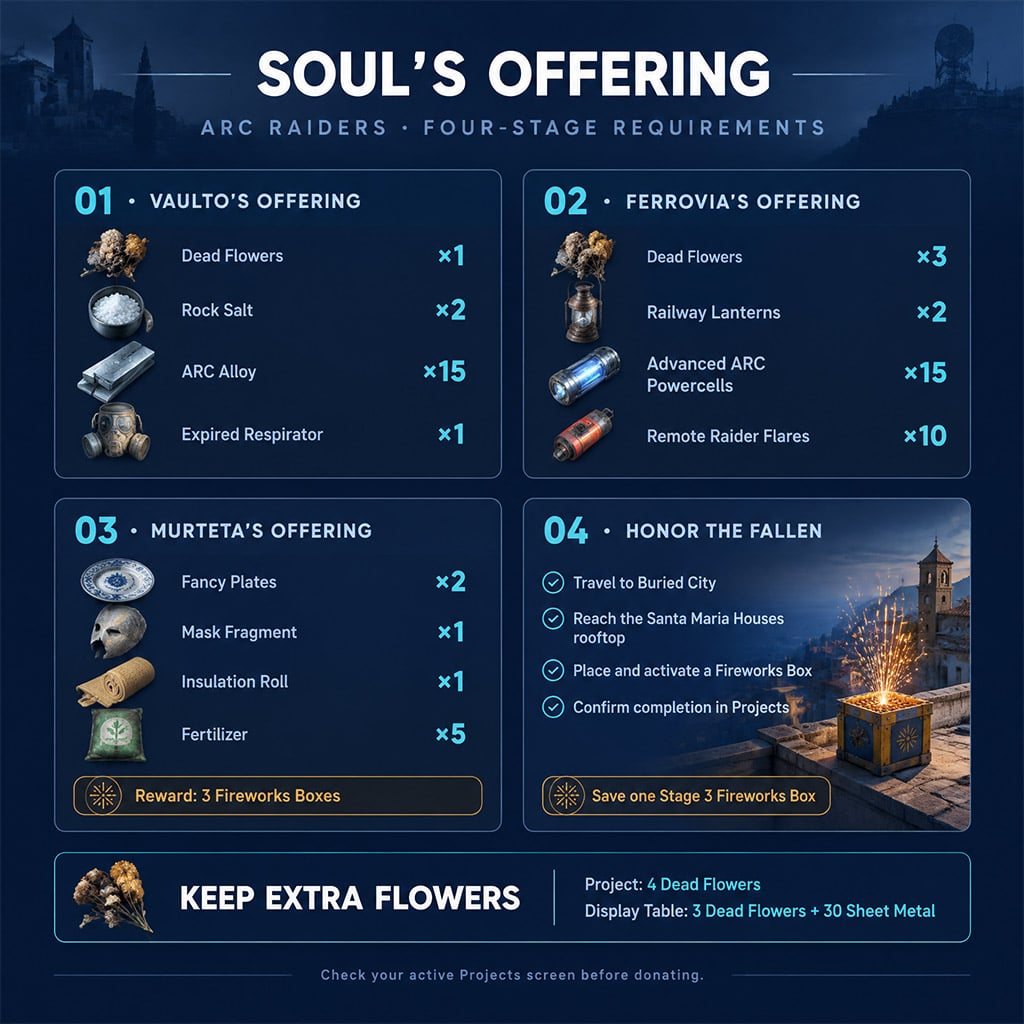
The Soul's Offering requirements tracker lists these four stages.
| Stage | Required Materials or Action | Rewards |
|---|---|---|
| 1: Vaulto's Offering | 1 Dead Flowers, 2 Rock Salt, 15 ARC Alloy, 1 Expired Respirator | Stiletto II, Extended Barrel I, Angled Grip II, Stable Stock II |
| 2: Ferrovia's Offering | 3 Dead Flowers, 2 Railway Lanterns, 15 Advanced ARC Powercells, 10 Remote Raider Flares | Torrente II, Compensator III, Extended Medium Mag III, Stable Stock III |
| 3: Murteta's Offering | 2 Fancy Plates, 1 Mask Fragment, 1 Insulation Roll, 5 Fertilizer | Vulcano I, Shotgun Silencer, Extended Shotgun Mag III, 3 Fireworks Boxes |
| 4: Honor the Fallen | Set off a firework on the Santa Maria Houses rooftop | Pilgrim Backpack, Offering Display Table design |
Keep later-stage items now; selling them turns an easy donation into another extraction run.
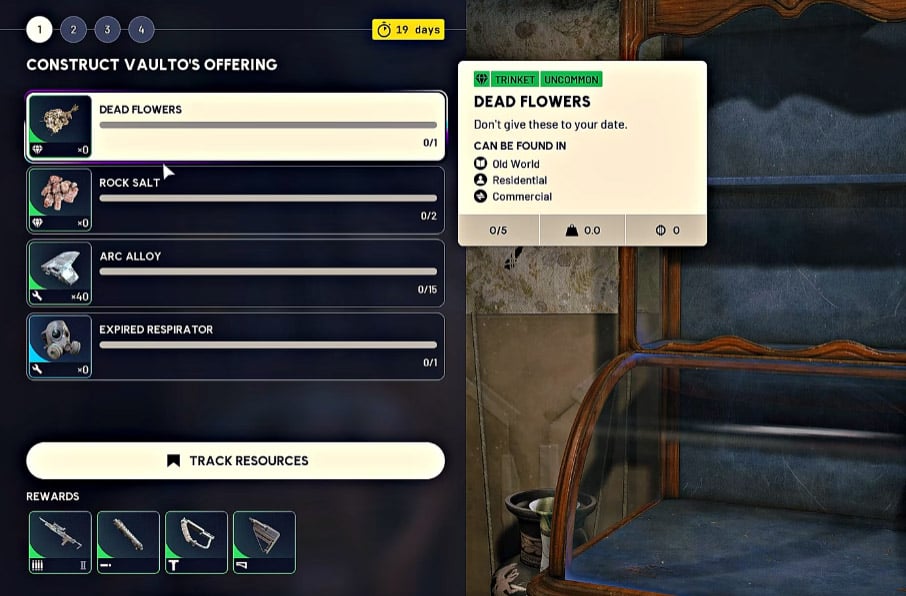
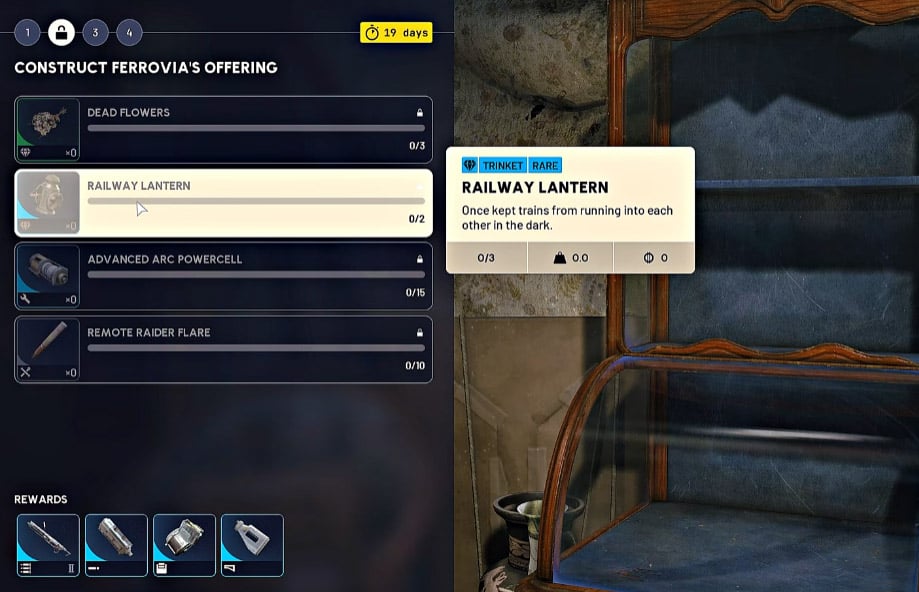
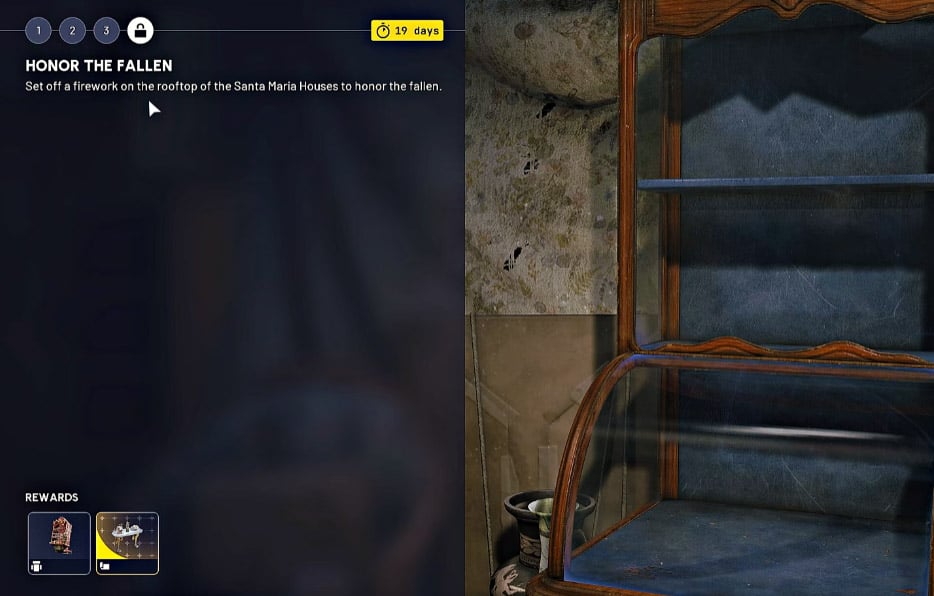
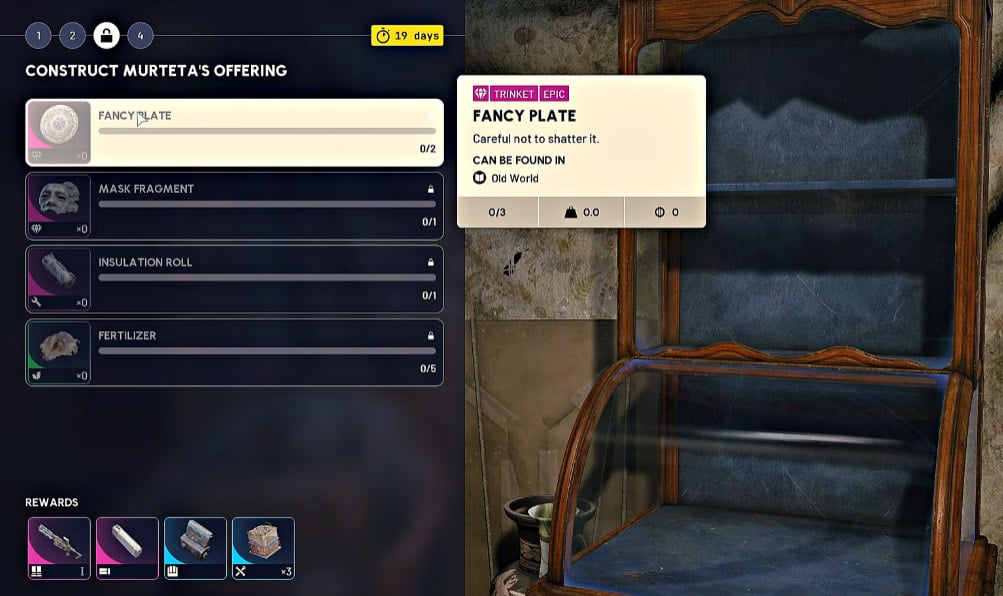
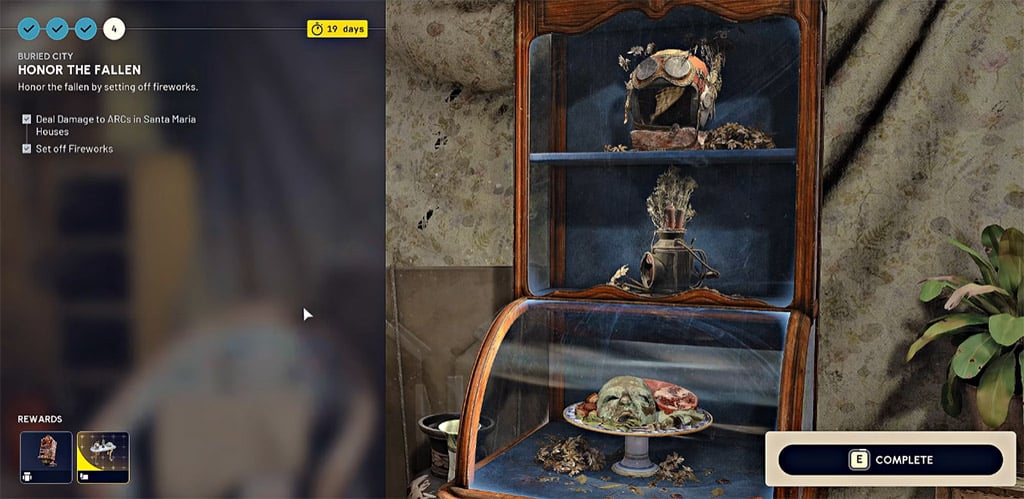
That's 58 submitted items across 11 item types, excluding the firework used for the final objective. Check the live Projects screen before committing supplies; its quantities take priority over any guide.
Craft Flares Before You Risk Another Raid
Random looting is a poor first choice when your hideout already solves the shortage. Remote Raider Flares require their blueprint and the Utility Station; check your stash before crafting the missing amount.
The Remote Raider Flare item listing also lists Shani as a vendor. If you lack the blueprint, check her current stock before searching Raider Caches, supply drops, and worn backpacks.
Don't deploy your donation stock.
Old Town Route and Targeted Material Stops
A useful loot route follows your shortages, not every container on the map. Old Town on Pendola Pass is a practical opening because residential searches cover Rock Salt, Dead Flowers, and Fancy Plates in the same sweep—not because any particular drawer guarantees them.
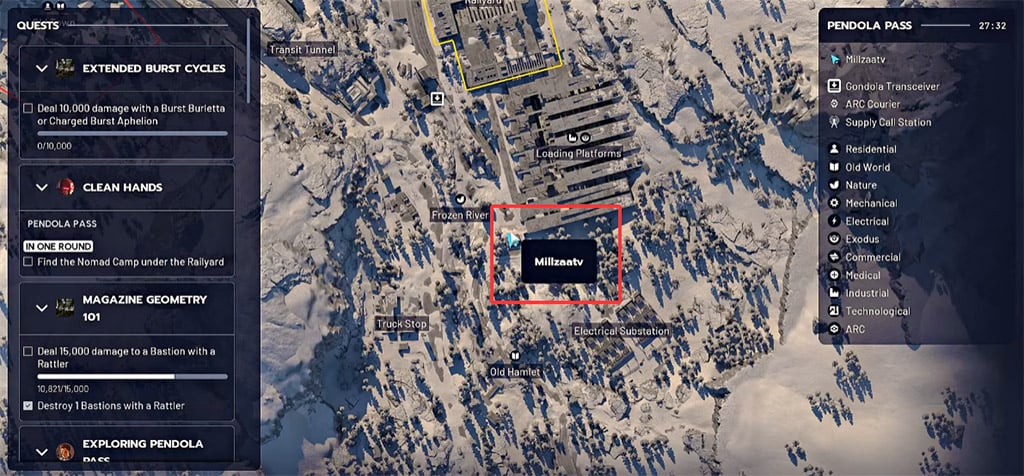
Clear Buildings, Not Scattered Containers
We recommend this order when your spawn and extraction route support it:
1. Search the pharmacy and nearby residential interiors.
2. Check kitchens, cupboards, and drawers in adjoining buildings.
3. Scan tables and floors before leaving each room.
4. Continue through accessible connected interiors rather than repeatedly crossing open streets.
If several nearby buildings are already stripped, change clusters. A longer route through empty rooms doesn't improve your odds.
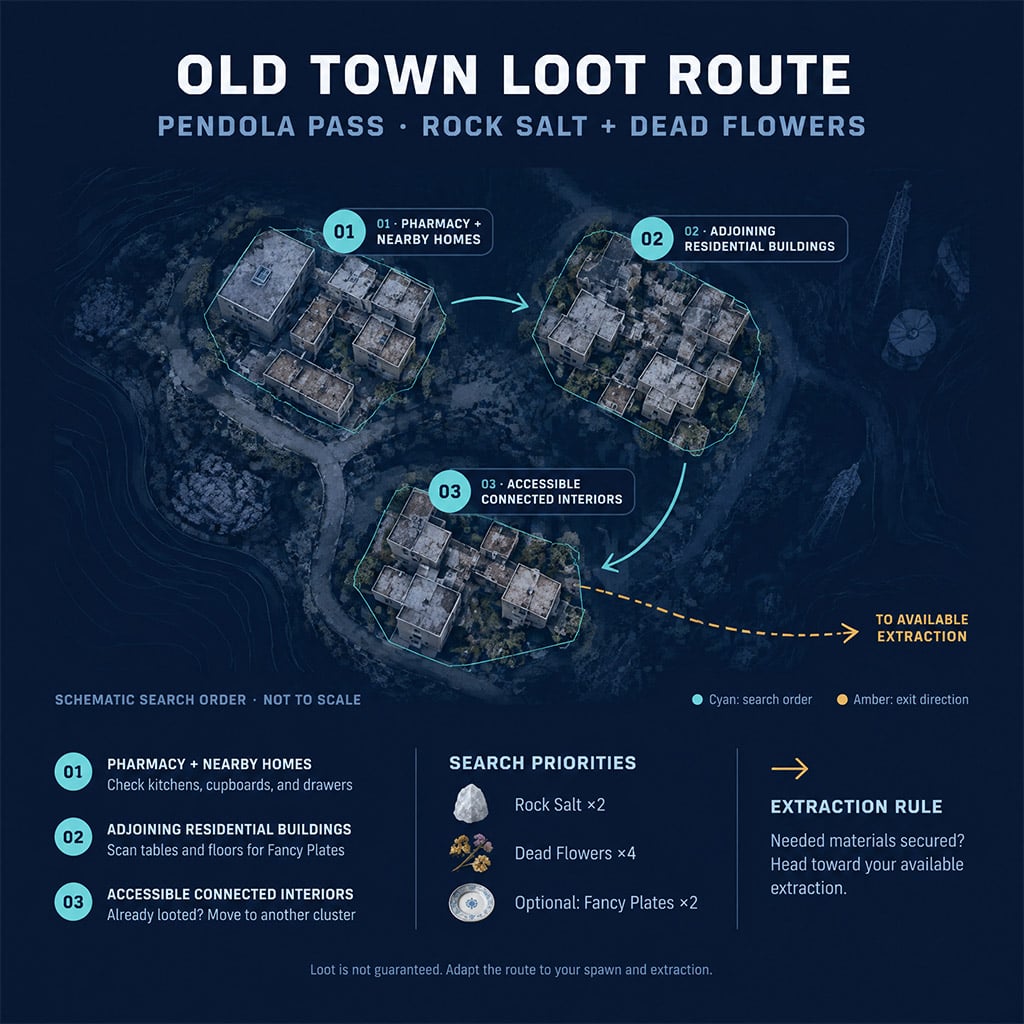
Fancy Plates deserve a separate surface check. Searching every drawer while ignoring the table beside it leaves part of the room unchecked.
For an alternative residential search, try Hotel Panorama's rooftop kitchen on Riven Tides. Treat it as another loot opportunity, not a guaranteed two-item pickup.
Detour Only for a Remaining Shortage
Once residential loot stops addressing your checklist, switch to a specific target rather than sweeping another district.
Use these stops as search leads, not fixed spawns.
| Missing Item | Search Lead | Execution Rule |
|---|---|---|
| Railway Lantern ×2 | Pendola Pass supermarket side room; security lockers | Check accessible lockers and cabinets on your existing route |
| Expired Respirator ×1 | Medical loot areas; Pendola Pass medical hut | If access is blocked, switch medical locations |
| Mask Fragment ×1 | Controlled Receiving Facility, Pendola Pass | Search drawers and surfaces; skip a contested interior |
| Insulation Roll ×1 | Pendola Pass Storm Huts during storm conditions | Check access and conditions before committing |
| Fertilizer ×5 | Riven Tides shallow-water areas; Dam Battlegrounds wetland areas | Make a dedicated stop only while fertilizer remains missing |
| Advanced ARC Powercell ×15 | Larger ARC remains, including Bastion and Bombardier | Confirm the Advanced item name when looting |
| ARC Alloy ×15 | Defeated ARC and suitable ARC salvage | Collect alongside powercells rather than scheduling a separate run |
Skip any detour that no longer solves a shortage; completed requirements don't justify extra exposure.
Don't build your powercell budget around a supposed 100% drop rate. Enemy loot and survival costs matter: if your ammo or healing is running low, extract instead of forcing another large-ARC fight.
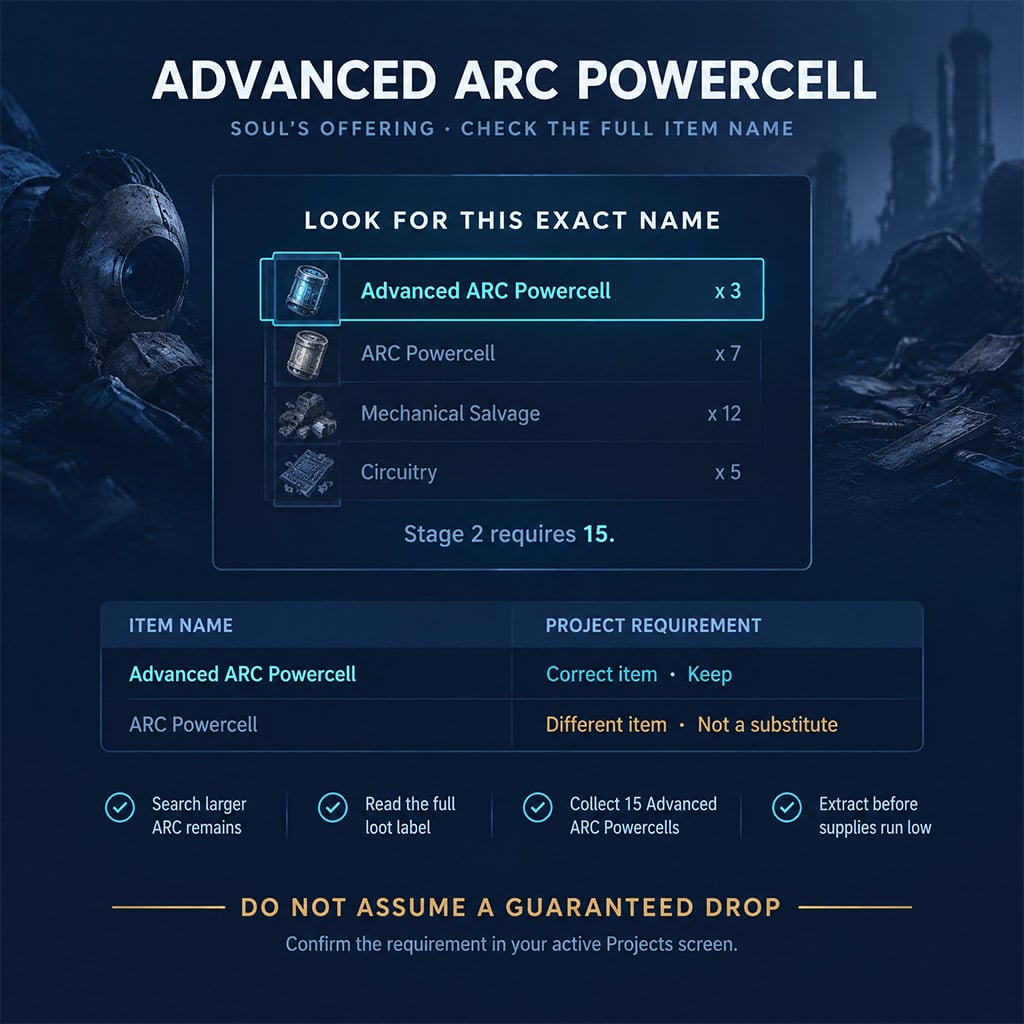
Extract when your bag contains the materials you came for. We recommend banking rare trinkets before starting a separate combat run; combining both objectives risks losing the harder-to-replace loot.
Santa Maria Houses: Finish the Rooftop Objective
The listed final project objective is setting off a firework on the rooftop, not dealing 300 ARC damage. Don't add a combat requirement that your active project screen doesn't show.
Use Your Stage 3 Fireworks Reward
Buying extra fireworks before checking your rewards wastes resources. Stage 3 gives you three Fireworks Boxes; reserve one for the tribute and leave spares in your stash.
1. Select Buried City and bring one Fireworks Box.
2. Reach Santa Maria Houses and clear immediate threats.
3. Climb onto the rooftop; bring a Grappling Hook only if your chosen approach needs it.
4. Place and activate the Fireworks Box.
5. Check Projects for completion before leaving the area.
Placement alone isn't activation.
We recommend confirming the tracker rather than relying on a notification. If the objective remains incomplete, recheck the rooftop location and interaction before spending a second box.

Keep Flowers for the Display Table
Finishing the project awards the design, not a free crafted table. The Offering Display Table recipe requires 3 Dead Flowers and 30 Sheet Metal.
If you plan to craft it, reserve 7 Dead Flowers total: four for the project and three for the table. That small stash decision prevents another flower hunt after the finale.
FAQ (Frequently Asked Questions)
How many Dead Flowers and Rock Salt does Soul's Offering need?
Soul's Offering requires 4 Dead Flowers and 2 Rock Salt across its material stages. Keep 3 additional Dead Flowers if you also plan to craft the Offering Display Table.
Where should I search for Rock Salt and Dead Flowers?
Start with Old Town residential kitchens, cupboards, and drawers on Pendola Pass. Hotel Panorama's rooftop kitchen on Riven Tides is an alternative, but neither location guarantees a spawn.
Do Fancy Plates appear outside containers?
Fancy Plates can appear as loose loot on tables and floors, so check exposed surfaces as well as cupboards and drawers. You need 2 for Stage 3.
Does Soul's Offering require 300 ARC damage at Santa Maria Houses?
The listed final Soul's Offering objective does not require 300 ARC damage. It requires setting off a firework on the rooftop; follow your active Projects screen if it displays a separate damage task.
Do I need to buy a Fireworks Box for the final stage?
No—Stage 3 awards three Fireworks Boxes, so save one for Santa Maria Houses. Use a Fireworks Box rather than assuming Firecrackers satisfy the same objective, then confirm completion in Projects.

I’m Sofia Bergström, a Swedish Managing Editor covering FPS, competitive shooters, and extraction shooters for GGWTB. My guides focus on loadout trade-offs, positioning, and when to commit—or cut your losses. A weapon’s stats tell only part of the story; I focus on how it fits your role and the fight ahead.
Most Popular Posts
- ARC Raiders Update 1.42: Phantom Targets Farming Guide (Glitched Wasps, Rewards, Regional Conditions)
- ARC Raiders Best Pop Trigger Strategy: Fast Phantom Targets Damage Guide
- ARC Raiders Subway Skin Guide: Unlock the Subterranean Outfit
- ARC Raiders Medium & Heavy Gun Parts Blueprint Guide: Best Farm Route, Locations, and Refiner Crafting
- ARC Raiders Ascending the Mountain: Fast Loot Routes and Item Guide
- ARC Raiders Frozen Trail Update Guide: Pendola Pass, Frigate & Meta Loadouts
Popular Category Lists
- ARC Raiders / (359)
- Grow a Garden / (295)
- CoD: Black Ops 7 / (167)
- Star Citizen / (163)
- MLB 26 / (159)
- Monopoly Go / (153)
- ARK Survival Ascended / (128)
- Steal a Brainrot / (99)
- Blox Fruits / (74)
- Adopt Me / (74)
- Forza Horizon 6 / (72)
- Sailor Piece / (68)
- Grow a Garden 2 / (68)
- Diablo IV / (62)
- CoD: BLACK OPS 6 / (55)
- Aion 2 / (55)
- Path of Exile 2 / (48)
- Monster Hunter Wilds / (46)
- Windrose / (44)
- Maplestory Classic / (44)