0
Created: Nov 22,2026 | COD: Modern Warfare 4
MW4 Patriot XMR Guide: Volt Boss Stuns, Multiplayer Stats & Best Builds

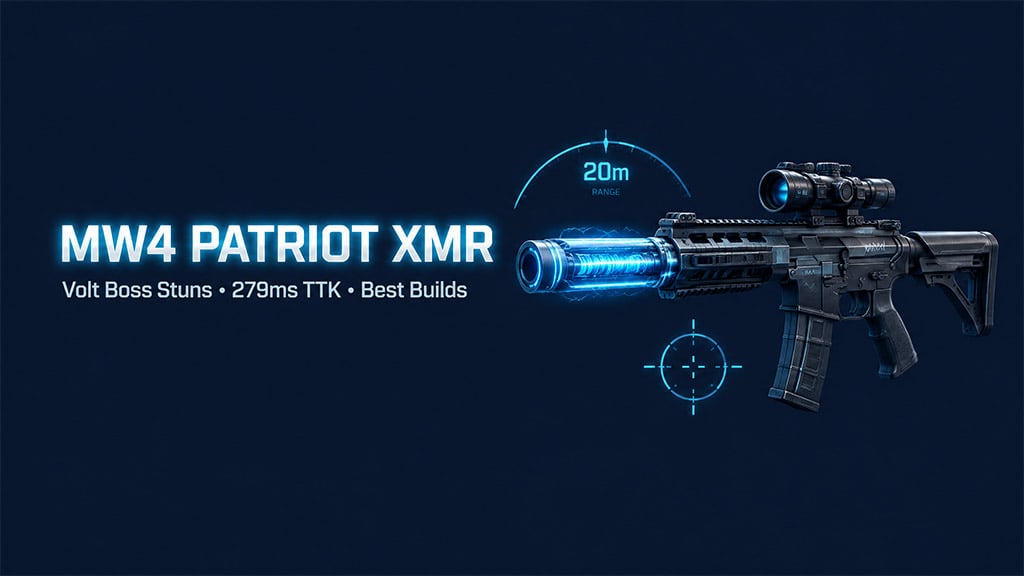
Use the Patriot XMR Volt at 20 m to stun the Colossus in DMZ, and skip it against the Railgun Sentry. In standard multiplayer, default to full-auto for a 279 ms four-shot kill at any range.
- DMZ: How to Stun the Colossus with the Volt
- Multiplayer: Full-Auto vs. Semi-Auto vs. Volt
- Recoil & Volt Engagement Rules
- Best Patriot XMR Builds
- FAQ (Frequently Asked Questions)
- Does the Volt work on every DMZ boss?
- Is 30 meters the Volt's maximum range?
- How many Volt rounds do ammo boxes restore?
- Is semi-auto better than full-auto on the Patriot XMR?
- Does Battle Hardened counter the Volt stun?
DMZ: How to Stun the Colossus with the Volt
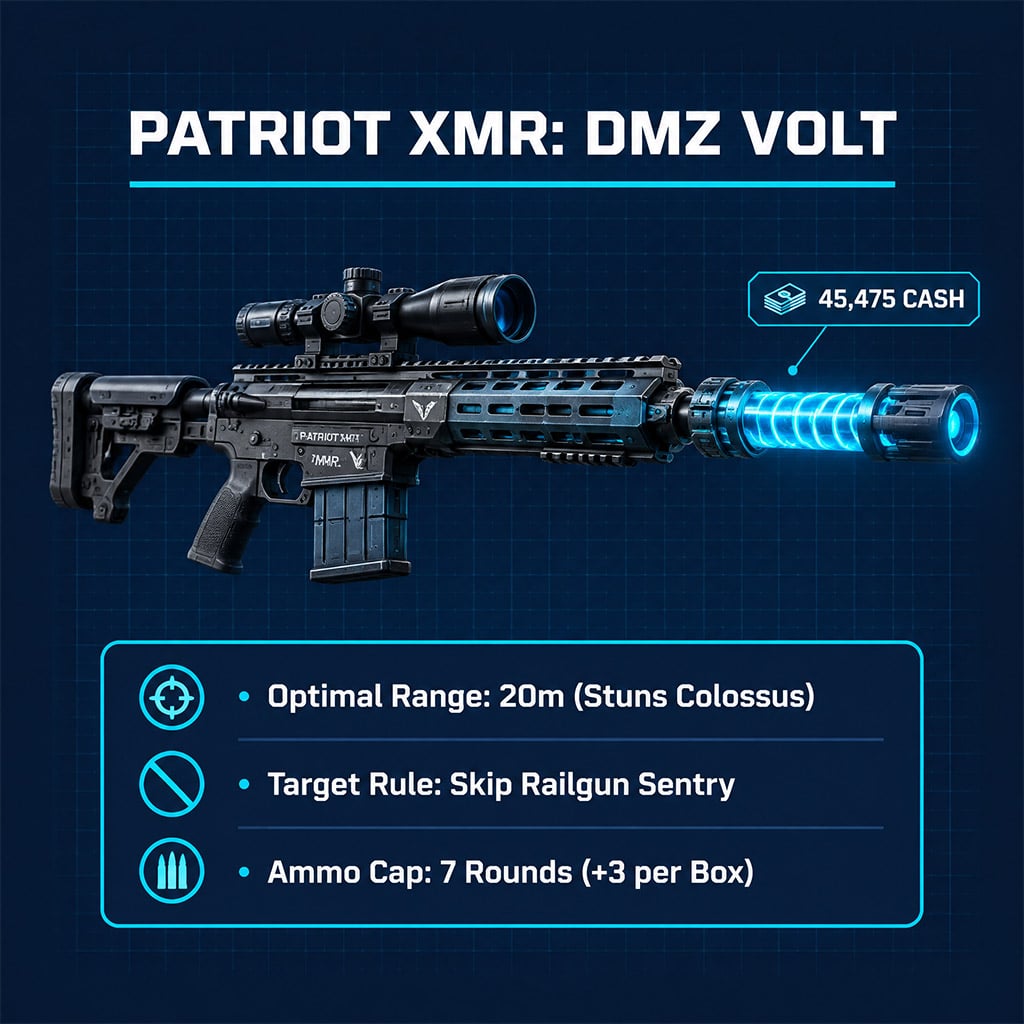
The Volt replaces your barrel with an alternate-fire stun launcher holding 7 rounds total. In our DMZ testing, it repeatedly stunned the Colossus and humanoid bosses, while the Railgun Sentry ignored every hit.
- Equip & Pay: Max out the Patriot XMR and slot the Volt in the barrel for 45,475 Cash.
- Close to 20 m: Switch fire modes and center the spread at 20 m, as hits turn inconsistent at 30 m or farther.
- Punish & Swap: Fire one Volt round, then immediately swap back to rifle fire while the boss is stunned.
- Manage Refills: Hit ammo or supply boxes at 4 rounds or fewer to maximize the 3-round refill up to the 7-round cap.
Pro Tip: Swap your spare Shock Charges for extra armor plates on Colossus runs, since the Volt handles all your stun duties.
Multiplayer: Full-Auto vs. Semi-Auto vs. Volt
We verified post-patch that full-auto dominates standard multiplayer unless you hit consistent three-shot kills in semi-auto. Use these verified base-rifle metrics to pick your engagement range.
| Mode / Stat | Verified Performance | Tactical Action |
|---|---|---|
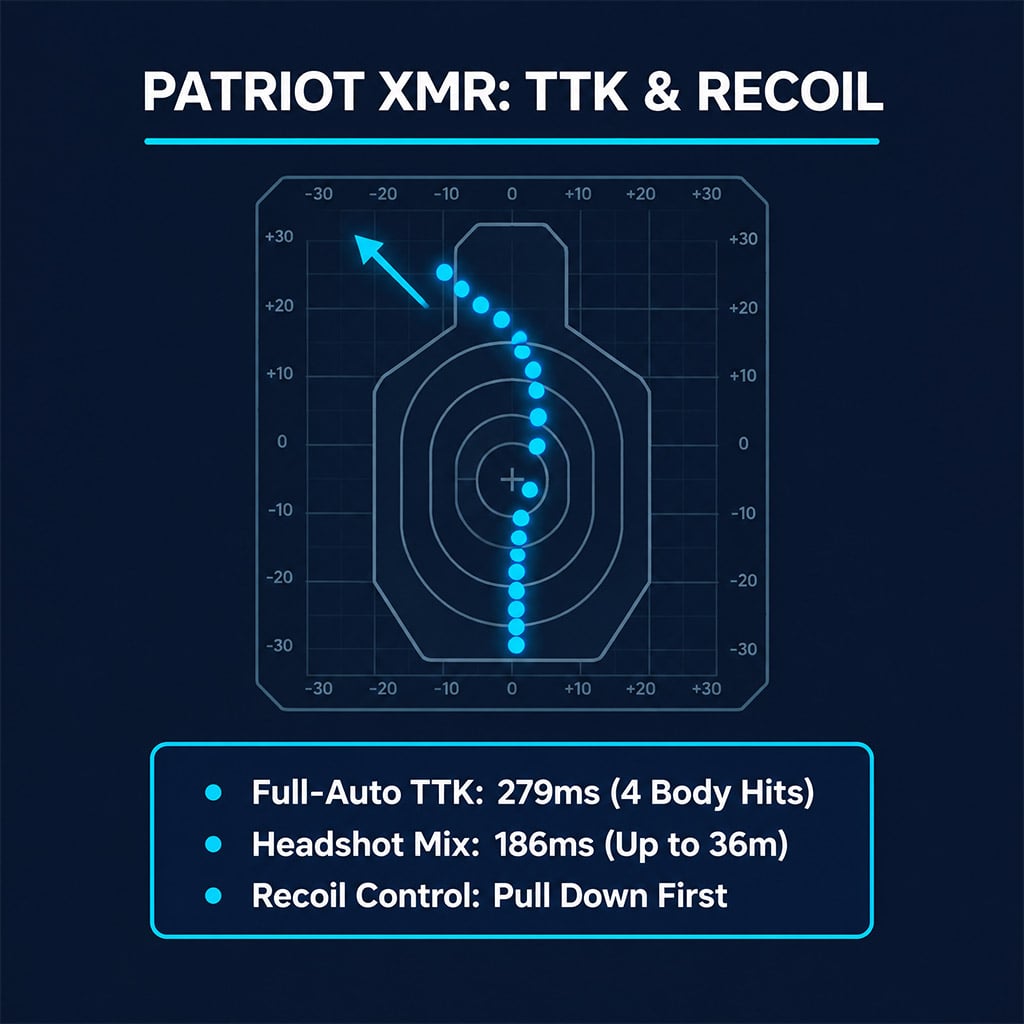
| Full-Auto (Body) | 645 RPM; 4 hits in 279 ms (any range) | Hold mid- and long-range lanes; avoid close sprint-out duels. |
| Full-Auto (Headshot Mix) | 2 headshots + 1 body in 186 ms (up to 36 m) | Aim for upper chest and head angles to force the faster TTK. |
| Semi-Auto (Body) | ~500 RPM; 3–4 hits (244 ms 3-hit TTK) | Test your exact lane distance before switching out of full-auto. |
| Bullet Velocity | 640 m/s (32 m hitscan threshold) | Lead crossing targets beyond 32 m. |
| Hardcore | 1 body hit (any range, no wallbang) | Take clean line-of-sight shots; do not rely on surface penetration. |
| Handling & Mag | 280 ms ADS; 25 rounds; 1.68 s reload | Pre-aim contested lanes and upgrade to the 35-round mag first. |
Stay in full-auto if your target takes four body shots to kill in semi-auto.
Recoil & Volt Engagement Rules
- Pull Down First: Counter the initial vertical kick before correcting for the slight leftward drift, and reset your aim if you miss the opening string.
- Rifle Over Stun: Shoot exposed enemies with rifle fire instead of the Volt's 11 electric pellets, as glancing stun hits waste time.
- Break Line of Sight: Strafe off an enemy's firing line immediately after landing a Volt shot, since stunned players without Battle Hardened still fire involuntarily.
Pro Tip: Pre-aim contested lanes to bypass the sluggish 280 ms ADS speed, and skip the 50-round drum unless you play high-traffic objective modes.
Best Patriot XMR Builds
Match your attachments to your exact weakness: radar exposure, missed long-range shots, or slow sprint-out times. Here are our three battle-tested setups for every playstyle.
| Build | Attachments | Key Trade-Off |
|---|---|---|
| Balanced Stealth | Light Silencer, Angled Short Grip, Aim Rear Grip, Mini Reflex Optic, Dim ADS Laser | 268 ms ADS and radar concealment, but suffers a 10% damage-range penalty. |
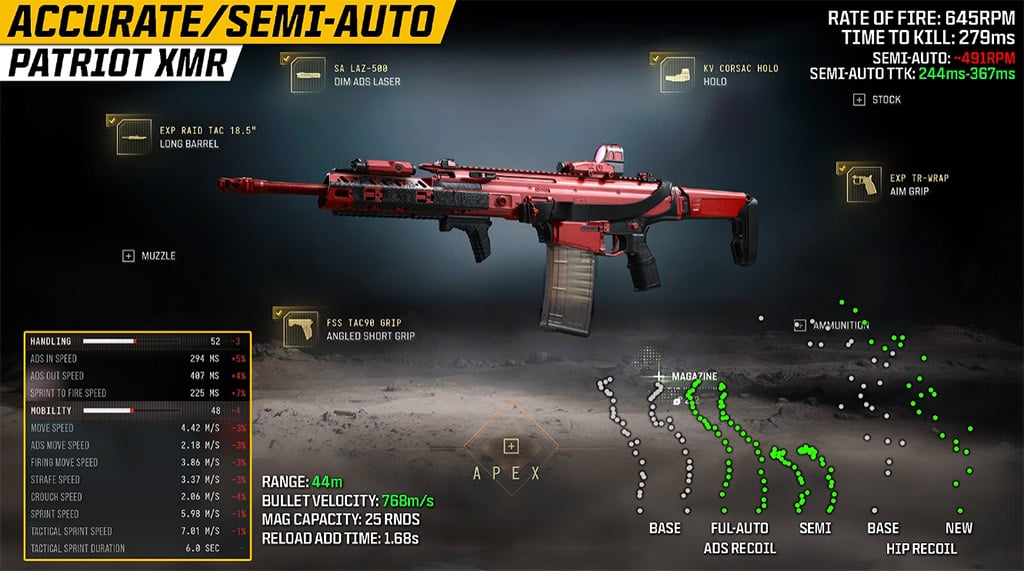
| Precision / Semi-Auto | Long Barrel, Angled Short Grip, Aim Rear Grip, 2.1x Holo Sight, Dim ADS Laser | 294 ms ADS with higher velocity and a 44 m damage-range profile. |
| Aggressive Volt | Volt, Light Silencer, Angled Short Grip, Skeleton Rear Grip, No Stock, Bright ADS Laser | 206 ms ADS and 142 ms sprint-out at the cost of accuracy (requires 6-slot setup). |
Drop the Volt first on the Aggressive build if your mode restricts you to five attachments.
Pro Tip: Test the Light Silencer in the firing range before locking it in, as its 10% damage-range penalty can shift your long-range shots-to-kill.
FAQ (Frequently Asked Questions)
Does the Volt work on every DMZ boss?
No. It stuns the Colossus and humanoid bosses, fails against the Railgun Sentry, and remains unconfirmed on the X01 commander.
Is 30 meters the Volt's maximum range?
No, but hits turn unreliable past 20 m due to steep pellet drop and wide spread. Always close to 20 m before firing.
How many Volt rounds do ammo boxes restore?
Ammo and supply boxes restore 3 launcher rounds per use. Refill at 4 rounds or fewer to avoid wasting ammo against the 7-round cap.
Is semi-auto better than full-auto on the Patriot XMR?
Only within your 3-shot kill range (244 ms TTK) if you tap near 500 RPM. Otherwise, full-auto (279 ms TTK) wins at all ranges.
Does Battle Hardened counter the Volt stun?
Yes. Battle Hardened removes the involuntary hip-fire and sprint lock, leaving only a minor movement slowdown.

I’m Hiroshi Tanaka, a Japanese Technical Content Writer at GGWTB covering action RPGs, loot farming, and gear builds. My guides connect character progression with stat priorities, gear synergies, and targeted farming routes. A build needs to work before the perfect drop arrives—not just after every slot is filled.
Most Popular Posts
- MW4 Beta Meta Weapons Class Setups: Attachments, Perks, and Tuning included
- MW4 Beta Easter Eggs: All 15 Secrets, Locked Doors, Hidden Routes & Unlocks Tested
- MW4 DMZ Hajin Map: Confirmed Features, Release Date and What's Still Unknown
- COD Warzone Season 5 Reloaded Meta Loadouts: Best Weapon Builds After the Update
- Modern Warfare 4 Beta Weapons Best Loadouts: Top Weekend 2 Meta Gun Builds
- Best MW4 Meta Loadouts: M4A1, ISO Kastov 762 & X-58 Nyx Setup
Popular Category Lists
- ARC Raiders / (378)
- Grow a Garden / (303)
- Star Citizen / (174)
- CoD: Black Ops 7 / (168)
- MLB 26 / (159)
- Monopoly Go / (153)
- ARK Survival Ascended / (132)
- Steal a Brainrot / (101)
- Adopt Me / (80)
- Blox Fruits / (74)
- Forza Horizon 6 / (72)
- Aion 2 / (69)
- Sailor Piece / (68)
- Grow a Garden 2 / (68)
- COD: Modern Warfare 4 / (66)
- Diablo IV / (62)
- CoD: BLACK OPS 6 / (55)
- Maplestory Classic / (51)
- Path of Exile 2 / (48)
- Monster Hunter Wilds / (46)