0
0Pokemon Legends Z-A Easy & Fast EXP Farm: Level Up Fast and Max Mega Shards
- Lime
- Share
- Legends Z-A
- 10/19/25
- 4014
You want a perfect team, fully powered, without turning the game into a grind. After testing multiple routes and timing respawns, we built a tight guide that shows you two complementary ways to level in Pokemon Legends Z-A: a shard-to-candy method for blasting a single target from 20s to 50s in minutes, and a couple of battle-based loops that spread XP across your entire party. We'll also explain why a specific plush turns shards from meh into insane, how to route rooftops without getting lost, and the math behind the hour rates so you can decide what fits your current goals.
- Target Leveling: Mega Shards → Small XP Candies → Instant Levels
- Full-Party Leveling: Battle Loops and Capture-After-Defeat
- Route Management, Fast Travel, and Refresh Discipline
- Practical Loadouts and Micro-Optimizations
- FAQ
- Conclusion

↖ Target Leveling: Mega Shards → Small XP Candies → Instant Levels
- Unlocks and vendors
- Requirement: Progress to Mission 10 to access Quazatico Inc. vendor selling Small XP Candies.
- Action: Fast travel to Quazatico Inc., buy Small XP Candies using mega shards, feed the target Pokemon.
- Why this is busted
- Small XP Candy = 800 XP. With efficient shard routing, you can hit ~999 shards per 10-minute respawn cycle.
- Case in practice: We boosted Hawlucha from Lv23 → Lv46 and Dratini Lv46 → Lv54 instantly using purchased candies.
- Gear: Pink Canary Plush (Rasin Construction)
- Why: It increases shards per node dramatically (observed jump from ~1–2 to ~6–7 per node at max).
- How: Trade Colorful Screws (glowing purple Pokeballs across scaffolding/rooftops) for the plush; you'll need 16 screws to max level.
- Tip: Enter the Rasin building once to unlock fast travel. If you find screws on scaffolds, mark the route for future loops.
- Shard farming route (dense nodes, minimal downtime)
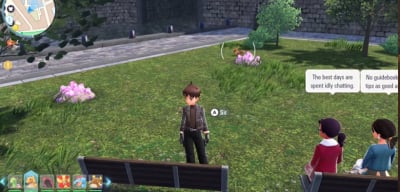
- Prism Tower perimeter: Walk a full loop around the tower, picking nodes as you go.
- Alley by Restaurant Lea: Walls stack shard nodes; use ranged moves or teleporting combat moves to tag them fast from ground level.
- Rooftops near Quazatico Inc.: Fast travel, head through the alley, go up scaffolding and ladders; follow rooftop paths with multiple nodes.
- Hotel Z roofs: Ladder by the door, then rooftop hop to clear clusters.
- Timing: Nodes seem to respawn on ~10-minute timer; you can't force respawns reliably, so rotate the above zones once, then reset the loop after 10 minutes.
- Numbers that matter
- Per 10 minutes: ~999 shards → trades for 124 Small XP Candies.
- Per hour: 124 candies × 6 cycles = 744 candies → 744 × 800 XP = 595,200 XP/hour to your chosen target.
- If you're pushing a pseudo-legendary or a new catcher into obedience range, this is the fastest, least-combat path.
↖ Full-Party Leveling: Battle Loops and Capture-After-Defeat
- Trainer one-shot loop (battle zones)
- Concept: If you can one-shot the trainer's first Pokemon, immediately run from the fight to reset it, then re-enter and one-shot again. This loops XP to your whole party rapidly.
- Why choose this: It avoids the variability of multi-mon trainer teams that slow you down; direct, repeatable, minimal travel.
- Tradeoffs: You get less money/items than completing full trainer routes; use this when XP is the only goal.
- Double dip on wilds: defeat then catch
- Mechanic: After defeating a wild Pokemon, there's a short window where you can still catch it. You gain XP for the KO plus extra XP for the capture.
- Why this matters: It effectively doubles the yield per encounter in high-XP zones.
- Recommended spot: Wild Zone 13 is currently excellent for XP; clear and capture in the post-battle window.
- Tip: If you find your capture odds low, rotate ball types (Quick for unalerted, Dusk at night), or backstrike to add “arrows” before the throw.
↖ Route Management, Fast Travel, and Refresh Discipline
- Fast travel pro tips
- Quazatico Inc., Restaurants, and Rasin Construction: Step inside each once to lock fast travel points; this trims minutes every loop.
- Refresh discipline
- Nodes respawn ~every 10 minutes. If you clear Prism Tower, swing to Restaurant Lea alley, then to Quazatico rooftops, then Hotel Z roofs; by the time you return, Prism Tower should be live again.
- If you find mixed densities: prioritize vertical stacks (walls, scaffold faces) and long rooftop runs where movement is uninterrupted.
- Inventory and ball economy
- Clear satchel space before big loops—124 candies per cycle adds up.
- Recover missed balls at Pokemon Centers to keep costs low during battle-based leveling add-ons.
↖ Practical Loadouts and Micro-Optimizations
- Plush priority
- If/Then: If you're shard-farming, then max the Pink Canary Plush first; it's the highest return on screws for XP conversion.
- If you're also catching while you roam, consider Blue Canary Plush to nudge catch odds; but shards → candies is where the XP explosion happens.
- Team composition
- For trainer loops: Lead with a high-speed hitter that safely one-shots first slots; swap Exp Share equivalents or set party for distribution if applicable.
- For wild double-dips: Carry multiple ball types and a backstrike plan; move sets that reposition/teleport help tag shard walls and minimize pathing friction.
↖ FAQ
Q: Do shards respawn faster if I rest at benches or change time of day?
A: Our tests suggest shard nodes are on a ~10-minute timer not directly tied to benches or time toggles. You'll get better results by maintaining a consistent four-stop loop and returning after 10 minutes.
Q: I don't have 16 screws for max plush—do I just wait?
A: No. Route scaffolding while doing shard loops; screws tend to appear on visible scaffold faces and rooftop corners. If you find a dense screw run, mark it. Level 1 plush already helps, but max plush is where shard counts turn from moderate to great.
Q: How many candies should I feed at once?
A: For targets below obedience thresholds, burst-feeding is fine. If/Then: If you're near an evolution level, then feed in smaller batches to avoid overshooting moves or evolution timing you want to control.
Q: Is the trainer loop bannable or a glitch?
A: It uses normal reset behavior—one-shot, run, re-enter. It's a time-efficient loop, not an exploit that breaks saves. Use it when you prioritize speed over money.
Q: The defeat-then-catch window feels short—how do I land it consistently?
A: Stand at optimal throw range pre-KO, align camera, finish the target, then immediately throw. Backstrikes and Quick/Dusk ball choice improve odds without adding extra encounters.
↖ Conclusion
If your goal is speed, the shard-to-candy pipeline is king: unlock Quazatico Inc. at Mission 10, max the Pink Canary Plush with 16 screws, run a four-stop shard route around Prism Tower, Restaurant Lea alley, Quazatico rooftops, and Hotel Z roofs. Convert ~999 shards every 10 minutes into 124 Small XP Candies, and you're looking at roughly 595k XP per hour on any single target you choose. If your focus shifts to whole-party growth, swap to the trainer one-shot loop and the defeat-then-catch flow in high-XP wild zones like Zone 13.
Most Popular Posts
- Pokemon Legends Z-A Money and EXP Farming Guide: Early, Mid, and Post-Game ZA Royale Routes
- Pokemon Legends Z-A Fast Method to Hunt 6 Shiny Alphas Wild Zone 20 Full Guide
- Pokemon Legends Z-A BEST Team: Gyarados + Excadrill + Gardevoir Full Guides
- How to Shiny Hunt Eevee in Pokemon Legends Z-A: Fast Respawn Route and AFK Bench Method
- Pokemon Legends Z-A Easy & Fast EXP Farm: Level Up Fast and Max Mega Shards
- Fast Farm Mega Shards in Pokemon Legends Z-A: Per-Loop Route, Best Mons, and Respawn Timers
Popular Category Lists
- Grow a Garden / (286)
- ARC Raiders / (263)
- CoD: Black Ops 7 / (166)
- Monopoly Go / (146)
- MLB 26 / (145)
- Star Citizen / (114)
- Steal a Brainrot / (89)
- ARK Survival Ascended / (72)
- Sailor Piece / (68)
- Forza Horizon 6 / (62)
- Diablo IV / (61)
- Blox Fruits / (60)
- CoD: BLACK OPS 6 / (55)
- Adopt Me / (53)
- Path of Exile 2 / (48)
- Monster Hunter Wilds / (46)
- Windrose / (44)
- Grow a Garden 2 / (41)
- Path of Exile / (40)
- Bee Swarm Simulator / (36)