0
Created: May 23,2026 | Star Citizen
Star Citizen 4.8 Deadbolt Blueprint Guide: How to Unlock Deadbolt Blueprints

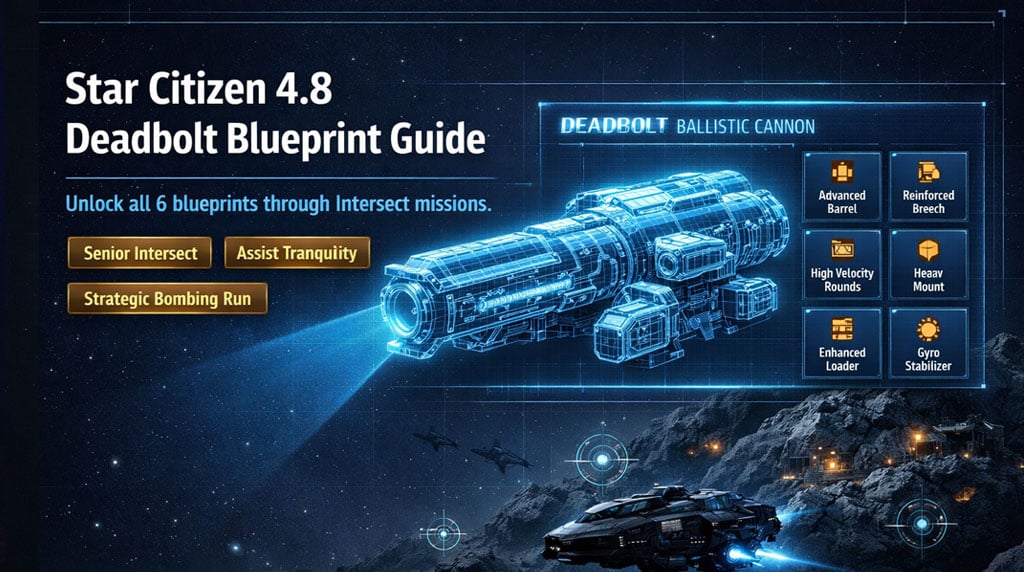
Deadbolts are the early Star Citizen 4.8 meta. Buying a full set of larger Deadbolts can cost around 750k–800k aUEC. Crafting them is cheaper long-term, but you need the blueprints first.
The path is short:
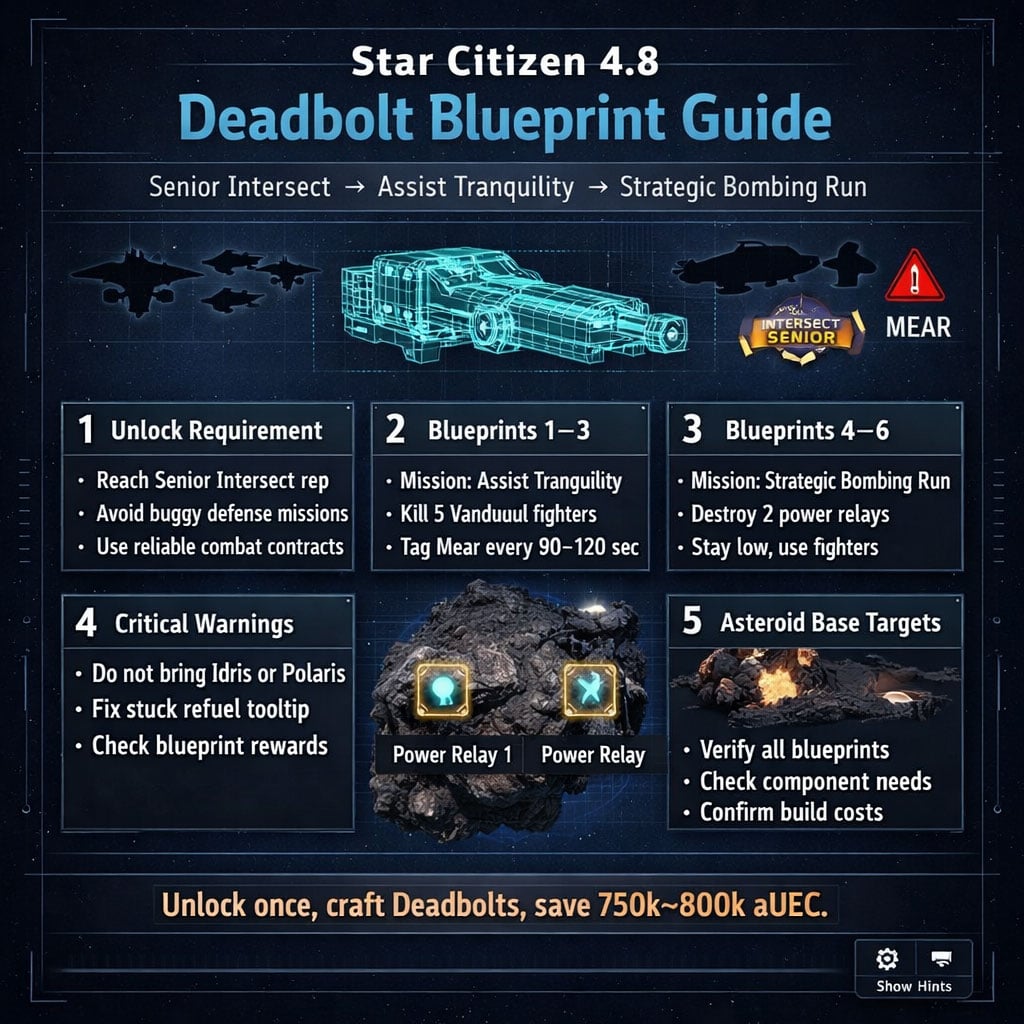
- Grind Intersect reputation to Senior
- Run Assist Tranquility for Deadbolt Blueprints 1–3
- Run Strategic Bombing Run for Deadbolt Blueprints 4–6
The missions are easy once you know the traps. The traps are what waste runs.
- Deadbolt Blueprint Unlock Route in Star Citizen 4.8
- Step 1: Grind Intersect Reputation to Senior
- Best Rep Grind Rules
- Good Ships for the Rep Grind
- Step 2: Fix the Refuel Tooltip Bug Before Farming
- Quick Fix
- Step 3: Get Deadbolt Blueprints 1–3 from Assist Tranquility
- Key Assist Tranquility Rule: Tag the Mear
- Best Positioning for Assist Tranquility
- Ship Tips for Assist Tranquility
- Step 4: Get Deadbolt Blueprints 4–6 from Strategic Bombing Run
- Strategic Bombing Run Execution
- Do Not Bring Capital Ships
- Fastest Route to All 6 Deadbolt Blueprints
- Common Deadbolt Blueprint Farming Mistakes
- Ignoring Intersect Rank
- Letting the Mear Free-Fire
- Flying Over the Asteroid
- Bringing an Idris or Polaris
- Farming With a Bugged UI
- FAQ
- How do you unlock all 6 Deadbolt blueprints in Star Citizen 4.8?
- How many times do you need to run Assist Tranquility?
- How many times do you need to run Strategic Bombing Run?
- Why does Assist Tranquility fail?
- Should you buy Deadbolts or unlock the blueprints?
- Summary
Deadbolt Blueprint Unlock Route in Star Citizen 4.8
| Blueprints | Mission | Objective | Expected Runs |
|---|---|---|---|
| Deadbolt 1–3 | Assist Tranquility | Kill 5 Vanduul fighters | 3–5 |
| Deadbolt 4–6 | Strategic Bombing Run | Destroy 2 power relays | 3–4 |
| Bonus blueprints | Both missions | Suits, gear, ship components | Varies |
You need Senior Intersect reputation before these missions become available.
Step 1: Grind Intersect Reputation to Senior
Start with lower-tier Intersect contracts and repeat the ones that finish cleanly.
Do not overcomplicate this. Pick reliable combat missions. Stack completions. Move up.
Best Rep Grind Rules
| Do This | Avoid This |
|---|---|
| Run simple combat contracts | Buggy defense missions |
| Use ships you can replace fast | Long, risky objectives |
| Focus on completion speed | Chasing perfect rewards |
| Stop after reaching Senior | Farming low-tier missions forever |
If you are solo, avoid defense missions that fail randomly. They waste more time than they pay.
Good Ships for the Rep Grind
| Ship | Why Use It |
|---|---|
| MISC Fortune M80 | Strong, practical, handles missions well |
| Corsair | Heavy firepower, deletes targets fast |
| Medium Fighter | Better tracking and faster travel |
| Heavy Fighter | Safer damage output |
Use whatever clears contracts reliably. The goal is Senior Intersect, not style points.
Step 2: Fix the Refuel Tooltip Bug Before Farming
Alpha 4.8 can leave a stuck Submit Refuel Request tooltip on-screen after refueling missions.
That can hide blueprint reward messages.
Quick Fix
1. Open Settings
2. Find Show Hints
3. Toggle it several times
4. Return to game
5. Confirm the tooltip is gone
Do this before blueprint farming. Missing reward messages makes the grind messy.
Step 3: Get Deadbolt Blueprints 1–3 from Assist Tranquility
Assist Tranquility is the first blueprint farm.
Objective: kill 5 Vanduul fighters.
| Wave | Enemies | Threat |
|---|---|---|
| Wave 1 | 3 light fighters | Fast, annoying, hardest part |
| Wave 2 | 2 medium fighters | Easier to track |
| Extra | Vanduul Mear | Can fail the mission if ignored |
The fighters are not the real problem. The Mear is.
Key Assist Tranquility Rule: Tag the Mear
The Vanduul Mear attacks the Tranquility. If you ignore it too long, the objective takes too much damage and the mission fails.
You do not need to kill it.
You need to shoot it every 90–120 seconds to pull aggro.
| If You See This | Do This |
|---|---|
| Mear firing on Tranquility | Put shots into the Mear |
| Fighters taking too long | Break off, tag Mear, return |
| Tranquility damage rising | Stop tunnel-visioning fighters |
| Mission fails unexpectedly | You probably ignored the Mear |
This one habit saves the run.
Best Positioning for Assist Tranquility
Stay on the underside of the asteroid.
The top side has base defenses, turrets, and missile pressure. There is no reason to fight all of that.
| Situation | Correct Move |
|---|---|
| Approaching objective | Come from below |
| Turrets start firing | Drop under the asteroid |
| Missiles appear | Break line of sight |
| Light fighters overshoot | Go decoupled and reverse-track |
Ship Tips for Assist Tranquility
| Ship | Performance |
|---|---|
| M80 | Clean, reliable clear |
| Corsair | Faster kills, worse tracking |
| Medium Fighter | Good balance |
| Heavy Fighter | Safe but less agile |
If light fighters keep slipping past, use decoupled flight. Drift backward into clear space, rotate toward them, and fire as they approach. Just make sure your vector is not sending you into an asteroid.
Step 4: Get Deadbolt Blueprints 4–6 from Strategic Bombing Run
Strategic Bombing Run gives Deadbolt Blueprints 4–6.
Objective: destroy 2 power relays at an asteroid base.
| Target | Location | Required |
|---|---|---|
| Power relays | Surface-level base structures | 2 |
| Light fighters | Around the base | Optional if not engaging |
| Surface turrets | Base exterior | Avoid or outrun |
This mission is fast, but it can be a one-way trip. Plan for that.
Strategic Bombing Run Execution
1. Accept Strategic Bombing Run
2. Fly to the asteroid base
3. Stay low
4. Ignore fighters unless they commit
5. Find the surface-level power relays
6. Destroy 2 relays
7. Leave, die, or reclaim
If the objective completes, the run counts. Survival is nice. Completion is the point.
Do Not Bring Capital Ships
Do not bring an Idris or Polaris.
Some bases have an anti-capital beam that can instantly delete capital ships. It is not worth testing.
| Ship Type | Use It? | Reason |
|---|---|---|
| Medium Fighter | Yes | Fast and replaceable |
| Heavy Fighter | Yes | Strong damage, still mobile |
| M80 | Yes | Practical combat option |
| Corsair | Maybe | Strong but slower |
| Idris / Polaris | No | Can be instantly nuked |
A good farming method is rotating ships. Run one, claim it if needed, then pull another while the claim timer cools down.
Fastest Route to All 6 Deadbolt Blueprints
| Step | Action | Result |
|---|---|---|
| 1 | Grind Intersect contracts | Reach Senior |
| 2 | Clear stuck UI tooltip | See blueprint rewards |
| 3 | Run Assist Tranquility3–5 times | Unlock Deadbolt 1–3 |
| 4 | Tag Mear every 90–120 sec | Prevent failed runs |
| 5 | Run Strategic Bombing Run3–4 times | Unlock Deadbolt 4–6 |
| 6 | Check crafting unlocks | Confirm all blueprints |
This is the cleanest solo route. No market prices. No overbuying. Just unlock and craft.
Common Deadbolt Blueprint Farming Mistakes
Ignoring Intersect Rank
You need Senior Intersect reputation. Without it, the blueprint missions do not matter.
Letting the Mear Free-Fire
In Assist Tranquility, tag the Mear every 90–120 seconds. Otherwise, Tranquility can die while you are busy fighting.
Flying Over the Asteroid
Stay under it. Top-side defenses add unnecessary turret and missile pressure.
Bringing an Idris or Polaris
Bad idea. The base anti-capital beam can erase you.
Farming With a Bugged UI
Fix the stuck refuel tooltip first. Blueprint messages can be hidden.
FAQ
How do you unlock all 6 Deadbolt blueprints in Star Citizen 4.8?
Reach Senior Intersect reputation, then farm Assist Tranquility for Deadbolt 1–3 and Strategic Bombing Run for Deadbolt 4–6.
How many times do you need to run Assist Tranquility?
Usually 3–5 completions. You may get other blueprints before all three Deadbolt unlocks appear.
How many times do you need to run Strategic Bombing Run?
Usually 3–4 completions. Destroy 2 power relays each run.
Why does Assist Tranquility fail?
Most failed runs happen because the Vanduul Mear damages the Tranquility too long. Shoot the Mear every 90–120 seconds to pull aggro.
Should you buy Deadbolts or unlock the blueprints?
Buy them only if you need one set immediately. Unlock the blueprints if you plan to use Deadbolts often. A full larger set can cost around 750k–800k aUEC, so crafting pays off.
Summary
The best way to get all Deadbolt blueprints in Star Citizen 4.8 is:
- Reach Senior Intersect reputation
- Run Assist Tranquility3–5 times for Deadbolt 1–3
- Tag the Mear every 90–120 seconds
- Run Strategic Bombing Run3–4 times for Deadbolt 4–6
- Use fighters or medium combat ships
- Avoid capital ships
- Fix the stuck tooltip before farming
Deadbolts are strong, expensive, and worth crafting. Unlock the blueprints once, and the 4.8 weapon grind gets a lot cheaper.

Most Popular Posts
- Star Citizen Ship Update: Galaxy, Kraken and 2026 Release Forecast
- Star Citizen 4.10 Weapons and Components Guide: Best Quantum Drives, Ballistics, Distortions, and Ship Loadouts
- Star Citizen 4.10 Industry Guide: Cargo, Hull C, Salvage, Mining Modules and Battaglia Blueprints
- Star Citizen 4.10 Farming Guides: aUEC Farming Route and FPS Attachment Loot Spots
- Star Citizen 4.10 Cargo Hauling Guide: What Works, What's Still Broken
- Star Citizen Ship Showdown: Top Bracket, Free Fly Rules, Idris-P Sale & Alpha 4.10 Timing
Popular Category Lists
- ARC Raiders / (375)
- Grow a Garden / (301)
- Star Citizen / (172)
- CoD: Black Ops 7 / (168)
- MLB 26 / (159)
- Monopoly Go / (153)
- ARK Survival Ascended / (132)
- Steal a Brainrot / (101)
- Adopt Me / (79)
- Blox Fruits / (74)
- Forza Horizon 6 / (72)
- Sailor Piece / (68)
- Grow a Garden 2 / (68)
- Aion 2 / (66)
- Diablo IV / (62)
- COD: Modern Warfare 4 / (61)
- CoD: BLACK OPS 6 / (55)
- Maplestory Classic / (50)
- Path of Exile 2 / (48)
- Monster Hunter Wilds / (46)