0
0 Created: Oct 6,2026 | Star Citizen
Star Citizen Aegis Eclipse Guide: Target Selection, Loadouts & Costs

The Aegis Eclipse fits selective torpedo strikes, not extended dogfights. We prioritize three decisions: whether the contract suits the ship, whether the weapon can reach its target, and whether another launch justifies its cost.
- Know What the Eclipse Is Built to Do
- Verified specifications—not a live-build benchmark
- Select the Objective and Diagnose the Strike
- Use this attack decision table
- Execute without wasting the follow-up
- Control Costs Before Buying Upgrades
- Set a spending limit before launch
- Test compatibility before buying
- FAQ (Frequently Asked Questions)
- Is the Eclipse good for solo bounty hunting?
- How many torpedoes does the Eclipse carry?
- What is the best Eclipse loadout?
- Can the Eclipse reliably one-shot a Hammerhead?
- Should we reclaim the Eclipse instead of paying to rearm?
Know What the Eclipse Is Built to Do
If you want one ship for combat, cargo, and varied missions, the Eclipse is a narrow choice. RSI's official Eclipse page identifies it as a single-seat stealth bomber intended to strike before detection.
Verified specifications—not a live-build benchmark
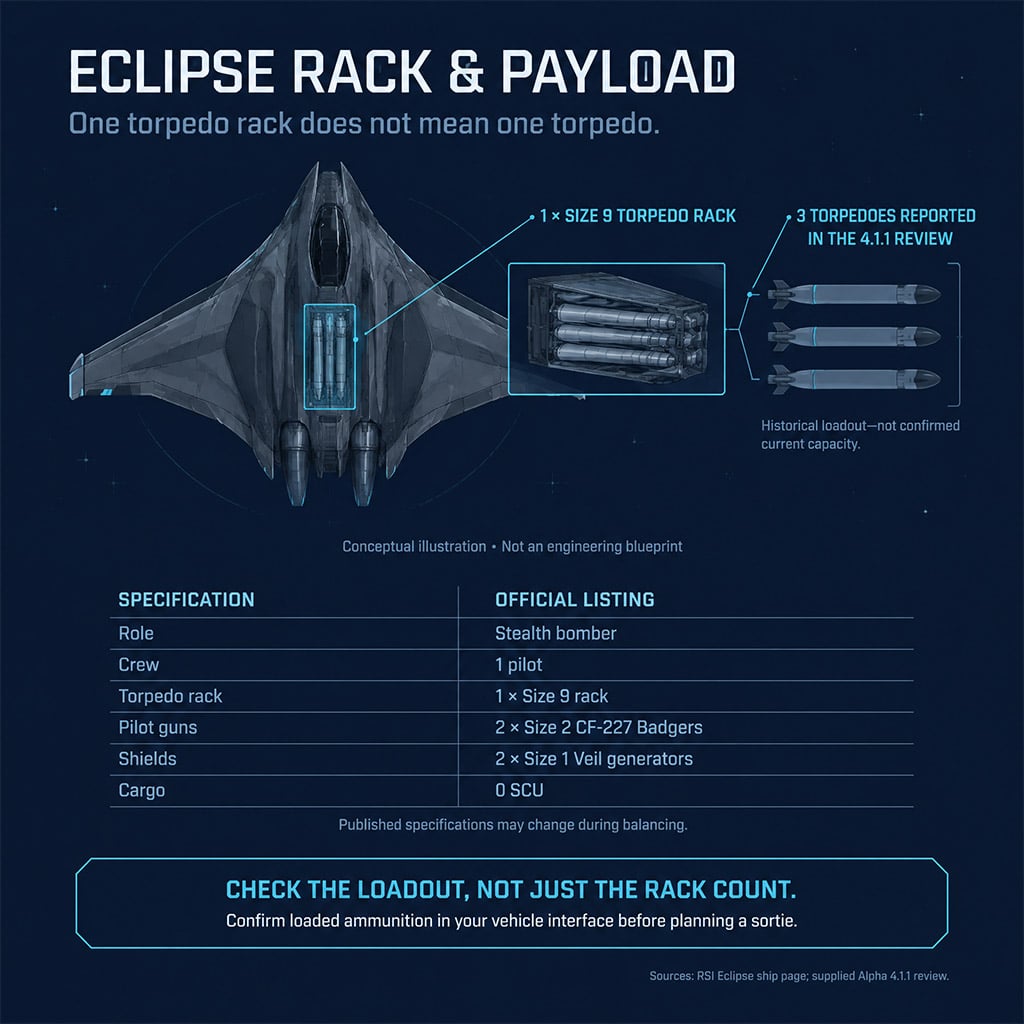
The official listing establishes the following configuration, while warning that specifications can change during balancing.
| Specification | Official Listing | Decision Impact |
|---|---|---|
| Role | Stealth bomber | Plan a strike and withdrawal |
| Crew | 1 | The pilot handles targeting and escape |
| Torpedo system | Size 9 Eclipse torpedo rack | A rack listing does not establish loaded ammunition count |
| Pilot guns | 2 × Size 2 CF-227 Badgers | Secondary armament, not proof of dogfighting performance |
| Shields | 2 × Size 1 Veil generators | Generator size alone does not establish survivability |
| Cargo | 0 SCU | Not a cargo-hauling platform |
Choose the Eclipse for its strike role; inspect your actual loadout before planning a sortie.
The important specification trap is rack count versus ammunition count. RSI lists one torpedo rack—not one torpedo—so check the loaded weapons in your vehicle interface rather than reading the headline missile entry as payload capacity.
Select the Objective and Diagnose the Strike
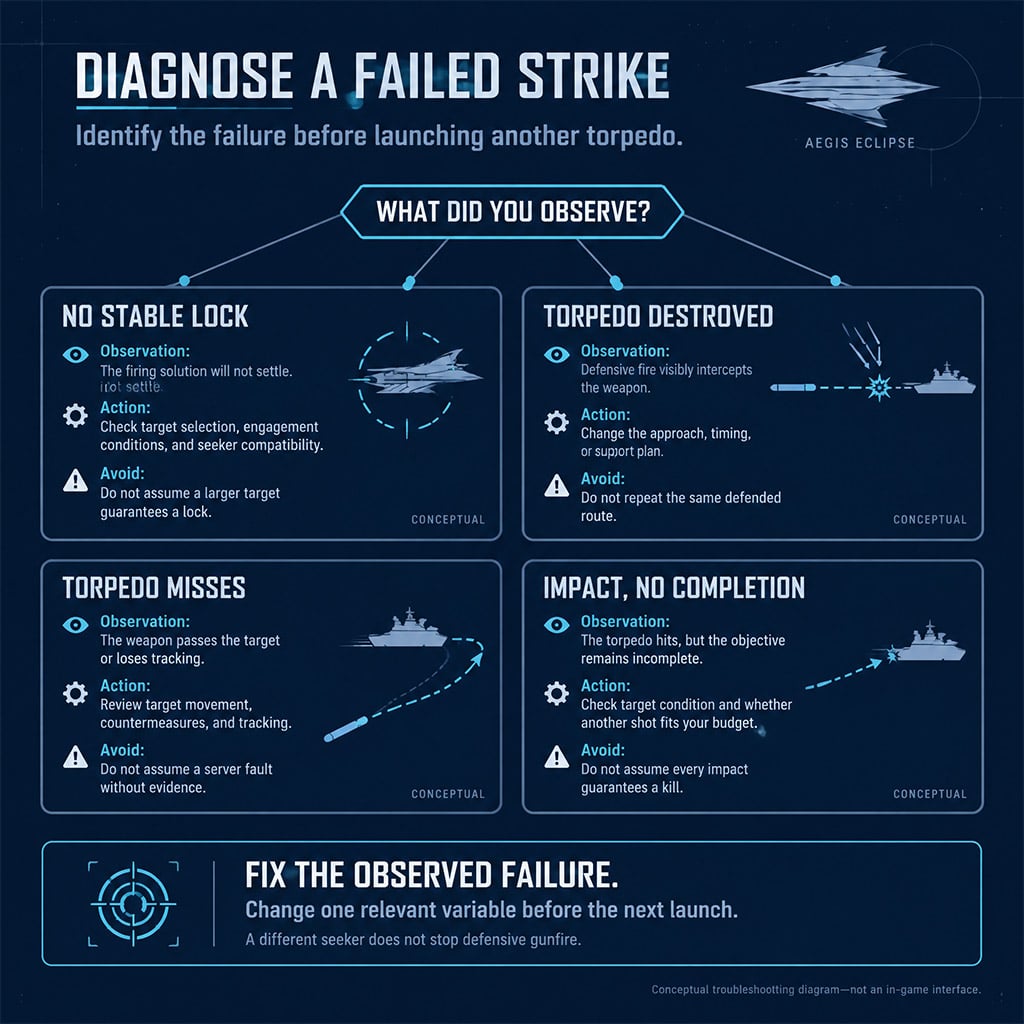
A valid lock does not prove the torpedo will survive its route. We assess target selection, defensive coverage, and escape direction before launching.
Use this attack decision table
Match the next action to what you can actually observe.
| Situation | Action | Stop Condition |
|---|---|---|
| Objective is surrounded by escorts | Reconfirm the selected ship and inspect the route | You cannot distinguish the objective reliably |
| Lock will not settle | Check selection and current engagement requirements | Acquisition remains unstable |
| Torpedo is visibly intercepted | Change approach, timing, or support | The same defenses still cover the route |
| Torpedo misses without visible interception | Review movement, countermeasures, and tracking | You cannot identify what needs changing |
| Impact does not complete the objective | Check target state and follow-up cost | Another launch exceeds your mission budget |
Do not change seekers to solve visible gunfire interception.
Execute without wasting the follow-up
1. Read the completion condition. Identify mandatory kills before departure.
2. Choose an exit direction. Avoid retreating through the escort formation.
3. Confirm the objective immediately before firing.
4. Launch only with a usable firing solution.
5. Reposition and check completion.
6. Diagnose failure before spending another weapon.
If the objective is complete, leave unless optional combat serves a separate purpose.
Against a Hammerhead or another defended target, do not assume the underside is permanently safe. Target rotation and escort positions can change coverage; an approach that worked once is not a guaranteed route.
Control Costs Before Buying Upgrades
If failed strikes make a contract unprofitable, a different gun is not necessarily the fix. We change equipment only when the observed problem warrants it.
Set a spending limit before launch
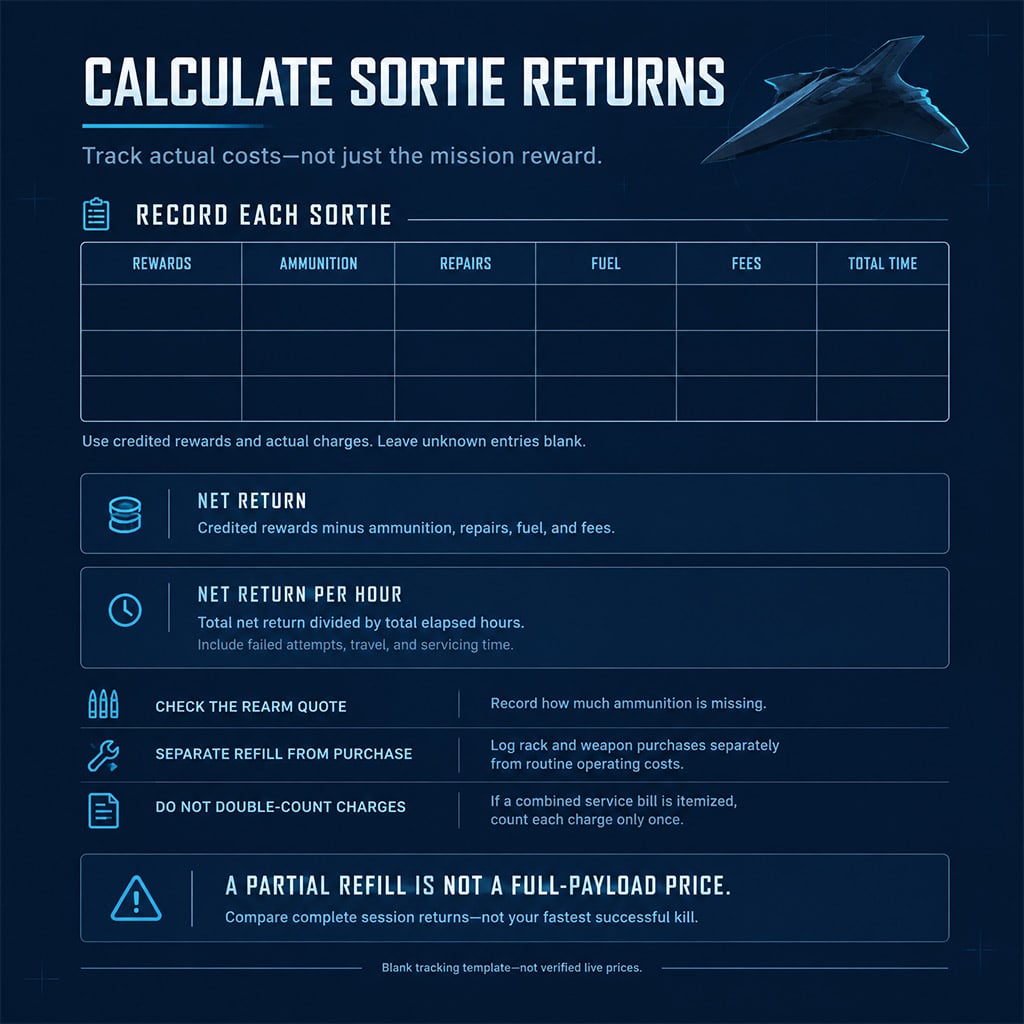
Check the actual rearm quote, mission reward, and return route. Count failed contracts, repairs, fuel, fees, and servicing time when measuring earnings.
Do not treat a partial refill quote as the price of a full payload. Record how much ammunition was missing when the quote appeared.
Test compatibility before buying
Inspect your current fitting interface before purchasing alternative seekers, shields, or racks. A compatible item still needs a mission-specific reason to justify its cost.
For bombing, confirm support and controls in your build first. Start with a single release at a stationary, permitted test point; establish repeatable placement before spending on salvos or attempting moving mission targets.
FAQ (Frequently Asked Questions)
Is the Eclipse good for solo bounty hunting?
The Eclipse is a specialist option for selective solo strikes, not an all-purpose bounty ship. We would choose contracts whose required targets and operating costs fit the payload available.
How many torpedoes does the Eclipse carry?
The supplied historical review reports three Size 9 torpedoes, but that is not a verified current-build capacity. RSI's specification lists one torpedo rack; check loaded ammunition separately in your vehicle interface.
What is the best Eclipse loadout?
No universally best loadout is established by the available evidence. Address the observed failure first: acquisition problems justify checking seekers, while interception requires changing the delivery opportunity.
Can the Eclipse reliably one-shot a Hammerhead?
A reliable one-shot guarantee is not established. Defensive fire, target condition, orientation, and impact outcome prevent treating a reported kill as a repeatable rule.
Should we reclaim the Eclipse instead of paying to rearm?
Only use reclaiming after confirming that your current build restores the required ammunition. Compare claim downtime and fees with the actual rearm quote before choosing the servicing method.

I’m Benjamin Walsh, an Australian Senior Copy Editor at GGWTB focused on survival crafting, open-world exploration, and extraction games. My guides weigh base locations, supply routes, and what deserves the last slot in your backpack. When editing, I look for skipped prerequisites and unclear directions—a useful guide shouldn’t send you across the map without the right tools.
Most Popular Posts
- Star Citizen 4.10 Quantum Drive Guide: Best Drives for Speed, Range, and Crafting
- Star Citizen 4.9 Rare Gun Attachments Farm: Echo Isles Loot Guide
- Star Citizen Alpha 4.10 Guide: Recco Battaglia Missions, Siege of Orison, Regen Crisis
- Star Citizen 4.9.0: Fastest Way to Farm Size 3 NDB Repeaters - Combat Gauntlet 5 Guide
- Star Citizen 4.10 Weapons and Components Guide: Best Quantum Drives, Ballistics, Distortions, and Ship Loadouts
- Star Citizen 4.10 aUEC Ship Guide: Hull B, Aurora MR II, Golem OX, L22, UTV Prices & Locations
Popular Category Lists
- ARC Raiders / (356)
- Grow a Garden / (295)
- CoD: Black Ops 7 / (167)
- Star Citizen / (163)
- MLB 26 / (159)
- Monopoly Go / (153)
- ARK Survival Ascended / (128)
- Steal a Brainrot / (99)
- Blox Fruits / (74)
- Adopt Me / (74)
- Forza Horizon 6 / (72)
- Sailor Piece / (68)
- Grow a Garden 2 / (68)
- Diablo IV / (62)
- CoD: BLACK OPS 6 / (55)
- Aion 2 / (54)
- Path of Exile 2 / (48)
- Monster Hunter Wilds / (46)
- Windrose / (44)
- COD: Modern Warfare 4 / (44)